Page 166 of 467
Locking doors
1. Place the ignition switch in the LOCKposition.
2. Close all doors.
3. Press the
Page 175 of 467
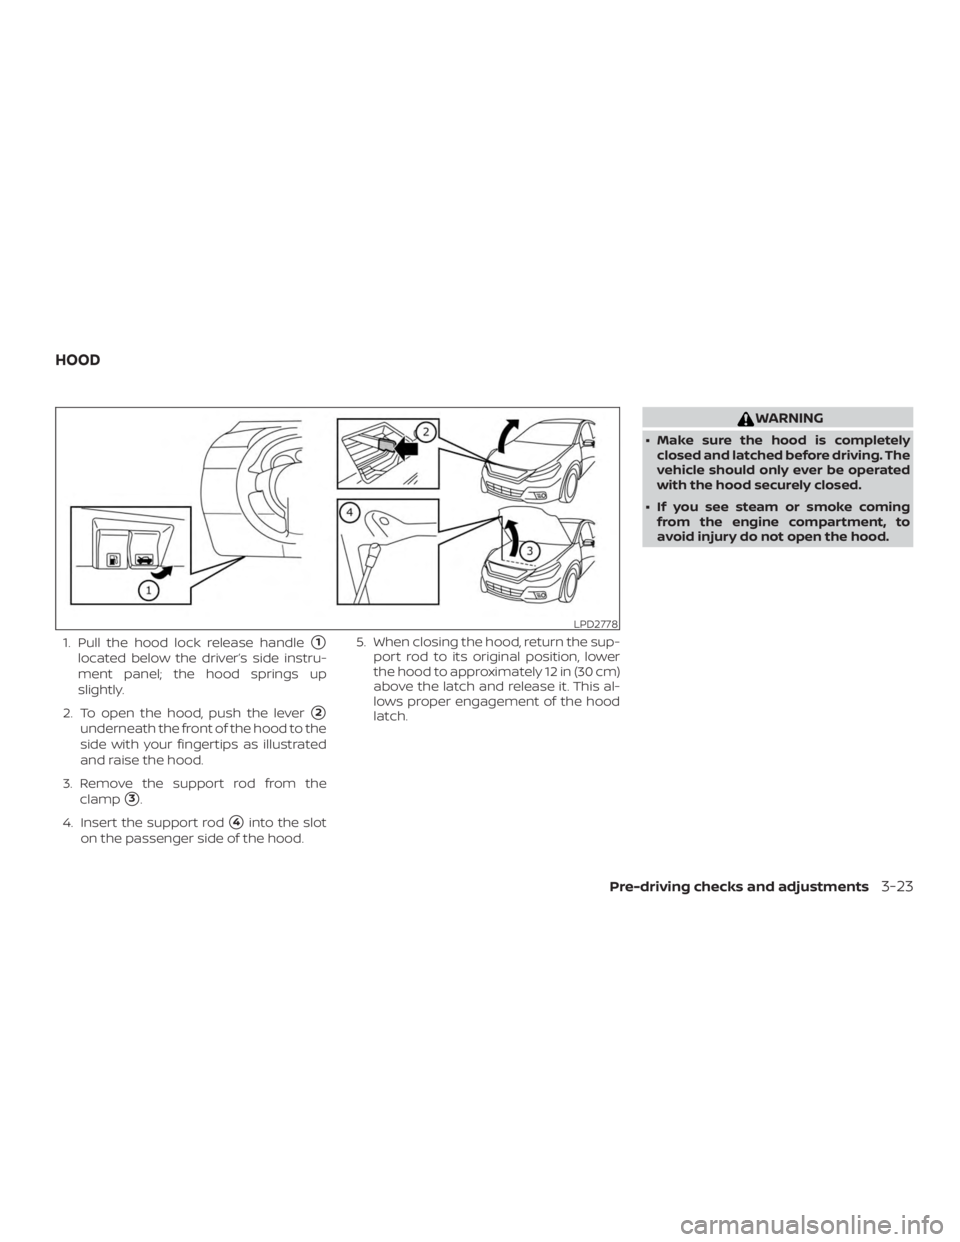
1. Pull the hood lock release handle�1
located below the driver’s side instru-
ment panel; the hood springs up
slightly.
2. To open the hood, push the lever
�2
underneath the front of the hood to the
side with your fingertips as illustrated
and raise the hood.
3. Remove the support rod from the clamp
�3.
4. Insert the support rod
�4into the slot
on the passenger side of the hood. 5. When closing the hood, return the sup-
port rod to its original position, lower
the hood to approximately 12 in (30 cm)
above the latch and release it. This al-
lows proper engagement of the hood
latch.
Page 177 of 467
NOTE:
Request switches for all doors and trunk
can be deactivated when the I-Key Door
Lock setting is switched to OFF in the
“Vehicle Settings” of the vehicle informa-
tion display. For additional information,
refer to “Vehicle information display ” in
the “Instruments and controls” section
of the manual.
INTERIOR TRUNK LID RELEASE
Page 178 of 467

WARNING
∙ Never allow anyone to ride in thecargo area or on the rear seat when it
is in the fold-down position. Use of
these areas by passengers without
proper restraints could result in seri-
ous injury or death in an accident or
sudden stop.
∙ Properly secure all cargo with ropes or straps to help prevent it from sliding
or shif ting. Do not place cargo higher
than the seatbacks. In a sudden stop
or collision, unsecured cargo could
cause personal injury.
∙ When returning the seatbacks to the upright position, be certain they are
completely secured in the latched po-
sition. If they are not completely se-
cured, passengers may be injured in
an accident or sudden stop.
∙ Closely supervise children when they are around cars to prevent them from
playing and becoming locked in the
trunk where they could be seriously
injured. Keep the car locked, with the
rear seatback and trunk lid securely
latched when not in use, and prevent
children’s access to car keys.
OPENER OPERATION
The fuel-filler door release is located below
the instrument panel. To open the fuel-filler
door, pull the release. To lock, close the fuel-
filler door securely.
FUEL-FILLER CAP
Page 180 of 467
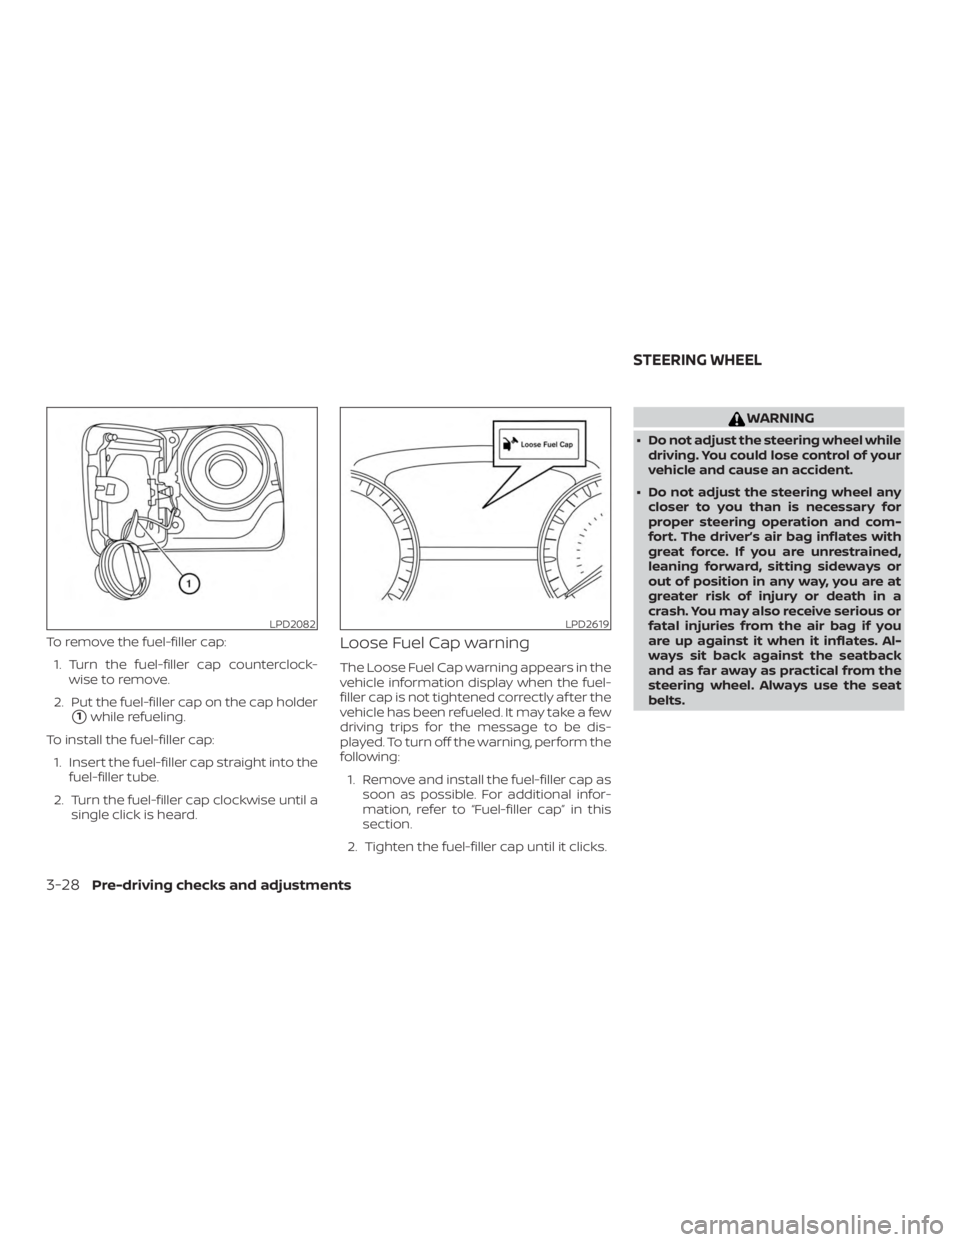
To remove the fuel-filler cap:1. Turn the fuel-filler cap counterclock- wise to remove.
2. Put the fuel-filler cap on the cap holder
�1while refueling.
To install the fuel-filler cap: 1. Insert the fuel-filler cap straight into the fuel-filler tube.
2. Turn the fuel-filler cap clockwise until a single click is heard.
Loose Fuel Cap warning
The Loose Fuel Cap warning appears in the
vehicle information display when the fuel-
filler cap is not tightened correctly af ter the
vehicle has been refueled. It may take a few
driving trips for the message to be dis-
played. To turn off the warning, perform the
following:
1. Remove and install the fuel-filler cap as soon as possible. For additional infor-
mation, refer to “Fuel-filler cap” in this
section.
2. Tighten the fuel-filler cap until it clicks.
Page 181 of 467
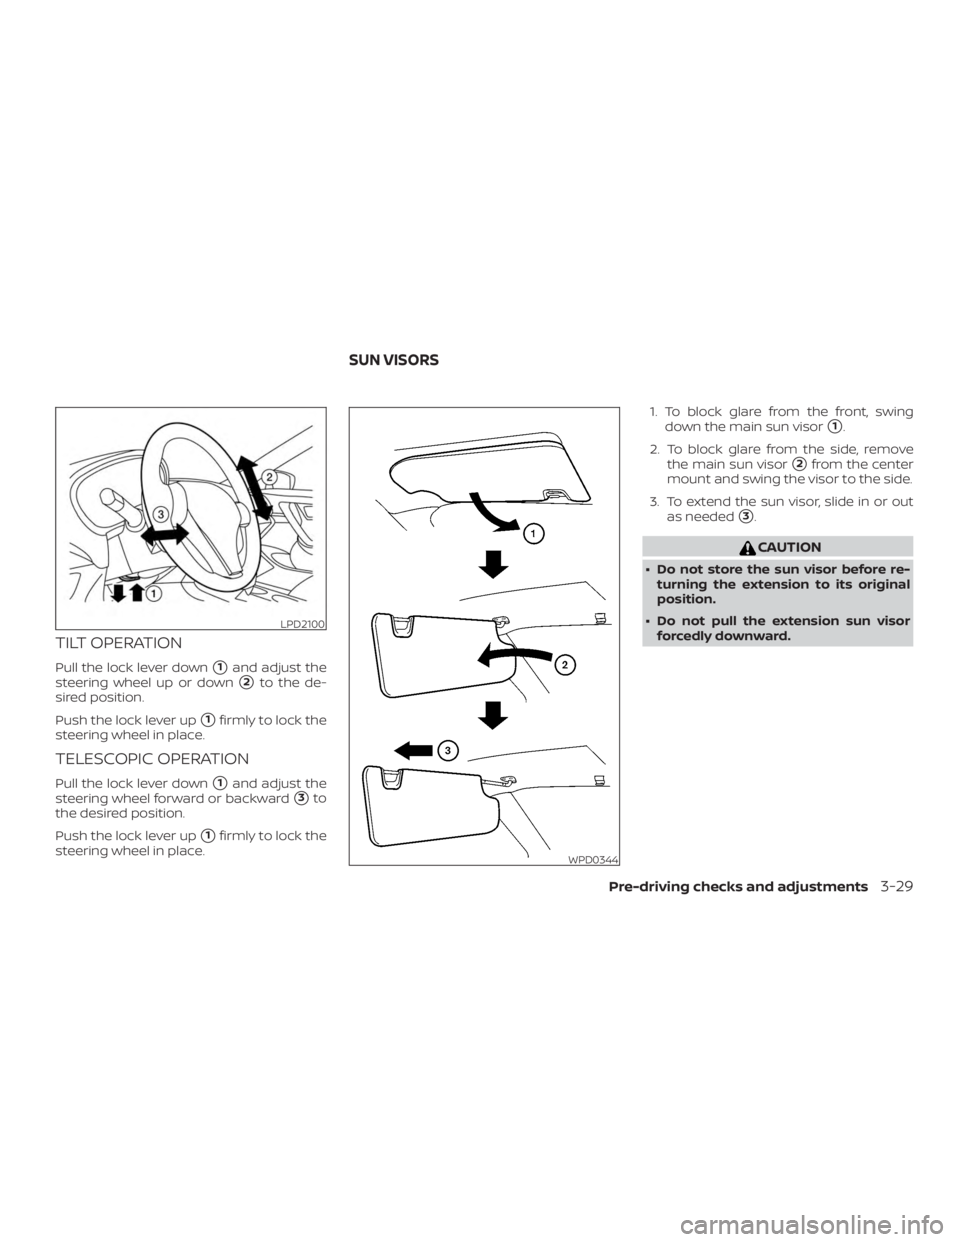
TILT OPERATION
Pull the lock lever down�1and adjust the
steering wheel up or down
�2to the de-
sired position.
Push the lock lever up
�1firmly to lock the
steering wheel in place.
TELESCOPIC OPERATION
Pull the lock lever down�1and adjust the
steering wheel forward or backward
�3to
the desired position.
Push the lock lever up
�1firmly to lock the
steering wheel in place. 1. To block glare from the front, swing
down the main sun visor
�1.
2. To block glare from the side, remove the main sun visor
�2from the center
mount and swing the visor to the side.
3. To extend the sun visor, slide in or out as needed
�3.
Page 256 of 467
WARNING
∙ Do not leave children or adults whowould normally require the assis-
tance of others alone in your vehicle.
Pets should also not be lef t alone.
They could accidentally injure them-
selves or others through inadvertent
operation of the vehicle. Also, on hot,
sunny days, temperatures in a closed
vehicle could quickly become high
enough to cause severe or possibly
fatal injuries to people or animals.
∙ Closely supervise children when they are around cars to prevent them from
playing and becoming locked in the
trunk where they could be seriously
injured. Keep the car locked, with the
rear seatback and trunk lid securely
latched when not in use, and prevent
children’s access to car keys.
EXHAUST GAS (carbon monoxide)
Page 263 of 467

WARNING
Do not operate the push-button igni-
tion switch while driving the vehicle ex-
cept in an emergency. (The engine will
stop when the ignition switch is pushed
three consecutive times in quick suc-
cession or the ignition switch is pushed
and held for more than 2 seconds.) If the
engine stops while the vehicle is being
driven, this could lead to a crash and
serious injury.When the ignition switch is pushed without
depressing the brake pedal, the ignition
switch will illuminate.
Push the ignition switch center:∙ Once to change to ACC.
∙ Two times to change to ON.
∙ Three times to return to OFF.
The ignition switch will automatically re-
turn to the LOCK position when any door is
either opened or closed with the switch in
the OFF position. The ignition lock is designed so that the
ignition switch cannot be placed in the OFF
position until the shif t lever is moved to the
P (Park) position.
When the ignition switch cannot be placed
in the OFF position, proceed as follows:
1. Move the shif t lever to the P (Park) posi- tion.
2. Push the ignition switch. The ignition switch position will change to the ON
position.
3. Push the ignition switch again to the OFF position.
The shif t lever can be moved from the P
(Park) position if the ignition switch is in
the ON position and the brake pedal is
depressed.
If the battery of the vehicle is discharged,
the ignition switch cannot be moved
from the LOCK position.
Some indicators and warnings for opera-
tion are displayed on the vehicle informa-
tion display. For additional information, re-
fer to “Vehicle information display” in the
“Instruments and controls” section of this
manual.