Page 341 of 467

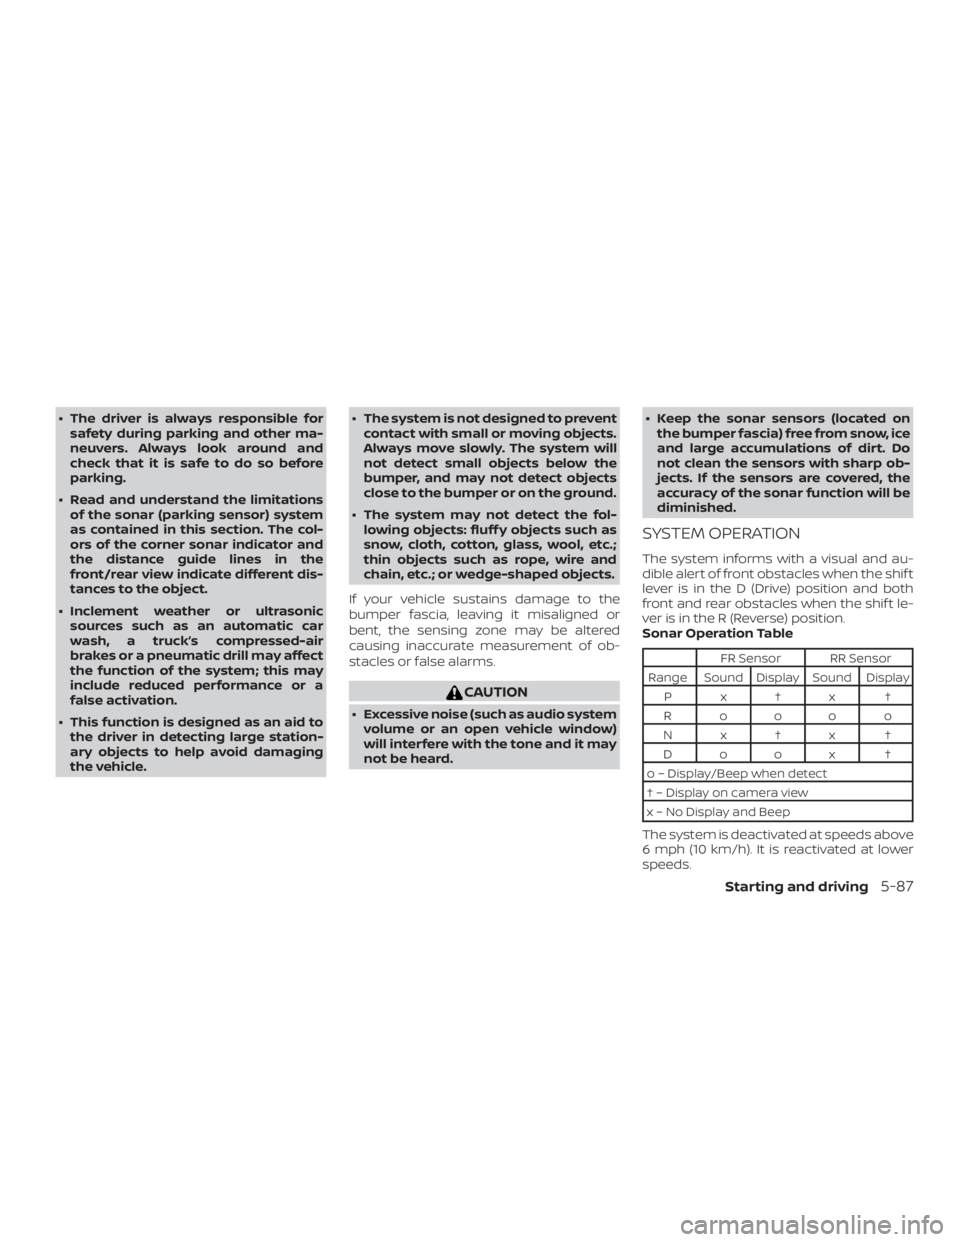
∙ The driver is always responsible forsafety during parking and other ma-
neuvers. Always look around and
check that it is safe to do so before
parking.
∙ Read and understand the limitations of the sonar (parking sensor) system
as contained in this section. The col-
ors of the corner sonar indicator and
the distance guide lines in the
front/rear view indicate different dis-
tances to the object.
∙ Inclement weather or ultrasonic sources such as an automatic car
wash, a truck’s compressed-air
brakes or a pneumatic drill may affect
the function of the system; this may
include reduced performance or a
false activation.
∙ This function is designed as an aid to the driver in detecting large station-
ary objects to help avoid damaging
the vehicle. ∙ The system is not designed to prevent
contact with small or moving objects.
Always move slowly. The system will
not detect small objects below the
bumper, and may not detect objects
close to the bumper or on the ground.
∙ The system may not detect the fol- lowing objects: fluff y objects such as
snow, cloth, cotton, glass, wool, etc.;
thin objects such as rope, wire and
chain, etc.; or wedge-shaped objects.
If your vehicle sustains damage to the
bumper fascia, leaving it misaligned or
bent, the sensing zone may be altered
causing inaccurate measurement of ob-
stacles or false alarms.
Page 344 of 467

∙ Read and understand the limitationsof the sonar system as contained in
this section. Inclement weather may
affect the function of the sonar sys-
tem; this may include reduced perfor-
mance or a false activation.
∙ The system is deactivated at speeds above 6 mph (10 km/h). It is reacti-
vated at lower speeds.
∙ Inclement weather or ultrasonic sources such as an automatic car
wash, a truck’s compressed-air
brakes or a pneumatic drill may affect
the function of the system; this may
include reduced performance or a
false activation.
∙ The system is not designed to prevent contact with small or moving objects.
Always move slowly. The system will
not detect small objects below the
bumper or on the ground.
∙ The system may not detect the fol- lowing objects: fluff y objects such as
snow, cloth, cotton, glass-wool, etc.;
thin objects such as rope, wire and
chain, etc.; or wedge-shaped objects. ∙ The system may not detect objects at
speeds above 3 mph (5 km/h) and
may not detect certain angular or
moving objects.
SYSTEM TEMPORARILY
UNAVAILABLE
When sonar blockage is detected, the sys-
tem will be deactivated automatically.
The system is not available until the condi-
tions no longer exist.
The sonar sensors may be blocked by tem-
porary ambient conditions such as splash-
ing water, mist or fog. The blocked condi-
tion may also be caused by objects such as
ice, frost or dirt obstructing the sonar sen-
sors.
Action to take:
When the above conditions no longer exist,
the system will resume automatically.
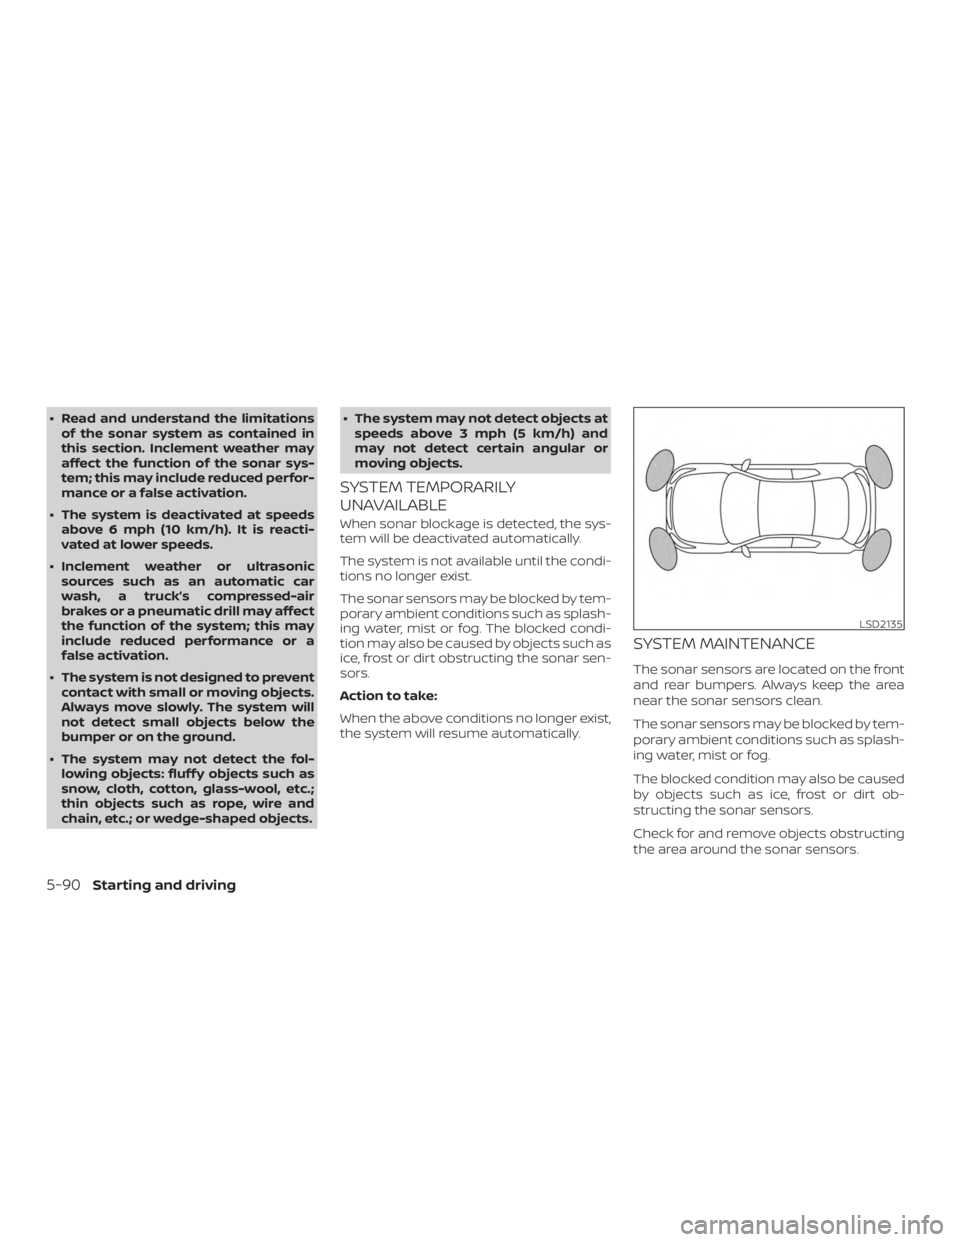
SYSTEM MAINTENANCE
The sonar sensors are located on the front
and rear bumpers. Always keep the area
near the sonar sensors clean.
The sonar sensors may be blocked by tem-
porary ambient conditions such as splash-
ing water, mist or fog.
The blocked condition may also be caused
by objects such as ice, frost or dirt ob-
structing the sonar sensors.
Check for and remove objects obstructing
the area around the sonar sensors.
Page 352 of 467

∙ When replacing a wheel without theTPMS such as the spare tire, TPMS will
not function and the low tire pressure
warning light will flash for approxi-
mately one minute. Have your tires re-
placed and/or TPMS system reset as
soon as possible. It is recommended
that you visit a NISSAN dealer for
these services.
∙ Replacing tires with those not origi- nally specified by NISSAN could affect
the proper operation of the TPMS.
∙ Do not inject any tire liquid or aerosol tire sealant into the tires, as this may
cause a malfunction of the tire pres-
sure sensors.
CHANGING A FLAT TIRE
If you have a flat tire, follow the instructions
below:
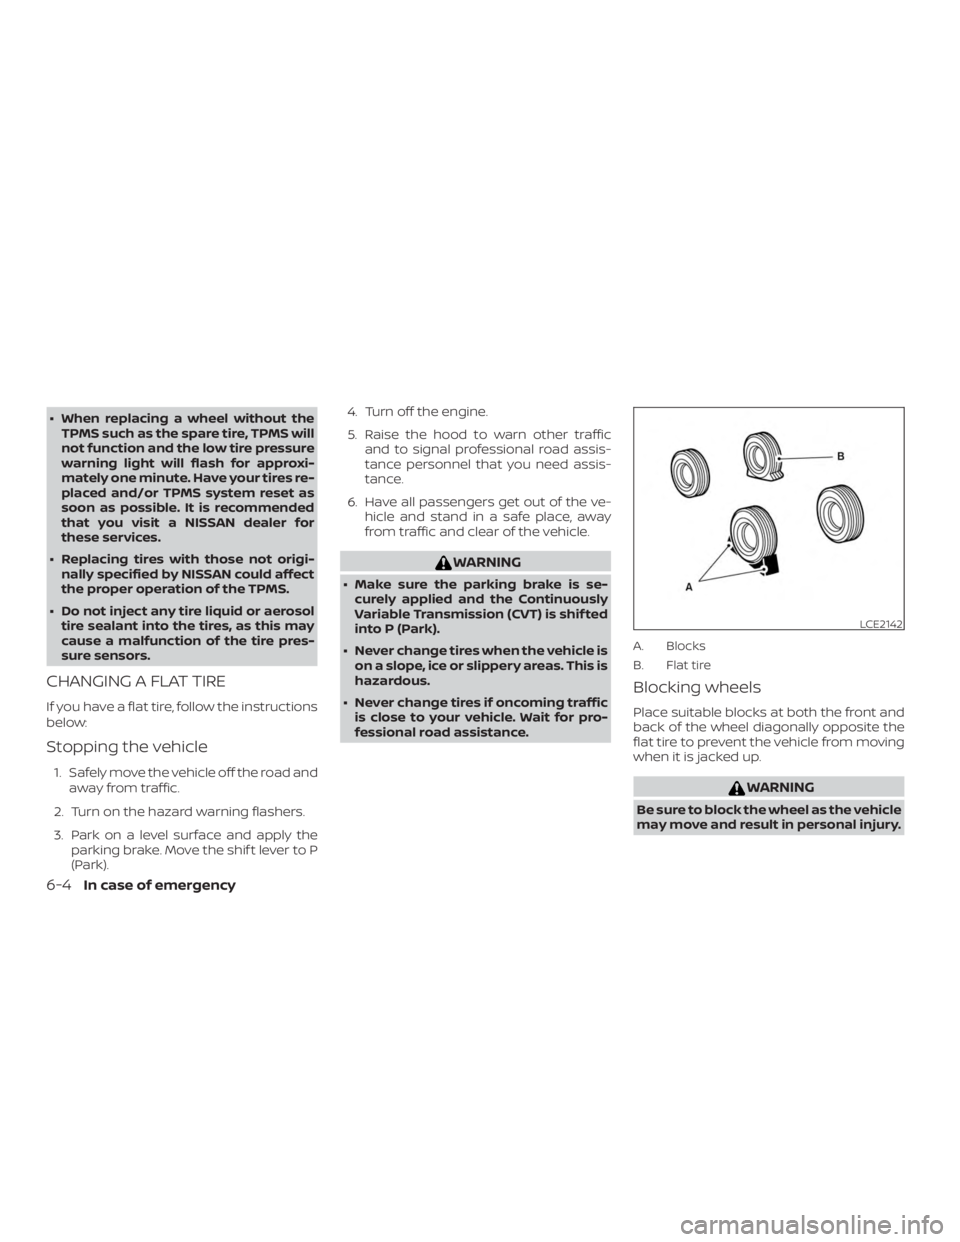
Stopping the vehicle
1. Safely move the vehicle off the road and
away from traffic.
2. Turn on the hazard warning flashers.
3. Park on a level surface and apply the parking brake. Move the shif t lever to P
(Park). 4. Turn off the engine.
5. Raise the hood to warn other traffic
and to signal professional road assis-
tance personnel that you need assis-
tance.
6. Have all passengers get out of the ve- hicle and stand in a safe place, away
from traffic and clear of the vehicle.
Page 359 of 467
WARNING
Always follow the instructions below.
Failure to do so could result in damage
to the charging system and cause per-
sonal injury.1. If the booster battery is in another ve- hicle, position the two vehicles to bring
their batteries near each other.
Do not allow the two vehicles to
touch. 2. Apply the parking brake. Move the shif t
lever to P (Park). Switch off all unneces-
sary electrical systems (lights, heater,
air conditioner, etc.).
3. Place the ignition switch in the LOCK position.
4. Ensure the vent caps are level and tight.
5. Connect the jumper cables in the se- quence illustrated (
�A,�B,�C,�D).
Page 370 of 467

∙ Use only Genuine NISSAN floor mats,or equivalent floor mats, that are spe-
cifically designed for use in your ve-
hicle model and model year.
∙ Properly position the mats in the floorwell using the floor mat position-
ing hook. For additional information,
refer to "Floor mat installation" in this
section.
∙ Make sure the floor mat does not in- terfere with pedal operation.
∙ Periodically check the floor mats to make sure they are properly installed.
∙ Af ter cleaning the vehicle interior, check the floor mats to make sure
they are properly installed.
The use of Genuine NISSAN floor mats can
extend the life of your vehicle carpet and
make it easier to clean the interior. Mats
should be maintained with regular clean-
ing and replaced if they become exces-
sively worn.
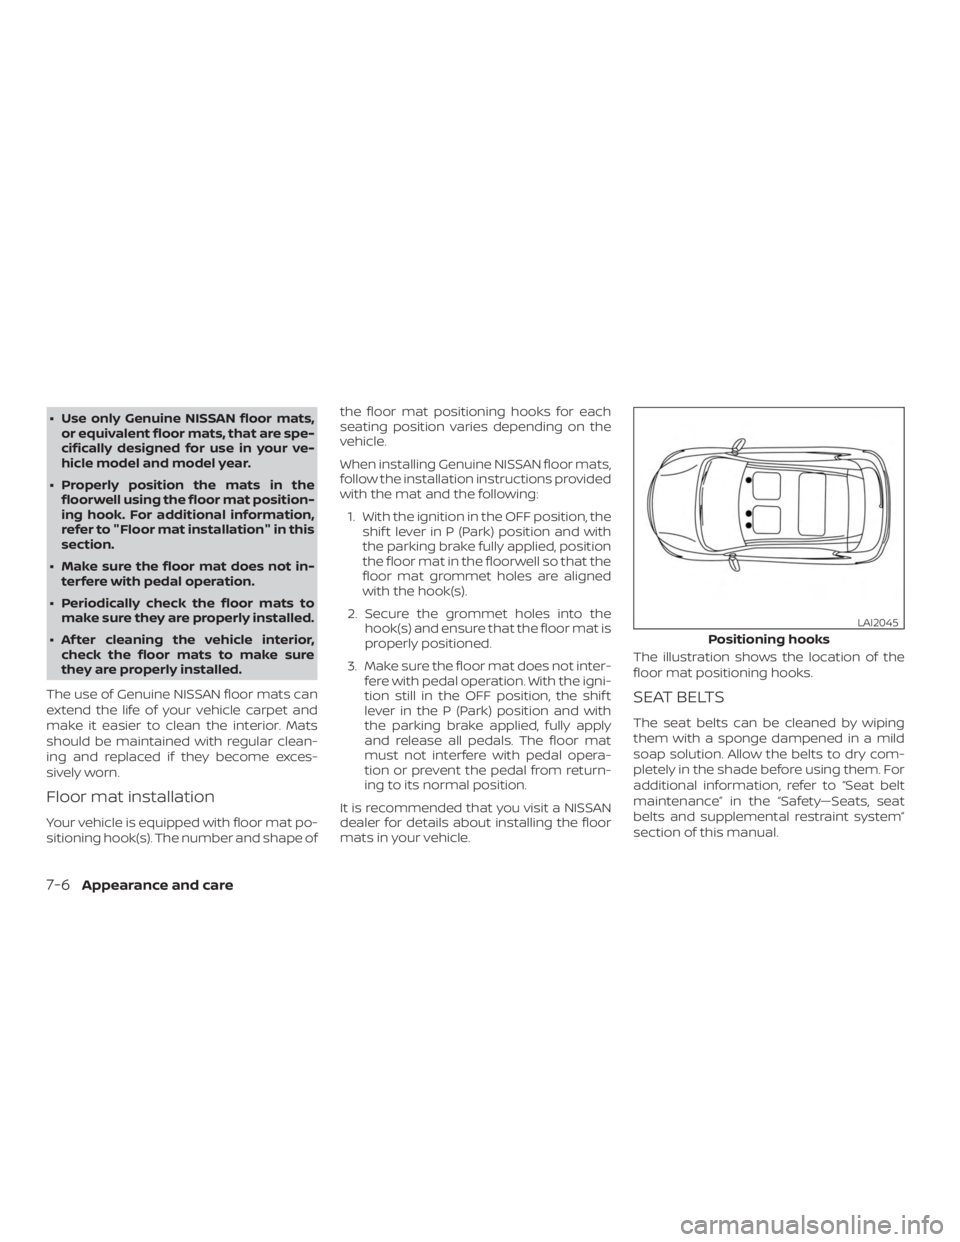
Floor mat installation
Your vehicle is equipped with floor mat po-
sitioning hook(s). The number and shape of the floor mat positioning hooks for each
seating position varies depending on the
vehicle.
When installing Genuine NISSAN floor mats,
follow the installation instructions provided
with the mat and the following:
1. With the ignition in the OFF position, the shif t lever in P (Park) position and with
the parking brake fully applied, position
the floor mat in the floorwell so that the
floor mat grommet holes are aligned
with the hook(s).
2. Secure the grommet holes into the hook(s) and ensure that the floor mat is
properly positioned.
3. Make sure the floor mat does not inter- fere with pedal operation. With the igni-
tion still in the OFF position, the shif t
lever in the P (Park) position and with
the parking brake applied, fully apply
and release all pedals. The floor mat
must not interfere with pedal opera-
tion or prevent the pedal from return-
ing to its normal position.
It is recommended that you visit a NISSAN
dealer for details about installing the floor
mats in your vehicle. The illustration shows the location of the
floor mat positioning hooks.
SEAT BELTS
The seat belts can be cleaned by wiping
them with a sponge dampened in a mild
soap solution. Allow the belts to dry com-
pletely in the shade before using them. For
additional information, refer to “Seat belt
maintenance” in the “Safety—Seats, seat
belts and supplemental restraint system”
section of this manual.
Page 372 of 467
CAUTION
∙ NEVER remove dirt, sand or other de-bris from the passenger compart-
ment by washing it out with a hose.
Remove dirt with a vacuum cleaner or
broom.
∙ Never allow water or other liquids to come in contact with electronic com-
ponents inside the vehicle as this may
damage them.
Chemicals used for road surface de-icing
are extremely corrosive. They accelerate
corrosion and deterioration of underbody
components such as the exhaust system,
fuel and brake lines, brake cables, floor pan
and fenders.
In winter, the underbody must be
cleaned periodically.
For additional protection against rust and
corrosion, which may be required in some
areas, it is recommended that you visit a
NISSAN dealer.
License plate bracket padding
1. License plate
2. Trunk
3. License plate frame
4. Padding
Page 380 of 467
CAUTION
∙ Oil level should be checked regularly.Operating the engine with an insuffi-
cient amount of oil can damage the
engine, and such damage is not cov-
ered by warranty.
∙ It is normal to add some oil between oil maintenance intervals or during
the break-in period, depending on the
severity of operating conditions.
CHANGING ENGINE OIL
1. Park the vehicle on a level surface and apply the parking brake.
2. Start the engine and let it idle until it reaches operating temperature, then
turn it off.
3. Remove the oil filler cap
�Aby turning it
counterclockwise. 4. Remove the pins
�Bfrom the under-
cover. Gently pull the undercover to
gain access to the drain plug. (VQ35DE
engine only)
Page 382 of 467
10. Turn the engine off and wait more than10 minutes. Check the oil level with the
dipstick. Add engine oil if necessary.
CHANGING ENGINE OIL FILTER
1. Park the vehicle on a level surface and
apply the parking brake.
2. Turn the engine off. 3. Place a large drain pan under the oil
filter
�B.
4. Remove pins
�Afrom the right engine
protector located inside right wheel
well, remove protector. Remove oil filter
�Bwith an oil filter wrench by turning it
counterclockwise. Then remove the oil
filter by turning it by hand.