2018 NISSAN ALTIMA navigation system
[x] Cancel search: navigation systemPage 188 of 467
Refer to the NissanConnect® Owner’s
Manual that includes the following infor-
mation.∙ NissanConnect® Services
∙ Navigation system (if so equipped)
∙ Audio system
∙ Apple CarPlay
TM
∙ Android AutoTM
∙ Bluetooth® Hands-Free Phone system
∙ Viewing information
∙ Other settings
∙ Voice recognition
∙ General system information
NISSANCONNECT® OWNER’S
MANUAL
4-2Monitor, climate, audio, phone and voice recognition systems
Page 195 of 467
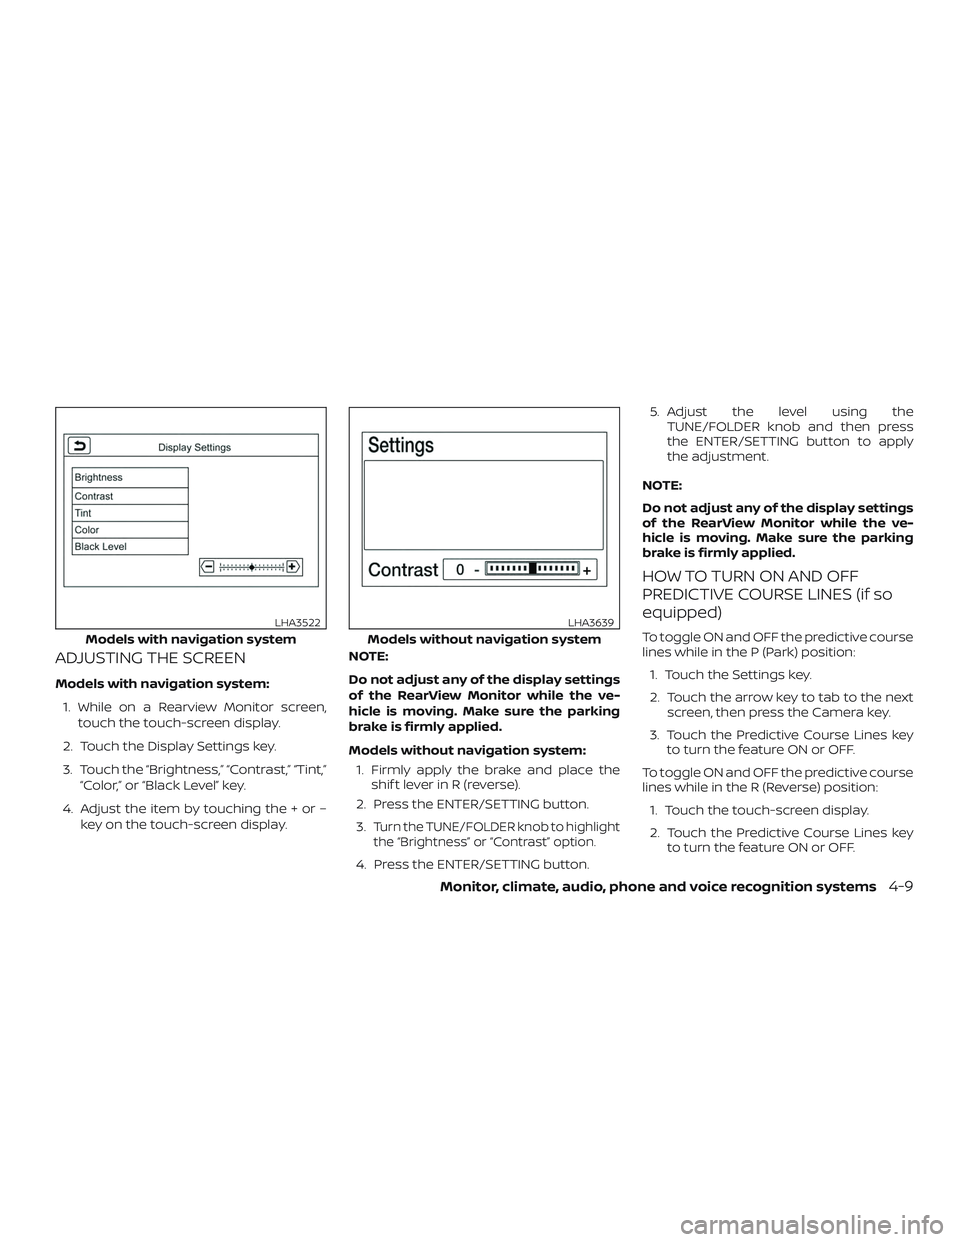
ADJUSTING THE SCREEN
Models with navigation system:1. While on a Rearview Monitor screen, touch the touch-screen display.
2. Touch the Display Settings key.
3. Touch the “Brightness,” “Contrast,” “Tint,” “Color,” or “Black Level” key.
4. Adjust the item by touching the + or – key on the touch-screen display. NOTE:
Do not adjust any of the display settings
of the RearView Monitor while the ve-
hicle is moving. Make sure the parking
brake is firmly applied.
Models without navigation system:
1. Firmly apply the brake and place the shif t lever in R (reverse).
2. Press the ENTER/SETTING button.
3.
Turn the TUNE/FOLDER knob to highlight
the “Brightness” or “Contrast” option.
4. Press the ENTER/SETTING button. 5. Adjust the level using the
TUNE/FOLDER knob and then press
the ENTER/SETTING button to apply
the adjustment.
NOTE:
Do not adjust any of the display settings
of the RearView Monitor while the ve-
hicle is moving. Make sure the parking
brake is firmly applied.
HOW TO TURN ON AND OFF
PREDICTIVE COURSE LINES (if so
equipped)
To toggle ON and OFF the predictive course
lines while in the P (Park) position: 1. Touch the Settings key.
2. Touch the arrow key to tab to the next screen, then press the Camera key.
3. Touch the Predictive Course Lines key to turn the feature ON or OFF.
To toggle ON and OFF the predictive course
lines while in the R (Reverse) position: 1. Touch the touch-screen display.
2. Touch the Predictive Course Lines key to turn the feature ON or OFF.Models with navigation system
LHA3522
Models without navigation system
LHA3639
Monitor, climate, audio, phone and voice recognition systems4-9
Page 221 of 467
iPod MENU button
This button can only be used for iPod® op-
erations. For additional information, refer to
“iPod® player operation (models without
navigation system)” in this section.
DISP (display) button
The DISP (display) button turns the display
screen on or off.
FM/AM radio operation
FM·AM button
Press the FM·AM button to change the
band as follows:
AM→FM1 →FM2 →AM
If another audio source is playing when the
FM·AM button is pressed, the audio source
playing will automatically be turned off and
the last radio station played will begin play-
ing.
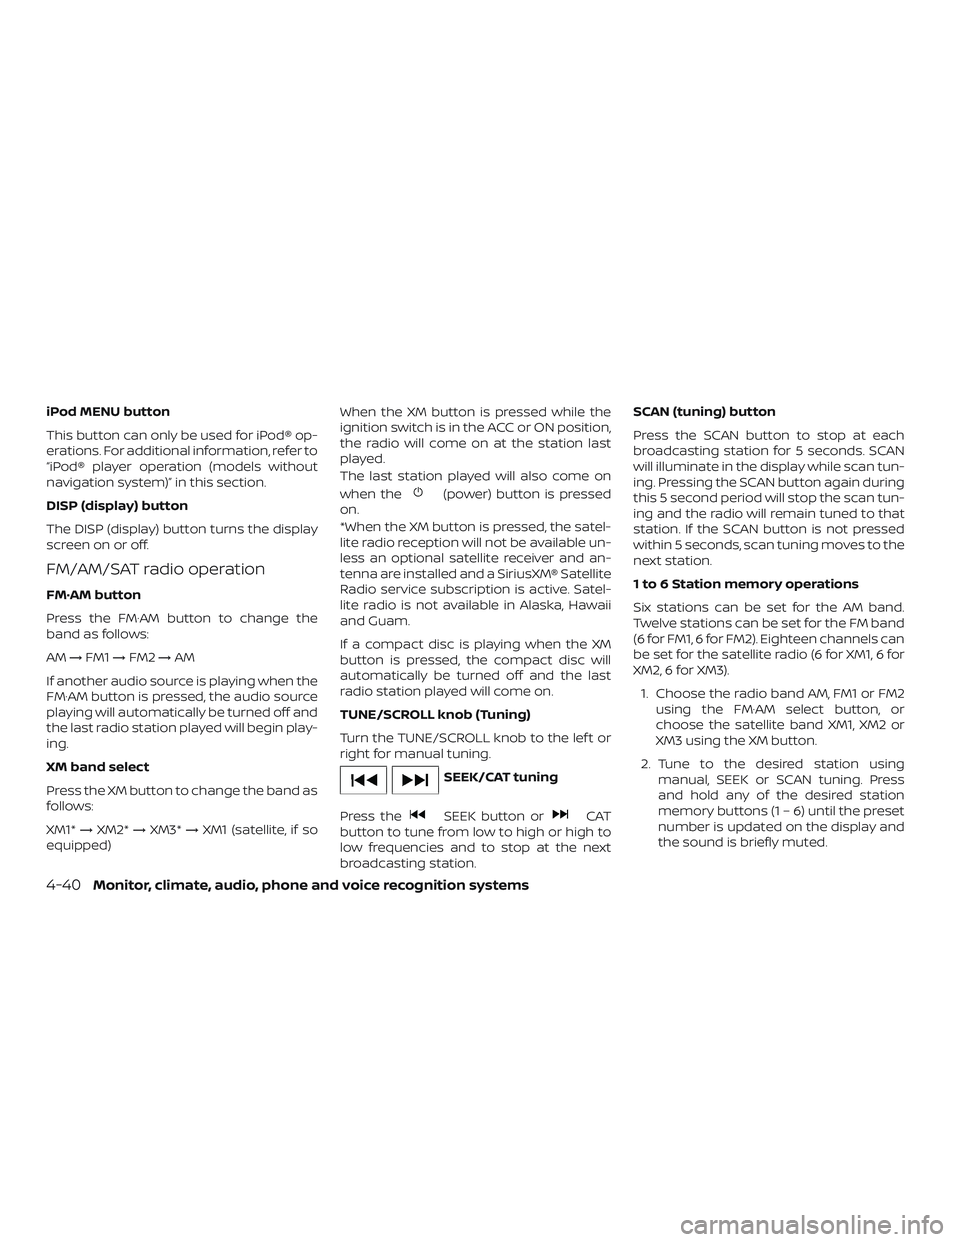
TUNE/FOLDER knob tuning
Turn the TUNE/FOLDER knob to the lef t or
right for manual tuning.
SEEK/TRACK tuning
Press the
SEEK button orTRACK button to tune from low to high or
high to low frequencies and to stop at the
next broadcasting station.
SCAN tuning
Press the SCAN button to stop at each
broadcasting station for 5 seconds. SCAN
will appear on the screen while the radio is
scan tuning.
Pressing the button again during this
5 second period will stop SCAN tuning and
the radio will remain tuned to that station. If
the SCAN button is not pressed within
5 seconds, SCAN tuning moves to the next
station.
1 to 6 Station memory operations
Six stations can be set for the AM band.
Twelve stations can be set for the FM band
(6 for FM1, 6 for FM2). 1. Choose the radio band AM, FM1 or FM2 using the FM·AM select button.
2. Tune to the desired station using the
SEEK button or theTRACK button. Press and hold any of
the desired station memory buttons (1 – 6) until the preset number is updated
on the display and the sound is briefly
muted.
3. The channel indicator will then come on and the sound will resume. Pro-
gramming is now complete.
4. Other buttons can be set in the same manner.
If the battery cable is disconnected, or if the
fuse opens, the radio memory will be can-
celed. In that case, reset the desired sta-
tions.
Compact disc (CD) player
operation
If the radio is already operating, it automati-
cally turns off and the compact disc begins
to play.
MEDIA button
With a CD loaded, press the MEDIA button
until the CD mode is displayed on the
screen.
CD/MP3 display mode
While listening to an MP3/WMA CD, certain
text may be displayed on the screen if the
CD has been encoded with text informa-
tion. Depending on how the MP3/WMA CD
Monitor, climate, audio, phone and voice recognition systems4-35
Page 223 of 467
CD EJECT button
When the
CD eject button is pressed
with a compact disc loaded, the compact
disc will eject and the last source will be
played.
When the
CD eject button is pressed
twice with a compact disc loaded, the
compact disc will be ejected further for
easier CD removal. If the disc is not re-
moved within 20 seconds, the disc will re-
load.
Additional features
For additional information about the iPod®
player available with this system, refer to
“iPod® player operation without Navigation
System” in this section.
For additional information about the USB
(Universal Serial Bus) connection port avail-
able with this system, refer to “USB (Univer-
sal Serial Bus) Connection Port (models
without Navigation System)” in this section.
For additional information about the
Bluetooth® audio interface available with
this system, refer to “Bluetooth® streaming
audio without Navigation System (Type B)”
in this section.
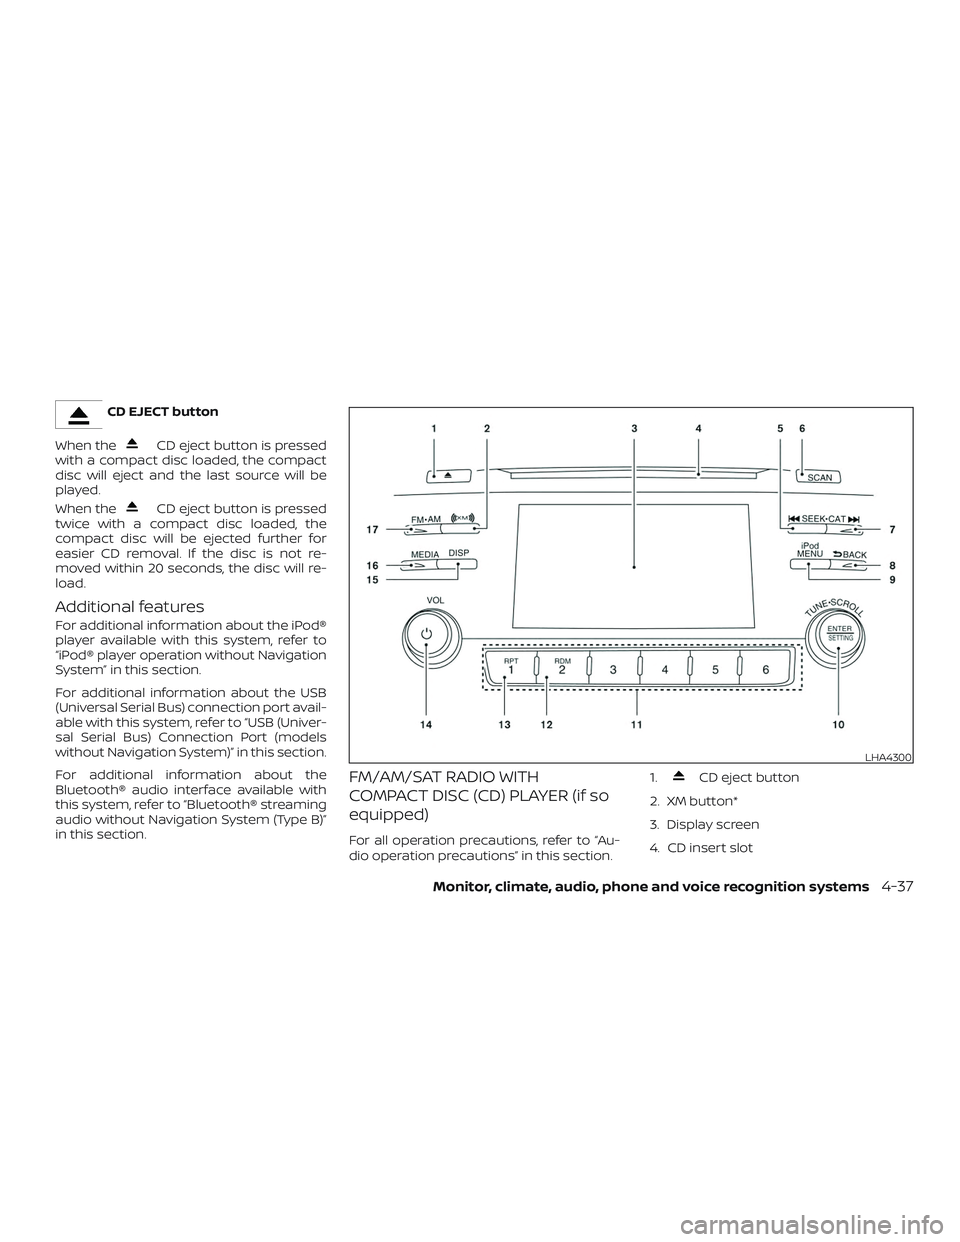
FM/AM/SAT RADIO WITH
COMPACT DISC (CD) PLAYER (if so
equipped)
For all operation precautions, refer to “Au-
dio operation precautions” in this section. 1.
CD eject button
2. XM button*
3. Display screen
4. CD insert slot
LHA4300
Monitor, climate, audio, phone and voice recognition systems4-37
Page 226 of 467
iPod MENU button
This button can only be used for iPod® op-
erations. For additional information, refer to
“iPod® player operation (models without
navigation system)” in this section.
DISP (display) button
The DISP (display) button turns the display
screen on or off.
FM/AM/SAT radio operation
FM·AM button
Press the FM·AM button to change the
band as follows:
AM→FM1 →FM2 →AM
If another audio source is playing when the
FM·AM button is pressed, the audio source
playing will automatically be turned off and
the last radio station played will begin play-
ing.
XM band select
Press the XM button to change the band as
follows:
XM1* →XM2* →XM3* →XM1 (satellite, if so
equipped) When the XM button is pressed while the
ignition switch is in the ACC or ON position,
the radio will come on at the station last
played.
The last station played will also come on
when the
(power) button is pressed
on.
*When the XM button is pressed, the satel-
lite radio reception will not be available un-
less an optional satellite receiver and an-
tenna are installed and a SiriusXM® Satellite
Radio service subscription is active. Satel-
lite radio is not available in Alaska, Hawaii
and Guam.
If a compact disc is playing when the XM
button is pressed, the compact disc will
automatically be turned off and the last
radio station played will come on.
TUNE/SCROLL knob (Tuning)
Turn the TUNE/SCROLL knob to the lef t or
right for manual tuning.
SEEK/CAT tuning
Press the
SEEK button orCAT
button to tune from low to high or high to
low frequencies and to stop at the next
broadcasting station. SCAN (tuning) button
Press the SCAN button to stop at each
broadcasting station for 5 seconds. SCAN
will illuminate in the display while scan tun-
ing. Pressing the SCAN button again during
this 5 second period will stop the scan tun-
ing and the radio will remain tuned to that
station. If the SCAN button is not pressed
within 5 seconds, scan tuning moves to the
next station.
1 to 6 Station memory operations
Six stations can be set for the AM band.
Twelve stations can be set for the FM band
(6 for FM1, 6 for FM2). Eighteen channels can
be set for the satellite radio (6 for XM1, 6 for
XM2, 6 for XM3).
1. Choose the radio band AM, FM1 or FM2 using the FM·AM select button, or
choose the satellite band XM1, XM2 or
XM3 using the XM button.
2. Tune to the desired station using manual, SEEK or SCAN tuning. Press
and hold any of the desired station
memory buttons (1 – 6) until the preset
number is updated on the display and
the sound is briefly muted.
4-40Monitor, climate, audio, phone and voice recognition systems
Page 228 of 467
The current play pattern of the CD is dis-
played on the screen unless no pattern is
applied.
RDM (random) button
When the RDM button is pressed while a
compact disc is playing, the play pattern
can be changed as follows:
CD:
1 Disc Random←→OFF
CD with MP3 or WMA:
1 Disc Random →1 Folder Random →OFF
1 Disc Random: all tracks on the disc will be
played randomly.
1 Folder Random: all tracks in the current
folder will be played randomly.
OFF: No random play pattern is applied. The
indicator on the display will turn off.
The current play pattern of the CD is dis-
played on the screen unless no pattern is
applied.CD EJECT button
When the
CD eject button is pressed
with a compact disc loaded, the compact
disc will eject and the last source will be
played.
When the
CD eject button is pressed
twice with a compact disc loaded, the
compact disc will be ejected further for
easier CD removal. If the disc is not re-
moved within 20 seconds, the disc will re-
load.
Additional features
For additional information about the iPod®
player available with this system, refer to
“iPod® player operation without Navigation
System” in this section.
For additional information about the USB
(Universal Serial Bus) connection port avail-
able with this system, refer to “USB (Univer-
sal Serial Bus) Connection Port (models
without Navigation System)” in this section.
For additional information about the
Bluetooth® audio interface available with
this system, refer to “Bluetooth® streaming
audio without Navigation System (Type B)”
in this section.
USB (Universal Serial Bus)
CONNECTION PORT (models
without Navigation System) (if so
equipped)
Connecting a device to the USB
Connection Port
WARNING
Do not connect, disconnect, or operate
the USB device while driving. Doing so
can be a distraction. If distracted you
could lose control of your vehicle and
cause an accident or serious injury.
LHA3077
4-42Monitor, climate, audio, phone and voice recognition systems
Page 230 of 467
OFF: No random play pattern is applied. The
indicator on the display will turn off.
The current play pattern of the USB device
is displayed on the screen unless no pat-
tern is applied.
RPT (repeat) button
When the RPT button is pressed while an
audio file on the USB device is playing, the
play pattern can be changed as follows:
1 Folder Repeat→1 Track Repeat →OFF
1 Track Repeat: the current track will be
repeated.
1 Folder Repeat: the current folder will be
repeated.
OFF: No repeat play pattern is applied. The
indicator on the display will turn off.
The current play pattern of the USB device
is displayed on the screen unless no pat-
tern is applied. TUNE/FOLDER or TUNE/SCROLL knob
If there are multiple folders with audio files
on the USB device, turn the TUNE/FOLDER
or TUNE/SCROLL knob to change folders.
Turn the knob to the lef t to skip back a
folder. Turn the knob to the right to skip
ahead a folder. If there is only one folder of
audio files on the USB device, turning the
TUNE/FOLDER or TUNE/SCROLL knob in ei-
ther direction will return to the first track on
the USB device.
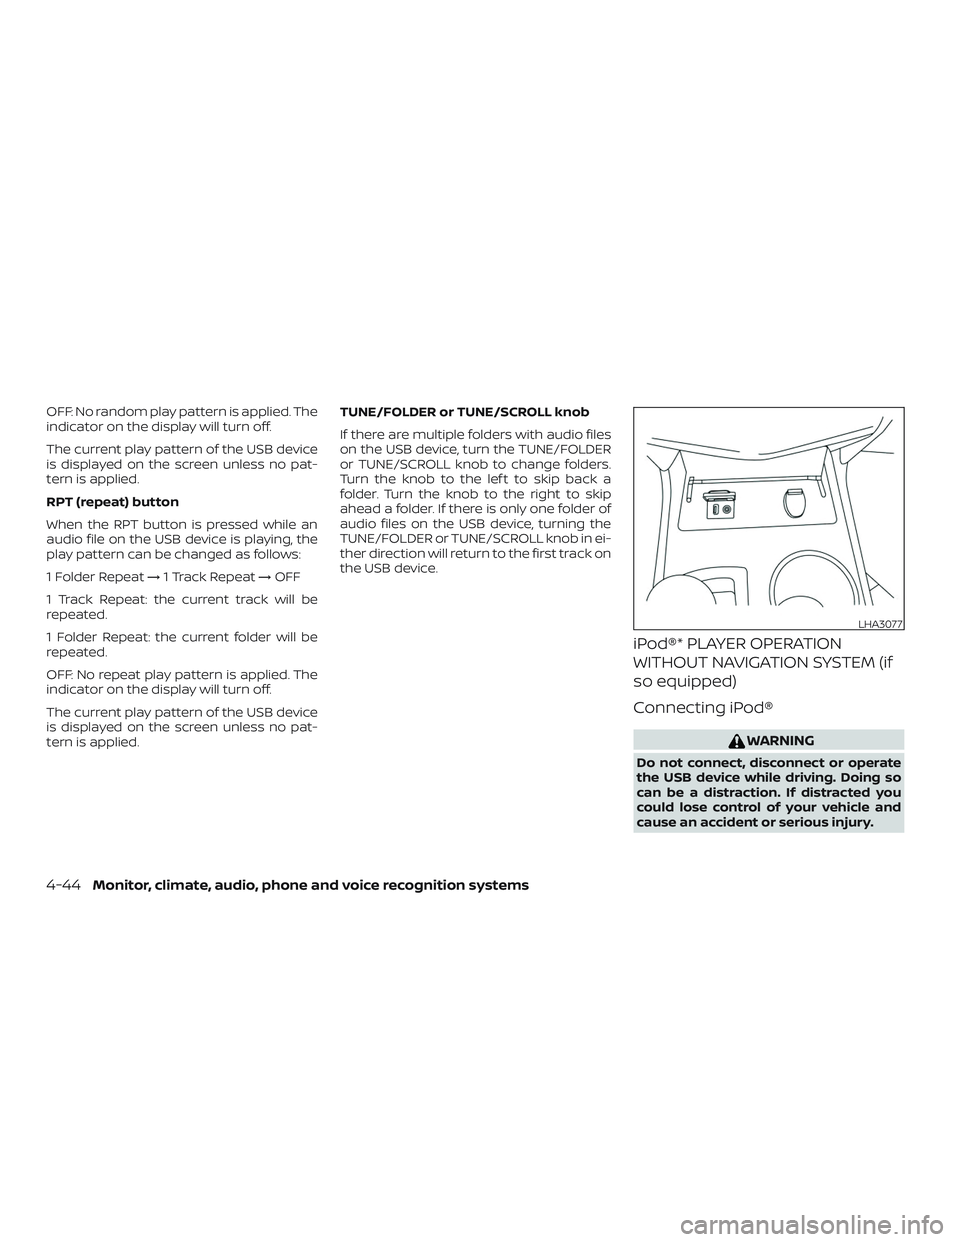
iPod®* PLAYER OPERATION
WITHOUT NAVIGATION SYSTEM (if
so equipped)
Connecting iPod®
WARNING
Do not connect, disconnect or operate
the USB device while driving. Doing so
can be a distraction. If distracted you
could lose control of your vehicle and
cause an accident or serious injury.
LHA3077
4-44Monitor, climate, audio, phone and voice recognition systems
Page 233 of 467
BACK button
When the
BACK button is pressed, it
returns to the previous menu.
BLUETOOTH® STREAMING AUDIO
WITHOUT NAVIGATION SYSTEM
If you have a compatible Bluetooth® audio
device that is capable of playing audio files,
the device can be connected to the vehi-
cle’s audio system so that the audio files on
the device play through the vehicle’s
speakers. For additional information, refer
to “FM/AM radio with compact disc (CD)
player” or “FM/AM/SAT radio with compact
disc (CD) player” in this section.
Connecting Bluetooth® audio
To connect your Bluetooth® audio device
to the vehicle, follow the procedure below:
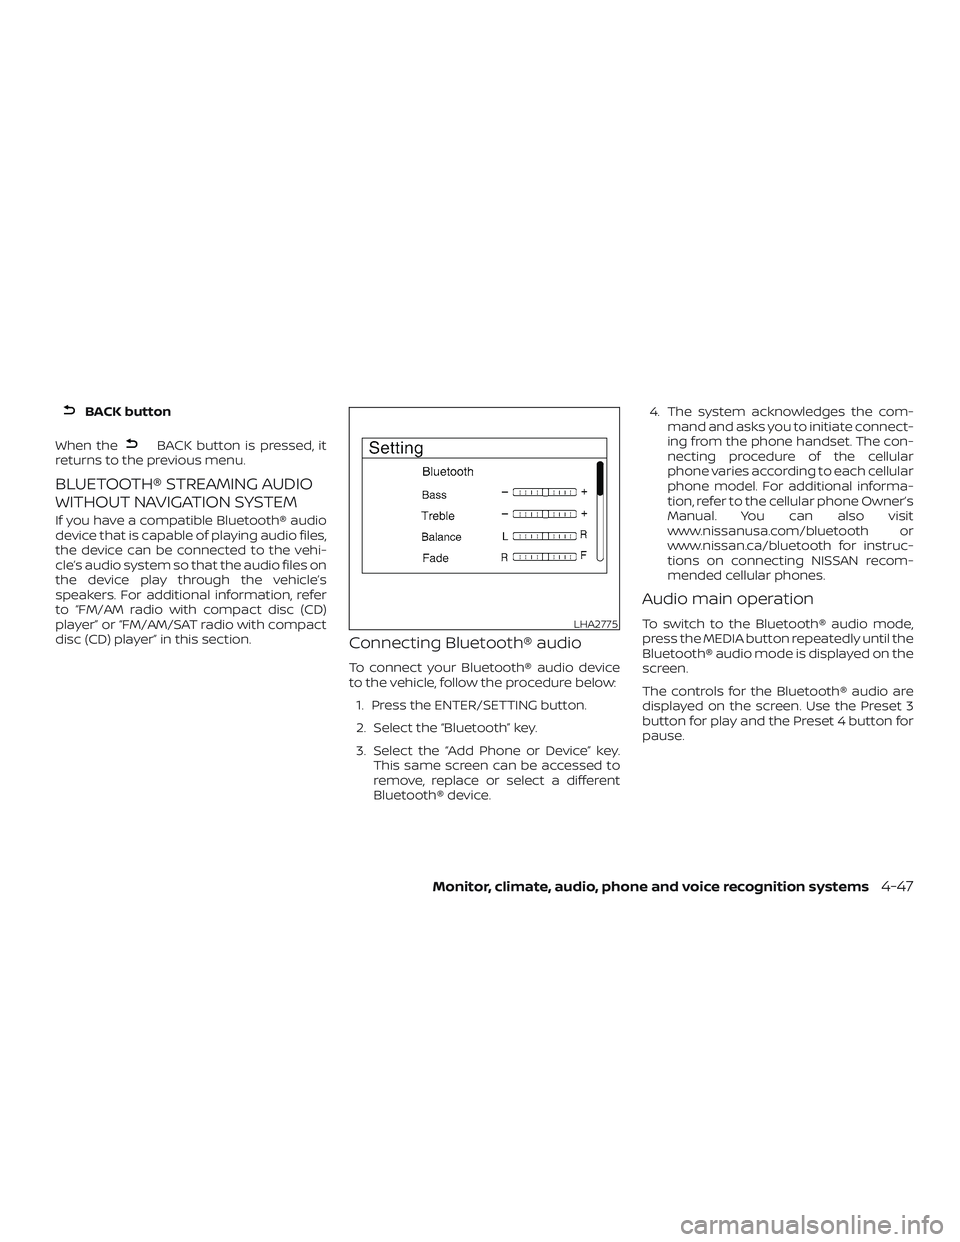
1. Press the ENTER/SETTING button.
2. Select the “Bluetooth” key.
3. Select the “Add Phone or Device” key. This same screen can be accessed to
remove, replace or select a different
Bluetooth® device. 4. The system acknowledges the com-
mand and asks you to initiate connect-
ing from the phone handset. The con-
necting procedure of the cellular
phone varies according to each cellular
phone model. For additional informa-
tion, refer to the cellular phone Owner’s
Manual. You can also visit
www.nissanusa.com/bluetooth or
www.nissan.ca/bluetooth for instruc-
tions on connecting NISSAN recom-
mended cellular phones.
Audio main operation
To switch to the Bluetooth® audio mode,
press the MEDIA button repeatedly until the
Bluetooth® audio mode is displayed on the
screen.
The controls for the Bluetooth® audio are
displayed on the screen. Use the Preset 3
button for play and the Preset 4 button for
pause.LHA2775
Monitor, climate, audio, phone and voice recognition systems4-47