2018 NISSAN ALTIMA CD player
[x] Cancel search: CD playerPage 226 of 467
iPod MENU button
This button can only be used for iPod® op-
erations. For additional information, refer to
“iPod® player operation (models without
navigation system)” in this section.
DISP (display) button
The DISP (display) button turns the display
screen on or off.
FM/AM/SAT radio operation
FM·AM button
Press the FM·AM button to change the
band as follows:
AM→FM1 →FM2 →AM
If another audio source is playing when the
FM·AM button is pressed, the audio source
playing will automatically be turned off and
the last radio station played will begin play-
ing.
XM band select
Press the XM button to change the band as
follows:
XM1* →XM2* →XM3* →XM1 (satellite, if so
equipped) When the XM button is pressed while the
ignition switch is in the ACC or ON position,
the radio will come on at the station last
played.
The last station played will also come on
when the
(power) button is pressed
on.
*When the XM button is pressed, the satel-
lite radio reception will not be available un-
less an optional satellite receiver and an-
tenna are installed and a SiriusXM® Satellite
Radio service subscription is active. Satel-
lite radio is not available in Alaska, Hawaii
and Guam.
If a compact disc is playing when the XM
button is pressed, the compact disc will
automatically be turned off and the last
radio station played will come on.
TUNE/SCROLL knob (Tuning)
Turn the TUNE/SCROLL knob to the lef t or
right for manual tuning.
SEEK/CAT tuning
Press the
SEEK button orCAT
button to tune from low to high or high to
low frequencies and to stop at the next
broadcasting station. SCAN (tuning) button
Press the SCAN button to stop at each
broadcasting station for 5 seconds. SCAN
will illuminate in the display while scan tun-
ing. Pressing the SCAN button again during
this 5 second period will stop the scan tun-
ing and the radio will remain tuned to that
station. If the SCAN button is not pressed
within 5 seconds, scan tuning moves to the
next station.
1 to 6 Station memory operations
Six stations can be set for the AM band.
Twelve stations can be set for the FM band
(6 for FM1, 6 for FM2). Eighteen channels can
be set for the satellite radio (6 for XM1, 6 for
XM2, 6 for XM3).
1. Choose the radio band AM, FM1 or FM2 using the FM·AM select button, or
choose the satellite band XM1, XM2 or
XM3 using the XM button.
2. Tune to the desired station using manual, SEEK or SCAN tuning. Press
and hold any of the desired station
memory buttons (1 – 6) until the preset
number is updated on the display and
the sound is briefly muted.
4-40Monitor, climate, audio, phone and voice recognition systems
Page 227 of 467
3. The channel indicator will then comeon and the sound will resume. Pro-
gramming is now complete.
4. Other buttons can be set in the same manner.
If the battery cable is disconnected, or if the
fuse opens, the radio memory will be can-
celed. In that case, reset the desired sta-
tions.
Compact disc (CD) player
operation
If the radio is already operating, it automati-
cally turns off and the compact disc begins
to play.
MEDIA button
With a CD loaded, press the MEDIA button
until the CD mode is displayed on the
screen.
CD/MP3 display mode
While listening to an MP3/WMA CD, certain
text may be displayed on the screen if the
CD has been encoded with text informa-
tion. Depending on how the MP3/WMA CD
is encoded, information such as Artist,
Song and Folder will be displayed. The track number and the total number of
tracks in the current folder or on the cur-
rent disc are displayed on the screen as
well.
SEEK/CAT (Reverse or
Fast Forward) button
Press and hold the SEEK/CAT button
orfor 1.5 seconds while the compact
disc is playing to reverse or fast forward the
track being played. The compact disc plays
at an increased speed while reversing or
fast forwarding. When the button is re-
leased, the compact disc returns to normal
play speed.
SEEK/CAT button
Press the
SEEK/CAT button while a
CD or MP3/WMA CD is playing to return to
the beginning of the current track. Press
the
SEEK/CAT button several times to
skip backward several tracks.
Press the
SEEK/CAT button while a
CD or MP3/WMA CD is playing to advance
one track. Press the
SEEK/CAT button
several times to skip forward several
tracks. If the last track on a CD is skipped,
the first track on the disc is played. If the last track in a folder of an MP3/WMA CD is
skipped, the first track of the next folder is
played.
TUNE/SCROLL knob (MP3/WMA CD only)
If a MP3/WMA CD with multiple folders is
playing, turn the TUNE/SCROLL knob to
change folders. Turn the knob to the lef t to
skip back a folder. Turn the knob to the right
to skip ahead a folder.
RPT (repeat) button
When the RPT button is pressed while a
compact disc is playing, the play pattern
can be changed as follows:
CD:
1 Track Repeat
←→OFF
CD with MP3 or WMA:
1 Folder Repeat →1 Track Repeat →OFF
1 Track Repeat: the current track will be
repeated.
1 Folder Repeat: the current folder will be
repeated.
OFF: No repeat play pattern is applied. The
indicator on the display will turn off.
Monitor, climate, audio, phone and voice recognition systems4-41
Page 228 of 467
The current play pattern of the CD is dis-
played on the screen unless no pattern is
applied.
RDM (random) button
When the RDM button is pressed while a
compact disc is playing, the play pattern
can be changed as follows:
CD:
1 Disc Random←→OFF
CD with MP3 or WMA:
1 Disc Random →1 Folder Random →OFF
1 Disc Random: all tracks on the disc will be
played randomly.
1 Folder Random: all tracks in the current
folder will be played randomly.
OFF: No random play pattern is applied. The
indicator on the display will turn off.
The current play pattern of the CD is dis-
played on the screen unless no pattern is
applied.CD EJECT button
When the
CD eject button is pressed
with a compact disc loaded, the compact
disc will eject and the last source will be
played.
When the
CD eject button is pressed
twice with a compact disc loaded, the
compact disc will be ejected further for
easier CD removal. If the disc is not re-
moved within 20 seconds, the disc will re-
load.
Additional features
For additional information about the iPod®
player available with this system, refer to
“iPod® player operation without Navigation
System” in this section.
For additional information about the USB
(Universal Serial Bus) connection port avail-
able with this system, refer to “USB (Univer-
sal Serial Bus) Connection Port (models
without Navigation System)” in this section.
For additional information about the
Bluetooth® audio interface available with
this system, refer to “Bluetooth® streaming
audio without Navigation System (Type B)”
in this section.
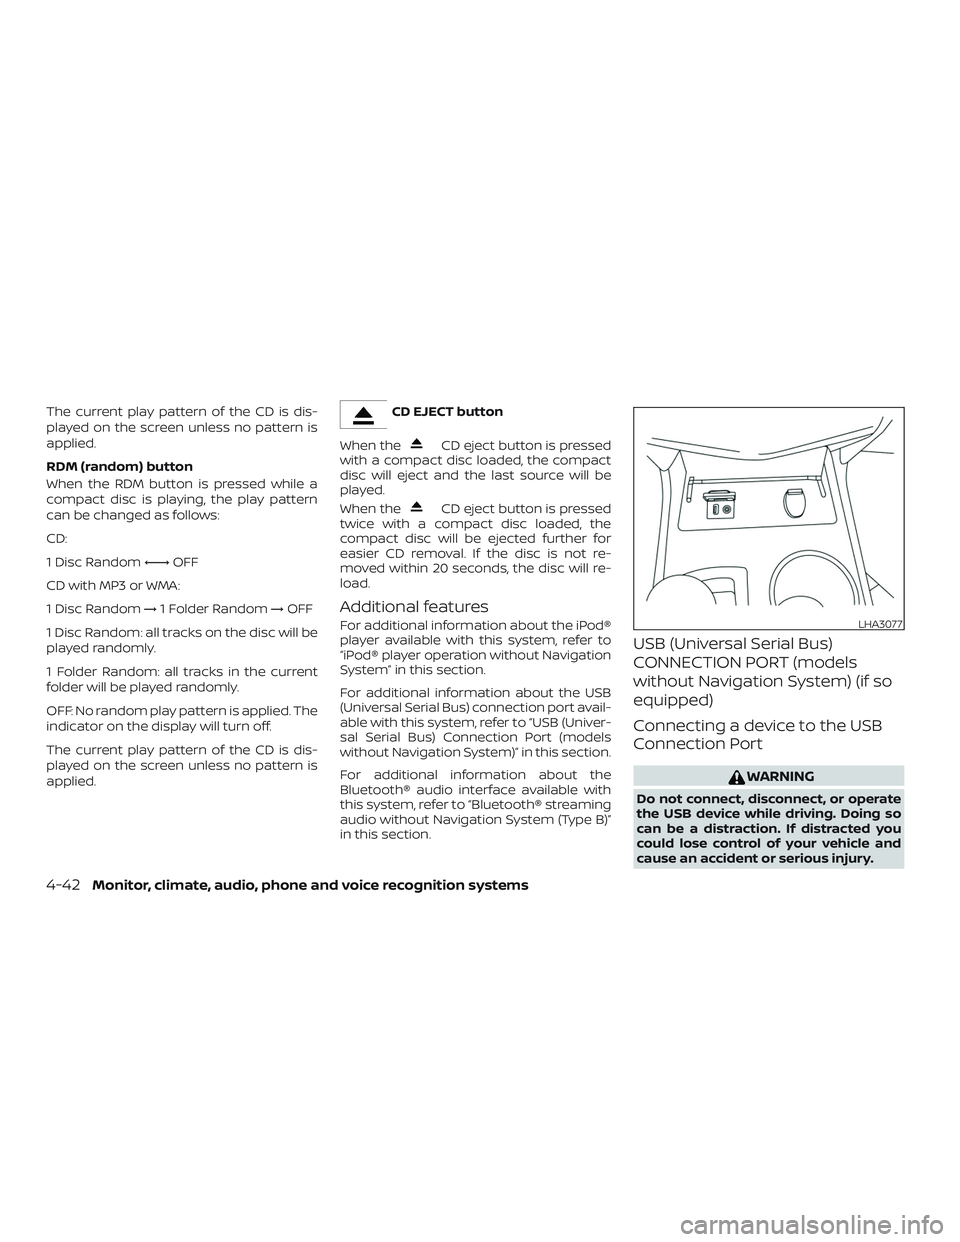
USB (Universal Serial Bus)
CONNECTION PORT (models
without Navigation System) (if so
equipped)
Connecting a device to the USB
Connection Port
WARNING
Do not connect, disconnect, or operate
the USB device while driving. Doing so
can be a distraction. If distracted you
could lose control of your vehicle and
cause an accident or serious injury.
LHA3077
4-42Monitor, climate, audio, phone and voice recognition systems
Page 230 of 467
OFF: No random play pattern is applied. The
indicator on the display will turn off.
The current play pattern of the USB device
is displayed on the screen unless no pat-
tern is applied.
RPT (repeat) button
When the RPT button is pressed while an
audio file on the USB device is playing, the
play pattern can be changed as follows:
1 Folder Repeat→1 Track Repeat →OFF
1 Track Repeat: the current track will be
repeated.
1 Folder Repeat: the current folder will be
repeated.
OFF: No repeat play pattern is applied. The
indicator on the display will turn off.
The current play pattern of the USB device
is displayed on the screen unless no pat-
tern is applied. TUNE/FOLDER or TUNE/SCROLL knob
If there are multiple folders with audio files
on the USB device, turn the TUNE/FOLDER
or TUNE/SCROLL knob to change folders.
Turn the knob to the lef t to skip back a
folder. Turn the knob to the right to skip
ahead a folder. If there is only one folder of
audio files on the USB device, turning the
TUNE/FOLDER or TUNE/SCROLL knob in ei-
ther direction will return to the first track on
the USB device.
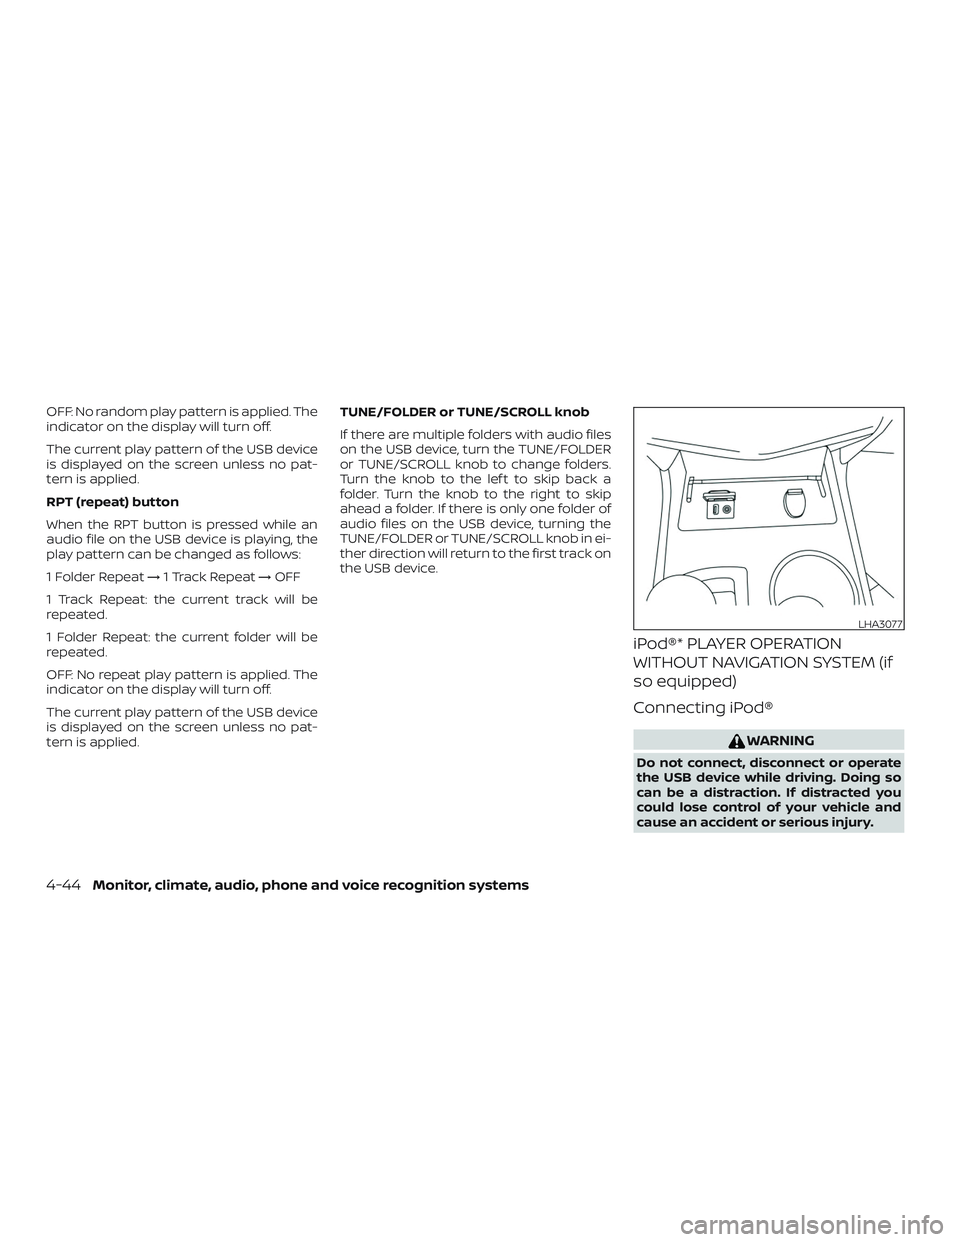
iPod®* PLAYER OPERATION
WITHOUT NAVIGATION SYSTEM (if
so equipped)
Connecting iPod®
WARNING
Do not connect, disconnect or operate
the USB device while driving. Doing so
can be a distraction. If distracted you
could lose control of your vehicle and
cause an accident or serious injury.
LHA3077
4-44Monitor, climate, audio, phone and voice recognition systems
Page 233 of 467
BACK button
When the
BACK button is pressed, it
returns to the previous menu.
BLUETOOTH® STREAMING AUDIO
WITHOUT NAVIGATION SYSTEM
If you have a compatible Bluetooth® audio
device that is capable of playing audio files,
the device can be connected to the vehi-
cle’s audio system so that the audio files on
the device play through the vehicle’s
speakers. For additional information, refer
to “FM/AM radio with compact disc (CD)
player” or “FM/AM/SAT radio with compact
disc (CD) player” in this section.
Connecting Bluetooth® audio
To connect your Bluetooth® audio device
to the vehicle, follow the procedure below:
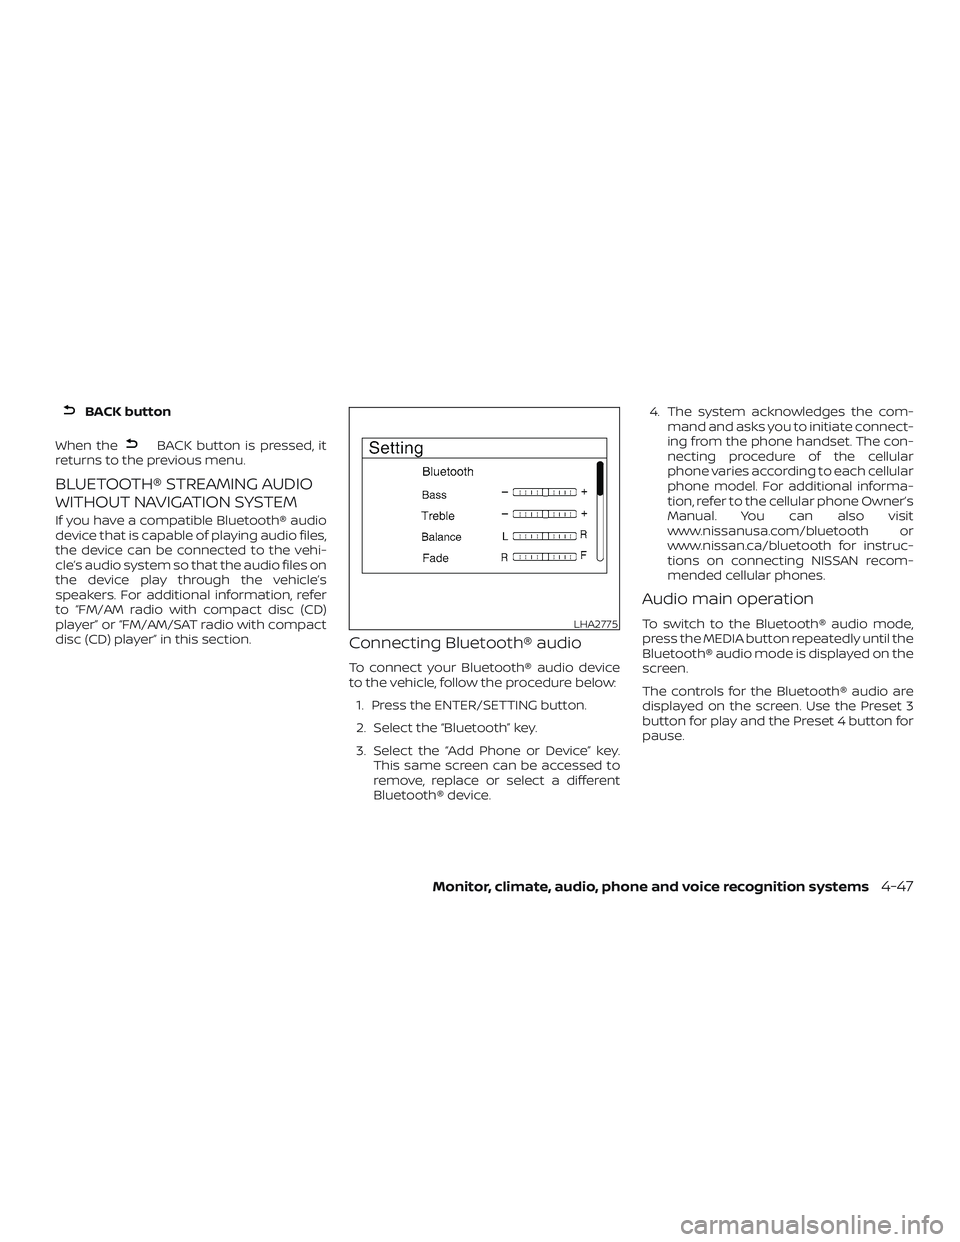
1. Press the ENTER/SETTING button.
2. Select the “Bluetooth” key.
3. Select the “Add Phone or Device” key. This same screen can be accessed to
remove, replace or select a different
Bluetooth® device. 4. The system acknowledges the com-
mand and asks you to initiate connect-
ing from the phone handset. The con-
necting procedure of the cellular
phone varies according to each cellular
phone model. For additional informa-
tion, refer to the cellular phone Owner’s
Manual. You can also visit
www.nissanusa.com/bluetooth or
www.nissan.ca/bluetooth for instruc-
tions on connecting NISSAN recom-
mended cellular phones.
Audio main operation
To switch to the Bluetooth® audio mode,
press the MEDIA button repeatedly until the
Bluetooth® audio mode is displayed on the
screen.
The controls for the Bluetooth® audio are
displayed on the screen. Use the Preset 3
button for play and the Preset 4 button for
pause.LHA2775
Monitor, climate, audio, phone and voice recognition systems4-47
Page 267 of 467
1. Apply the parking brake.
2. Move the shif t lever to P (Park) or N(Neutral). P (Park) is recommended.
The starter is designed not to oper-
ate if the shif t lever is in any of the
driving positions.
3. Push the ignition switch to the ON po- sition. Depress the brake pedal and
push the ignition switch to start the
engine.
To start the engine immediately, push
and release the ignition switch while
depressing the brake pedal with the
ignition switch in any position.
∙ If the engine is very hard to start in extremely cold weather or when re-
starting, depress the accelerator
pedal a little (approximately 1/3 to the
floor) and while holding, crank the en-
gine. Release the accelerator pedal
when the engine starts.
∙ If the engine is very hard to start be- cause it is flooded, depress the accel-
erator pedal all the way to the floor
and hold it. Push the ignition switch
to the ON position to start cranking
the engine. Af ter 5 or 6 seconds, stop
cranking by pushing the ignition switch to the LOCK position. Af ter
cranking the engine, release the ac-
celerator pedal. Crank the engine
with your foot off the accelerator
pedal by depressing the brake pedal
and pushing the ignition switch to
start the engine. If the engine starts,
but fails to run, repeat the above pro-
cedure.
CAUTION
Do not operate the starter for more
than 15 seconds at a time. If the engine
does not start, push the ignition switch
to the OFF position and wait 10 seconds
before cranking again, otherwise the
starter could be damaged.
4. Warm-up:
Allow the engine to idle for at least
30 seconds af ter starting. Do not race
the engine while warming it up. Drive at
a moderate speed for a short distance
first, especially in cold weather. In cold
weather, keep the engine running for a
minimum of 2 to 3 minutes before
shutting it off. Starting and stopping
the engine over a short period of time
may make the vehicle more difficult to
start. 5. To stop the engine, move the shif t lever
to the P (Park) position and push the
ignition switch to the OFF position.
NOTE:
Care should be taken to avoid situations
that can lead to potential battery dis-
charge and potential no-start conditions
such as: 1. Installation or extended use of elec-
tronic accessories that consume bat-
tery power when the engine is not
running (phone chargers, GPS, DVD
players, etc.).
2. The vehicle is not driven regularly
and/or only driven short distances.
In these cases, the battery may need to
be charged to maintain battery health.
STARTING THE ENGINE
Starting and driving5-13
Page 386 of 467
∙ Keep the battery surface clean and dry.Any corrosion should be washed off
with a solution of baking soda and wa-
ter.
∙ Make certain the terminal connections are clean and securely tightened.
∙ If the vehicle is not to be used for 30 days or longer, disconnect the nega-
tive (-) battery terminal cable to prevent
discharge.
NOTE:
Care should be taken to avoid situations
that can lead to potential battery dis-
charge and potential no-start conditions
such as: 1. Installation or extended use of elec-
tronic accessories that consume bat-
tery power when the engine is not
running (Phone chargers, GPS, DVD
players, etc.)
2. Vehicle is not driven regularly and/or
only driven short distances.
In these cases, the battery may need to
be charged to maintain battery health.WARNING
∙ Do not operate the vehicle if the fluid in the battery is low. Low battery fluid
can cause a higher load on the battery
which can generate heat, reduce bat-
tery life, and in some cases lead to an
explosion.
∙ When working on or near a battery, always wear suitable eye protection
and remove all jewelry.
∙ Do not tip the battery. Keep the vent caps tight and the battery level.
∙ Battery posts, terminals and related accessories contain lead and lead
compounds. Wash hands af ter
handling.
∙ Keep battery out of the reach of children. ∙ Do not expose the battery to flames,
an electrical spark or a cigarette. Hy-
drogen gas generated by the battery
is explosive. Explosive gases can
cause blindness or injury. Do not allow
battery fluid to contact your skin,
eyes, fabrics or painted surfaces. Sul-
furic acid can cause blindness or in-
jury. Af ter touching a battery or bat-
tery cap, do not touch or rub your
eyes. Thoroughly wash your hands. If
the acid contacts your eyes, skin or
clothing, immediately flush with wa-
ter for at least 15 minutes and seek
medical attention.
BATTERY
8-14Do-it-yourself
Page 420 of 467
Seats:Check seat position controls such
as seat adjusters, seatback recliner, etc., to
ensure they operate smoothly and all
latches lock securely in every position.
Check that the head restraints/headrests
move up and down smoothly and the locks
(if so equipped) hold securely in all latched
positions.
Seat belts: Check that all parts of the seat
belt system (for example, buckles, anchors,
adjusters and retractors) operate properly
and smoothly, and are installed securely.
Check the belt webbing for cuts, fraying,
wear or damage.
Steering wheel: Check for changes in the
steering system, such as excessive free
play, hard steering or strange noises.
Warning lights and chimes: Make sure all
warning lights and chimes are operating
properly.
Windshield defroster: Check that the air
comes out of the defroster outlets properly
and in sufficient quantity when operating
the heater or air conditioner.
Windshield wiper and washer*: Check
that the wipers and washer operate prop-
erly and that the wipers do not streak.Under the hood and vehicle
The maintenance items listed here should
be checked periodically (for example, each
time you check the engine oil or refuel).
Battery* (for serviceable batteries):
Check the fluid level in each cell. The fluid
should be at the bottom of the filler open-
ing. Vehicles operated in high tempera-
tures or under severe conditions require
frequent checks of the battery fluid level.
NOTE:
Care should be taken to avoid situations
that can lead to potential battery dis-
charge and potential no-start conditions
such as:
1. Installation or extended use of elec-
tronic accessories that consume bat-
tery power when the engine is not
running (Phone chargers, GPS, DVD
players, etc.).
2. Vehicle is not driven regularly and/or
only driven short distances.
In these cases, the battery may need to
be charged to maintain battery health. Brake fluid level*:
Make sure that the brake
fluid level is between the MAX and MIN lines
on the reservoir.
Engine coolant level*: Check the coolant
level when the engine is cold.
Engine drive belts*: Make sure the drive
belts are not frayed, worn, cracked or oily.
Engine oil level*: Check the level af ter
parking the vehicle on a level spot and
turning off the engine. Wait more than
15 minutes for the oil to drain back into the
oil pan.
Exhaust system: Make sure there are no
loose supports, cracks or holes. If the
sound of the exhaust seems unusual or
there is a smell of exhaust fumes, immedi-
ately have the exhaust system inspected. It
is recommended that you visit a NISSAN
dealer for this service. For additional infor-
mation, refer to “Exhaust gas (carbon mon-
oxide)” in the “Starting and driving” section
of this manual.
Fluid leaks: Check under the vehicle for
fuel, oil, water or other fluid leaks af ter the
vehicle has been parked for a while. Water
dripping from the air conditioner af ter use
is normal. If you should notice any leaks or if
9-4Maintenance and schedules