2018 NISSAN 370Z ROADSTER center console
[x] Cancel search: center consolePage 109 of 453
.Any liquid spilled on the heated
seat should be removed immedi-
ately with a dry cloth.
. When cleaning the seat, never use
gasoline, thinner, or any similar
materials.
. If any malfunctions are found or
the heated seat does not operate,
turn the switch off and have the
system checked. It is recom-
mended you visit a NISSAN dealer
for this service.
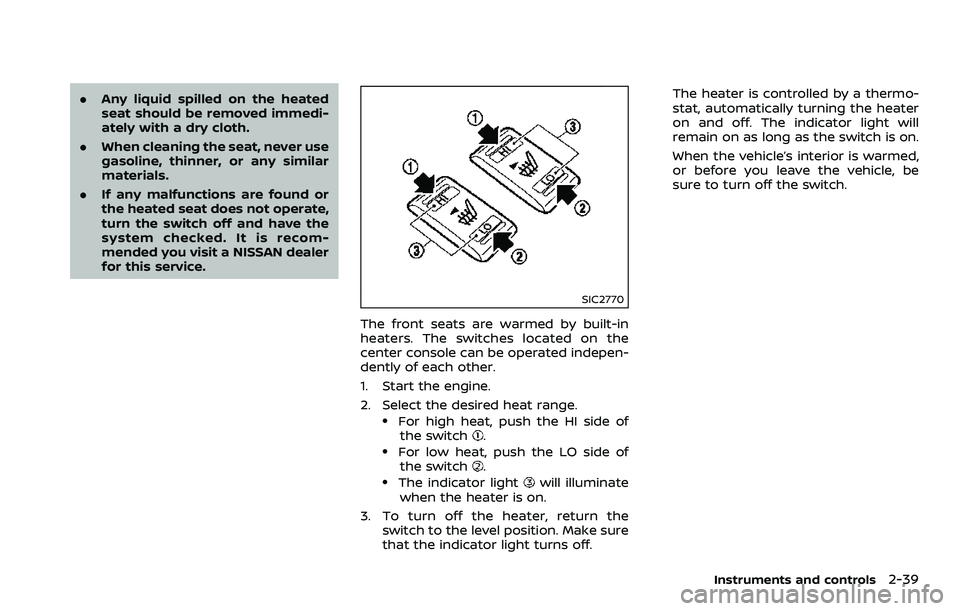
SIC2770
The front seats are warmed by built-in
heaters. The switches located on the
center console can be operated indepen-
dently of each other.
1. Start the engine.
2. Select the desired heat range.
.For high heat, push the HI side of
the switch..For low heat, push the LO side ofthe switch..The indicator lightwill illuminate
when the heater is on.
3. To turn off the heater, return the switch to the level position. Make sure
that the indicator light turns off. The heater is controlled by a thermo-
stat, automatically turning the heater
on and off. The indicator light will
remain on as long as the switch is on.
When the vehicle’s interior is warmed,
or before you leave the vehicle, be
sure to turn off the switch.
Instruments and controls2-39
Page 110 of 453
2-40Instruments and controls
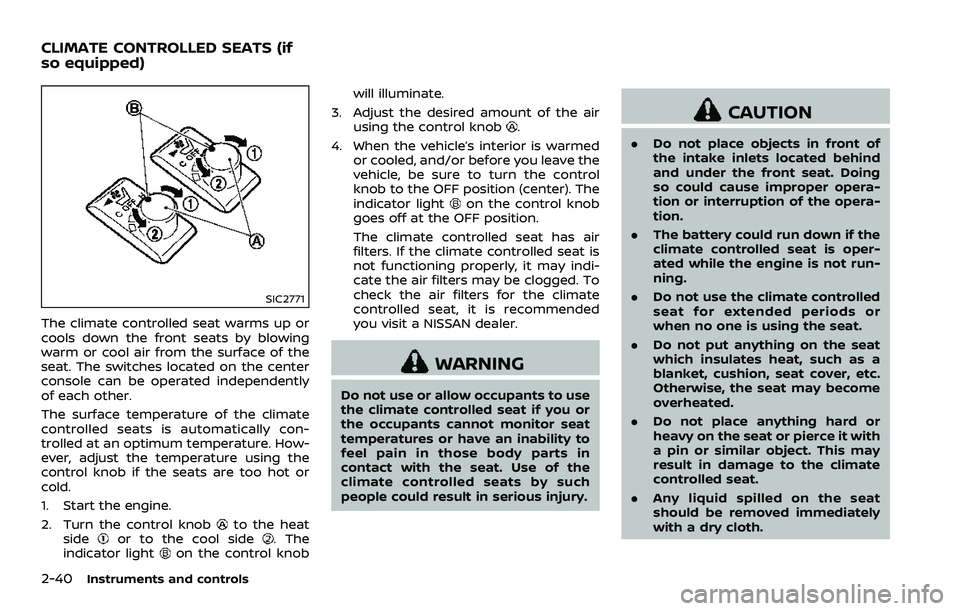
SIC2771
The climate controlled seat warms up or
cools down the front seats by blowing
warm or cool air from the surface of the
seat. The switches located on the center
console can be operated independently
of each other.
The surface temperature of the climate
controlled seats is automatically con-
trolled at an optimum temperature. How-
ever, adjust the temperature using the
control knob if the seats are too hot or
cold.
1. Start the engine.
2. Turn the control knob
to the heat
sideor to the cool side. The
indicator lighton the control knob will illuminate.
3. Adjust the desired amount of the air using the control knob
.
4. When the vehicle’s interior is warmed or cooled, and/or before you leave the
vehicle, be sure to turn the control
knob to the OFF position (center). The
indicator light
on the control knob
goes off at the OFF position.
The climate controlled seat has air
filters. If the climate controlled seat is
not functioning properly, it may indi-
cate the air filters may be clogged. To
check the air filters for the climate
controlled seat, it is recommended
you visit a NISSAN dealer.
WARNING
Do not use or allow occupants to use
the climate controlled seat if you or
the occupants cannot monitor seat
temperatures or have an inability to
feel pain in those body parts in
contact with the seat. Use of the
climate controlled seats by such
people could result in serious injury.
CAUTION
. Do not place objects in front of
the intake inlets located behind
and under the front seat. Doing
so could cause improper opera-
tion or interruption of the opera-
tion.
. The battery could run down if the
climate controlled seat is oper-
ated while the engine is not run-
ning.
. Do not use the climate controlled
seat for extended periods or
when no one is using the seat.
. Do not put anything on the seat
which insulates heat, such as a
blanket, cushion, seat cover, etc.
Otherwise, the seat may become
overheated.
. Do not place anything hard or
heavy on the seat or pierce it with
a pin or similar object. This may
result in damage to the climate
controlled seat.
. Any liquid spilled on the seat
should be removed immediately
with a dry cloth.
CLIMATE CONTROLLED SEATS (if
so equipped)
Page 112 of 453
2-42Instruments and controls
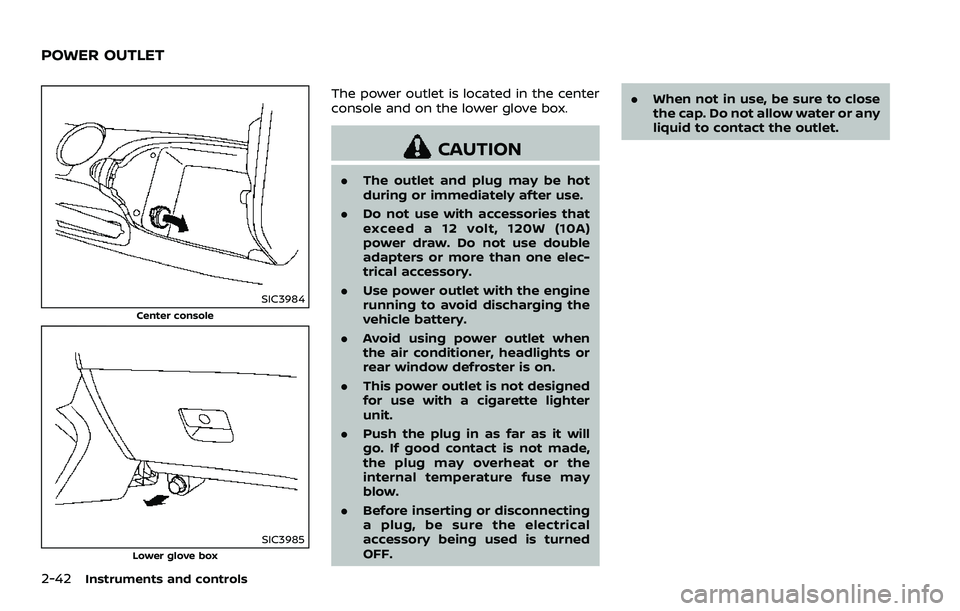
SIC3984
Center console
SIC3985Lower glove box
The power outlet is located in the center
console and on the lower glove box.
CAUTION
.The outlet and plug may be hot
during or immediately after use.
. Do not use with accessories that
exceed a 12 volt, 120W (10A)
power draw. Do not use double
adapters or more than one elec-
trical accessory.
. Use power outlet with the engine
running to avoid discharging the
vehicle battery.
. Avoid using power outlet when
the air conditioner, headlights or
rear window defroster is on.
. This power outlet is not designed
for use with a cigarette lighter
unit.
. Push the plug in as far as it will
go. If good contact is not made,
the plug may overheat or the
internal temperature fuse may
blow.
. Before inserting or disconnecting
a plug, be sure the electrical
accessory being used is turned
OFF. .
When not in use, be sure to close
the cap. Do not allow water or any
liquid to contact the outlet.
POWER OUTLET
Page 113 of 453
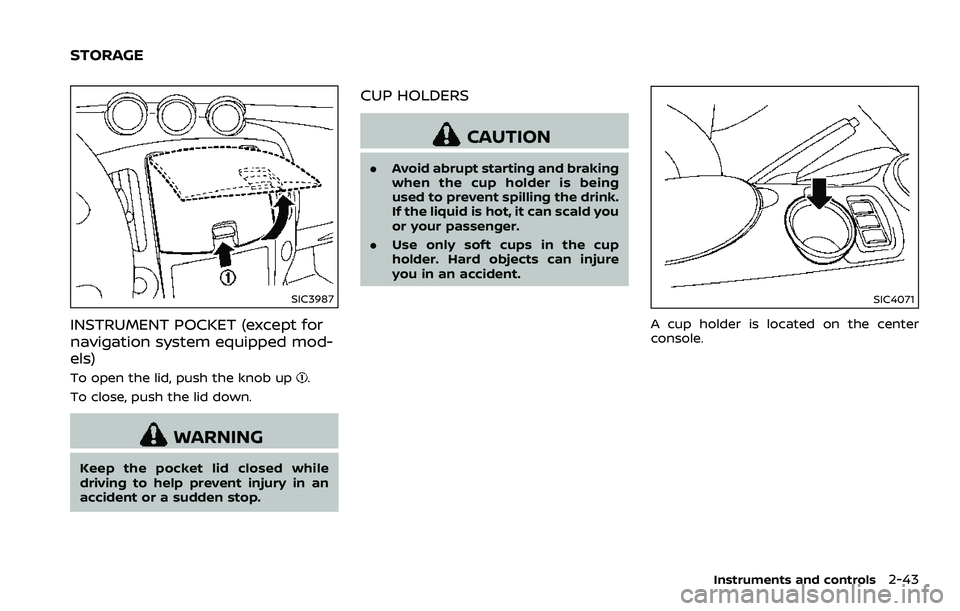
SIC3987
INSTRUMENT POCKET (except for
navigation system equipped mod-
els)
To open the lid, push the knob up.
To close, push the lid down.
WARNING
Keep the pocket lid closed while
driving to help prevent injury in an
accident or a sudden stop.
CUP HOLDERS
CAUTION
. Avoid abrupt starting and braking
when the cup holder is being
used to prevent spilling the drink.
If the liquid is hot, it can scald you
or your passenger.
. Use only soft cups in the cup
holder. Hard objects can injure
you in an accident.
SIC4071
A cup holder is located on the center
console.
Instruments and controls2-43
STORAGE
Page 145 of 453
JVP0317X
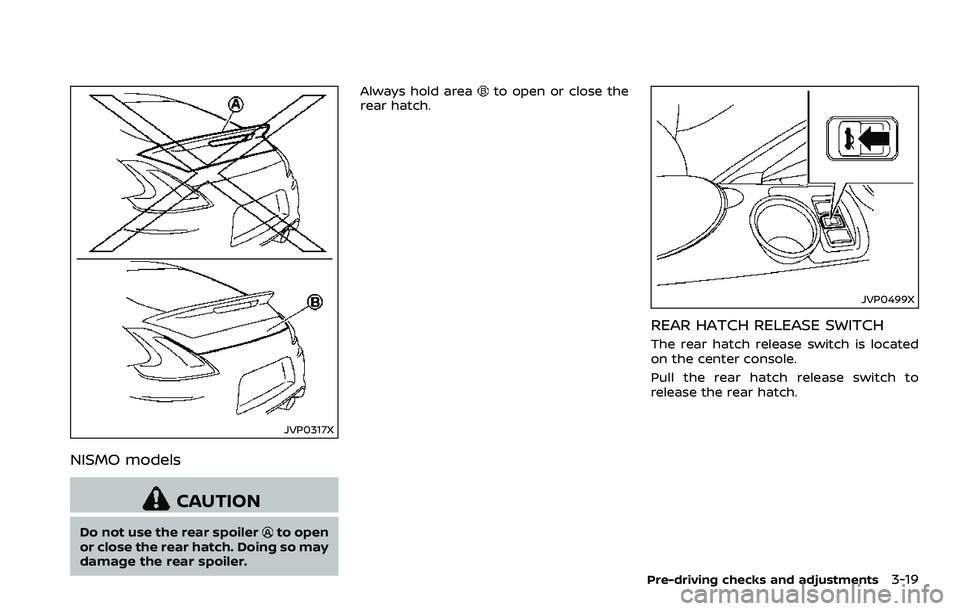
NISMO models
CAUTION
Do not use the rear spoilerto open
or close the rear hatch. Doing so may
damage the rear spoiler. Always hold area
to open or close the
rear hatch.
JVP0499X
REAR HATCH RELEASE SWITCH
The rear hatch release switch is located
on the center console.
Pull the rear hatch release switch to
release the rear hatch.
Pre-driving checks and adjustments3-19
Page 149 of 453
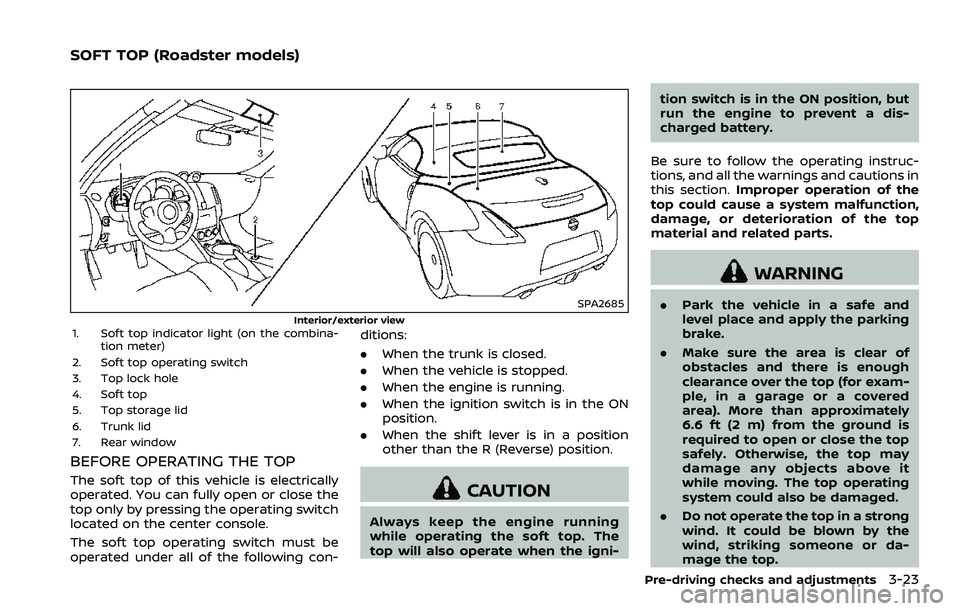
SPA2685
Interior/exterior view1. Soft top indicator light (on the combina-tion meter)
2. Soft top operating switch
3. Top lock hole
4. Soft top
5. Top storage lid
6. Trunk lid
7. Rear window
BEFORE OPERATING THE TOP
The soft top of this vehicle is electrically
operated. You can fully open or close the
top only by pressing the operating switch
located on the center console.
The soft top operating switch must be
operated under all of the following con- ditions:
.
When the trunk is closed.
. When the vehicle is stopped.
. When the engine is running.
. When the ignition switch is in the ON
position.
. When the shift lever is in a position
other than the R (Reverse) position.CAUTION
Always keep the engine running
while operating the soft top. The
top will also operate when the igni- tion switch is in the ON position, but
run the engine to prevent a dis-
charged battery.
Be sure to follow the operating instruc-
tions, and all the warnings and cautions in
this section. Improper operation of the
top could cause a system malfunction,
damage, or deterioration of the top
material and related parts.
WARNING
. Park the vehicle in a safe and
level place and apply the parking
brake.
. Make sure the area is clear of
obstacles and there is enough
clearance over the top (for exam-
ple, in a garage or a covered
area). More than approximately
6.6 ft (2 m) from the ground is
required to open or close the top
safely. Otherwise, the top may
damage any objects above it
while moving. The top operating
system could also be damaged.
. Do not operate the top in a strong
wind. It could be blown by the
wind, striking someone or da-
mage the top.
Pre-driving checks and adjustments3-23
SOFT TOP (Roadster models)
Page 215 of 453
played, the title of the played track is
displayed. If the title information is not
provided then “Track” is displayed.
When the DISP button is pushed repeat-
edly, further information about the track
can be displayed along with the track title
as follows:
CD:
Track time?Album ?Artist ?Track
time
CD with MP3/WMA:
Track time ?Album ?Artist ?Folder
name ?Track time
Track details:
Pushing and holding the DISP button will
turn the display into a detailed overview
and after a few seconds it returns to the
main display.
button:
When the SCAN button is pushed while a
CD is being played, the first 10 seconds of
all the tracks will be played.
When the SCAN button is pushed again,
the CD will return to normal play from the
track which is playing.
CD eject button:
When the CD eject button is pushed while
a CD is loaded, the CD will be ejected.
When the CD eject button is pushed twice,
the CD will be ejected further, and the CD
can be removed with ease.
When the ignition switch is in the “OFF” or
“LOCK” position it is possible to eject the
CD currently being played. However the
audio unit will not be activated.
If a CD is ejected by pushing the CD eject
button, and it is not taken out from the
loading slot within 8 seconds, the CD will
automatically be reloaded to the slot to
protect the CD.
JVH0920X
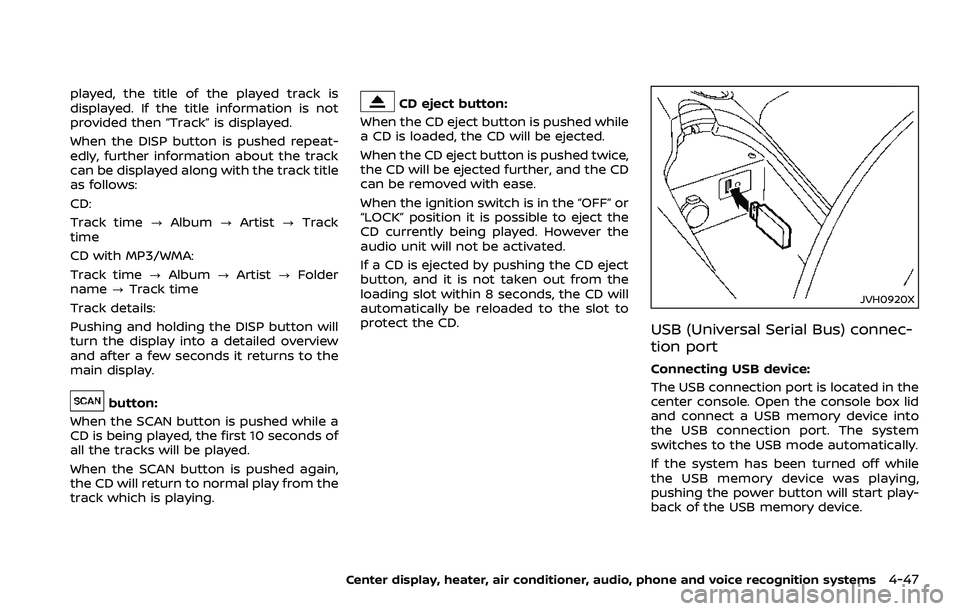
USB (Universal Serial Bus) connec-
tion port
Connecting USB device:
The USB connection port is located in the
center console. Open the console box lid
and connect a USB memory device into
the USB connection port. The system
switches to the USB mode automatically.
If the system has been turned off while
the USB memory device was playing,
pushing the power button will start play-
back of the USB memory device.
Center display, heater, air conditioner, audio, phone and voice recognition systems4-47
Page 217 of 453
JVH0921X
iPod® player operation
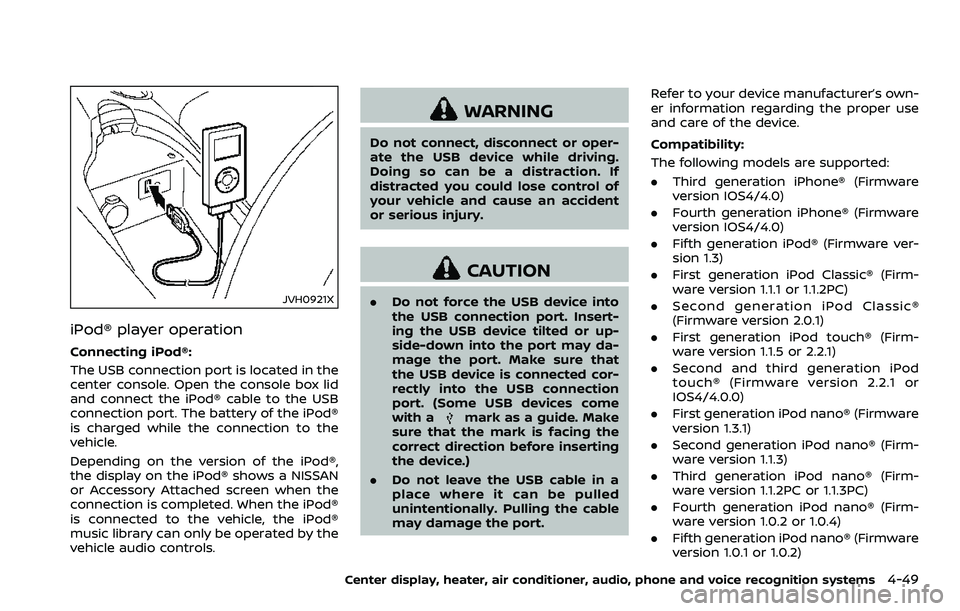
Connecting iPod®:
The USB connection port is located in the
center console. Open the console box lid
and connect the iPod® cable to the USB
connection port. The battery of the iPod®
is charged while the connection to the
vehicle.
Depending on the version of the iPod®,
the display on the iPod® shows a NISSAN
or Accessory Attached screen when the
connection is completed. When the iPod®
is connected to the vehicle, the iPod®
music library can only be operated by the
vehicle audio controls.
WARNING
Do not connect, disconnect or oper-
ate the USB device while driving.
Doing so can be a distraction. If
distracted you could lose control of
your vehicle and cause an accident
or serious injury.
CAUTION
.Do not force the USB device into
the USB connection port. Insert-
ing the USB device tilted or up-
side-down into the port may da-
mage the port. Make sure that
the USB device is connected cor-
rectly into the USB connection
port. (Some USB devices come
with a
mark as a guide. Make
sure that the mark is facing the
correct direction before inserting
the device.)
. Do not leave the USB cable in a
place where it can be pulled
unintentionally. Pulling the cable
may damage the port. Refer to your device manufacturer’s own-
er information regarding the proper use
and care of the device.
Compatibility:
The following models are supported:
.
Third generation iPhone® (Firmware
version IOS4/4.0)
. Fourth generation iPhone® (Firmware
version IOS4/4.0)
. Fifth generation iPod® (Firmware ver-
sion 1.3)
. First generation iPod Classic® (Firm-
ware version 1.1.1 or 1.1.2PC)
. Second generation iPod Classic®
(Firmware version 2.0.1)
. First generation iPod touch® (Firm-
ware version 1.1.5 or 2.2.1)
. Second and third generation iPod
touch® (Firmware version 2.2.1 or
IOS4/4.0.0)
. First generation iPod nano® (Firmware
version 1.3.1)
. Second generation iPod nano® (Firm-
ware version 1.1.3)
. Third generation iPod nano® (Firm-
ware version 1.1.2PC or 1.1.3PC)
. Fourth generation iPod nano® (Firm-
ware version 1.0.2 or 1.0.4)
. Fifth generation iPod nano® (Firmware
version 1.0.1 or 1.0.2)
Center display, heater, air conditioner, audio, phone and voice recognition systems4-49