2018 NISSAN 370Z engine
[x] Cancel search: enginePage 156 of 453
3-30Pre-driving checks and adjustments
IF THE TOP DOES NOT OPEN OR
CLOSE ELECTRICALLY
If you cannot operate the soft top with
the operating switch, first check whether
all the following operating conditions are
met.
.vehicle is stopped
. ignition switch is ON (Run the engine
when operating the top.)
. the trunk is closed
. the shift lever is in a position other
than the R (Reverse) position
If the top still does not move under the
above conditions or has any system
malfunction, it is recommended you visit
a NISSAN dealer as soon as possible.
When you must close the top by yourself,
in the event of emergency or when an
immediate dealer service is not available,
close the top manually according to the
procedures shown in this section.
When closing the soft top manually:
. Move the vehicle to a safe place, away
from traffic.
. Two people should perform this pro-
cedure, as some of the top parts are
extremely heavy.
The top cannot be opened manually.
WARNING
. Do not drive with the top partially
opened.
. If the top cannot be operated
properly, have your vehicle
checked as soon as possible. It is
recommended you visit a NISSAN
dealer for this service.
CAUTION
The storage lid is extremely heavy.
The storage lid should be manually
opened or closed by two people.
SPA2715
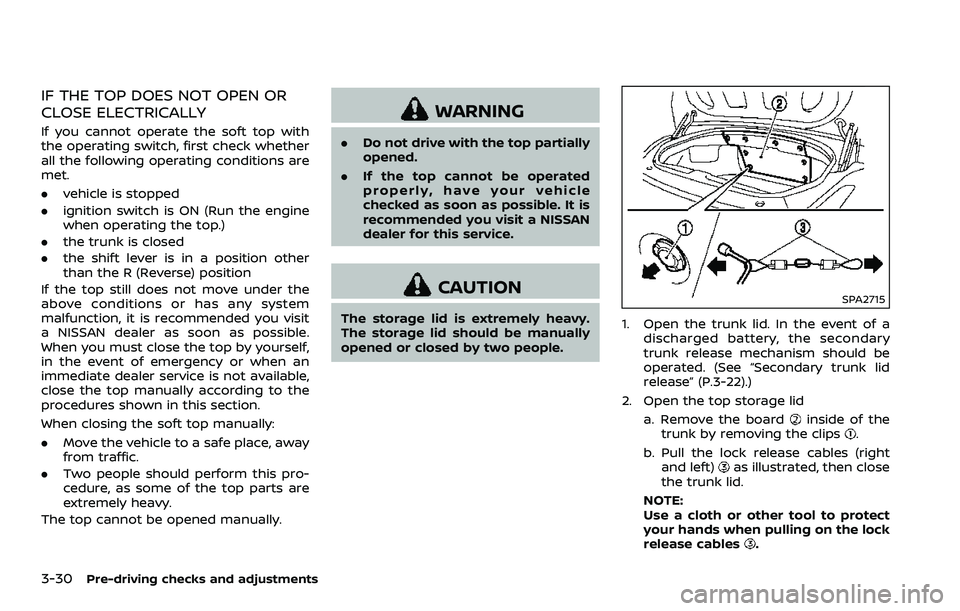
1. Open the trunk lid. In the event of a
discharged battery, the secondary
trunk release mechanism should be
operated. (See “Secondary trunk lid
release” (P.3-22).)
2. Open the top storage lid a. Remove the board
inside of the
trunk by removing the clips.
b. Pull the lock release cables (right and left)
as illustrated, then close
the trunk lid.
NOTE:
Use a cloth or other tool to protect
your hands when pulling on the lock
release cables
.
Page 162 of 453
3-36Pre-driving checks and adjustments
To lock, close the fuel-filler door securely
and lock all doors by operating the door
handle request switch, the LOCK button
on the Intelligent Key, the mechanical key
or the power door lock switch.
FUEL-FILLER CAP
WARNING
.Gasoline is extremely flammable
and highly explosive under cer-
tain conditions. You could be
burned or seriously injured if it is
misused or mishandled. Always
stop engine and do not smoke or
allow open flames or sparks near
the vehicle when refueling.
. Do not attempt to top off the fuel
tank after the fuel pump nozzle
shuts off automatically. Contin-
ued refueling may cause fuel
overflow, resulting in fuel spray
and possibly a fire.
. Use only an original equipment
type fuel-filler cap as a replace-
ment. It has a built-in safety valve
needed for proper operation of
the fuel system and emission
control system. An incorrect cap
can result in a serious malfunc-
tion and possible injury. It could also cause the malfunction indi-
cator light to come on.
. Never pour fuel into the throttle
body to attempt to start your
vehicle.
. Do not fill a portable fuel contain-
er in the vehicle or trailer. Static
electricity can cause an explosion
of flammable liquid, vapor or gas
in any vehicle or trailer. To reduce
the risk of serious injury or death
when filling portable fuel contain-
ers:
— Always place the container on
the ground when filling.
— Do not use electronic devices when filling.
— Keep the pump nozzle in con- tact with the container while
you are filling it.
— Use only approved portable fuel containers for flammable
liquid.
CAUTION
. If fuel is spilled on the vehicle
body, flush it away with water to avoid paint damage.
. Insert the cap straight into the
fuel-filler tube, then tighten until
the fuel-filler cap clicks. Failure to
tighten the fuel-filler cap properly
may cause the
malfunction
indicator light (MIL) to illuminate.
If the
light illuminates be-
cause the fuel-filler cap is loose
or missing, tighten or install the
cap and continue to drive the
vehicle. The
light should turn
off after a few driving trips. If the
light does not turn off after a
few driving trips, have the vehicle
inspected. It is recommended you
visit a NISSAN dealer for this
service.
. The LOOSE FUEL CAP warning will
appear if the fuel-filler cap is not
properly tightened. It may take a
few driving trips for the message
to be displayed. Failure to tighten
the fuel-filler cap properly after
the LOOSE FUEL CAP warning
appears may cause the
Mal-
function Indicator Light (MIL) to
illuminate.
Page 178 of 453
4-10Center display, heater, air conditioner, audio, phone and voice recognition systems
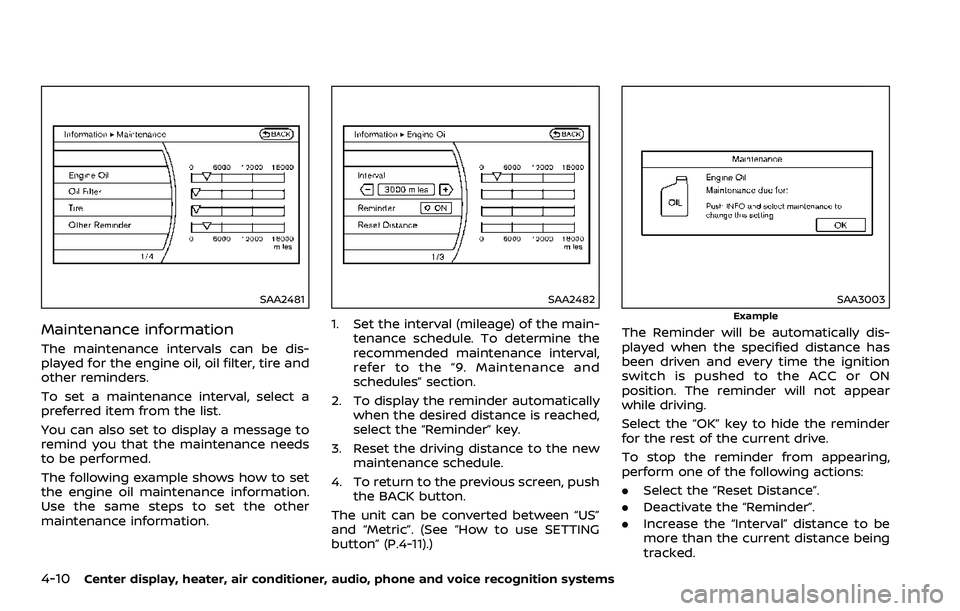
SAA2481
Maintenance information
The maintenance intervals can be dis-
played for the engine oil, oil filter, tire and
other reminders.
To set a maintenance interval, select a
preferred item from the list.
You can also set to display a message to
remind you that the maintenance needs
to be performed.
The following example shows how to set
the engine oil maintenance information.
Use the same steps to set the other
maintenance information.
SAA2482
1. Set the interval (mileage) of the main-tenance schedule. To determine the
recommended maintenance interval,
refer to the “9. Maintenance and
schedules” section.
2. To display the reminder automatically when the desired distance is reached,
select the “Reminder” key.
3. Reset the driving distance to the new maintenance schedule.
4. To return to the previous screen, push the BACK button.
The unit can be converted between “US”
and “Metric”. (See “How to use SETTING
button” (P.4-11).)
SAA3003
Example
The Reminder will be automatically dis-
played when the specified distance has
been driven and every time the ignition
switch is pushed to the ACC or ON
position. The reminder will not appear
while driving.
Select the “OK” key to hide the reminder
for the rest of the current drive.
To stop the reminder from appearing,
perform one of the following actions:
. Select the “Reset Distance”.
. Deactivate the “Reminder”.
. Increase the “Interval” distance to be
more than the current distance being
tracked.
Page 193 of 453
WARNING
.The air conditioner cooling func-
tion operates only when the en-
gine is running.
. Do not leave children or adults
who would normally require the
support of others alone in your
vehicle. Pets should not be left
alone either. On hot, sunny days,
temperatures in a closed vehicle
could quickly become high en-
ough to cause severe or possibly
fatal injuries to people or animals.
. Do not use the recirculation mode
for long periods as it may cause
the interior air to become stale
and the windows to fog up.
Start the engine and operate the heater
and air conditioner system.
NOTE:
. Odors from inside and outside the
vehicle can build up in the air condi-
tioner unit. Odor can enter the pas-
senger compartment through the
vents.
. When parking, set the heater and air
conditioner controls to turn off air
recirculation to allow fresh air into the passenger compartment. This
should help reduce odors inside the
vehicle.
SAA2493
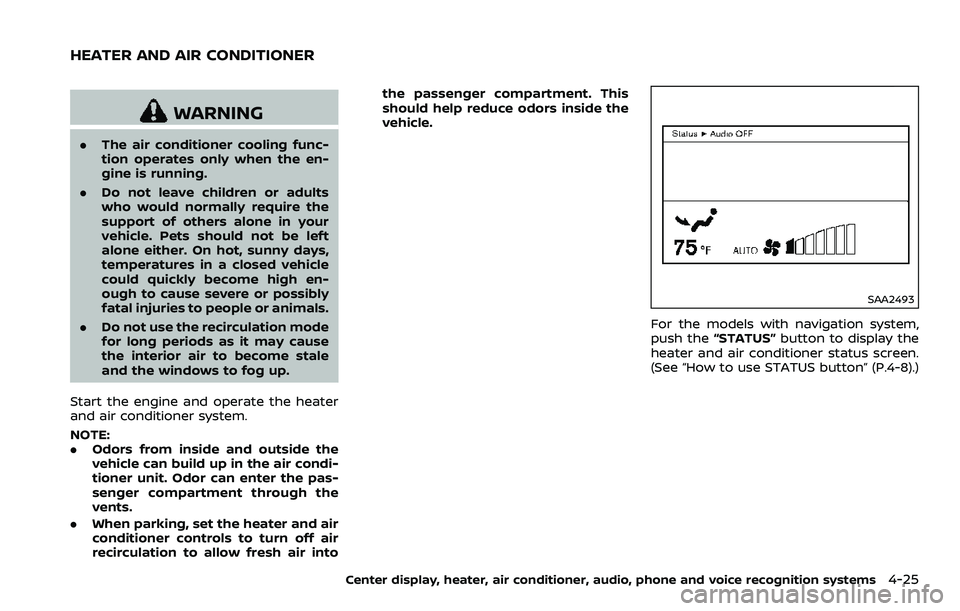
For the models with navigation system,
push the
“STATUS” button to display the
heater and air conditioner status screen.
(See “How to use STATUS button” (P.4-8).)
Center display, heater, air conditioner, audio, phone and voice recognition systems4-25
HEATER AND AIR CONDITIONER
Page 198 of 453

4-30Center display, heater, air conditioner, audio, phone and voice recognition systems
OPERATING TIPS
When the engine coolant temperature
and outside air temperature are low, the
air flow from the foot outlets may not
operate. This is not a malfunction. After
the coolant temperature warms up, air
will flow normally from the foot outlets.
The sensors
andon the instrument
panel helps maintain a constant tem-
perature. Do not put anything on or
around this sensor.
IN-CABIN MICROFILTER
The air conditioning system is equipped
with an in-cabin microfilter which collects
dirt, pollen, dust, etc. To make sure the air
conditioner heats, defogs, and ventilates
efficiently, replace the filter in accordance
with the specified maintenance intervals
listed in the “9. Maintenance and sche-
dules” section. It is recommended to see a
NISSAN dealer to replace the filter.
The filter should be replaced if air flow
is extremely decreased or when win-
dows fog up easily when operating
heater or air conditioning system.
SERVICING AIR CONDITIONER
The air conditioning system in your
NISSAN is charged with a refrigerant
designed with the environment in mind.
This refrigerant will not harm the
earth’s ozone layer. However, special
charging equipment and lubricant are
required when servicing your NISSAN air
conditioner. Using improper refrigerants
or lubricants will cause severe damage to
your air conditioning system. (See “Capa-
cities and recommended fluids/lubri-
cants” (P.10-2) for air conditioning
system refrigerant and lubricant recom-
mendations.)
Your NISSAN dealer will be able to service
your environmentally friendly air condi-
tioning system.
WARNING
The system contains refrigerant un-
der high pressure. To avoid personal
injury, any air conditioner service
should be done only by an experi-
enced technician with the proper
equipment.
AUDIO OPERATION PRECAUTIONS
Radio
Push the ignition switch to the ACC or ON
position and push the radio band select
button to turn on the radio. If you listen to
the radio with the engine not running, the
ignition switch should be pushed to the
ACC position.
Radio reception is affected by station
signal strength, distance from radio
transmitter, buildings, bridges, mountains
and other external influences. Intermit-
tent changes in reception quality nor-
mally are caused by these external
influences.
Using a cellular phone in or near the
vehicle may influence radio reception
quality.
Radio reception:
Your NISSAN radio system is equipped
with state-of-the-art electronic circuits to
enhance radio reception. These circuits
are designed to extend reception range,
and to enhance the quality of that recep-
tion.
However there are some general charac-
teristics of both FM and AM radio signals
that can affect radio reception quality in a
moving vehicle, even when the finest
equipment is used. These characteristics
AUDIO SYSTEM
Page 223 of 453
PLAY:
When the DISC·AUX (CD play) button is
pushed with the system off and the CD
loaded, the system will turn on and the
CD will start to play.
When the DISC·AUX button is pushed with
the CD loaded and the radio playing, the
radio will automatically be turned off and
the CD will start to play.
Menu:
When the “Menu” key on the display is
selected while the CD is being played, the
menu screen will be displayed. The fol-
lowing menu options are available.
. Folder List (for CD with compressed
audio files)
Displays the folder list.
. Track List
Displays the track list.
. Play Mode
Select a play mode from the following
items.
— Normal
— 1 Folder Repeat (for CD with com-
pressed audio files)
— 1 Track Repeat
— 1 Disc Random
— 1 Folder Random (for CD with com- pressed audio files)Next/Previous Track and
Fast Forward/Rewind:
When the
orbutton is pushed for
more than 1.5 seconds while the CD is
being played, the CD will play while fast
forwarding or rewinding. When the but-
ton is released, the CD will return to
normal play speed.
When the
orbutton is pushed for
less than 1.5 seconds while the CD is being
played, the next track or the beginning of
the current track on the CD will be played.
When the rewind button is pushed for less
than 1.5 seconds within 3 seconds after
the current track starts playing, the pre-
vious track will be played. Push the button
several times to skip through the tracks.
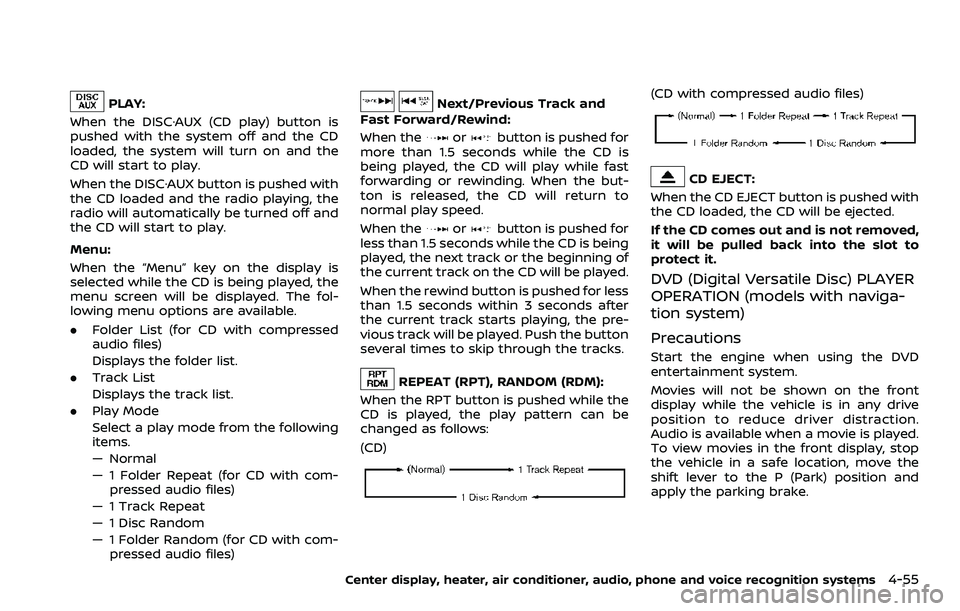
REPEAT (RPT), RANDOM (RDM):
When the RPT button is pushed while the
CD is played, the play pattern can be
changed as follows:
(CD)
(CD with compressed audio files)
CD EJECT:
When the CD EJECT button is pushed with
the CD loaded, the CD will be ejected.
If the CD comes out and is not removed,
it will be pulled back into the slot to
protect it.
DVD (Digital Versatile Disc) PLAYER
OPERATION (models with naviga-
tion system)
Precautions
Start the engine when using the DVD
entertainment system.
Movies will not be shown on the front
display while the vehicle is in any drive
position to reduce driver distraction.
Audio is available when a movie is played.
To view movies in the front display, stop
the vehicle in a safe location, move the
shift lever to the P (Park) position and
apply the parking brake.
Center display, heater, air conditioner, audio, phone and voice recognition systems4-55
Page 224 of 453
4-56Center display, heater, air conditioner, audio, phone and voice recognition systems
WARNING
.The driver must not attempt to
operate the DVD system or wear
the headphones while the vehicle
is in motion so that full attention
may be given to vehicle opera-
tion.
. Do not attempt to modify the
system to display a movie on the
front screen while the vehicle is
being driven. Doing so may dis-
tract the driver and may cause a
collision and serious personal in-
jury or death.
CAUTION
.Only operate the DVD while the
vehicle engine is running. Operat-
ing the DVD for extended periods
of time with the engine OFF can
discharge the vehicle battery.
. Do not allow the system to get
wet. Excessive moisture such as
spilled liquids may cause the
system to malfunction. .
While playing VIDEO-CD media,
this DVD player does not guaran-
tee complete functionality of all
VIDEO-CD formats.
Display settings
To adjust the front display mode, push
the SETTING button while the DVD is
being played, select the “Others” key and
then select the “Display” key.
To adjust the display ON/OFF, brightness,
tint, color and contrast, select the “Display
Adjustment” key and then select each key.
Then you can adjust each item using the
multi-function controller. After changes
have been made push the BACK button
to save the setting.
SAA2497
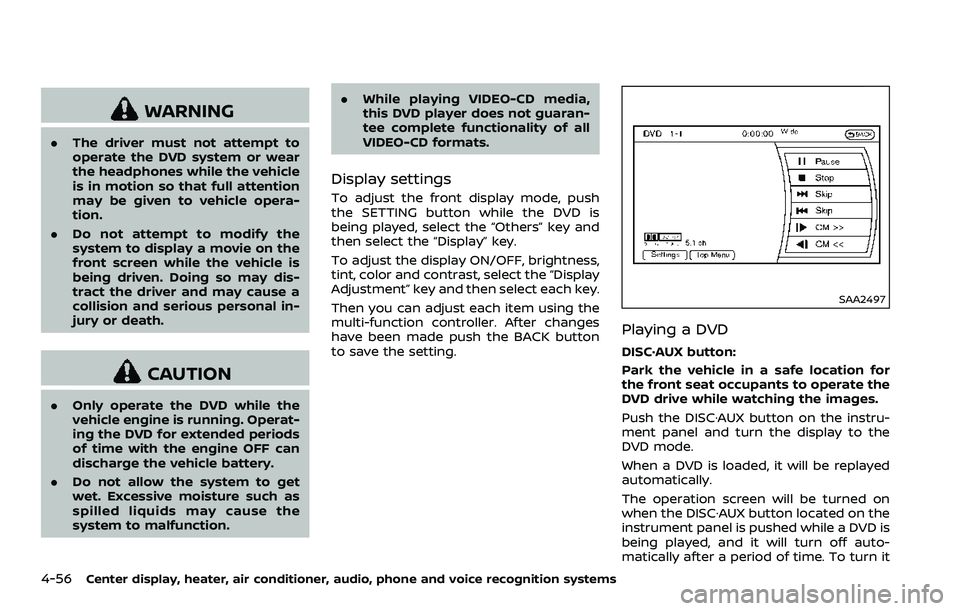
Playing a DVD
DISC·AUX button:
Park the vehicle in a safe location for
the front seat occupants to operate the
DVD drive while watching the images.
Push the DISC·AUX button on the instru-
ment panel and turn the display to the
DVD mode.
When a DVD is loaded, it will be replayed
automatically.
The operation screen will be turned on
when the DISC·AUX button located on the
instrument panel is pushed while a DVD is
being played, and it will turn off auto-
matically after a period of time. To turn it
Page 264 of 453
4-96Center display, heater, air conditioner, audio, phone and voice recognition systems
“Select Phone”
Use the Select Phone command to select
from a list of phones connected to the
vehicle. The system will list the names
assigned to each phone and then prompt
you for the phone you wish to select. Only
one phone can be active at a time.
“Delete Phone”
Use the Delete Phone command to delete
a phone that is connected to the vehicle.
The system will list the names assigned to
each phone and then prompt you for the
phone you wish to delete. Deleting a
phone from the vehicle will also delete
that phonebook for that phone.
“Bluetooth Off”
Use the Bluetooth Off command to pre-
vent a wireless connection to your phone.
“Replace phone”
This can be used to reconnect a new
phone with the vehicle you have changed
your cellular phone.
SPEAKER ADAPTATION (SA) MODE
Speaker Adaptation allows up to two out-
of dialect users to train the system to
improve recognition accuracy. By repeat-
ing a number of commands, the users
can create a voice model of their own
voice that is stored in the system. The
system is capable of storing a differentspeaker adaptation model for each con-
nected phone.
Training procedure
1. Position the vehicle in a reasonably
quiet outdoor location.
2. Sit in the driver’s seat with the engine running, the parking brake on, and the
transmission in Park.
3. Push and hold the
button for
more than 5 seconds.
4. The system announces: “Press the PHONE SEND (
) button for the
hands-free phone system to enter
the speaker adaptation mode or press
the PHONE END (
) button to select
a different language.”
5. Push the
button.
For information on selecting a differ-
ent language, see “Choosing a lan-
guage” (P.4-90).
6. If the connected phone is already in use, the system will prompt you to
overwrite. Follow the instructions pro-
vided by the system.
7. When preparation is complete and you are ready to begin, push the
button.
8. The SA mode will be explained. Follow the instructions provided by the sys-
tem. 9. When training is finished, the system
will tell you an adequate number of
phrases have been recorded.
10. The system will announce that speak- er adaptation has been completed
and the system is ready.
The SA mode will stop if:
. The
button is pressed for more
than 5 seconds in SA mode.
. The vehicle is driven during SA mode.
. The ignition switch is placed in the
OFF or LOCK position.
Training phrases
During the SA mode, the system instructs
you to say the following phrases.
(The system will prompt you for each
phrase.)
.phonebook transfer entry
. dial 3 0 4 2 9
. delete call back number
. Incoming
. Transfer entry
. 8 pause 9 3 2 pause 7
. delete all entries
. call 7 2 4 0 9
. phonebook delete entry
. next entry