2018 NISSAN 370Z instrument panel
[x] Cancel search: instrument panelPage 108 of 453
2-38Instruments and controls
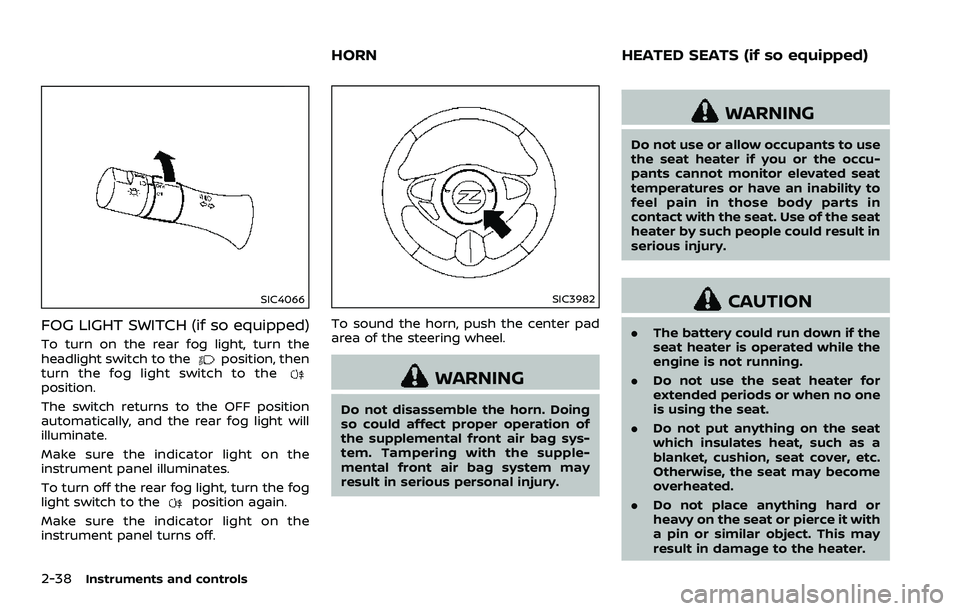
SIC4066
FOG LIGHT SWITCH (if so equipped)
To turn on the rear fog light, turn the
headlight switch to theposition, then
turn the fog light switch to the
position.
The switch returns to the OFF position
automatically, and the rear fog light will
illuminate.
Make sure the indicator light on the
instrument panel illuminates.
To turn off the rear fog light, turn the fog
light switch to the
position again.
Make sure the indicator light on the
instrument panel turns off.
SIC3982
To sound the horn, push the center pad
area of the steering wheel.
WARNING
Do not disassemble the horn. Doing
so could affect proper operation of
the supplemental front air bag sys-
tem. Tampering with the supple-
mental front air bag system may
result in serious personal injury.
WARNING
Do not use or allow occupants to use
the seat heater if you or the occu-
pants cannot monitor elevated seat
temperatures or have an inability to
feel pain in those body parts in
contact with the seat. Use of the seat
heater by such people could result in
serious injury.
CAUTION
. The battery could run down if the
seat heater is operated while the
engine is not running.
. Do not use the seat heater for
extended periods or when no one
is using the seat.
. Do not put anything on the seat
which insulates heat, such as a
blanket, cushion, seat cover, etc.
Otherwise, the seat may become
overheated.
. Do not place anything hard or
heavy on the seat or pierce it with
a pin or similar object. This may
result in damage to the heater.
HORN HEATED SEATS (if so equipped)
Page 119 of 453
Automatic window lowering
(Roadster models)
When the soft top operating switch is
pressed, the power windows will auto-
matically be lowered completely. The
windows do not rise automatically after
the soft top open/close operation is
completed. Use the power window
switches to raise them.
Automatic adjusting function
CAUTION
When the battery cable is removed
from the battery terminal, do not
close either of the front doors. The
automatic window adjusting func-
tion will not work and the side roof
panel may be damaged.
The power window has an automatic
adjusting function. When the door is
being opened, the window is automati-
cally lowered slightly to avoid contact
between the window and the side roof
panel. When the door is closed, the
window is automatically raised slightly.
While the automatic adjusting function
does not work, the window will be con-
trolled as follows: .
When the door is opened, the window
lowers for approximately 2 seconds.
. While the door is open, the window
cannot be raised.
If the windows do not close auto-
matically
If the power window automatic function
(closing only) does not operate properly,
perform the following procedure to initi-
alize the power window system.
1. Push the ignition switch to the ON
position.
2. Close the door and soft top (Roadster models).
3. Open the window completely by op- erating the power window switch.
4. Pull the power window switch and hold it to close the window, and then
hold the switch more than 3 seconds
after the window is closed completely.
5. Release the power window switch. Operate the window by the automatic
function to confirm the initialization is
complete.
6. Perform steps 2 through 5 above for other windows.
If the power window automatic function
does not operate properly after perform-
ing the procedure above, have your vehicle checked. It is recommended you
visit a NISSAN dealer for this service.
Instruments and controls2-49
Page 143 of 453
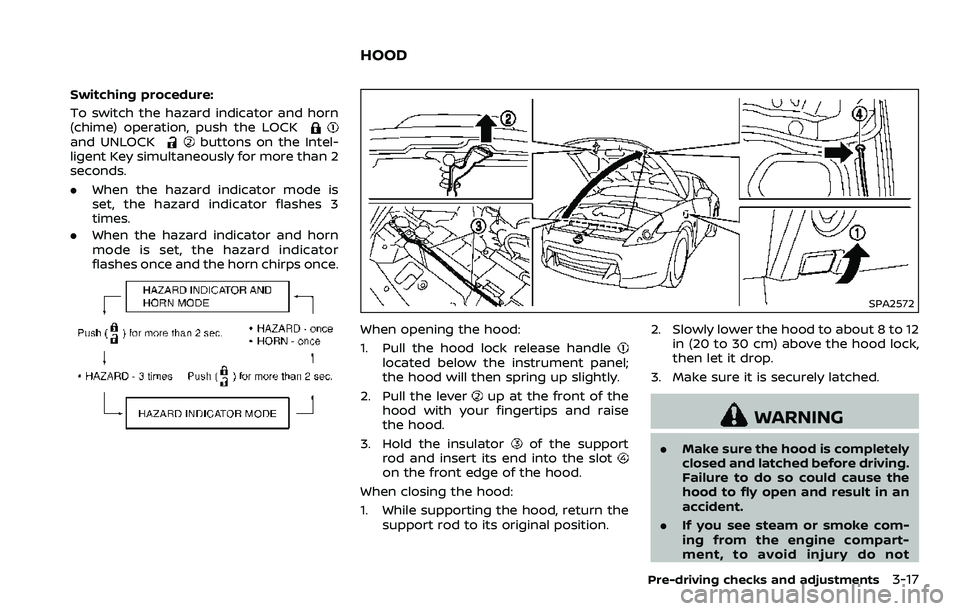
Switching procedure:
To switch the hazard indicator and horn
(chime) operation, push the LOCK
and UNLOCKbuttons on the Intel-
ligent Key simultaneously for more than 2
seconds.
. When the hazard indicator mode is
set, the hazard indicator flashes 3
times.
. When the hazard indicator and horn
mode is set, the hazard indicator
flashes once and the horn chirps once.
SPA2572
When opening the hood:
1. Pull the hood lock release handle
located below the instrument panel;
the hood will then spring up slightly.
2. Pull the lever
up at the front of the
hood with your fingertips and raise
the hood.
3. Hold the insulator
of the support
rod and insert its end into the slot
on the front edge of the hood.
When closing the hood:
1. While supporting the hood, return the support rod to its original position. 2. Slowly lower the hood to about 8 to 12
in (20 to 30 cm) above the hood lock,
then let it drop.
3. Make sure it is securely latched.
WARNING
. Make sure the hood is completely
closed and latched before driving.
Failure to do so could cause the
hood to fly open and result in an
accident.
. If you see steam or smoke com-
ing from the engine compart-
ment, to avoid injury do not
Pre-driving checks and adjustments3-17
HOOD
Page 198 of 453

4-30Center display, heater, air conditioner, audio, phone and voice recognition systems
OPERATING TIPS
When the engine coolant temperature
and outside air temperature are low, the
air flow from the foot outlets may not
operate. This is not a malfunction. After
the coolant temperature warms up, air
will flow normally from the foot outlets.
The sensors
andon the instrument
panel helps maintain a constant tem-
perature. Do not put anything on or
around this sensor.
IN-CABIN MICROFILTER
The air conditioning system is equipped
with an in-cabin microfilter which collects
dirt, pollen, dust, etc. To make sure the air
conditioner heats, defogs, and ventilates
efficiently, replace the filter in accordance
with the specified maintenance intervals
listed in the “9. Maintenance and sche-
dules” section. It is recommended to see a
NISSAN dealer to replace the filter.
The filter should be replaced if air flow
is extremely decreased or when win-
dows fog up easily when operating
heater or air conditioning system.
SERVICING AIR CONDITIONER
The air conditioning system in your
NISSAN is charged with a refrigerant
designed with the environment in mind.
This refrigerant will not harm the
earth’s ozone layer. However, special
charging equipment and lubricant are
required when servicing your NISSAN air
conditioner. Using improper refrigerants
or lubricants will cause severe damage to
your air conditioning system. (See “Capa-
cities and recommended fluids/lubri-
cants” (P.10-2) for air conditioning
system refrigerant and lubricant recom-
mendations.)
Your NISSAN dealer will be able to service
your environmentally friendly air condi-
tioning system.
WARNING
The system contains refrigerant un-
der high pressure. To avoid personal
injury, any air conditioner service
should be done only by an experi-
enced technician with the proper
equipment.
AUDIO OPERATION PRECAUTIONS
Radio
Push the ignition switch to the ACC or ON
position and push the radio band select
button to turn on the radio. If you listen to
the radio with the engine not running, the
ignition switch should be pushed to the
ACC position.
Radio reception is affected by station
signal strength, distance from radio
transmitter, buildings, bridges, mountains
and other external influences. Intermit-
tent changes in reception quality nor-
mally are caused by these external
influences.
Using a cellular phone in or near the
vehicle may influence radio reception
quality.
Radio reception:
Your NISSAN radio system is equipped
with state-of-the-art electronic circuits to
enhance radio reception. These circuits
are designed to extend reception range,
and to enhance the quality of that recep-
tion.
However there are some general charac-
teristics of both FM and AM radio signals
that can affect radio reception quality in a
moving vehicle, even when the finest
equipment is used. These characteristics
AUDIO SYSTEM
Page 224 of 453
4-56Center display, heater, air conditioner, audio, phone and voice recognition systems
WARNING
.The driver must not attempt to
operate the DVD system or wear
the headphones while the vehicle
is in motion so that full attention
may be given to vehicle opera-
tion.
. Do not attempt to modify the
system to display a movie on the
front screen while the vehicle is
being driven. Doing so may dis-
tract the driver and may cause a
collision and serious personal in-
jury or death.
CAUTION
.Only operate the DVD while the
vehicle engine is running. Operat-
ing the DVD for extended periods
of time with the engine OFF can
discharge the vehicle battery.
. Do not allow the system to get
wet. Excessive moisture such as
spilled liquids may cause the
system to malfunction. .
While playing VIDEO-CD media,
this DVD player does not guaran-
tee complete functionality of all
VIDEO-CD formats.
Display settings
To adjust the front display mode, push
the SETTING button while the DVD is
being played, select the “Others” key and
then select the “Display” key.
To adjust the display ON/OFF, brightness,
tint, color and contrast, select the “Display
Adjustment” key and then select each key.
Then you can adjust each item using the
multi-function controller. After changes
have been made push the BACK button
to save the setting.
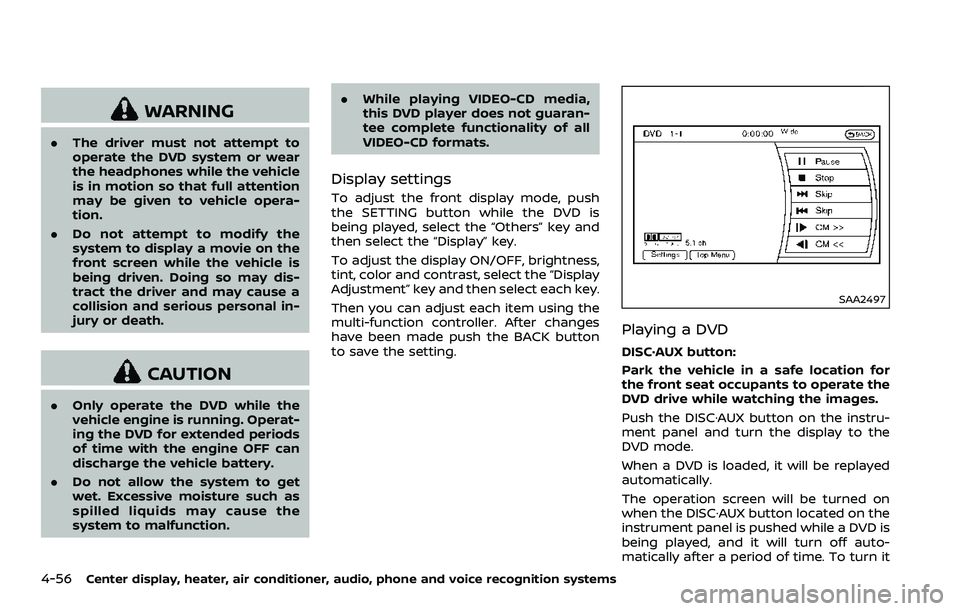
SAA2497
Playing a DVD
DISC·AUX button:
Park the vehicle in a safe location for
the front seat occupants to operate the
DVD drive while watching the images.
Push the DISC·AUX button on the instru-
ment panel and turn the display to the
DVD mode.
When a DVD is loaded, it will be replayed
automatically.
The operation screen will be turned on
when the DISC·AUX button located on the
instrument panel is pushed while a DVD is
being played, and it will turn off auto-
matically after a period of time. To turn it
Page 251 of 453
.Hold Call
Put an incoming call on hold.
. Reject Call
Reject an incoming call.
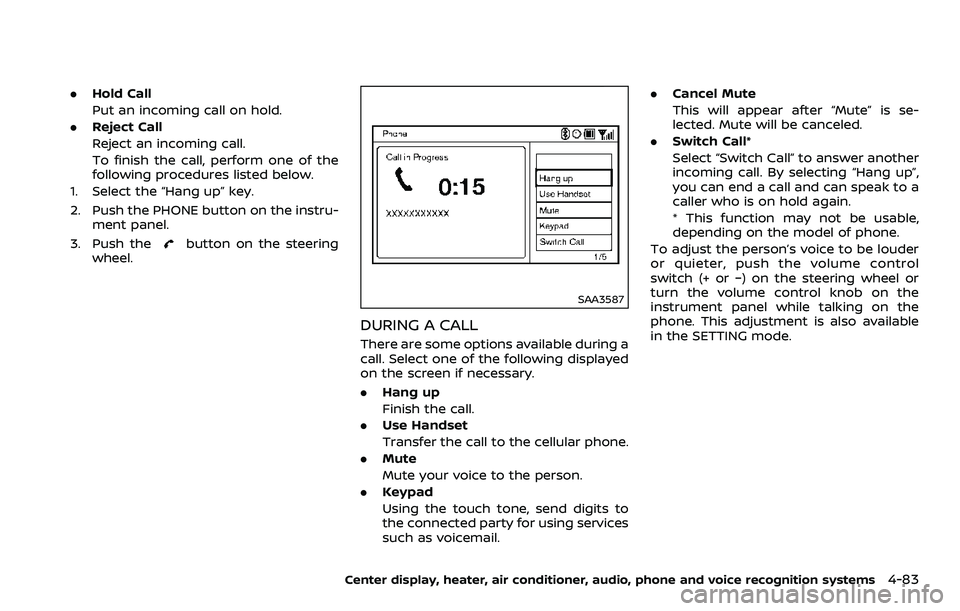
To finish the call, perform one of the
following procedures listed below.
1. Select the “Hang up” key.
2. Push the PHONE button on the instru- ment panel.
3. Push the
button on the steering
wheel.
SAA3587
DURING A CALL
There are some options available during a
call. Select one of the following displayed
on the screen if necessary.
. Hang up
Finish the call.
. Use Handset
Transfer the call to the cellular phone.
. Mute
Mute your voice to the person.
. Keypad
Using the touch tone, send digits to
the connected party for using services
such as voicemail. .
Cancel Mute
This will appear after “Mute” is se-
lected. Mute will be canceled.
. Switch Call*
Select “Switch Call” to answer another
incoming call. By selecting “Hang up”,
you can end a call and can speak to a
caller who is on hold again.
* This function may not be usable,
depending on the model of phone.
To adjust the person’s voice to be louder
or quieter, push the volume control
switch (+ or −) on the steering wheel or
turn the volume control knob on the
instrument panel while talking on the
phone. This adjustment is also available
in the SETTING mode.
Center display, heater, air conditioner, audio, phone and voice recognition systems4-83
Page 267 of 453
NISSAN Voice Recognition allows hands-
free operation of the Phone, Navigation,
Information and Audio systems in one of
two modes, Standard Mode or Alternate
Command Mode.
In Standard Mode, commands that are
available are always shown on the display
and announced by the system. You can
complete your desired operation by sim-
ply following the prompts given by the
system. (See “NISSAN voice recognition
Standard Mode” (P.4-99) for details.)
For advanced operation, you can use the
Alternate Command Mode. (See “NISSAN
voice recognition Alternate Command
Mode” (P.4-110) for details.) When this
mode is active, an expanded list of
commands can be spoken after pushing
the TALK
switch, and the voice
command menu prompts are turned off.
Review the expanded command list,
which is available when this mode is
active. Note that in this mode the recog-
nition success rate may be affected as
the number of available commands and
the ways of speaking each command are
increased.
To switch one mode to another, see each
mode description later in this section.
To improve the recognition success rate
when Alternate Command Mode is active,
try using the Speaker Adaptation Func- tion available in that mode. Otherwise, it
is recommended that Alternate Com-
mand Mode be turned off and Standard
Mode be used for the best recognition
performance.
For the voice commands for the naviga-
tion system, refer to the Navigation Sys-
tem Owner’s Manual of your vehicle.
For Roadster models:
The voice recognition system cannot be
operated when the soft top is not closed.
NISSAN VOICE RECOGNITION
STANDARD MODE
The following section is applicable when
the Standard Mode is activated.
The Standard Mode enables you to com-
plete the desired operation by simply
following the prompts that appear on
the display and also are announced by
the system.SAA2529
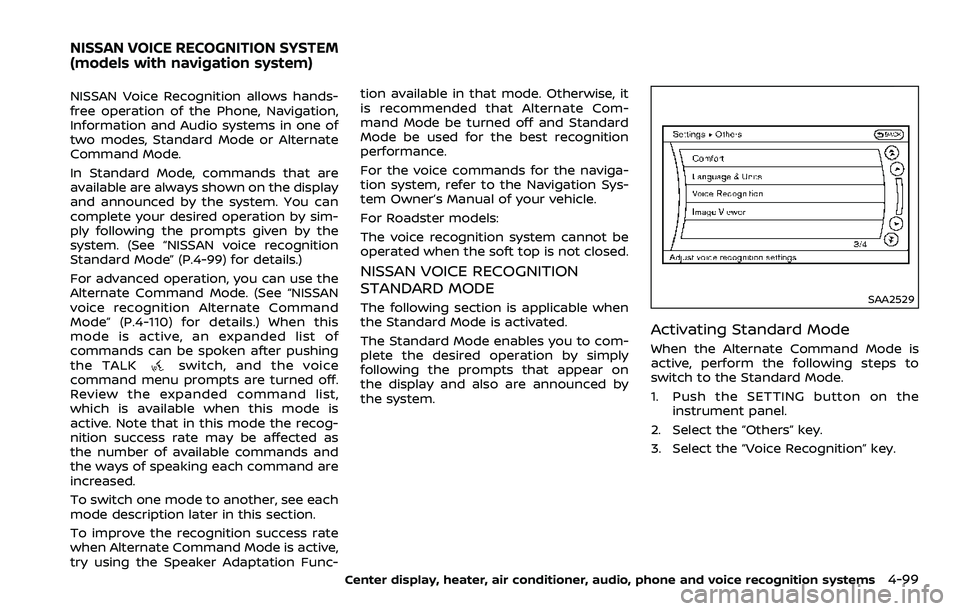
Activating Standard Mode
When the Alternate Command Mode is
active, perform the following steps to
switch to the Standard Mode.
1. Push the SETTING button on the
instrument panel.
2. Select the “Others” key.
3. Select the “Voice Recognition” key.
Center display, heater, air conditioner, audio, phone and voice recognition systems4-99
NISSAN VOICE RECOGNITION SYSTEM
(models with navigation system)
Page 279 of 453
prompted. Review the expanded com-
mand list when this mode is active. See
examples of Alternate Command Mode
screens.
Please note that in this mode the recog-
nition success rate may be affected as
the number of available commands and
ways of speaking each command are
increased. To improve the recognition
success rate, try using the Speaker Adap-
tation Function available in that mode.
(See “Speaker adaptation function (for
Alternate Command Mode)” (P.4-121).)
Otherwise it is recommended that Alter-
nate Command Mode be turned OFF and
Standard Mode be used for the best
recognition performance.
SAA2529
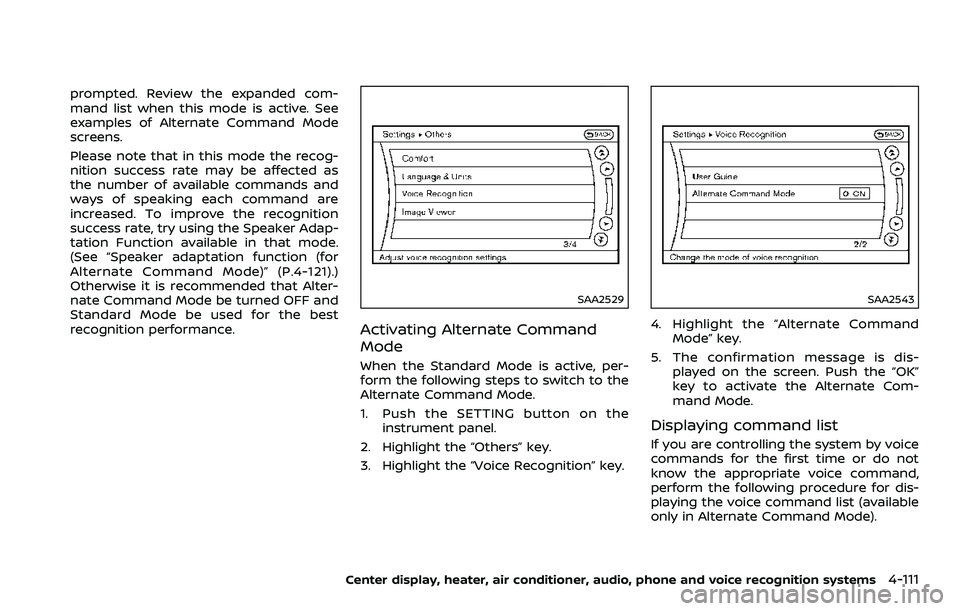
Activating Alternate Command
Mode
When the Standard Mode is active, per-
form the following steps to switch to the
Alternate Command Mode.
1. Push the SETTING button on theinstrument panel.
2. Highlight the “Others” key.
3. Highlight the “Voice Recognition” key.
SAA2543
4. Highlight the “Alternate Command Mode” key.
5. The confirmation message is dis- played on the screen. Push the “OK”
key to activate the Alternate Com-
mand Mode.
Displaying command list
If you are controlling the system by voice
commands for the first time or do not
know the appropriate voice command,
perform the following procedure for dis-
playing the voice command list (available
only in Alternate Command Mode).
Center display, heater, air conditioner, audio, phone and voice recognition systems4-111