2018 NISSAN 370Z warning lights
[x] Cancel search: warning lightsPage 85 of 453

If any of the following conditions occur,
the front air bag, side air bag and curtain
air bag systems and/or pretensioner
system need servicing.
.The supplemental air bag warning
light remains on after approximately
7 seconds.
. The supplemental air bag warning
light flashes intermittently.
. The supplemental air bag warning
light does not come on at all.
It is recommended you visit a NISSAN
dealer for these services.
Unless checked and repaired, the Supple-
mental Restraint Systems and/or the
pretensioner seat belt may not function
properly.
For additional information, see “Supple-
mental restraint system” (P.1-30).
WARNING
If the supplemental air bag warning
light is on, it could mean that the
front air bag, side air bag and curtain
air bag systems and/or pretensioner
system will not operate in an acci-
dent. To help avoid injury to yourself
or others, have your vehicle checked.
It is recommended you visit a NISSAN
dealer for this service.
Vehicle Dynamic Control (VDC)
warning light
When the ignition switch is in the ON
position, the Vehicle Dynamic Control
(VDC) warning light illuminates and then
turns off.
The light will blink when the VDC system
or the traction control system is operat-
ing, thus alerting the driver that the
vehicle is nearing its traction limits. The
road surface may be slippery.
When the VDC warning light illuminates
when the VDC system is turned on, this
light alerts the driver to the fact that the
VDC system’s fail-safe mode is operating,
for example the VDC system may not be
functioning properly. Have the system
checked. It is recommended you visit a
NISSAN dealer for this service. If a mal-
function occurs in the system, the VDC
system function will be canceled but the
vehicle is still driveable. For additional
information, see “Vehicle Dynamic Control
(VDC) system” (P.5-30) of this manual.
INDICATOR LIGHTS
Cruise indicator light
Cruise main switch indicator:
This light illuminates when the cruise
control main switch is pushed. The light
turns off when the main switch is pushed
again. When the cruise main switch in-
dicator light illuminates, the cruise control
system is operational. (See “Cruise con-
trol” (P.5-22).)
Cruise malfunction:
If the cruise indicator light blinks while the
engine is running, it may indicate the
cruise control system is not functioning
properly. Have the system checked. It is
recommended you visit a NISSAN dealer
for this service. (See “Cruise control” (P.5-
22).)
Exterior light indicator
This indicator illuminates when the head-
light switch is turned to the AUTO,orposition and the front parking lights,
instrument panel lights, rear combination
lights, license plate lights or headlights
are on. The indicator turns off when these
lights are turned off.
Instruments and controls2-15
Page 88 of 453
2-18Instruments and controls
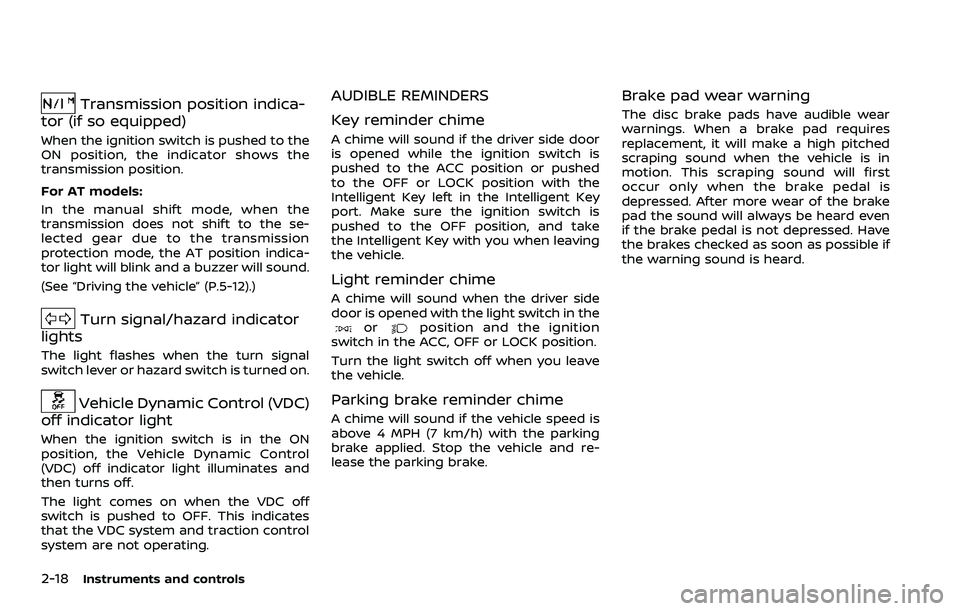
Transmission position indica-
tor (if so equipped)
When the ignition switch is pushed to the
ON position, the indicator shows the
transmission position.
For AT models:
In the manual shift mode, when the
transmission does not shift to the se-
lected gear due to the transmission
protection mode, the AT position indica-
tor light will blink and a buzzer will sound.
(See “Driving the vehicle” (P.5-12).)
Turn signal/hazard indicator
lights
The light flashes when the turn signal
switch lever or hazard switch is turned on.
Vehicle Dynamic Control (VDC)
off indicator light
When the ignition switch is in the ON
position, the Vehicle Dynamic Control
(VDC) off indicator light illuminates and
then turns off.
The light comes on when the VDC off
switch is pushed to OFF. This indicates
that the VDC system and traction control
system are not operating.
AUDIBLE REMINDERS
Key reminder chime
A chime will sound if the driver side door
is opened while the ignition switch is
pushed to the ACC position or pushed
to the OFF or LOCK position with the
Intelligent Key left in the Intelligent Key
port. Make sure the ignition switch is
pushed to the OFF position, and take
the Intelligent Key with you when leaving
the vehicle.
Light reminder chime
A chime will sound when the driver side
door is opened with the light switch in the
orposition and the ignition
switch in the ACC, OFF or LOCK position.
Turn the light switch off when you leave
the vehicle.
Parking brake reminder chime
A chime will sound if the vehicle speed is
above 4 MPH (7 km/h) with the parking
brake applied. Stop the vehicle and re-
lease the parking brake.
Brake pad wear warning
The disc brake pads have audible wear
warnings. When a brake pad requires
replacement, it will make a high pitched
scraping sound when the vehicle is in
motion. This scraping sound will first
occur only when the brake pedal is
depressed. After more wear of the brake
pad the sound will always be heard even
if the brake pedal is not depressed. Have
the brakes checked as soon as possible if
the warning sound is heard.
Page 104 of 453
2-34Instruments and controls
XENON HEADLIGHTS
WARNING
HIGH VOLTAGE
. When xenon headlights are on,
they produce a high voltage. To
prevent an electric shock, never
attempt to modify or disassem-
ble. Always have your xenon
headlights replaced by a certified
service technician.
. Xenon headlights provide consid-
erably more light than conven-
tional headlights. If they are not
correctly aimed, they might tem-
porarily blind an oncoming driver
or the driver ahead of you and
cause a serious accident. If head-
lights are not aimed correctly, it is
recommended you immediately
take your vehicle to a NISSAN
dealer and have the headlights
adjusted correctly.
When the xenon headlight is initially
turned on, its brightness or color varies
slightly. However, the color and bright-
ness will soon stabilize. .
The life of xenon headlights will be
shortened by frequent on-off opera-
tion. It is generally desirable not to
turn off the headlights for short
intervals (for example, when the
vehicle stops at a traffic signal).
. If the xenon headlight bulb is close
to burning out, the brightness will
drastically decrease, the light will
start blinking, or the color of the
light will become reddish. If one or
more of the above signs appear, it is
recommended you visit a NISSAN
dealer.
SIC3994
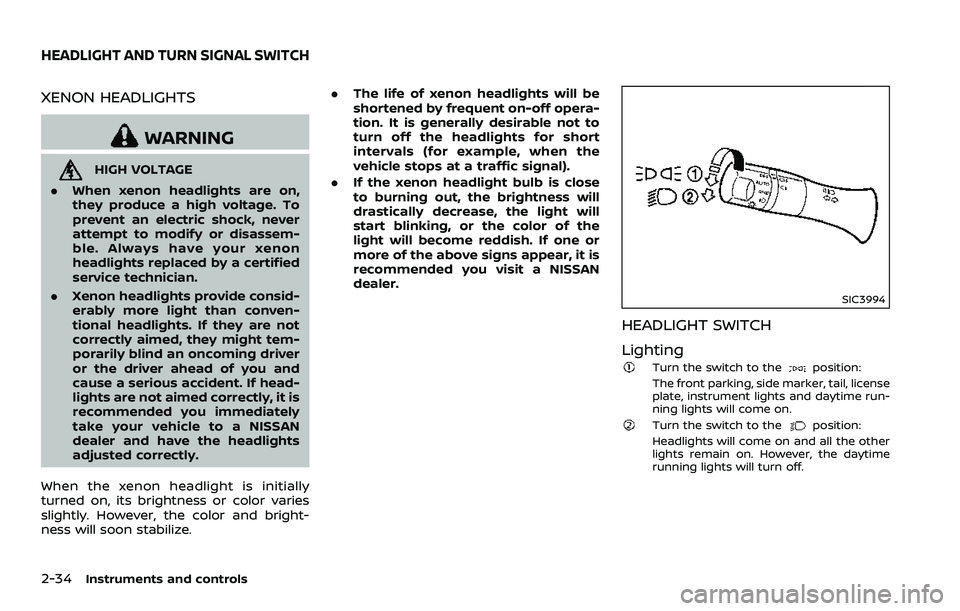
HEADLIGHT SWITCH
Lighting
Turn the switch to theposition:
The front parking, side marker, tail, license
plate, instrument lights and daytime run-
ning lights will come on.
Turn the switch to theposition:
Headlights will come on and all the other
lights remain on. However, the daytime
running lights will turn off.
HEADLIGHT AND TURN SIGNAL SWITCH
Page 106 of 453
2-36Instruments and controls
SIC3996
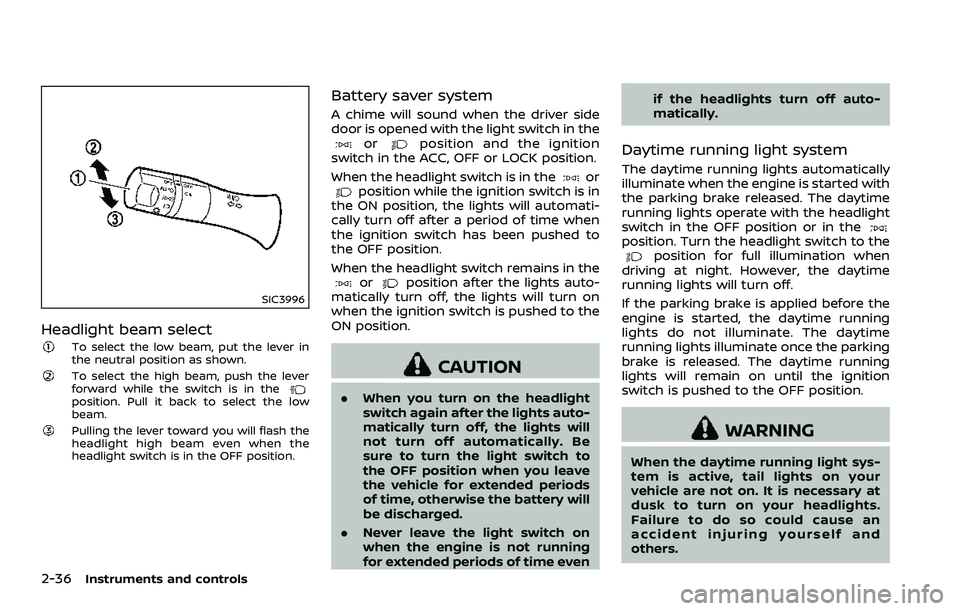
Headlight beam select
To select the low beam, put the lever in
the neutral position as shown.
To select the high beam, push the lever
forward while the switch is in the
position. Pull it back to select the low
beam.
Pulling the lever toward you will flash the
headlight high beam even when the
headlight switch is in the OFF position.
Battery saver system
A chime will sound when the driver side
door is opened with the light switch in the
orposition and the ignition
switch in the ACC, OFF or LOCK position.
When the headlight switch is in the
orposition while the ignition switch is in
the ON position, the lights will automati-
cally turn off after a period of time when
the ignition switch has been pushed to
the OFF position.
When the headlight switch remains in the
orposition after the lights auto-
matically turn off, the lights will turn on
when the ignition switch is pushed to the
ON position.
CAUTION
. When you turn on the headlight
switch again after the lights auto-
matically turn off, the lights will
not turn off automatically. Be
sure to turn the light switch to
the OFF position when you leave
the vehicle for extended periods
of time, otherwise the battery will
be discharged.
. Never leave the light switch on
when the engine is not running
for extended periods of time even if the headlights turn off auto-
matically.
Daytime running light system
The daytime running lights automatically
illuminate when the engine is started with
the parking brake released. The daytime
running lights operate with the headlight
switch in the OFF position or in the
position. Turn the headlight switch to theposition for full illumination when
driving at night. However, the daytime
running lights will turn off.
If the parking brake is applied before the
engine is started, the daytime running
lights do not illuminate. The daytime
running lights illuminate once the parking
brake is released. The daytime running
lights will remain on until the ignition
switch is pushed to the OFF position.
WARNING
When the daytime running light sys-
tem is active, tail lights on your
vehicle are not on. It is necessary at
dusk to turn on your headlights.
Failure to do so could cause an
accident injuring yourself and
others.
Page 141 of 453
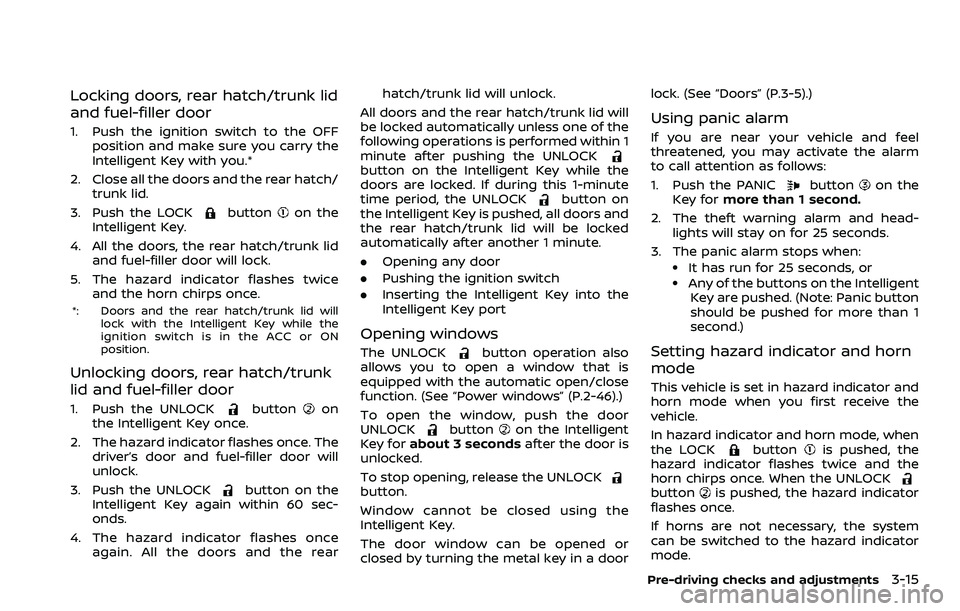
Locking doors, rear hatch/trunk lid
and fuel-filler door
1. Push the ignition switch to the OFFposition and make sure you carry the
Intelligent Key with you.*
2. Close all the doors and the rear hatch/ trunk lid.
3. Push the LOCK
buttonon the
Intelligent Key.
4. All the doors, the rear hatch/trunk lid and fuel-filler door will lock.
5. The hazard indicator flashes twice and the horn chirps once.
*: Doors and the rear hatch/trunk lid will
lock with the Intelligent Key while the
ignition switch is in the ACC or ON
position.
Unlocking doors, rear hatch/trunk
lid and fuel-filler door
1. Push the UNLOCKbuttonon
the Intelligent Key once.
2. The hazard indicator flashes once. The driver’s door and fuel-filler door will
unlock.
3. Push the UNLOCK
button on the
Intelligent Key again within 60 sec-
onds.
4. The hazard indicator flashes once again. All the doors and the rear hatch/trunk lid will unlock.
All doors and the rear hatch/trunk lid will
be locked automatically unless one of the
following operations is performed within 1
minute after pushing the UNLOCK
button on the Intelligent Key while the
doors are locked. If during this 1-minute
time period, the UNLOCK
button on
the Intelligent Key is pushed, all doors and
the rear hatch/trunk lid will be locked
automatically after another 1 minute.
. Opening any door
. Pushing the ignition switch
. Inserting the Intelligent Key into the
Intelligent Key port
Opening windows
The UNLOCKbutton operation also
allows you to open a window that is
equipped with the automatic open/close
function. (See “Power windows” (P.2-46).)
To open the window, push the door
UNLOCK
buttonon the Intelligent
Key for about 3 seconds after the door is
unlocked.
To stop opening, release the UNLOCK
button.
Window cannot be closed using the
Intelligent Key.
The door window can be opened or
closed by turning the metal key in a door lock. (See “Doors” (P.3-5).)
Using panic alarm
If you are near your vehicle and feel
threatened, you may activate the alarm
to call attention as follows:
1. Push the PANIC
buttonon the
Key for more than 1 second.
2. The theft warning alarm and head- lights will stay on for 25 seconds.
3. The panic alarm stops when:
.It has run for 25 seconds, or.Any of the buttons on the Intelligent Key are pushed. (Note: Panic button
should be pushed for more than 1
second.)
Setting hazard indicator and horn
mode
This vehicle is set in hazard indicator and
horn mode when you first receive the
vehicle.
In hazard indicator and horn mode, when
the LOCK
buttonis pushed, the
hazard indicator flashes twice and the
horn chirps once. When the UNLOCK
buttonis pushed, the hazard indicator
flashes once.
If horns are not necessary, the system
can be switched to the hazard indicator
mode.
Pre-driving checks and adjustments3-15
Page 165 of 453
CAUTION
.Do not store the main sun visor
before storing the extension sun
visor.
. Do not pull the extension sun
visor forcedly downwards.
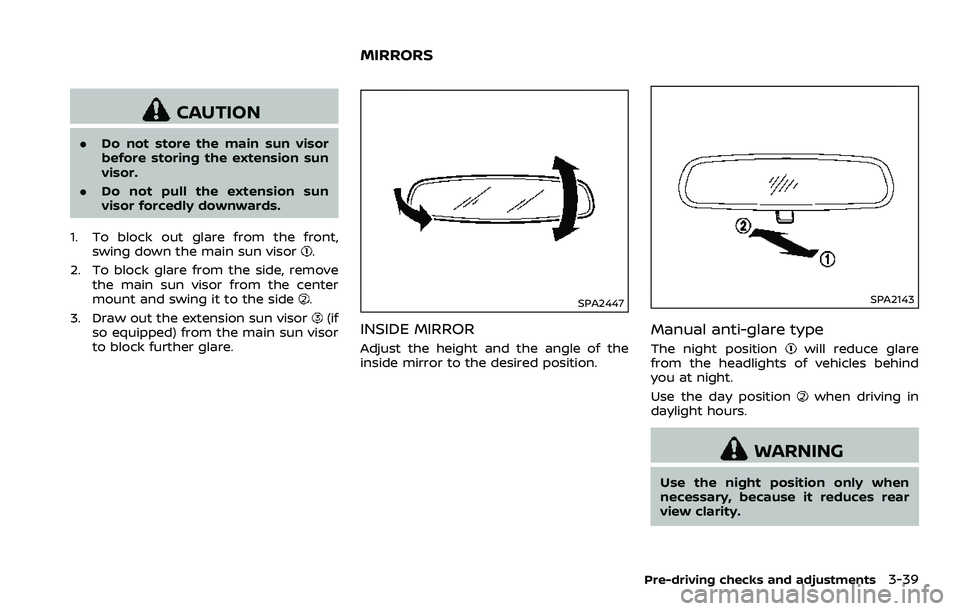
1. To block out glare from the front, swing down the main sun visor
.
2. To block glare from the side, remove the main sun visor from the center
mount and swing it to the side
.
3. Draw out the extension sun visor
(if
so equipped) from the main sun visor
to block further glare.SPA2447
INSIDE MIRROR
Adjust the height and the angle of the
inside mirror to the desired position.
SPA2143
Manual anti-glare type
The night positionwill reduce glare
from the headlights of vehicles behind
you at night.
Use the day position
when driving in
daylight hours.
WARNING
Use the night position only when
necessary, because it reduces rear
view clarity.
Pre-driving checks and adjustments3-39
MIRRORS
Page 166 of 453
3-40Pre-driving checks and adjustments
SPA2450
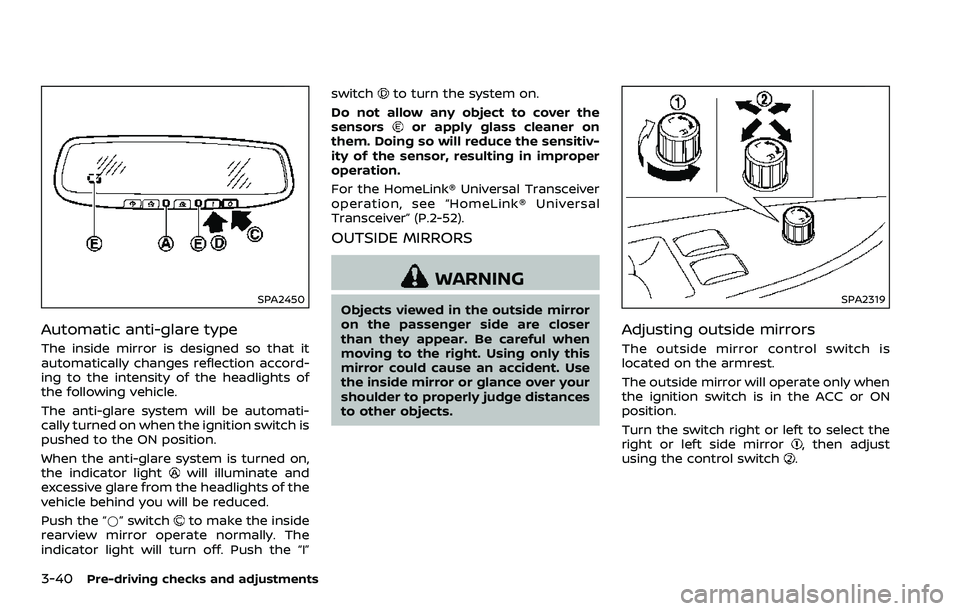
Automatic anti-glare type
The inside mirror is designed so that it
automatically changes reflection accord-
ing to the intensity of the headlights of
the following vehicle.
The anti-glare system will be automati-
cally turned on when the ignition switch is
pushed to the ON position.
When the anti-glare system is turned on,
the indicator light
will illuminate and
excessive glare from the headlights of the
vehicle behind you will be reduced.
Push the “*” switch
to make the inside
rearview mirror operate normally. The
indicator light will turn off. Push the “I” switch
to turn the system on.
Do not allow any object to cover the
sensors
or apply glass cleaner on
them. Doing so will reduce the sensitiv-
ity of the sensor, resulting in improper
operation.
For the HomeLink® Universal Transceiver
operation, see “HomeLink® Universal
Transceiver” (P.2-52).
OUTSIDE MIRRORS
WARNING
Objects viewed in the outside mirror
on the passenger side are closer
than they appear. Be careful when
moving to the right. Using only this
mirror could cause an accident. Use
the inside mirror or glance over your
shoulder to properly judge distances
to other objects.SPA2319
Adjusting outside mirrors
The outside mirror control switch is
located on the armrest.
The outside mirror will operate only when
the ignition switch is in the ACC or ON
position.
Turn the switch right or left to select the
right or left side mirror
, then adjust
using the control switch.
Page 303 of 453
.Make sure the area around the vehicle
is clear.
. Check fluid levels such as engine oil,
coolant, brake fluid and window
washer fluid as frequently as possible,
or at least whenever you refuel.
. Check that all windows and lights are
clean.
. Visually inspect tires for their appear-
ance and condition. Also check tires
for proper inflation.
. Lock all doors.
. Position seat and adjust head re-
straints.
. Adjust inside and outside mirrors.
. Fasten seat belts and ask all passen-
gers to do likewise.
. Check the operation of warning lights
when the ignition switch is pushed to
the ON position. (See “Warning lights,
indicator lights and audible remin-
ders” (P.2-10).)1. Apply the parking brake.
2.Automatic Transmission (AT) model:
Move the shift lever to the P (Park) or N
(Neutral) position. (P is recommended.)
The starter is designed not to operate
unless the shift lever is in either of the
above positions.
Manual Transmission (MT) model:
Move the shift lever to the N (Neutral)
position. Depress the clutch pedal fully
to the floor.
The starter is designed not to operate
unless the clutch pedal is fully de-
pressed.
The Intelligent Key must be carried
when operating the ignition switch.
3. Push the ignition switch to the ON position. Depress the brake pedal (AT
model) or the clutch pedal (MT model)
and push the ignition switch to start
the engine.
To start the engine immediately, push
and release the ignition switch while
depressing the brake pedal or the
clutch pedal with the ignition switch
in any position.
.If the engine is very hard to start inextremely cold weather or when
restarting, depress the accelerator
pedal a little (approximately 1/3 to the floor) and while holding, crank
the engine. Release the accelerator
pedal when the engine starts.
.If the engine is very hard to start
because it is flooded, depress the
accelerator pedal all the way to the
floor and hold it. Push the ignition
switch to the ON position to start
cranking the engine. After 5 or 6
seconds, stop cranking by pushing
the ignition switch to OFF. After
cranking the engine, release the
accelerator pedal. Crank the engine
with your foot off the accelerator
pedal by depressing the brake
pedal and pushing the push-button
ignition switch to start the engine.
If the engine starts, but fails to run,
repeat the above procedure.
CAUTION
Do not operate the starter for more
than 15 seconds at a time. If the
engine does not start, push the
ignition switch to OFF and wait 10
seconds before cranking again,
otherwise the starter could be da-
maged.
Starting and driving5-11
BEFORE STARTING THE ENGINE STARTING THE ENGINE