Page 141 of 562
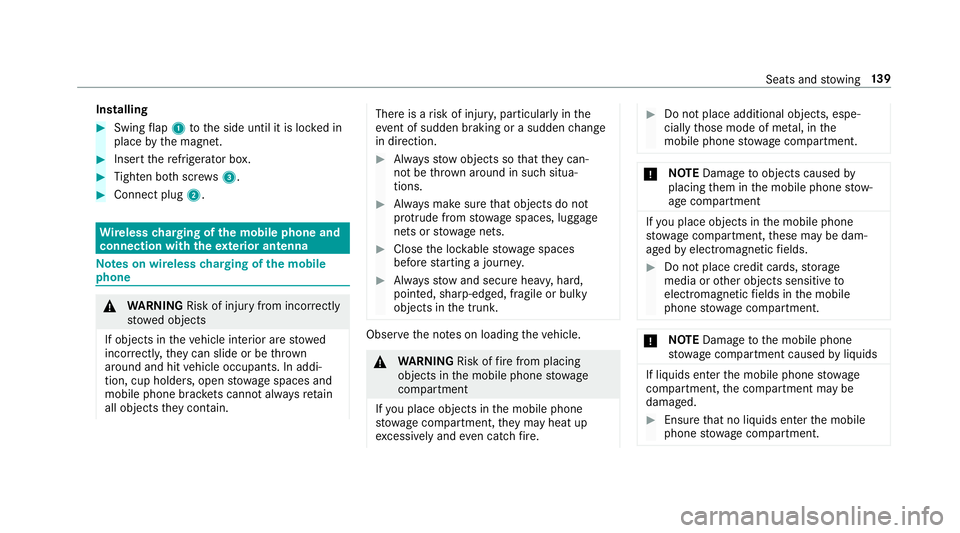
Installing
#Swingflap 1 tothe side until it is loc ked in
place bythe magnet.
#Insert there frigerator box.
#Tighten bo thscr ews3.
#Connect plug 2.
Wirelesscharging of the mobile phone and
connection with theex terior antenna
Note s on wireless charging of the mobile
phone
& WARNING Risk of injury from incorrectly
stowe d objects
If objects in theve hicle interior are stowed
incor rectly, they can slide or be throw n
around and hit vehicle occupants. In addi‐
tion, cup holders, open stowage spaces and
mobile phone brac kets cann otalw aysre tain
all objects they contain.
There is arisk of injur y,particularly in the
ev ent of sudden braking or a sudden change
in direction.
#Alw aysstow objects so that they can‐
not be throw n around in such situa‐
tions.
#Alw ays make sure that objects do not
pr otru de from stowage spaces, luggage
nets or stowage nets.
#Close the loc kable stow age spaces
before starting a journe y.
#Alwaysstow and secure heavy, hard,
pointe d, sharp-edged, fragile or bulky
objects in the trunk.
Obser vethe no tes on loading theve hicle.
&
WARNING Risk offire from placing
objects in the mobile phone stowage
compartment
If yo u place objects in the mobile phone
stow age compartment, they may heat up
exc essively and even catch fire .
#Do not place additional objects, espe‐
cially those mode of me tal, in the
mobile phone stowage compartment.
* NO
TEDama getoobjects caused by
placing them in the mobile phone stow‐
age compartment
If yo u place objects in the mobile phone
stow age compartment, these may be dam‐
aged byelectromagnetic fields.
#Do not place credit cards, storage
media or other objects sensitive to
electromagnetic fields in the mobile
phone stowage compartment.
* NO
TEDama getothe mobile phone
stow age compartment caused byliquids
If liquids enter the mobile phone stowage
compartment, the compartment may be
damaged.
#Ensure that no liquids enter the mobile
phone stowage compartment.
Seats and stowing 13
9
Page 142 of 562
RDepending ontheve hicle equipment, the
mobile phone is connected totheve hicle's
ex terior antenna via thech arging module.
RThe charging function and wireless connec‐
tion of the mobile phone totheve hicle's
ex terior antenna are only available if the igni‐
tion is switched on.
RSmall mobile phones may not be able tobe
ch arge d in every position of the mobile
phone stowage compartment.
RLargemobile phones which do not rest flat in
th e mobile phone stowage compartment may
not be able tobe charge d or connec ted with
th eve hicle's exterior antenna.
RThe mobile phone may heat up during the
ch arging process.
RTo ensure more ef ficient charging and con‐
nection with theve hicle's exterior antenna,
re mo vethe pr otective co ver from the mobile
phone.
RWhen charging, the mat should be used if
possible.
Wire lesscharging of the mobile phone in the
front
Re quirements:RThe mobile phone must be suitable for wire‐
less charging (Qi-compatible mobile phone).
Yo u can find a li stof Qi-compatible mobile
phones at:
http://www.mercedes-benz.com/connect
Example: vehicles without a rear air conditioning
sy stem
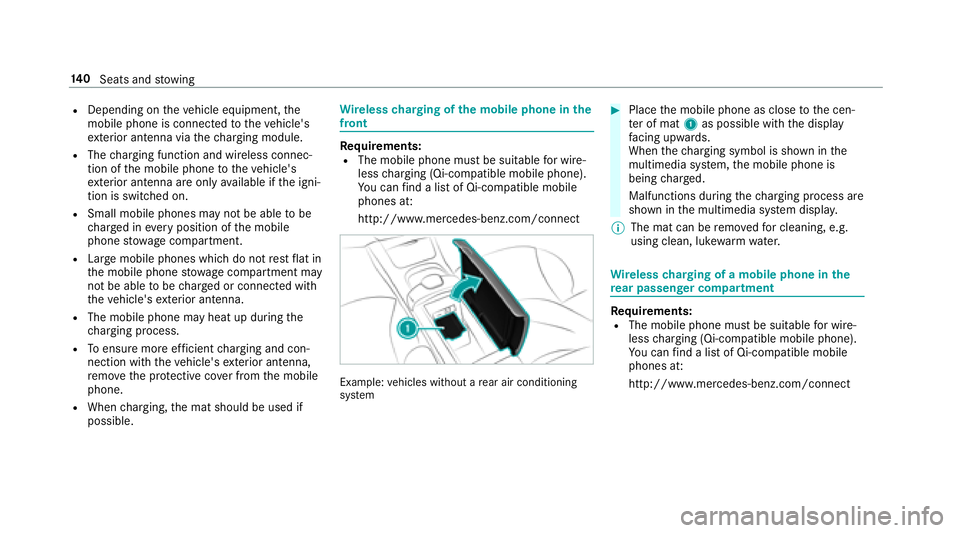
#Place the mobile phone as close tothe cen‐
te r of mat 1as possible with the display
fa cing up wards.
When thech arging symbol is shown in the
multimedia sy stem, the mobile phone is
being charge d.
Malfunctions during thech arging process are
shown in the multimedia sy stem displa y.
% The mat can be remo vedfo r cleaning, e.g.
using clean, luk ewarmwate r.
Wire lesscharging of a mobile phone in the
re ar passenger co mpartment
Requirements:RThe mobile phone must be suitable for wire‐
less charging (Qi-compatible mobile phone).
Yo u can find a li stof Qi-compatible mobile
phones at:
http://www.mercedes-benz.com/connect
14 0
Seats and stowing
Page 143 of 562
Example:vehicles with individual rear seats
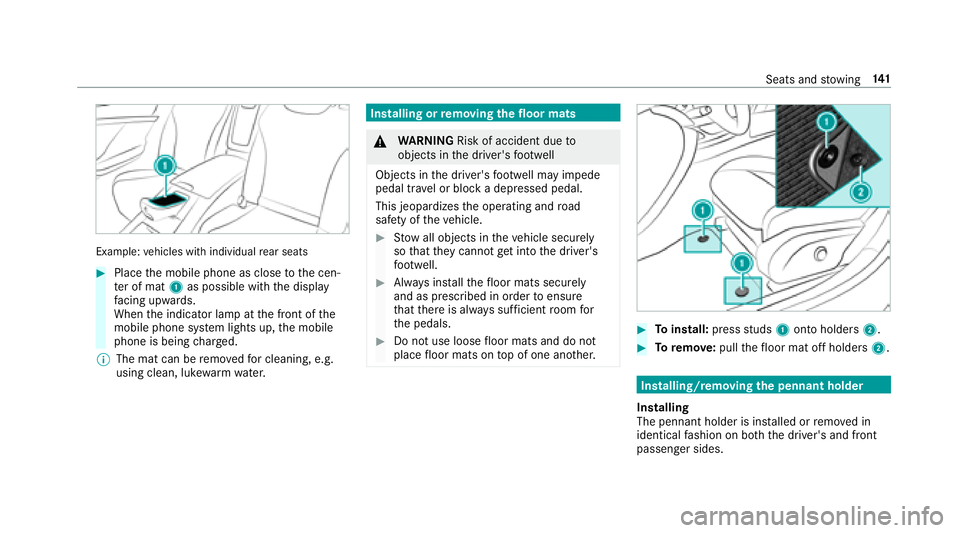
#Place the mobile phone as close tothe cen‐
te r of mat 1as possible with the display
fa cing up wards.
When the indicator lamp at the front of the
mobile phone sy stem lights up, the mobile
phone is being charge d.
% The mat can be remo vedfo r cleaning, e.g.
using clean, luk ewarmwate r.
Installing or removing the floor mats
&
WARNING Risk of accident due to
objects in the driver's foot we ll
Objects in the driver's foot we ll may impede
pedal tr avel or block a depressed pedal.
This jeopardizes the operating and road
saf etyof theve hicle.
#Stow all objects in theve hicle securely
so that they cannot getinto the driver's
fo ot we ll.
#Alw ays ins tallth efloor mats securely
and as prescribed in order toensure
th at there is alw ays suf ficient room for
th e pedals.
#Do not use loose floor mats and do not
place floor mats on top of one ano ther.#To install: pressstuds 1onto holders 2.
#Toremo ve:pull thefloor mat off holders 2.
Installing/removing the pennant holder
Installing
The pennant holder is ins talled or remo ved in
identical fashion on bo th the driver's and front
passenger sides.
Seats and stowing 14
1
Page 144 of 562
#Press cover1 and turn it forw ards in the
direction of tra vel.
#Re mo vethe co ver.
#Po sition pennant holder 2horizontally on
th e opening and press it in.
#Tu rn pennant holder 2inthe opposite
direction tothe direction of tra vel until it is in
a ve rtical position and engages in place.
Re moving
#Press pennant holder 2into the opening
and turn it forw ards in the direction of tr avel
until it isin a horizontal position.
#Re mo vepennant holder 2.
#Install co ver1 and turn it backwards in the
opposite direction tothe direction of tra vel.
The pennant holder can be stowed inthe parcel
net in the trunk, forex ample.
14 2
Seats and stowing
Page 364 of 562
Rear passenger co mpartment displa ys
Rear passenger co mpartment displa ys over‐
view
1Displ ay
2Socketfo r corded headphones with a
3.5 mm stereo jack The
rear passenger compartment displa ysare
located behind the head restra ints of the front
seats.
Setting the display angle
#Selecting a rear display on there mo tecon‐
trol (→page 363).
#Press the/ button.
#Toshow the menu: pressthe= button.
#Select �(�Q�W�H�U�W�D�L�Q�P�H�Q�W �V�H�W�W�L�Q�J�V .
#Select�'�L�V�S�O�D�\ �D�Q�J�O�H .
#Select�8�Sor�'�R�Z�Q.
Re mo tecontro l
Remo tecontro love rview
1To switch the display on and off
2Main functions button group:
ß Toswitch navigation on
z Tocall up online and Internet functions
$ Toswitch on thera dio
362
Multimedia sy stem
Page 369 of 562
RBetweenthere ar shelf and thro ugh-load ski
bag.
Po rts
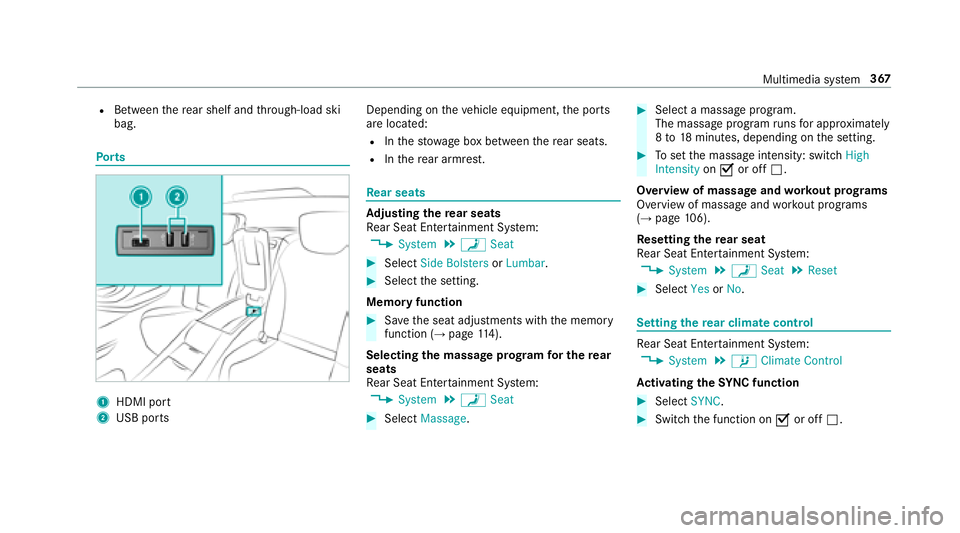
1HDMI port
2USB ports Depending on
theve hicle equipment, the ports
are located:
RIn thestow age box between there ar seats.
RIn there ar armrest.
Re ar seats
Ad justing the rear seats
Re ar Seat En tertainment Sy stem:
,�6�\�V�W�H�P.a �6�H�D�W
#Select �6�L�G�H �%�R�O�V�W�H�U�V or�/�X�P�E�D�U .
#Selectthe setting.
Memory function
#Sa ve the seat adjustments with the memory
function (→page 114).
Selec ting the massage prog ram for the rear
seats
Re ar Seat En tertainment Sy stem:
,�6�\�V�W�H�P.a �6�H�D�W
#Select �0�D�V�V�D�J�H.
#Select a massage program.
The massage program runs for app roxima tely
8 to 18 minutes, depending on the setting.
#To set the massage intensity: switch �+�L�J�K
�,�Q�W�H�Q�V�L�W�\ onO or off ª.
Overview of massa geand workout prog rams
Overview of massa geand workout programs
(
→page 106).
Re setting there ar seat
Re ar Seat En tertainment Sy stem:
,�6�\�V�W�H�P.a �6�H�D�W.�5�H�V�H�W
#Select �<�H�Vor�1�R.
Setting there ar climate control
Re ar Seat En tertainment Sy stem:
,�6�\�V�W�H�P.b �&�O�L�P�D�W�H �&�R�Q�W�U�R�O
Ac tivating the SYNC function
#Select �6�<�1�&.
#Switch the function on Oor off ª.
Multimedia sy stem 367
Page 419 of 562
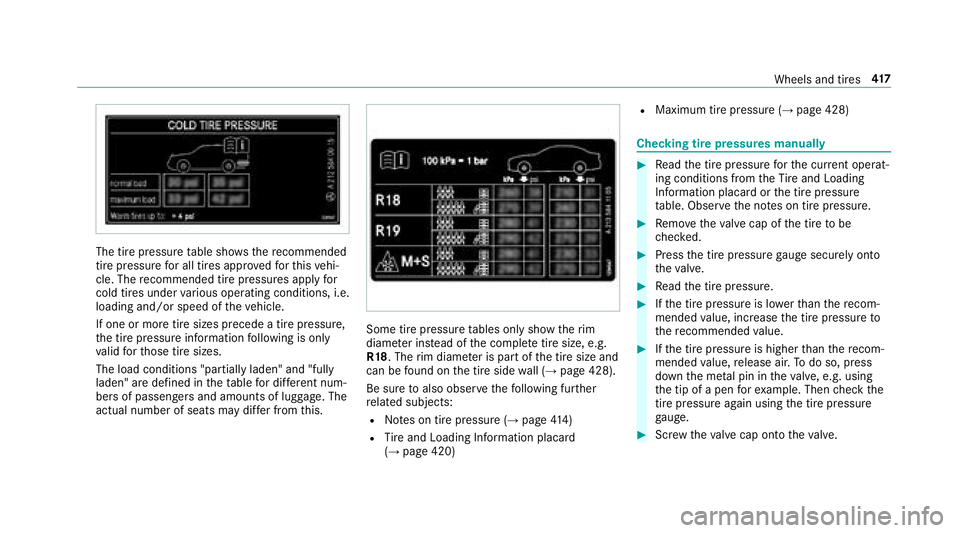
The tire pressuretable sho ws there commended
tire pressure for all tires app rove dfo rth is vehi‐
cle. The recommended tire pressures apply for
cold tires under various operating conditions, i.e.
loading and/or speed of theve hicle.
If one or more tire sizes precede a tire pressure,
th e tire pressure information following is only
va lid forth ose tire sizes.
The load conditions "partially laden" and "fully
laden" are defined in theta ble for dif fere nt num‐
be rs of passengers and amounts of luggage. The
actual number of seats may dif fer from this.
Some tire pressure tables only show therim
diame ter ins tead of the comple tetire size, e.g.
R18 . The rim diame ter is part of the tire size and
can be found on the tire side wall (
→page 428).
Be sure toalso observ eth efo llowing fur ther
re lated subjects:
RNo tes on tire pressure (→page 414)
RTire and Loading Info rmation placard
(→page 420)
RMaximum tire pressure (→page 428)
Checking tire pressure s manually
#Read the tire pressure forth e cur rent operat‐
ing conditions from theTire and Loading
Info rmation placard or the tire pressure
ta ble. Obser vethe no tes on tire pressure.
#Re mo vetheva lve cap of the tire tobe
ch ecked.
#Press the tire pressure gauge securely onto
th eva lve.
#Re ad the tire pressure.
#Ifth e tire pressure is lo werth an there com‐
mended value, inc rease the tire pressure to
th ere commended value.
#Ifth e tire pressure is higher than there com‐
mended value, release air. Todo so, press
down the me tal pin in theva lve, e.g. using
th e tip of a pen forex ample. Then check the
tire pressure again usingthe tire pressure
ga uge.
#Sc rew theva lve cap onto theva lve.
Wheels and tires 41
7
Page 423 of 562
#Observethe load rating of the tires.
#The load rating must be at least half the
permissible axle load of theve hicle.
#Ne verove rload the tires by exceeding
th e maximum load.
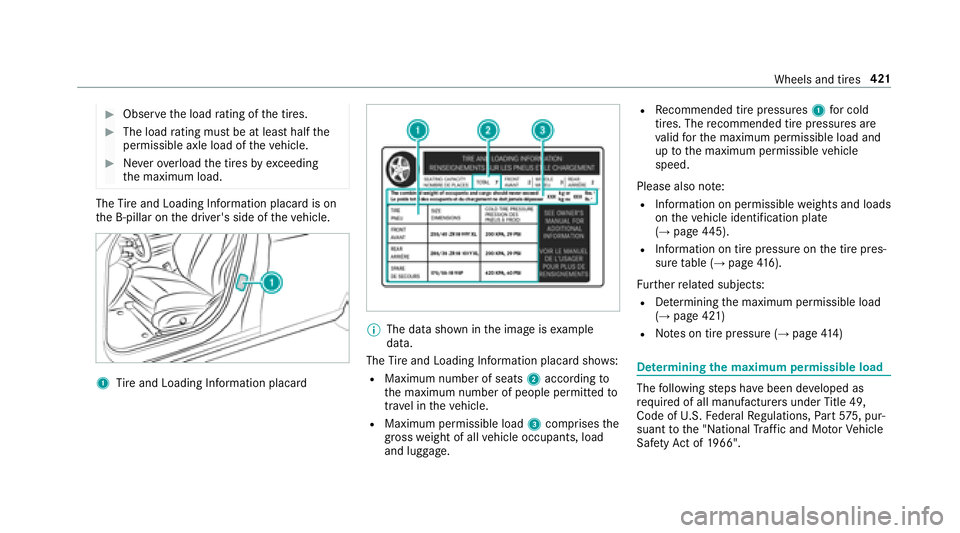
The Tire and Loading Info rmation placard is on
th e B-pillar on the driver's side of theve hicle.
1Tire and Loading Info rmation placard
%
The data shown in the image is example
data.
The Tire and Loading Info rmation placard sho ws:
RMaximum number of seats 2according to
th e maximum number of people permitted to
tr ave l in theve hicle.
RMaximum permissible load 3comprises the
gros swe ight of all vehicle occupants, load
and luggage.
RRe commended tire pressures 1for cold
tires. The recommended tire pressures are
va lid forth e maximum permissible load and
up tothe maximum permissible vehicle
speed.
Please also no te:
RInformation on permissible weights and loads
on theve hicle identification plate
(
→page 445).
RInfo rm ation on tire pressure on the tire pres‐
sure table (→page 416).
Fu rther related subjects:
RDe term ining the maximum permissible load
(→page 421)
RNo tes on tire pressure (→page 414)
De term ining the maximum permissible load
The following steps ha vebeen de veloped as
requ ired of all manufacturers under Title 49,
Code of U.S. Federal Regulations, Part57 5, pur‐
suant tothe "National Traf fic and Mo torVe hicle
Saf etyAc t of 1966".
Wheels and tires 421