2018 MERCEDES-BENZ GLS ECU
[x] Cancel search: ECUPage 68 of 398

Never leave animals unattended in the vehi-
cle. Always secure animals properly during
the journey, e.g. use a suitable animal trans-
port box.
Driving safety systems
Overview of driving safety systems In this section, you will find information about
the following driving safety systems: R
ABS ( A nti-lock B raking S ystem)
( Y
page 66)R
BAS ( B rake A ssist S ystem) ( Y
page 67)R
Active Brake Assist ( Y
page 67)R
ESP ®
( E lectronic S tability P rogram)
( Y
page 70)R
EBD ( E lectronic B rake force D istribution)
( Y
page 72)R
ADAPTIVE BRAKE ( Y
page 72)R
Active Brake Assist with cross-traffic function
( Y
page 72)R
Steering Pilot STEER CONTROL
( Y
page 75)
Important safety notes If you fail to adapt your driving style or if you are
inattentive, the driving safety systems can nei-
ther reduce the risk of an accident nor override
the laws of physics. Driving safety systems are
merely aids designed to assist driving. You are
responsible for maintaining the distance to the
vehicle in front, for vehicle speed, for braking in
good time, and for staying in lane. Always adapt
your driving style to suit the prevailing road and
weather conditions and maintain a safe distance
from the vehicle in front. Drive carefully.
The driving safety systems described only work
as effectively as possible when there is ade-
quate contact between the tires and the road
surface. Pay particular attention to the informa-
tion regarding tires, recommended minimum
tire tread depths etc. in the "Wheels and tires"
section ( Y
page 354).
In wintry driving conditions, always use winter
tires (M+S tires) and if necessary, snow chains.
Only in this way will the driving safety systems
described in this section work as effectively as
possible. ABS (Anti-lock Braking System)
General information ABS regulates brake pressure in such a way that
the wheels do not lock when you brake. This
allows you to continue steering the vehicle when
braking.
The �% ABS warning lamp in the instrument
cluster lights up when the ignition is switched
on. It goes out when the engine is running.
ABS works from a speed of about 5 mph
(8 km/h), regardless of road-surface conditions.
ABS works on slippery surfaces, even when you
only brake gently.
Important safety notes
i Observe the "Important safety notes" sec-
tion ( Y
page 66).
G WARNING
If ABS is faulty, the wheels could lock when
braking. The steerability and braking charac-
teristics may be severely impaired. Addition-
ally, further driving safety systems are deac-
tivated. There is an increased danger of skid-
ding and accidents.
Drive on carefully. Have ABS checked imme-
diately at a qualified specialist workshop.
When ABS is malfunctioning, other systems,
including driving safety systems, will also
become inoperative. Observe the information
on the ABS warning lamp ( Y
page 282) and dis-
play messages which may be shown in the
instrument cluster ( Y
page 249).
Braking X
If ABS intervenes: continue to depress the
brake pedal vigorously until the braking sit-
uation is over. X
To make a full brake application: depress
the brake pedal with full force.
If ABS intervenes when braking, you will feel a
pulsing in the brake pedal.
The pulsating brake pedal can be an indication
of hazardous road conditions, and functions as a
reminder to take extra care while driving.66
Driving safety systems
Safety
Page 85 of 398
Door s
Important safet y notes
G WARNING
If children are lef t unsupervised in th e vehicle,
they could: R
ope n th e doors , thus endangerin g other
people or road users. R
get out and disrup t traffic .R
operat e th e vehicle' s equipment.
Additionally, children could set th e vehicle in
motion if, fo r example, they:R
release th e parking brake .R
shiftin g th e automatic transmissio n out of
par k position PR
Start th e engine.
There is a ris k of an acciden t and injury.
Whe n leavin g th e vehicle, always take th e
SmartKey wit h you and loc k th e vehicle. Never
leav e children or animals unattended in th e
vehicle. Always keep th e SmartKey out of
reach of children .
Unlockin g an d opening doors from
th e insideYou can ope n a doo r from insid e th e vehicle
eve n if it has bee n locked. You can only ope n th e
rea r doors from insid e th e vehicle if they are no t
secure d by th e child-proof locks ( Y
page 65).
If th e vehicle has previously bee n locke d from
th e outside, opening a doo r from th e insid e will
trigger th e anti-thef t alar m system. Switc h of f
th e alar m ( Y
page 75). X
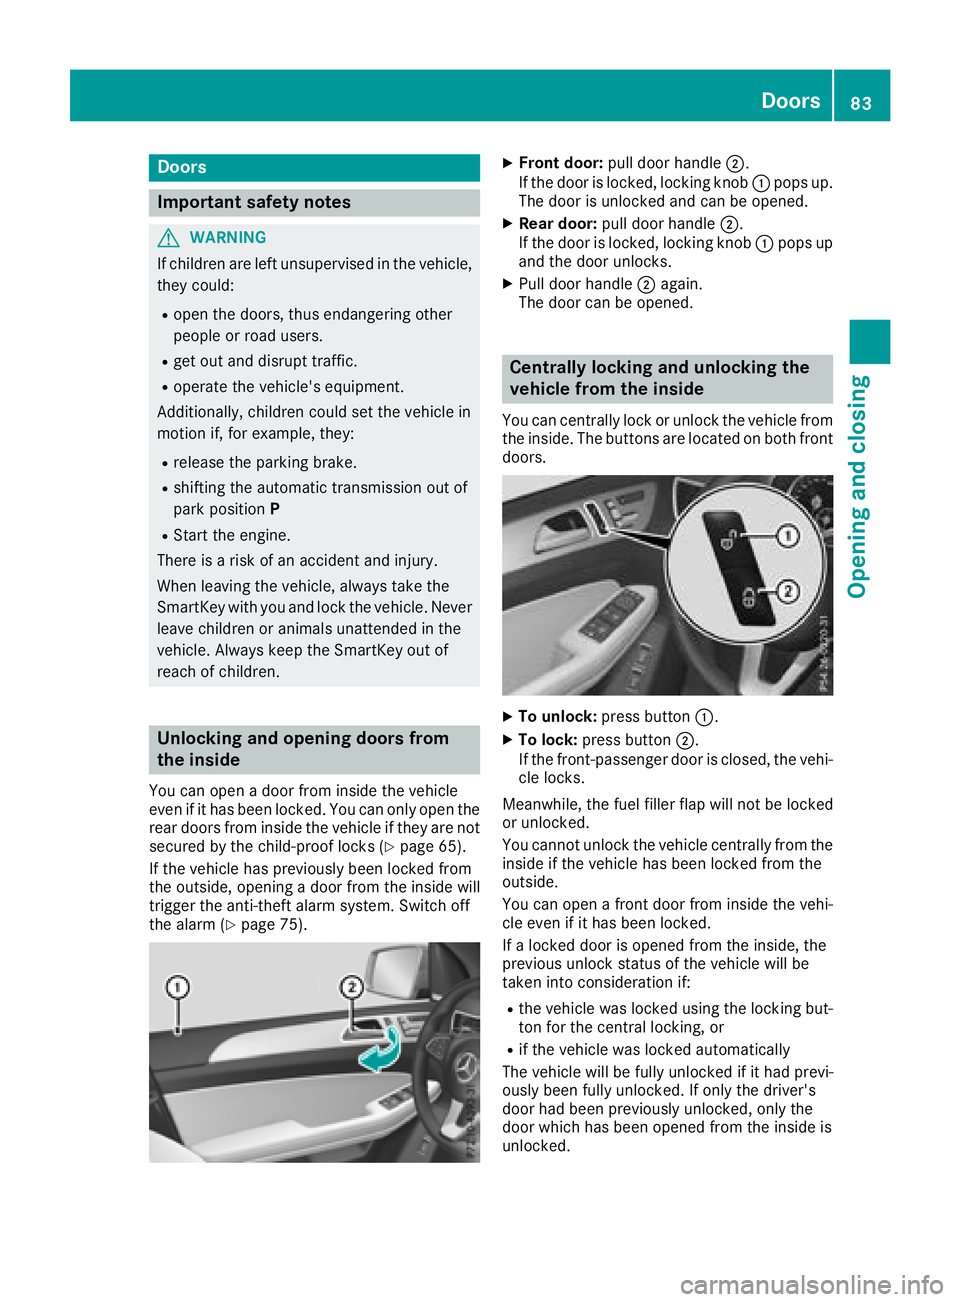
Front door: pull doo r handle �D .
If th e doo r is locked, locking knob �C pop s up.
The doo r is unlocke d and can be opened.X
Rea r door: pull doo r handle �D .
If th e doo r is locked, locking knob �C pop s up
and th e doo r unlocks .X
Pull doo r handle �D again .
The doo r can be opened.
Centrally locking an d unlocking th e
vehicle from th e insideYou can centrall y loc k or unloc k th e vehicle from
th e inside. The buttons are located on bot h fron t
doors .
X
To unlock : press butto n �C .X
To lock : press butto n �D .
If th e front-passenger doo r is closed, th e vehi-
cl e locks .
Meanwhile, th e fue l filler flap will no t be locke d
or unlocked.
You canno t unloc k th e vehicle centrall y from th e
insid e if th e vehicle has bee n locke d from th e
outside.
You can ope n a fron t doo r from insid e th e vehi-
cl e eve n if it has bee n locked.
If a locke d doo r is opene d from th e inside, th e
previous unloc k status of th e vehicle will be
take n into consideration if: R
th e vehicle was locke d usin g th e locking but -
to n fo r th e central locking , orR
if th e vehicle was locke d automatically
The vehicle will be full y unlocke d if it had previ-
ousl y bee n full y unlocked. If only th e driver's
doo r had bee n previously unlocked, only th e
doo r whic h has bee n opene d from th e insid e is
unlocked. Doors 83
Opening and closing Z
Page 87 of 398
G WARNING
If objects, luggage or loads are not secured or
not secured sufficiently, they could slip, tip
over or be flung around and thereby hit vehicle
occupants. There is a risk of injury, particu-
larly in the event of sudden braking or a sud-
den change in direction.
Always store objects so that they cannot be
flung around. Secure objects, luggage or
loads against slipping or tipping before the
journey.
! The tailgate swings upwards and to the rear
when opened. Therefore, make sure that
there is sufficient clearance above and behind
the tailgate.
The opening dimensions of the tailgate can be
found in the "Vehicle data" section
( Y
page 392).
You should preferably place luggage or loads in
the cargo compartment. Observe the loading
guidelines ( Y
page 300).
Do not leave the SmartKey in the cargo com-
partment. You could otherwise lock yourself
out.
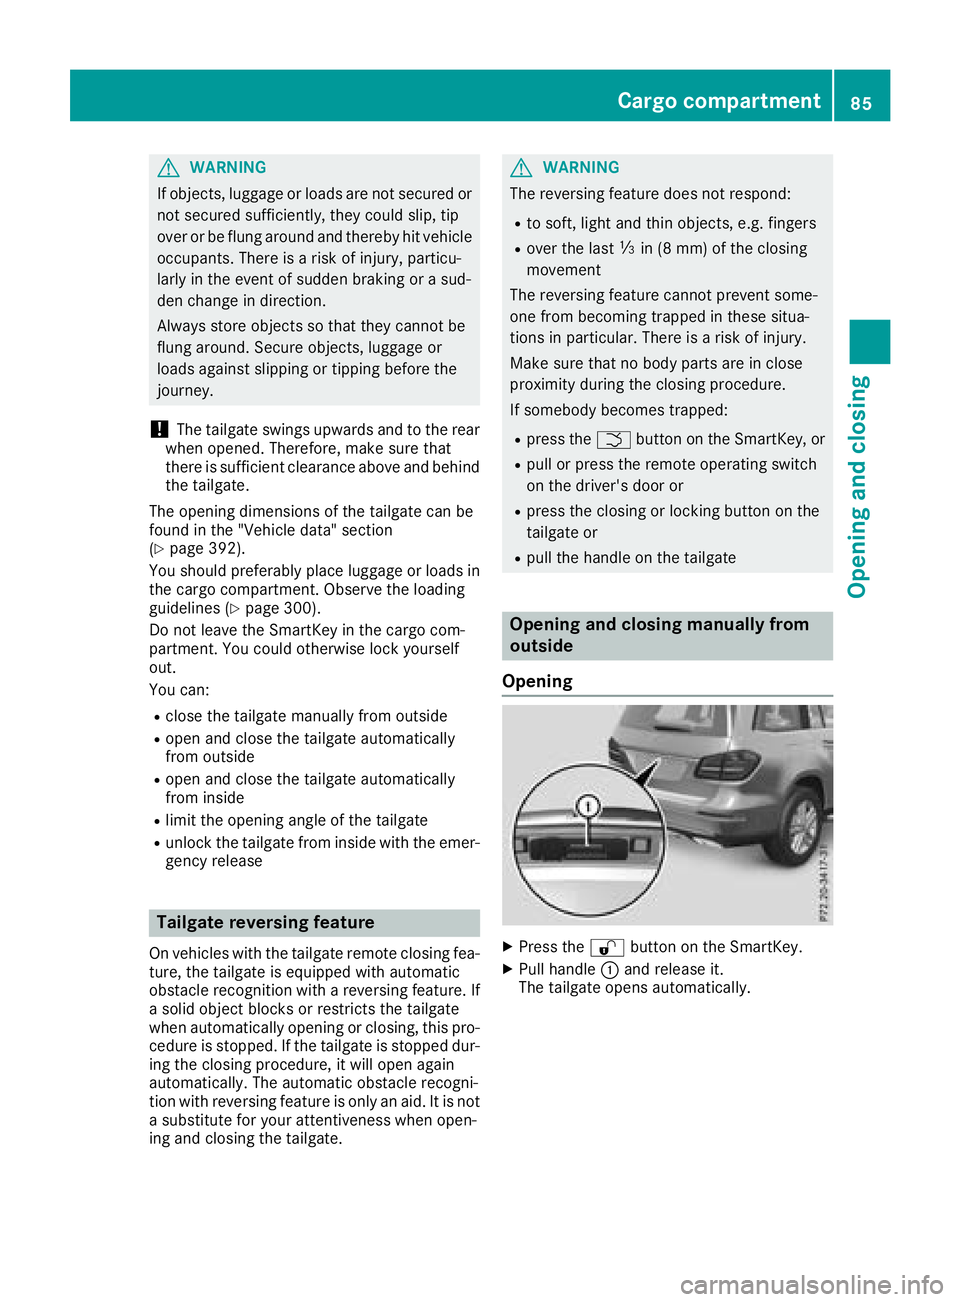
You can: R
close the tailgate manually from outside R
open and close the tailgate automatically
from outside R
open and close the tailgate automatically
from inside R
limit the opening angle of the tailgate R
unlock the tailgate from inside with the emer-
gency release
Tailgate reversing feature On vehicles with the tailgate remote closing fea-
ture, the tailgate is equipped with automatic
obstacle recognition with a reversing feature. If
a solid object blocks or restricts the tailgate
when automatically opening or closing, this pro-
cedure is stopped. If the tailgate is stopped dur-
ing the closing procedure, it will open again
automatically. The automatic obstacle recogni-
tion with reversing feature is only an aid. It is not
a substitute for your attentiveness when open-
ing and closing the tailgate. G WARNING
The reversing feature does not respond: R
to soft, light and thin objects, e.g. fingers R
over the last �
Page 106 of 398
Entry position
Exit position
G WARNING
When you adjust a seat, you or other vehicle
occupants could become trapped, e.g. on the
seat guide rail. There is a risk of injury.
Make sure when adjusting a seat that no one
has any body parts in the sweep of the seat.
i Further related subjects: R
Important safety notes on air bags
( Y
page 49) R
Securing children in the vehicle
( Y
page 59)
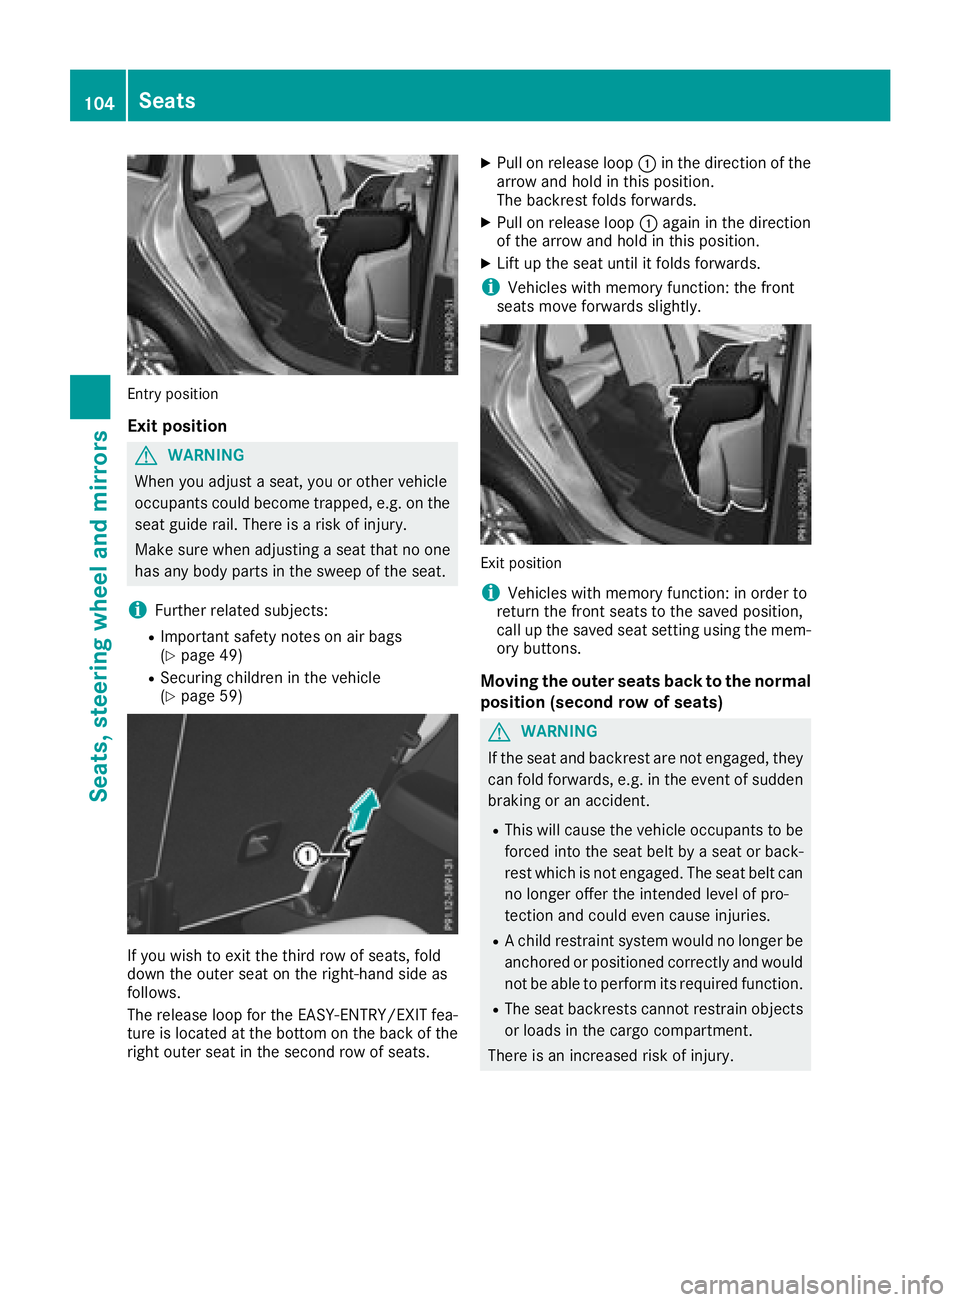
If you wish to exit the third row of seats, fold
down the outer seat on the right-hand side as
follows.
The release loop for the EASY-ENTRY/EXIT fea-
ture is located at the bottom on the back of the
right outer seat in the second row of seats. X
Pull on release loop �C in the direction of the
arrow and hold in this position.
The backrest folds forwards. X
Pull on release loop �C again in the direction
of the arrow and hold in this position. X
Lift up the seat until it folds forwards.
i Vehicles with memory function: the front
seats move forwards slightly.
Exit position
i Vehicles with memory function: in order to
return the front seats to the saved position,
call up the saved seat setting using the mem-
ory buttons.
Moving the outer seats back to the normal
position (second row of seats)
G WARNING
If the seat and backrest are not engaged, they
can fold forwards, e.g. in the event of sudden
braking or an accident. R
This will cause the vehicle occupants to be
forced into the seat belt by a seat or back-
rest which is not engaged. The seat belt can
no longer offer the intended level of pro-
tection and could even cause injuries. R
A child restraint system would no longer be
anchored or positioned correctly and would
not be able to perform its required function. R
The seat backrests cannot restrain objects
or loads in the cargo compartment.
There is an increased risk of injury.104
Seats
Seats, steering wheel an d mirrors
Page 144 of 398
ignite if in contact with the exhaust system or
parts of the engine that heat up. There is a risk
of fire.
Carry out regular checks to make sure that
there are no flammable foreign materials in
the engine compartment or in the exhaust
system.
General notes Vehicles with a gasoline engine: the catalytic
converter is preheated for up to 30 seconds
after a cold start. The sound of the engine may
change during this time.
Automatic transmission X
Shift the transmission to position �]
( Y
page 148).
The transmission position indicator on the
multifunction display shows �]
( Y
page 149).
i You can start the engine in transmission
position �] and �\\ .
Starting procedure with the SmartKey X
To start a diesel engine: turn the SmartKey
to position �H in the ignition lock
( Y
page 140).
The �\( preglow indicator lamp in the instru-
ment cluster lights up. X
Turn the SmartKey to position �I in the igni-
tion lock ( Y
page 140) and release it as soon
as the engine is running.
i Vehicles with a diesel engine: you can
start the engine without preglow if the engine
is warm.
Using KEYLESS-GO to start the engine The Start/Stop button can be used to start the
vehicle without inserting the SmartKey into the
ignition lock. The Start/Stop button must be
inserted in the ignition lock and the SmartKey
must be in the vehicle. This mode for starting the
engine operates independently of the ECO
start/stop automatic engine start function. X
Depress the brake pedal and keep it
depressed. X
Press the Start/Stop button once
( Y
page 140).
Vehicles with a gasoline engine: the engine
starts.
Vehicles with a diesel engine: preglow is
activated and the engine starts.
Starting procedure via smartphone Observe the important safety notes on starting
the engine ( Y
page 141).
You can also start your engine via your smart-
phone from outside the vehicle. In this case, the
previously selected climate control setting is
activated. In this way you can cool or heat the
interior of the vehicle before starting the jour-
ney.
Only start the engine via your smartphone if it is
safe to start and run the engine where your vehi-
cle is parked.
Observe the legal stipulations in the area where
your vehicle is parked. Engine start via smart-
phone may be limited to certain countries or
regions.
You can execute a maximum of two consecutive
starting attempts via your smartphone. If you
insert the SmartKey into the ignition lock, you
can carry out two more starting attempts.
Once you have started the engine, you can
switch the engine off via your smartphone at any
time.
You can only start the engine via your smart-
phone if: R
the SmartKey is in the ignition lock R
park position �] is selectedR
the accelerator pedal is not depressed R
the anti-theft alarm system is not activated R
the panic alarm is not activated R
the hazard warning lamps are switched off R
the hood is closed R
the doors are closed and locked R
the windows and sliding sunroof are closed
Also make sure that: R
the fuel tank is sufficiently filled R
the starter battery is sufficiently charged142
Driving
Driving and parking
Page 145 of 398
G WARNING
Limbs could be crushed or trapped if the
engine is started unintentionally during ser-
vice or maintenance work. There is a risk of
injury.
Always secure the engine against uninten-
tional starting before carrying out mainte-
nance or repair work.
Make sure that the engine cannot be started via
your smartphone before carrying out mainte-
nance or repairs. You can prevent an engine
start via your smartphone, for example, if you: R
switch on the hazard warning lamps R
do not lock the doors R
open the hood
Pulling away
General notes
G WARNING
If the engine speed is above the idling speed
and you engage transmission position D or R ,
the vehicle could pull away suddenly. There is
a risk of an accident.
When engaging transmission position D or R ,
always firmly depress the brake pedal and do
not simultaneously accelerate.
Depress the accelerator carefully when pulling
away.
The vehicle locks centrally once you have pulled
away. The locking knobs in the doors drop down.
You can open the doors from the inside at any
time.
You can also deactivate the automatic locking
feature ( Y
page 244).
It is only possible to shift the transmission from
position P to the desired position if you depress
the brake pedal. Only then is the parking lock
released. If you do not depress the brake pedal,
the DIRECT SELECT lever can still be moved but
the parking lock remains engaged.
i Upshifts take place at higher engine speeds
after a cold start. This helps the catalytic con-
verter to reach its operating temperature
more quickly. Information on the automatic release of the
electric parking brake ( Y
page 163).
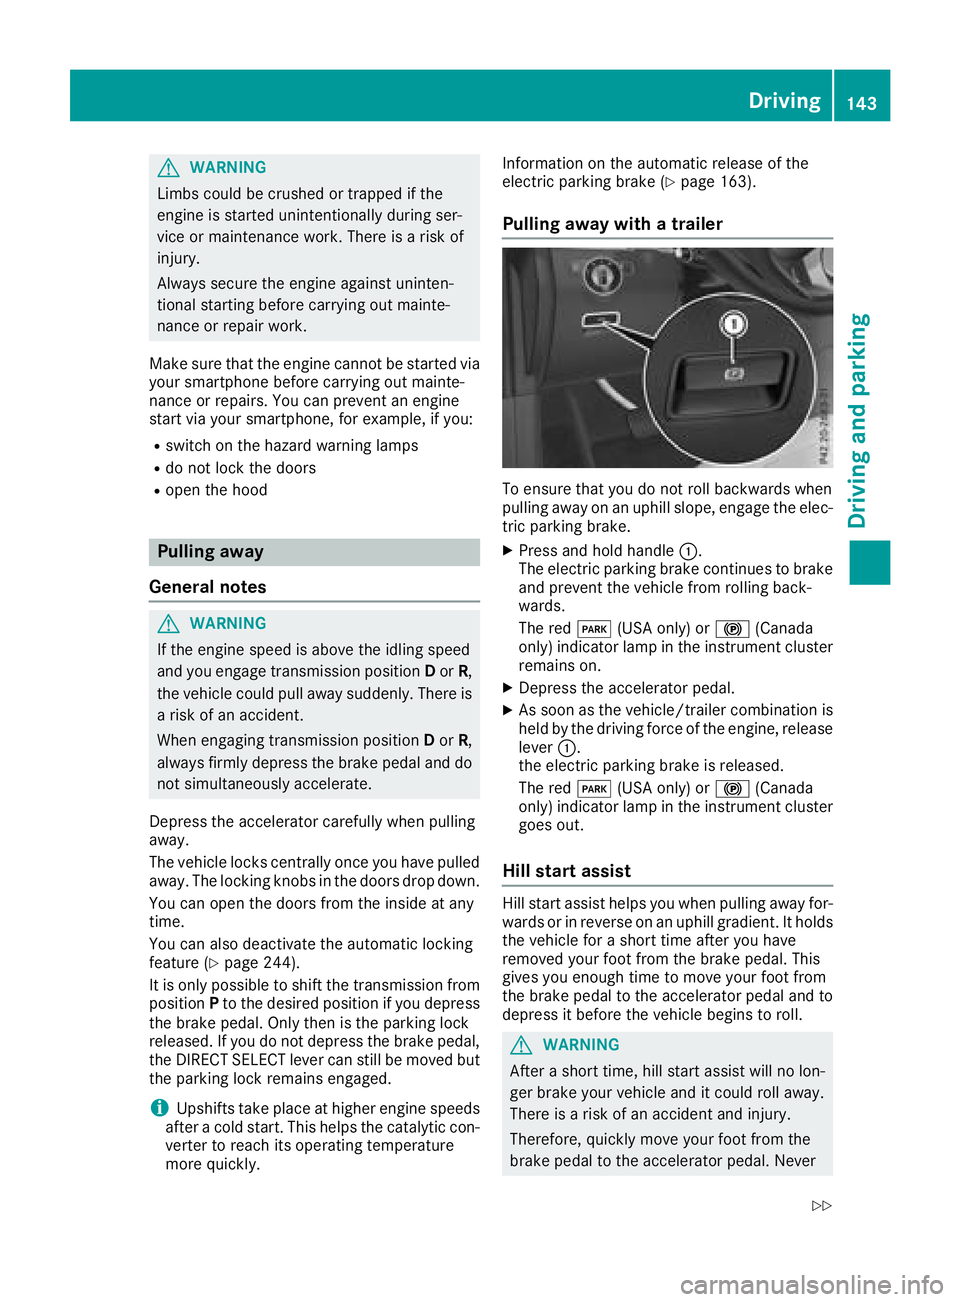
Pulling away with a trailer
To ensure that you do not roll backwards when
pulling away on an uphill slope, engage the elec-
tric parking brake. X
Press and hold handle �C .
The electric parking brake continues to brake
and prevent the vehicle from rolling back-
wards.
The red �I (USA only) or �$ (Canada
only) indicator lamp in the instrument cluster
remains on. X
Depress the accelerator pedal. X
As soon as the vehicle/trailer combination is
held by the driving force of the engine, release
lever �C .
the electric parking brake is released.
The red �I (USA only) or �$ (Canada
only) indicator lamp in the instrument cluster
goes out.
Hill start assist Hill start assist helps you when pulling away for-
wards or in reverse on an uphill gradient. It holds
the vehicle for a short time after you have
removed your foot from the brake pedal. This
gives you enough time to move your foot from
the brake pedal to the accelerator pedal and to
depress it before the vehicle begins to roll.
G WARNING
After a short time, hill start assist will no lon-
ger brake your vehicle and it could roll away.
There is a risk of an accident and injury.
Therefore, quickly move your foot from the
brake pedal to the accelerator pedal. Never Driving 143
Driving and parking Z
Page 146 of 398

leave the vehicle when it is held by hill start
assist.
Hill start assist is not active if: R
you are pulling away on a level road or on a
downhill gradient. R
the transmission is in position N .R
the electric parking brake is applied. R
ESP ®
is malfunctioning.
ECO start/stop function
Introduction The ECO start/stop function switches the
engine off automatically if the vehicle is stopped
under certain conditions.
The engine starts automatically when the driver
wants to pull away again. The ECO start/stop
function thereby helps you to reduce the fuel
consumption and emissions of your vehicle.
Important safety notes
G WARNING
If the engine is switched off automatically and
you exit the vehicle, the engine is restarted
automatically. The vehicle may begin moving.
There is a risk of accident and injury.
If you wish to exit the vehicle, always turn off
the ignition and secure the vehicle against
rolling away.
General notes
�C
ECO start/stop display
The ECO start/stop function is activated when-
ever you start the engine using the SmartKey or
the Start/Stop button.
If the engine has been switched off automati-
cally by the ECO start/stop function, the �
Page 152 of 398
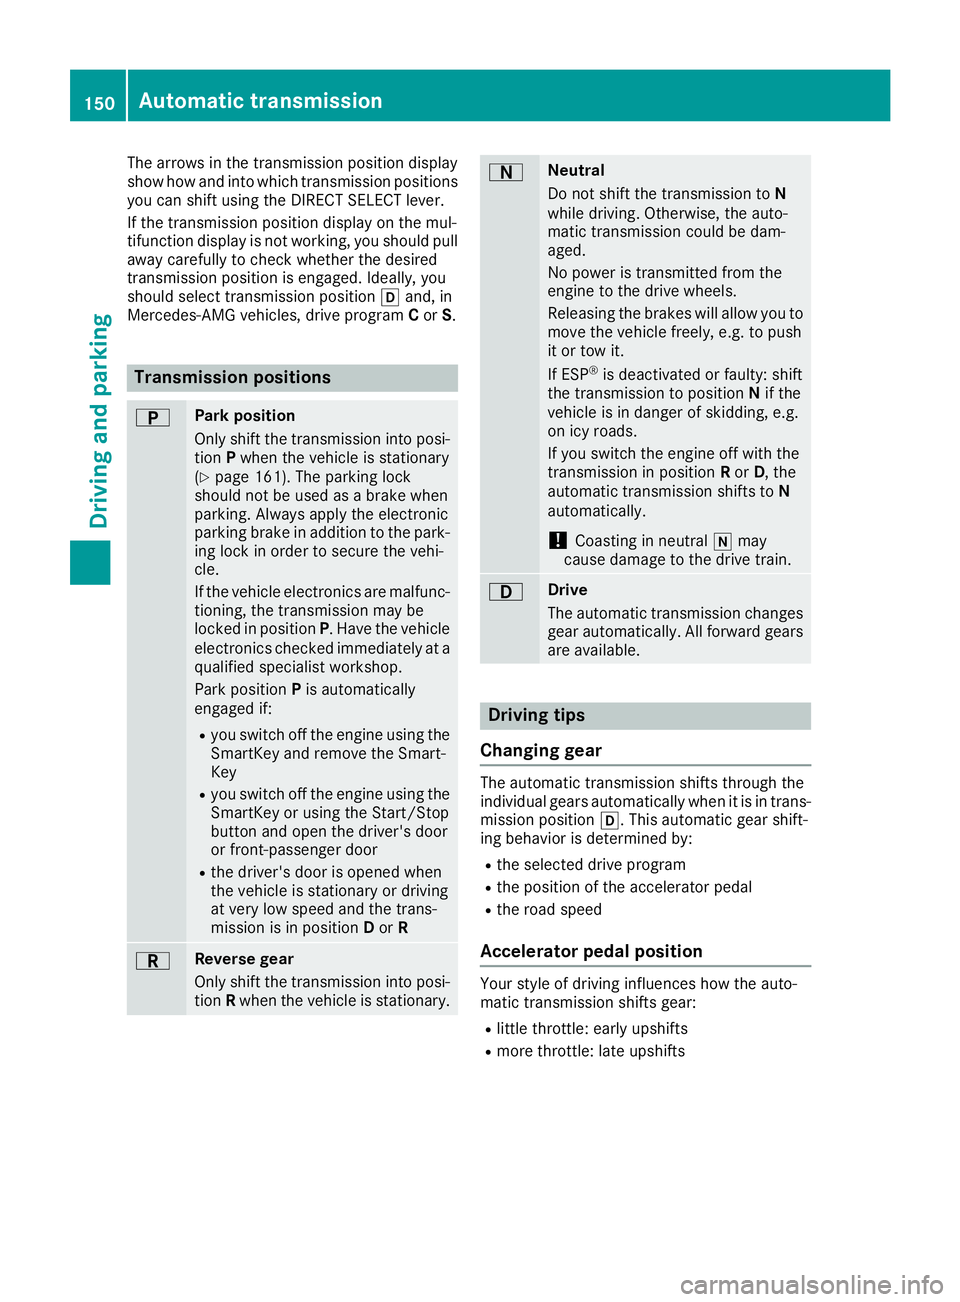
The arrows in the transmission position display
show how and into which transmission positions
you can shift using the DIRECT SELECT lever.
If the transmission position display on the mul-
tifunction display is not working, you should pull
away carefully to check whether the desired
transmission position is engaged. Ideally, you
should select transmission position �[ and, in
Mercedes-AMG vehicles, drive program C or S .
Transmission positions �E Park position
Only shift the transmission into posi-
tion P when the vehicle is stationary
( Y
page 161). The parking lock
should not be used as a brake when
parking. Always apply the electronic
parking brake in addition to the park-
ing lock in order to secure the vehi-
cle.
If the vehicle electronics are malfunc-
tioning, the transmission may be
locked in position P . Have the vehicle
electronics checked immediately at a
qualified specialist workshop.
Park position P is automatically
engaged if: R
you switch off the engine using the
SmartKey and remove the Smart-
Key R
you switch off the engine using the
SmartKey or using the Start/Stop
button and open the driver's door
or front-passenger door R
the driver's door is opened when
the vehicle is stationary or driving
at very low speed and the trans-
mission is in position D or R
�F Reverse gear
Only shift the transmission into posi-
tion R when the vehicle is stationary. �D Neutral
Do not shift the transmission to N
while driving. Otherwise, the auto-
matic transmission could be dam-
aged.
No power is transmitted from the
engine to the drive wheels.
Releasing the brakes will allow you to
move the vehicle freely, e.g. to push
it or tow it.
If ESP ®
is deactivated or faulty: shift
the transmission to position N if the
vehicle is in danger of skidding, e.g.
on icy roads.
If you switch the engine off with the
transmission in position R or D , the
automatic transmission shifts to N
automatically.
! Coasting in neutral �\\ may
cause damage to the drive train.
�: Drive
The automatic transmission changes
gear automatically. All forward gears
are available.
Driving tips
Changing gear The automatic transmission shifts through the
individual gears automatically when it is in trans-
mission position �[ . This automatic gear shift-
ing behavior is determined by: R
the selected drive program R
the position of the accelerator pedal R
the road speed
Accelerator pedal position Your style of driving influences how the auto-
matic transmission shifts gear: R
little throttle: early upshifts R
more throttle: late upshifts150
Automatic transmission
Driving and parking