2018 MERCEDES-BENZ GLE SUV trailer
[x] Cancel search: trailerPage 19 of 398
Function/notes ............................. 187
Important safety notes .................. 187
Problems (malfunctions) ................ 190
Sensor range .................................188
Towing a trailer .............................. 187
Warning display ............................. 189
Parking assistance
see Driving system
Parking brake
Applying automatically ................... 158
Applying or releasing manually ...... 158
Display message ............................ 246
Electric parking brake .................... 157
Emergency braking ........................ 159
General notes ................................ 157
Releasing automatically ................. 158
Warning lamp ................................. 282
Parking lamps
Switching on/off ........................... 111
Parking Pilot
Canceling ....................................... 194
Detecting parking spaces .............. 191
Display Message ............................ 264
Exiting a parking space .................. 193
Function/notes ............................. 190
Important safety notes .................. 190
Parking .......................................... 192
PASSENGER AIR BAG
Display message ............................ 253
Indicator lamps ................................ 45
Problem (malfunction) ................... 253
Pets in the vehicle ............................... 65
Phone book
see also Digital Operator's Man-
ual .................................................. 287
Plastic trim (cleaning instruc-
tions) .................................................. 331
Power locks ......................................... 84
Power washers .................................. 327
Power windows
see Side windows
PRE-SAFE
®(anticipatory occupant
protection)
Display message ............................ 250
Operation ......................................... 58 PRE-SAFE
®PLUS (anticipatory
occupant protection PLUS)
Display message ............................ 250
Operation ......................................... 59
Protection against theft
ATA (Anti-Theft Alarm system) ......... 75
Immobilizer ...................................... 75
Protection of the environment
General notes .................................. 27
Pulling away
Automatic transmission ................. 138
General note
s ................................ 138
Hill start assist ............................... 139
Trailer ............................................ 138
Q
QR code
Mercedes-Benz Guide App ................. 1
Rescue card ..................................... 32
Qualified specialist workshop ........... 31
R
RACE TIMER (on-board computer,
Mercedes-AMG vehicles).................. 241
Radiator cover ................................... 322
Radio
Selecting a station ......................... 234
Radio mode
see also Digital Operator's Man-
ual .................................................. 287
Radio-controlled devices (instal-
ling) ..................................................... 320
Radio-wave reception/transmis-
sion in the vehicle
Declaration of conformity ................ 30
Reading lamp ..................................... 114
Rear bench seat
Folding forwards/back .................. 299
Rear compartment
Setting the air vents ...................... 133
Setting the temperature ................ 128
Rear fog lamp
Display message ............................ 255
Switching on/off ........................... 111
Rear Seat Entertainment System
AUX jacks ...................................... 294
Index17
Page 23 of 398

TailgateDisplay message ............................ 271
Emergency unlocking ....................... 88
Important safety notes .................... 84
Limiting the opening angle ............... 88
Opening dimensions ...................... 390
Opening/closing (automatically
from inside) ...................................... 87
Opening/closing (automatically
from outside) ................................... 86
Opening/closing (from outside) ....... 85
Power closing .................................. 84
Tank
see Fuel tank
Tank content
Fuel gauge ....................................... 37
Technical data
Capacities ...................................... 383
Information .................................... 381
Tires/wheels ................................. 376
Trailer loads ................................... 394
Vehicle data ................................... 390
Telephone
Accepting a call (multifunction
steering wheel) .............................. 235
Authorizing a mobile phone (con-
necting) ......................................... 291
Authorizing a mobile phone via the
device manager (connecting) ......... 292
Connecting a mobile phone
(device manager) ........................... 292
Connecting a mobile phone (gen-
eral information) ............................ 291
Display message ............................ 272
Menu (on-board computer) ............ 235
Number from the phone book ........ 235
Redialing ........................................ 235
Rejecting/ending a call ................. 235
see also Digital Operator's Man-
ual .................................................. 287
Temperature
Coolant (display in the instrument
cluster) .......................................... 229
Coolant (on-board computer,
Mercedes-AMG vehicles) ............... 240
Engine oil (on-board computer,
Mercedes-AMG vehicles) ............... 240
Outside temperature ...................... 228 Setting (climate control) ................ 128
Transmission oil (on-board com-
puter, Mercedes-AMG vehicles) ..... 240
Through-loading feature ................... 298
Timing (
RACETIMER) ......................... 241
Tire pressure
Calling up (on-board computer) ..... 358
Checking manually ........................ 357
Display message ............................ 268
Maximum ....................................... 357
Not reached (TIREFIT) .................... 338
Notes ............................................. 356
Reached (TIREFIT) .......................... 339
Recommended ............................... 354
Tire pressure loss warning system
General notes ................................ 357
Important safety notes .................. 358
Restarting ...................................... 358
Tire pressure monitor
Checking the tire pressure elec-
tronically ........................................ 360
Function/notes ............................. 358
General notes ................................ 358
Important safety notes .................. 359
Radio type approval for the tire
pressure monitor ........................... 361
Restarting ...................................... 361
Warning lamp ................................. 286
Warning message .......................... 360
Tire pressure table ............................ 355
TIREFIT kit
Important safety notes .................. 337
Storage location ............................ 335
Tire pressure not reached .............. 338
Tire pressure reached .................... 339
Using ............................................. 337
Tires
Aspect ratio (definition) ................. 370
Average weight of the vehicle
occupants (definition) .................... 369
Bar (definition) ............................... 369
Changing a wheel .......................... 371
Characteristics .............................. 369
Checking ........................................ 351
Curb weight (definition) ................. 370
Definition of terms ......................... 369
Direction of rotation ...................... 372
Display message ............................ 268
Index21
Page 24 of 398

Distribution of the vehicle occu-
pants (definition) ............................ 371
DOT (Department of Transporta-
tion) (definition) ............................. 369
DOT, Tire Identification Number
(TIN) ............................................... 368
GAWR (Gross Axle Weight Rating)
(definition) .....................................369
GTW (Gross Trailer Weight) (defi-
nition) ............................................ 370
GVW (Gross Vehicle Weight) (def-
inition) ...........................................3 70
GVWR (Gross Vehicle Weight Rat-
ing) (definition) .............................. 370
Important safety notes .................. 351
Increased vehicle weight due to
optional equipment (definition) ...... 369
Information on driving .................... 351
Kilopascal (kPa) (definition) ........... 370
Labeling (overview) ........................ 366
Load bearing index (definition) ...... 371
Load index ..................................... 368
Load index (definition) ................... 370
M+S tires ....................................... 353
Maximum load on a tire (defini-
tion) ............................................... 370
Maximum loaded vehicle weight
(definition) ..................................... 370
Maximum permissible tire pres-
sure (definition) ............................. 370
Maximum tire load ......................... 368
Maximum tire load (definition) ....... 370
MOExtended tires .......................... 353
Optional equipment weight (defi-
nition) ............................................ 371
PSI (pounds per square inch) (def-
inition) ........................................... 370
Replacing ....................................... 371
Service life ..................................... 352
Sidewall (definition) ....................... 371
Snow chains .................................. 353
Speed rating (definition) ................ 370
Storing ........................................... 372
Structure and characteristics
(definition) ..................................... 369
Summer tires in winter .................. 353
Temp
erature .................................. 365 TIN (Tire Identification Number)
(definition) ..................................... 371
Tire bead (definition) ...................... 370
Tire pressure (definition) ................ 370
Tire pressures (recommended) ...... 369
Tire size (data) ............................... 376
Tire size designation, load-bearing
capacity, speed rating .................... 366
Tire tread ....................................... 352
Tire tread (definition) ..................... 370
Total load limit (definition) ............. 371
Traction ......................................... 365
Traction (definition) ....................... 371
Tread wear ..................................... 365
TWR (permissible trailer drawbar
noseweight) (definition) ................. 371
Uniform Tire Quality Grading
Standards ...................................... 364
Uniform Tire Quality Grading
Standards (definition) .................... 369
Wear indicator (definition) ............. 371
Wheel and tire combination ........... 376
Wheel rim (definition) .................... 369
see Flat tire
Top Tether ............................................ 62
Tow-starting
Emergency engine starting ............ 348
Important safety notes .................. 345
Towing a trailer
Axle load, permissible .................... 394
Cleaning the trailer tow hitch ......... 331
Coupling up a trailer ...................... 222
Decoupling a trailer ....................... 224
Driving tips .................................... 220
Important safety notes .................. 219
Installing the ball coupling ............. 221
Lights display message .................. 255
Mounting dimensions .................... 394
Parking Assist PARKTRONIC .......... 187
Power supply ................................. 225
Pulling away with a trailer .............. 138
Removing the ball coupling ............ 224
Trailer loads ................................... 394
Towing away
Important safety guidelines ........... 345
Insta
lling the towing eye ................ 346
Notes for 4MATIC vehicles ............ 348
Removing the towing eye ............... 346
22Index
Page 25 of 398

Transporting the vehicle ................347
With both axles on the ground ....... 346
Towing eye ......................................... 335
Traffic reports
see also Digital Operator's Man-
ual ..................................................2 87
Traffic Sign Assist
Activating/deactivating the warn-
ing function ....................................2 36
Display message ............................ 263
Function/notes .............................2 03
Important safety notes .................. 204
Instrument cluster display ............. 204
Trailer coupling
see Towing a trailer
Trailer loads and drawbar nose-
weights ............................................... 224
Trailer towing
Active Blind Spot Assist ................. 210
Active Lane Keeping Assist ............ 213
Blind Spot Assist ............................ 206
Permissible trailer loads and
drawbar noseweights ..................... 224
Transfer case ..................................... 150
Transmission
see Automatic transmission
Transmission position display ......... 145
Transporting the vehicle .................. 347
Traveling uphill
Brow of hill ..................................... 169
Driving downhill .............................1 69
Maximum gradient-climbing capa-
bility ............................................... 168
Trim pieces (cleaning instruc-
tions) ..................................................3 32
Trip computer (on-board com-
puter) ..................................................2 31
Trip odometer
Calling up ....................................... 231
Resetting (on-board computer) ...... 232
Trunk
see Tailgate
Turn signals
Display message ............................ 255
Replacing bulbs (front) ................... 117
Switching on/off ........................... 111 Two-way radio
Frequencies ................................... 381
Installation ..................................... 381
Transmission output (maximum) .... 381
TWR (Tongue Weight Rating) (defi-
nition) ................................................. 371
Type identification plate
see Vehicl e i
dentification plate
U
Unlocking
Emergency unlocking ....................... 84
From inside the vehicle (central
unlocking button) ............................. 83
Upshift indicator (on-board com-
puter, Mercedes-AMG vehicles) ....... 240
USB devices
Connecting to the Media Inter-
face ............................................... 294
V
Vanity mirror (in the sun visor) ........ 306
Vehicle
Correct use ...................................... 31
Data acquisition ............................... 32
Display message ............................ 270
Equipment ....................................... 28
Individual settings .......................... 238
Limited Warranty ............................. 32
Loading .......................................... 361
Locking (in an emergency) ............... 84
Locking (SmartKey) .......................... 77
Lowering ........................................ 375
Maintenance .................................... 29
Operating safety .............................. 30
Parking .......................................... 156
Parking for a long period ................ 159
Pulling away ................................... 138
Raising ........................................... 373
Reporting problems ......................... 31
Securing from rolling away ............ 372
Towing away .................................. 345
Transporting .................................. 347
Unlocking (in an emergency) ........... 84
Unlocking (SmartKey) ...................... 77
Vehicle data ................................... 390
Index23
Page 113 of 398
The daytime running lamps improve the visibility
of your vehicle during the day. To do this, the
daytime running lamps function must be
switched on using the on-board computer
(
Ypage 238).
If the engine is running and you turn the light
switch to TorL, the manual settings
take precedence over the daytime running
lamps.
Low-beam headlamps
Even if the light sensor does not detect that it is
dark, the parking lamps and low-beam head-
lamps switch on when the ignition is switched on and the light switch is set to the Lposition.
This is a particularly useful function in the event
of rain and fog.
XTo switch on the low-beam headlamps:
turn the SmartKey to position 2in the igni-
tion lock or start the engine.
XTurn the light switch to L.
The green Lindicator lamp in the instru-
ment cluster lights up.
Rear fog lamp
The rear fog lamp improves visibility of your
vehicle for the traffic behind in the event of thick
fog. Please take note of the country-specific
regulations for the use of rear fog lamps.
XTo switch on the rear fog lamp: turn the
SmartKey to position 2in the ignition lock or
start the engine.
XTurn the light switch to Lorc.
XPress the Rbutton.
The yellow Rindicator lamp in the instru-
ment cluster lights up.
XTo switch off the rear fog lamp: press the
R button.
The yellow Rindicator lamp in the instru-
ment cluster goes out.
Parking lamps
!If the battery charge is very low, the parking
lamps or standing lamps are automatically
switched off to enable the next engine start.
Always park your vehicle safely and in a well lit
area, in accordance with the relevant legal
stipulations. Avoid using the Tparking
lamps over a period of several hours. If pos-
sible, switch on the right-hand Xor left-
hand W standing lamps.
XTo switch on: turn the light switch to T.
The green Tindicator lamp in the instru-
ment cluster lights up.
Standing lamps
Switching on the standing lamps ensures the
corresponding side of the vehicle is illuminated.
XTo switch on the standing lamps: the
SmartKey should not be in the ignition lock or
in key position uin the ignition lock.
XTurn the light switch to W(left-hand side of
the vehicle) or X(right-hand side of the
vehicle).
Vehicles towing a trailer: both the right-hand
and left-hand standing lamps (tail lamps) are
always illuminated on the trailer.
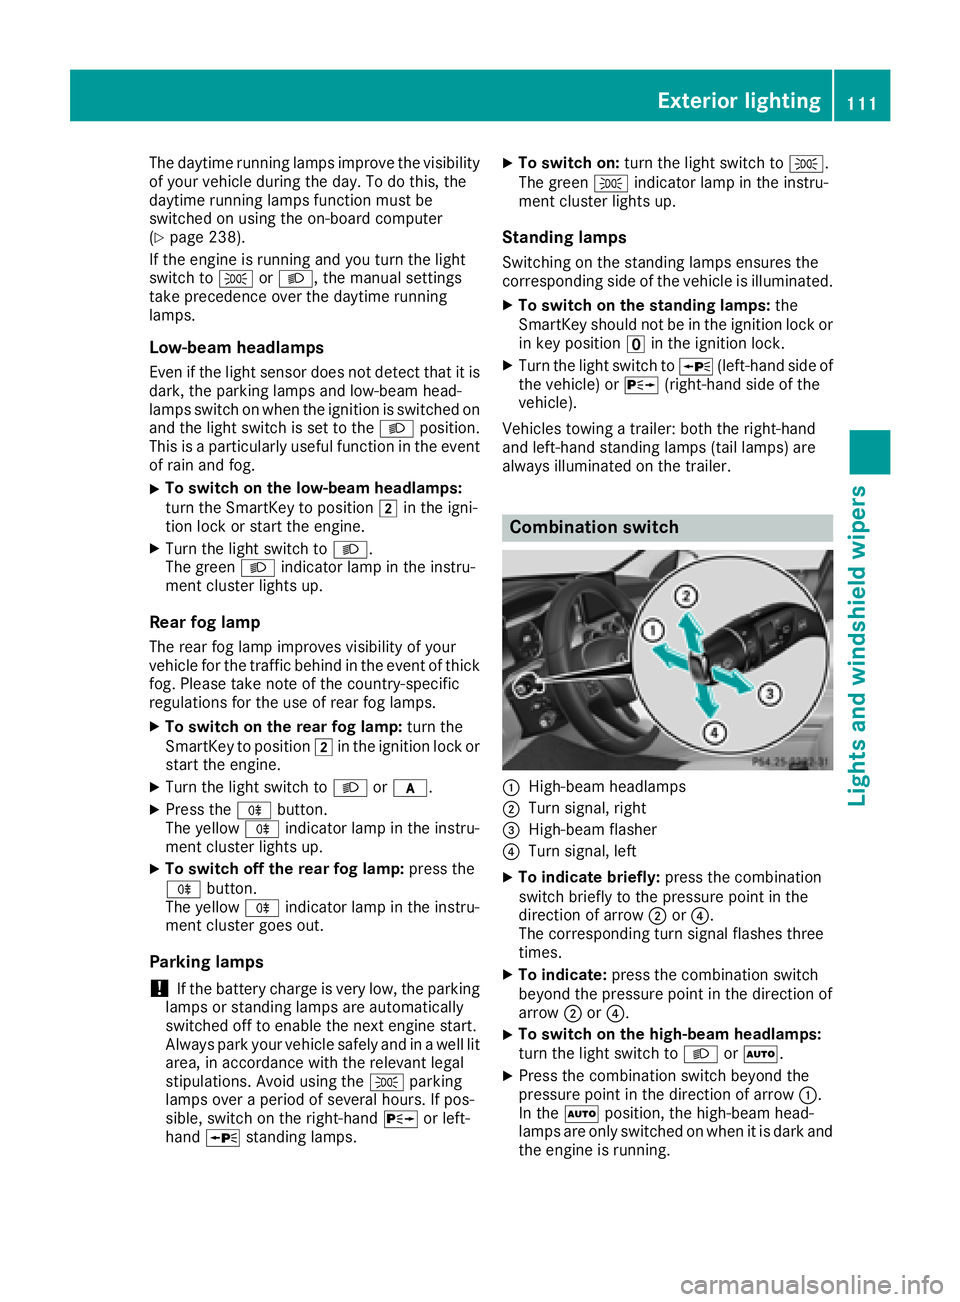
Combination switch
:High-beam headlamps
;Turn signal, right
=High-beam flasher
?Turn signal, left
XTo indicate briefly: press the combination
switch briefly to the pressure point in the
direction of arrow ;or?.
The corresponding turn signal flashes three
times.
XTo indicate: press the combination switch
beyond the pressure point in the direction of
arrow ;or?.
XTo switch on the high-beam headlamps:
turn the light switch to LorÃ.
XPress the combination switch beyond the
pressure point in the direction of arrow :.
In the Ãposition, the high-beam head-
lamps are only switched on when it is dark and
the engine is running.
Exterior lighting111
Lights and windshield wipers
Z
Page 140 of 398
You can execute a maximum of two consecutive
starting attempts via your smartphone. If you
insert the SmartKey into the ignition lock, you
can carry out two more starting attempts.
Once you have started the engine, you can
switch the engine off via your smartphone at any
time.
You can only start the engine via your smart-
phone if:
Rthe SmartKey is in the ignition lock
Rpark positionjis selected
Rthe accelerator pedal is not depressed
Rthe anti-theft alarm system is not activated
Rthe panic alarm is not activated
Rthe hazard warning lamps are switched off
Rthe hood is closed
Rthe doors are closed and locked
Rthe windows and sliding sunroof are closed
Also make sure that:
Rthe fuel tank is sufficiently filled
Rthe starter battery is sufficiently charged
GWARNING
Limbs could be crushed or trapped if the
engine is started unintentionally during ser-
vice or maintenance work. There is a risk of
injury.
Always secure the engine against uninten-
tional starting before carrying out mainte-
nance or repair work.
Make sure that the engine cannot be started via
your smartphone before carrying out mainte-
nance or repairs. You can prevent an engine
start via your smartphone, for example, if you:
Rswitch on the hazard warning lamps
Rdo not lock the doors
Ropen the hood
Pulling away
General notes
GWARNING
If the engine speed is above the idling speed
and you engage transmission position Dor R,
the vehicle could pull away suddenly. There is
a risk of an accident.
When engaging transmission position Dor R,
always firmly depress the brake pedal and do
not simultaneously accelerate.
Depress the accelerator carefully when pulling
away.
The vehicle locks centrally once you have pulled
away. The locking knobs in the doors drop down.
You can open the doors from the inside at any
time.
You can also deactivate the automatic locking
feature (
Ypage 239).
It is only possible to shift the transmission from
position Pto the desired position if you depress
the brake pedal. Only then is the parking lock
released. If you do not depress the brake pedal,
the DIRECT SELECT lever can still be moved but
the parking lock remains engaged.
iUpshifts take place at higher engine speeds
after a cold start. This helps the catalytic con-
verter to reach its operating temperature
more quickly.
Information on the automatic release of the
electric parking brake (
Ypage 158).
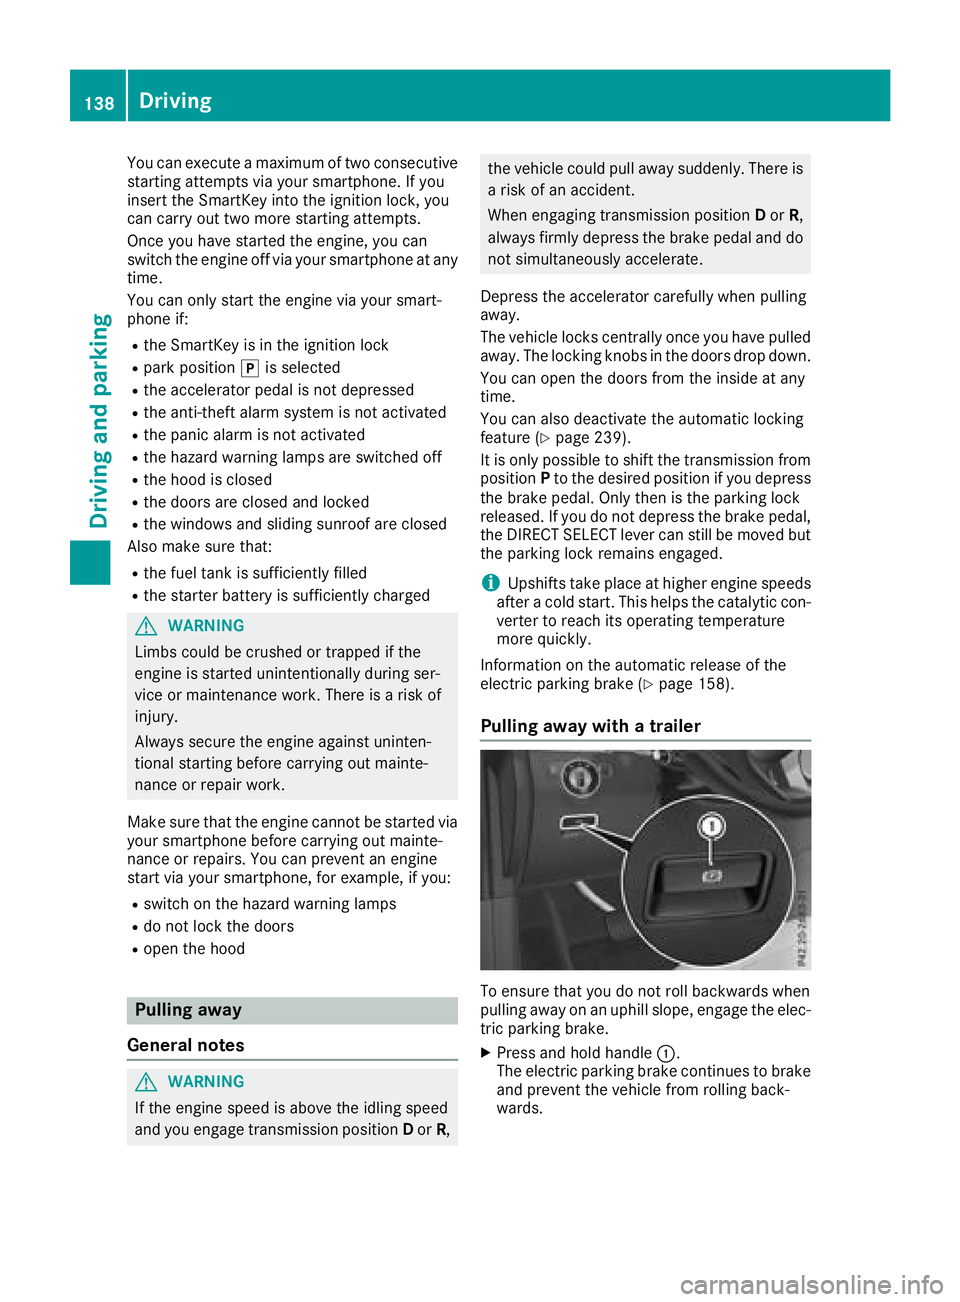
Pulling away with a trailer
To ensure that you do not roll backwards when
pulling away on an uphill slope, engage the elec-
tric parking brake.
XPress and hold handle :.
The electric parking brake continues to brake
and prevent the vehicle from rolling back-
wards.
138Driving
Driving and parking
Page 141 of 398
The redF(USA only) or !(Canada
only) indicator lamp in the instrument cluster
remains on.
XDepress the accelerator pedal.
XAs soon as the vehicle/trailer combination is
held by the driving force of the engine, release
lever :.
the electric parking brake is released.
The red F(USA only) or !(Canada
only) indicator lamp in the instrument cluster
goes out.
Hill start assist
Hill start assist helps you when pulling away for-
wards or in reverse on an uphill gradient. It holds
the vehicle for a short time after you have
removed your foot from the brake pedal. This
gives you enough time to move your foot from
the brake pedal to the accelerator pedal and to
depress it before the vehicle begins to roll.
GWARNING
After a short time, hill start assist will no lon-
ger brake your vehicle and it could roll away.
There is a risk of an accident and injury.
Therefore, quickly move your foot from the
brake pedal to the accelerator pedal. Never
leave the vehicle when it is held by hill start
assist.
Hill start assist is not active if:
Ryou are pulling away on a level road or on a
downhill gradient.
Rthe transmission is in position N.
Rthe electric parking brake is applied.
RESP®is malfunctioning.
ECO start/stop function
Introduction
Plug-in hybrid: observe the notes on the ECO
start/stop function in the separate Operator's
Manual.
The ECO start/stop function switches the
engine off automatically if the vehicle is stopped
under certain conditions.
The engine starts automatically when the driver
wants to pull away again. The ECO start/stop function thereby helps you to reduce the fuel
consumption and emissions of your vehicle.
Important safety notes
GWARNING
If the engine is switched off automatically and
you exit the vehicle, the engine is restarted
automatically. The vehicle may begin moving.
There is a risk of accident and injury.
If you wish to exit the vehicle, always turn off
the ignition and secure the vehicle against
rolling away.
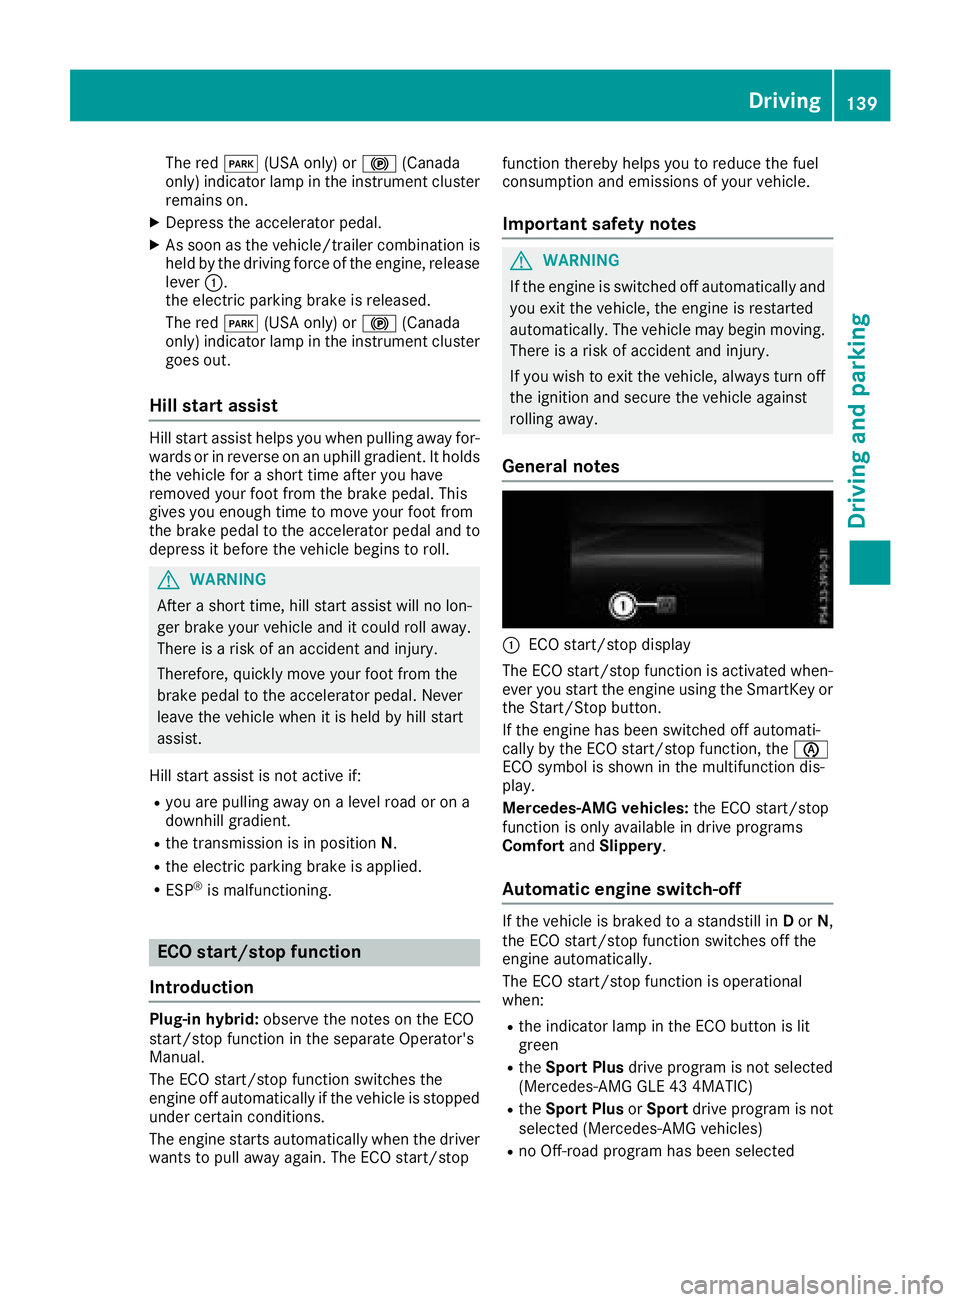
General notes
:ECO start/stop display
The ECO start/stop function is activated when-
ever you start the engine using the SmartKey or the Start/Stop button.
If the engine has been switched off automati-
cally by the ECO start/stop function, the è
ECO symbol is shown in the multifunction dis-
play.
Mercedes-AMG vehicles: the ECO start/stop
function is only available in drive programs
Comfort andSlippery .
Automatic engine switch-off
If the vehicle is braked to a standstill in Dor N,
the ECO start/stop function switches off the
engine automatically.
The ECO start/stop function is operational
when:
Rthe indicator lamp in the ECO button is lit
green
Rthe Sport Plus drive program is not selected
(Mercedes-AMG GLE 43 4MATIC)
Rthe Sport Plus orSport drive program is not
selected (Mercedes-AMG vehicles)
Rno Off-road program has been selected
Driving139
Driving and parking
Z
Page 148 of 398
ANeutral
Do not shift the transmission toN
while driving. Otherwise, the auto-
matic transmission could be dam-
aged.
No power is transmitted from the
engine to the drive wheels.
Releasing the brakes will allow you to
move the vehicle freely, e.g. to push
it or tow it.
If ESP
®is deactivated or faulty: shift
the transmission to position Nif the
vehicle is in danger of skidding, e.g.
on icy roads.
If you switch the engine off with the
transmission in position Ror D, the
automatic transmission shifts to N
automatically.
!Coasting in neutral imay
cause damage to the drive train.
7Drive
The automatic transmission changes
gear automatically. All forward gears
are available.
Driving tips
Changing gear
The automatic transmission shifts through the
individual gears automatically when it is in trans-
mission position h. This automatic gear shift-
ing behavior is determined by:
Rthe selected drive program
Rthe position of the accelerator pedal
Rthe road speed
Accelerator pedal position
Your style of driving influences how the auto-
matic transmission shifts gear:
Rlittle throttle: early upshifts
Rmore throttle: late upshifts
Kickdown
Use kickdown for maximum acceleration.
XDepress the accelerator pedal beyond the
pressure point.
The automatic transmission shifts to a lower
gear depending on the engine speed.
XEase off the accelerator pedal once the
desired speed is reached.
The automatic transmission shifts back up.
Rocking the vehicle free
Shifting back and forth between transmission
positions hand kcan help to free up the
vehicle if it gets stuck in mud or snow. The vehi-
cle's engine management system limits the
speed to a maximum of 5 mph (9 km/h) when
shifting back and forth. To shift repeatedly
between transmission positions hand k,
move the DIRECT SELECT lever up and down
past the point of resistance.
Towing a trailer
XDrive in the middle of the engine speed range
on uphill gradients.
XDepending on the uphill or downhill gradient,
use the left-hand steering wheel paddle
shifter (
Ypage 147) to select a lower gear,
even if cruise control or Distance Pilot
DISTRONIC are activated.
Drive programs
Slippery drive program
The Slippery drive program has the following
characteristics:
Rreduced engine and transmission settings for
optimum propulsion on slippery or snow-cov-
ered roads.
Roptimized ESP®stability control on slippery or
snow-covered roads.
Rthe vehicle has improved driving stability on
slippery or snow-covered roads, for example.
146Automatic transmission
Driving an d parking