2018 MERCEDES-BENZ GLE steering wheel
[x] Cancel search: steering wheelPage 69 of 398
Off-road ABS An ABS system specifically suited to off-road
terrain is activated automatically once the off-
road program is activated on: R
Vehicles without the Offroad Engineering
package ( Y
page 214)R
Vehicles with the Off-Road Engineering pack-
age ( Y
page 215)
At speeds below 20 mph (30 km/h), the front
wheels lock cyclically during braking. The dig-
ging-in effect achieved in the process reduces
the stopping distance on off-road terrain. This
limits steering capability.
BAS (Brake Assist System)
General information BAS operates in emergency braking situations.
If you depress the brake pedal quickly, BAS
automatically boosts the braking force, thus
shortening the stopping distance.
Important safety notes
i Observe the "Important safety notes" sec-
tion ( Y
page 66).
G WARNING
If BAS is malfunctioning, the braking distance
in an emergency braking situation is
increased. There is a risk of an accident.
In an emergency braking situation, depress
the brake pedal with full force. ABS prevents
the wheels from locking.
Braking X
Keep the brake pedal firmly depressed until
the emergency braking situation is over.
ABS prevents the wheels from locking.
The brakes will function as usual once you
release the brake pedal. BAS is deactivated. Active Brake Assist
General information
i Observe the "Important safety notes" sec-
tion ( Y
page 66).
Active Brake Assist consists of a distance warn-
ing function with an autonomous braking func-
tion and situation-dependent braking assis-
tance
Active Brake Assist can help you to minimize the
risk of a collision with the vehicle traveling in
front or reduce the effects of such a collision.
If Active Brake Assist detects that there is a risk
of collision, you will be warned visually and
acoustically. If you do not react to the visual and
audible collision warning, autonomous braking
can be initiated in critical situations. If you apply
the brake yourself in a critical situation, Adap-
tive Brake Assist supports you with situation-
dependent braking assistance.
Active Brake Assist is only available in certain
countries.
Important safety notes In particular, the detection of obstacles can be
impaired if: R
there is dirt on the sensors or anything else
covering the sensors R
there is snow or heavy rain R
there is interference by other radar sources R
there are strong radar reflections, for exam-
ple in parking garages R
a narrow vehicle is traveling in front, e.g. a
motorbike R
a vehicle is traveling in front on a different line R
you are driving a new vehicle or servicing on
the Active Brake Assist system has just been
carried out
Observe the notes in the section on breaking-
in ( Y
page 134).
Following damage to the front end of the vehicle,
have the configuration and operation of the
radar sensor checked at a qualified specialist
workshop. This also applies to collisions at slow
speeds where there is no visible damage to the
front of the vehicle.Driving safety systems 67
Safety Z
Page 74 of 398
Offroad ESP ®
(vehicles with Offroad
Engineering package) An ESP ®
system specifically suited to off-road
terrain is activated automatically once the off-
road program is activated on: R
Vehicles without the Offroad Engineering
package ( Y
page 214)R
Vehicles with the Off-Road Engineering pack-
age ( Y
page 215)
Offroad ESP ®
intervenes with a delay if there is
oversteering or understeering, thus improving
traction.
Crosswind Assist General information Strong crosswind gusts can impair the ability of
your vehicle to drive straight ahead. The cross-
wind driving assistance function integrated in
ESP ®
noticeably reduces these impairments.
ESP ®
intervenes automatically according to the
direction and intensity of the crosswinds affect-
ing your vehicle.
ESP ®
intervenes with stabilizing braking to
assist you in keeping the vehicle in the lane.
Crosswind Assist is active at vehicle speeds
above 50 mph (80 km/h) when driving straight
ahead or cornering gently.
Important safety notes Crosswind Assist does not work if ESP ®
is
switched off or deactivated because of a mal-
function.
EBD (electronic brake force distribu-
tion)
General information EBD monitors and controls the brake pressure
on the rear wheels to improve driving stability
while braking.
Important safety notes
i Observe the "Important safety notes" sec-
tion for driving safety systems ( Y
page 66). G WARNING
If EBD is malfunctioning, the rear wheels can
lock, e.g. under full braking. This increases the
risk of skidding and an accident.
You should therefore adapt your driving style
to the different handling characteristics. Have
the brake system checked at a qualified spe-
cialist workshop.
Observe information regarding indicator and
warning lamps ( Y
page 277) as well as display
messages ( Y
page 246).
ADAPTIVE BRAKE ADAPTIVE BRAKE enhances braking safety and
offers increased braking comfort. In addition to
the braking function, ADAPTIVE BRAKE also has
the HOLD function ( Y
page 182) and hill start
assist ( Y
page 139).
Active Brake Assist with cross-traffic
function
General information
i Pay attention to the important safety notes
in the "Driving safety systems" section
( Y
page 66).
Active Brake Assist with cross-traffic function
can help you to minimize the risk of a collision
with a vehicle in front or a pedestrian and reduce
the effects of such a collision. If the Active Brake
Assist with cross-traffic function detects a risk
of collision, you will be warned visually and
acoustically and, if necessary, your brake appli-
cation will be assisted according to the situa-
tion. If you do not react, the system can also
react by braking automatically. In the event of a
detected risk of collision due to crossing traffic,
you will also be visually and acoustically warned
as well as assisted by the brake boosting effect
according to the situation.
Active Brake Assist with cross-traffic function is
only available in vehicles with the Driving Assis-
tance Plus package.
For Active Brake Assist with cross-traffic func-
tion to assist you when driving, the radar sensor
system and the camera system must be opera-
tional.72
Driving safety systems
Safety
Page 77 of 398
Up to a speed of approximately 44 mph
(70 km/h) the Active Brake Assist with cross-
traffic function assists you with braking in haz-
ardous situations with: R
stationary obstacles in the path of the vehicle,
e.g. stopped or parked vehicles R
stationary pedestrians in the path of the vehi-
cle R
obstacles crossing your path that move in the
detection range of the sensors and are detec-
ted X
Keep the brake pedal depressed until the
emergency braking situation is over.
ABS prevents the wheels from locking.
You can prevent the intervention of Active Brake
Assist with cross-traffic function at any time by: R
depressing the accelerator pedal further R
activating kickdown R
releasing the brake pedal
The braking application of Active Brake Assist
with cross-traffic function is ended automati-
cally if: R
you maneuver to avoid the obstacle R
there is no longer a risk of collision R
there is no longer an obstacle detected in
front of your vehicle
STEER CONTROL
General information STEER CONTROL helps you by transmitting a
noticeable steering force to the steering wheel
in the direction required for vehicle stabilization.
This steering assistance is provided in particular
if: R
both right wheels or both left wheels are on a
wet or slippery road surface when you brake R
the vehicle starts to skid
Important safety notes
i Observe the "Important safety notes" sec-
tion ( Y
page 66). No steering assistance is provided from STEER
CONTROL, if: R
ESP ®
is deactivated R
ESP ®
is malfunctioning R
the steering is malfunctioning
If ESP ®
is malfunctioning, you will be assisted
further by the electrical power steering.
Protection against theft
Immobilizer X
To activate with the SmartKey: remove the
SmartKey from the ignition lock. X
To activate with KEYLESS-GO: switch the
ignition off and open the driver's door. X
To deactivate: switch on the ignition.
The immobilizer prevents your vehicle from
being started without the correct SmartKey.
When leaving the vehicle, always take the
SmartKey with you and lock the vehicle. Anyone
can start the engine if a valid SmartKey has been
left inside the vehicle.
i The immobilizer is always deactivated when
you start the engine.
In the event that the engine cannot be started
(yet the vehicle's battery is charged), the sys-
tem is not operational. Contact an authorized
Mercedes-Benz Center or call
1-800 FOR-MERCEDES (in the USA) or
1-800-387-0100 (in Canada).
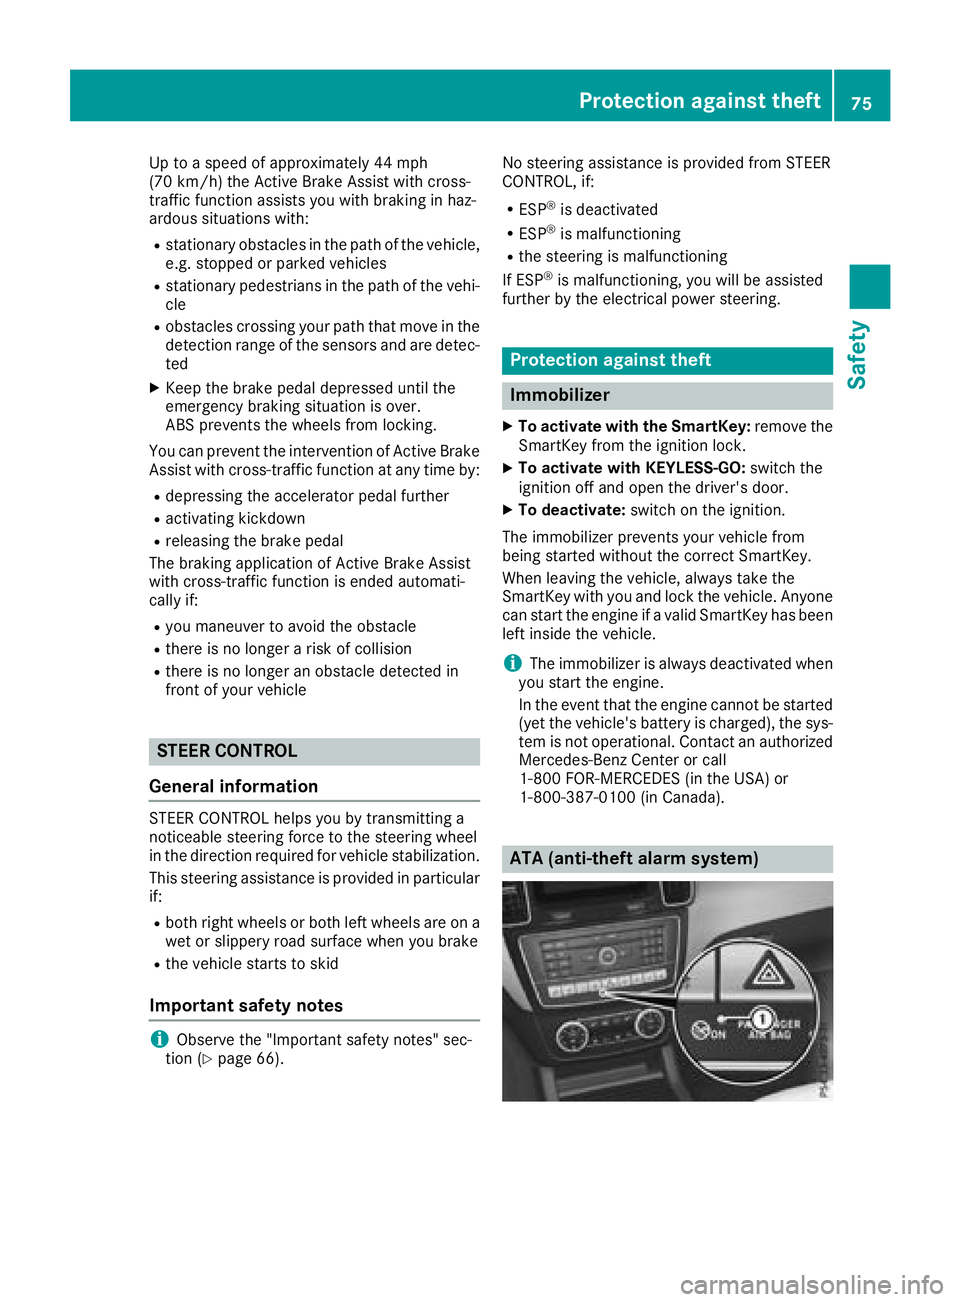
ATA (anti-theft alarm system)Protection against theft 75
Safety Z
Page 99 of 398
Correct driver's seat position
G WARNING
You could lose control of your vehicle if you do
the following while driving: R
adjust the driver's seat, head restraint,
steering wheel or mirrors R
fasten the seat belt
There is a risk of an accident.
Adjust the driver's seat, head restraint, steer-
ing wheel and mirror and fasten your seat belt
before starting the engine.
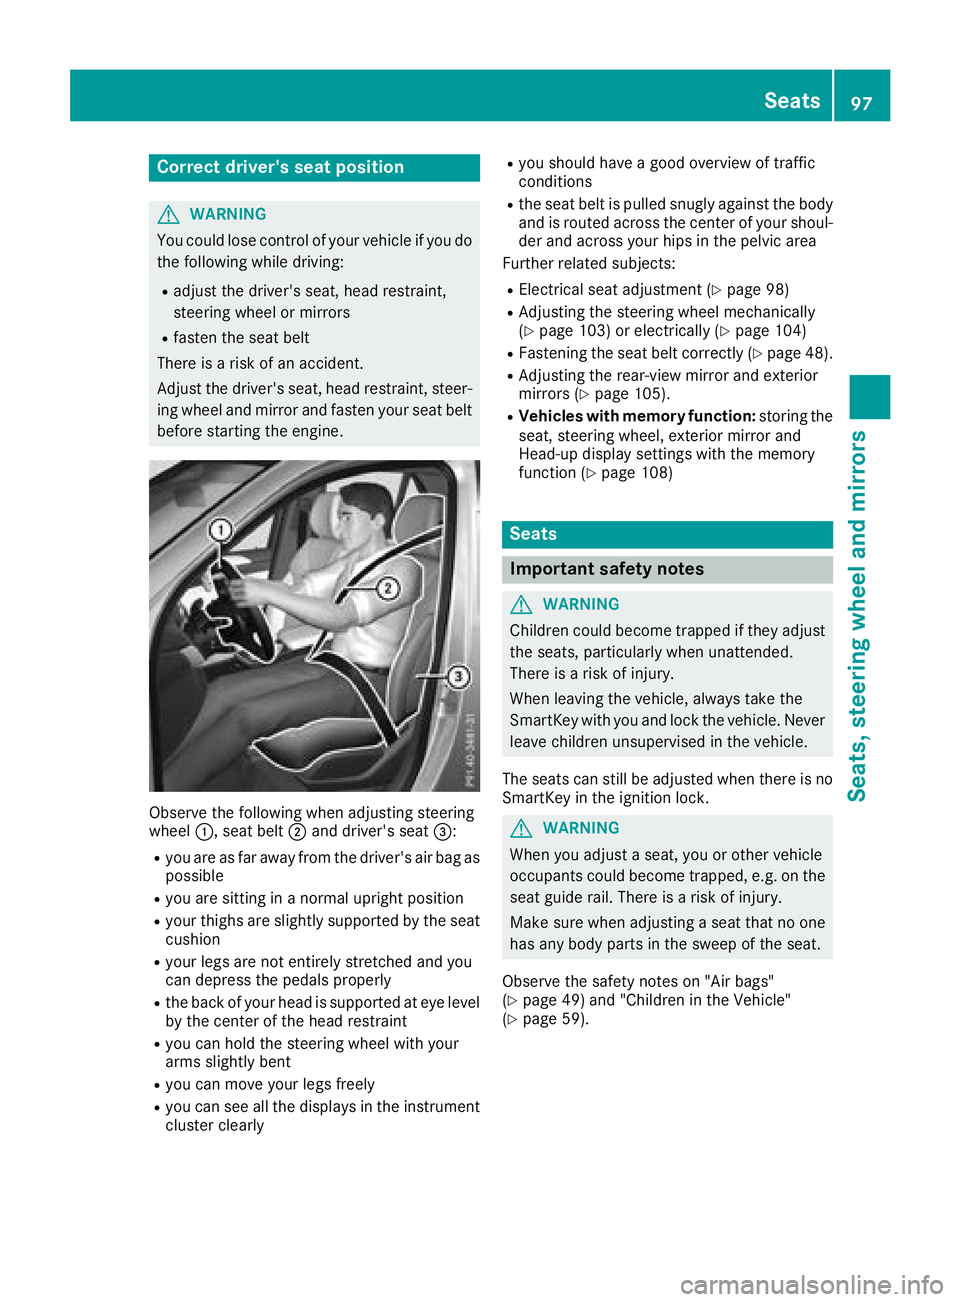
Observe the following when adjusting steering
wheel �C , seat belt �D and driver's seat �
Page 100 of 398
G WARNING
You could lose control of your vehicle if you do
the following while driving: R
adjust the driver's seat, head restraint,
steering wheel or mirrors R
fasten the seat belt
There is a risk of an accident.
Adjust the driver's seat, head restraint, steer-
ing wheel and mirror and fasten your seat belt
before starting the engine.
G WARNING
If you adjust the seat height carelessly, you or
other vehicle occupants could be trapped and
thereby injured. Children in particular could
accidentally press the electrical seat adjust-
ment buttons and become trapped. There is a
risk of injury.
While moving the seats, make sure that your
hands or other body parts do not get under the
lever assembly of the seat adjustment sys-
tem.
G WARNING
If the head restraints are not installed or not
adjusted correctly, they cannot provide pro-
tection as intended. There is an increased risk
of injury in the head and neck area, e.g. in the
event of an accident or when braking.
Always drive with the head restraints instal-
led. Before driving off, make sure for every
vehicle occupant that the center of the head
restraint supports the back of the head at
about eye level.
G WARNING
The seat belt does not offer the intended level
of protection if you have not moved the back-
rest to an almost vertical position. When brak-
ing or in the event of an accident, you could
slide underneath the seat belt and sustain
abdomen or neck injuries, for example. This
poses an increased risk of injury or even fatal
injury. Adjust the seat properly before beginning
your journey. Always ensure that the backrest
is in an almost vertical position and that the
shoulder section of your seat belt is routed
across the center of your shoulder.
! To avoid damage to the seats and the seat
heating, observe the following information: R
keep liquids from spilling on the seats. If
liquid is spilled on the seats, dry them as
soon as possible. R
if the seat covers are damp or wet, do not
switch on the seat heating. The seat heat-
ing should also not be used to dry the seats. R
clean the seat covers as recommended;
see "Interior care". R
do not transport heavy loads on the seats.
Do not place sharp objects on the seat
cushions, e.g. knives, nails or tools. The
seats should only be occupied by passen-
gers, if possible. R
when the seat heating is in operation, do
not cover the seats with insulating materi-
als, e.g. blankets, coats, bags, seat covers,
child seats or booster seats.
! Make sure that there are no objects in the
footwell under or behind the seats when mov-
ing the seats back. There is a risk that the
seats and/or the objects could be damaged.
i Further related subjects: R
Cargo compartment enlargement (folding
down the rear bench seat) ( Y
page 298)
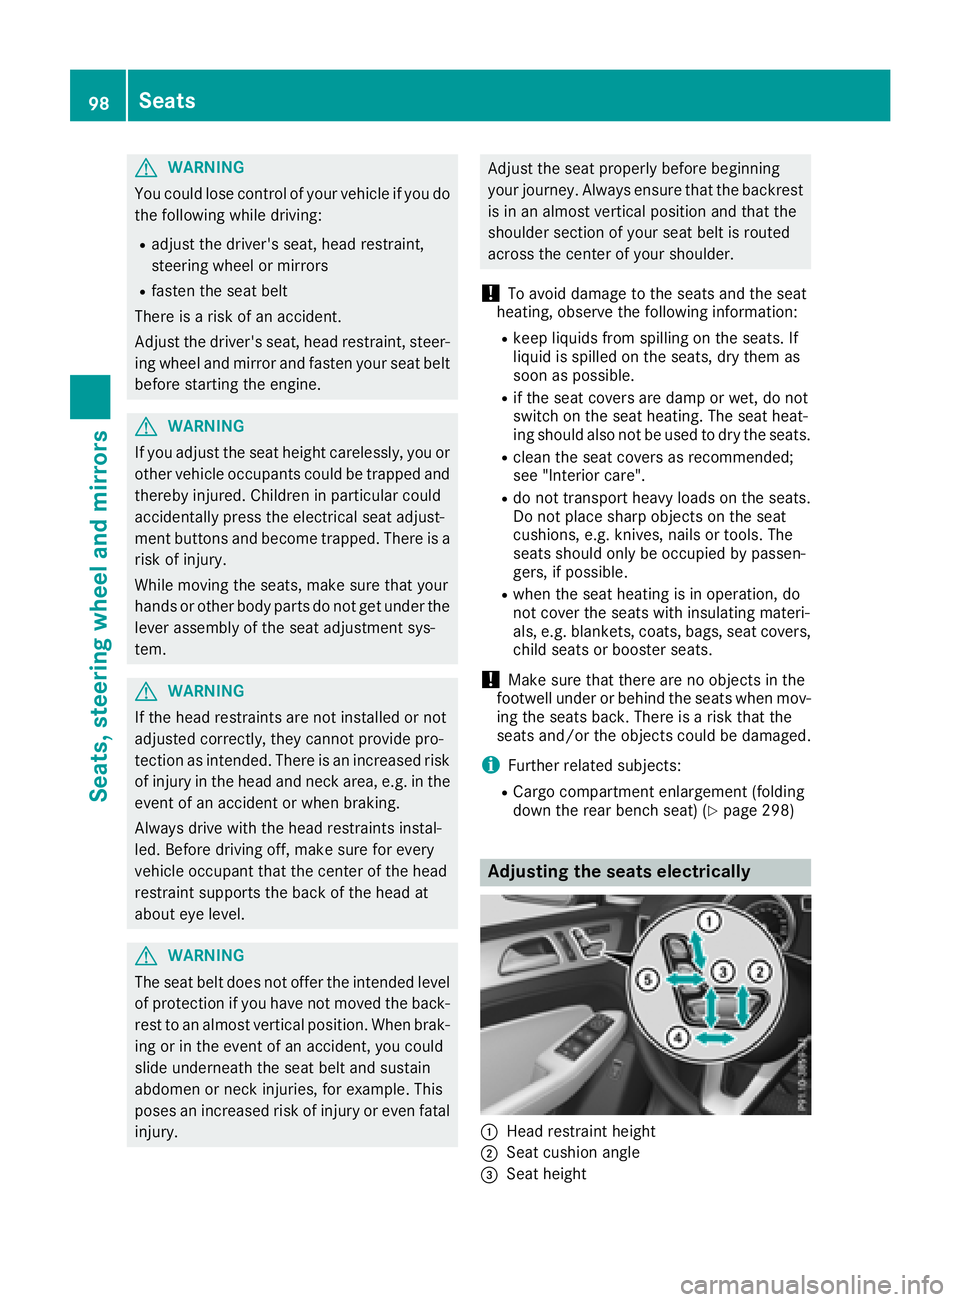
Adjusting the seats electrically
�C
Head restraint height
�D
Seat cushion angle
�
Page 102 of 398
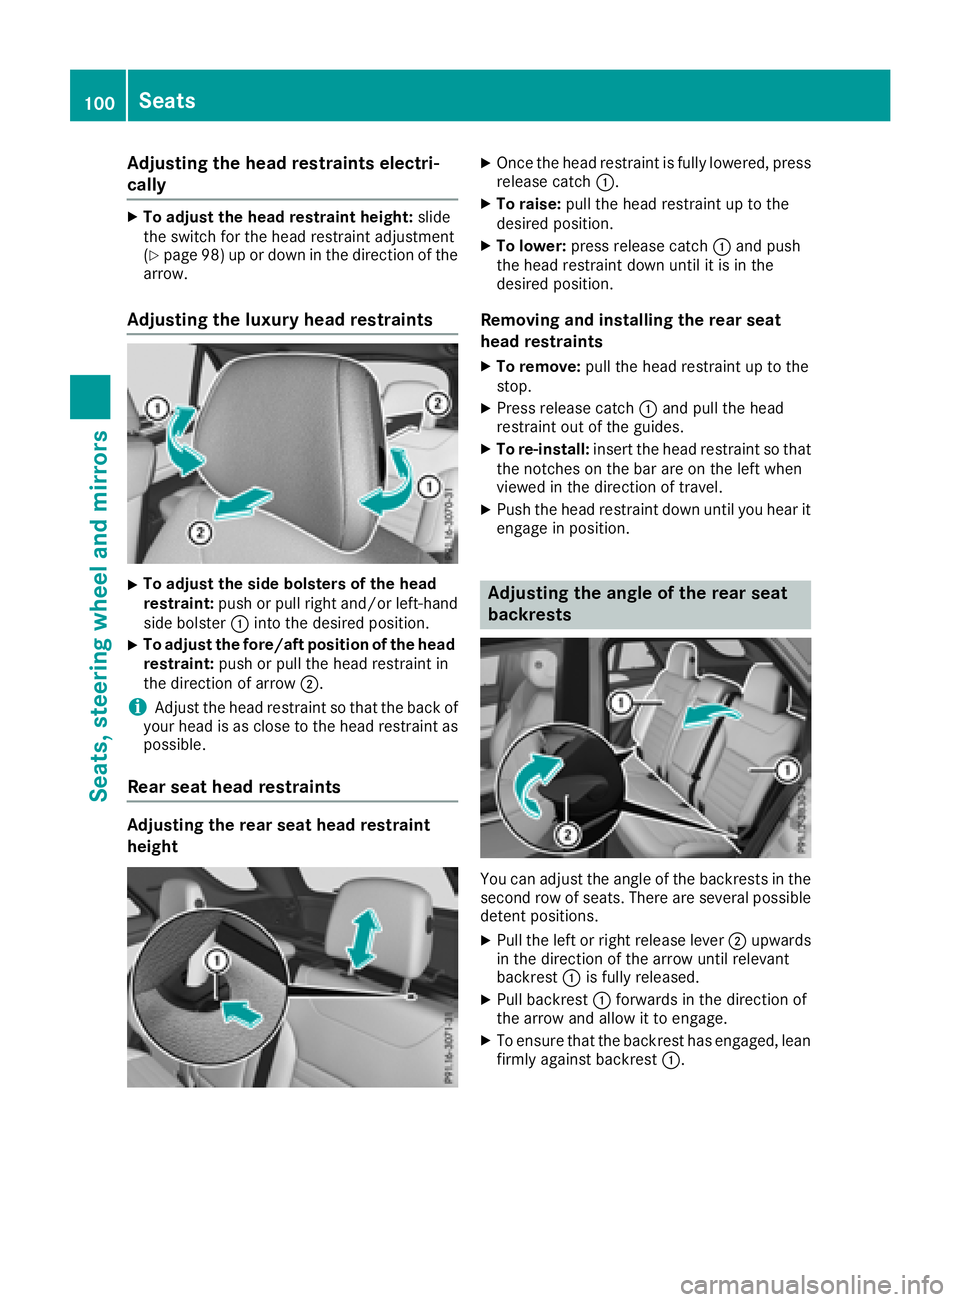
Adjusting the head restraints elect ri -
cally X
To adjust th e hea d restrain t height : slid e
th e switch for th e head restrain t adjustmen t
( Y
page 98) up or down in th e direction of th e
arrow.
Adjusting the luxury head restraints X
To adjust th e sid e bolsters of th e hea d
restraint: push or pull right and/o r left-han d
side bolste r �C int o th e desired position .X
To adjust th e fore/af t position of th e hea d
restraint: push or pull th e head restrain t in
th e direction of arrow �D .
i Adjus t th e head restrain t so that th e bac k of
your head is as close to th e head restrain t as
possible.
Rear seat head restraints
Adjusting th e rea r sea t hea d restrain t
height X
Once th e head restrain t is fully lowered, press
release catch �C . X
To raise: pull th e head restrain t up to th e
desired position . X
To lower : press release catch �C and push
th e head restrain t down until it is in th e
desired position .
Removin g and installing th e rea r sea t
hea d restraints X
To remove: pull th e head restrain t up to th e
stop. X
Press release catch �C and pull th e head
restrain t out of th e guides.X
To re-install : insert th e head restrain t so that
th e notches on th e bar are on th e lef t when
viewed in th e direction of travel .X
Push th e head restrain t down until you hear it
engage in position .
Adjusting the angle of the rear seat
backrests
You can adjust th e angle of th e backrest s in th e
secon d row of seats. There are several possibl e
deten t positions. X
Pull th e lef t or right release lever �D upwards
in th e direction of th e arrow until relevan t
backrest �C is fully released. X
Pull backrest �C forward s in th e direction of
th e arrow and allow it to engage .X
To ensur e that th e backrest has engaged, lean
firmly against backrest �C .100
Seats
Seats, steering wheel and mirrors
Page 104 of 398
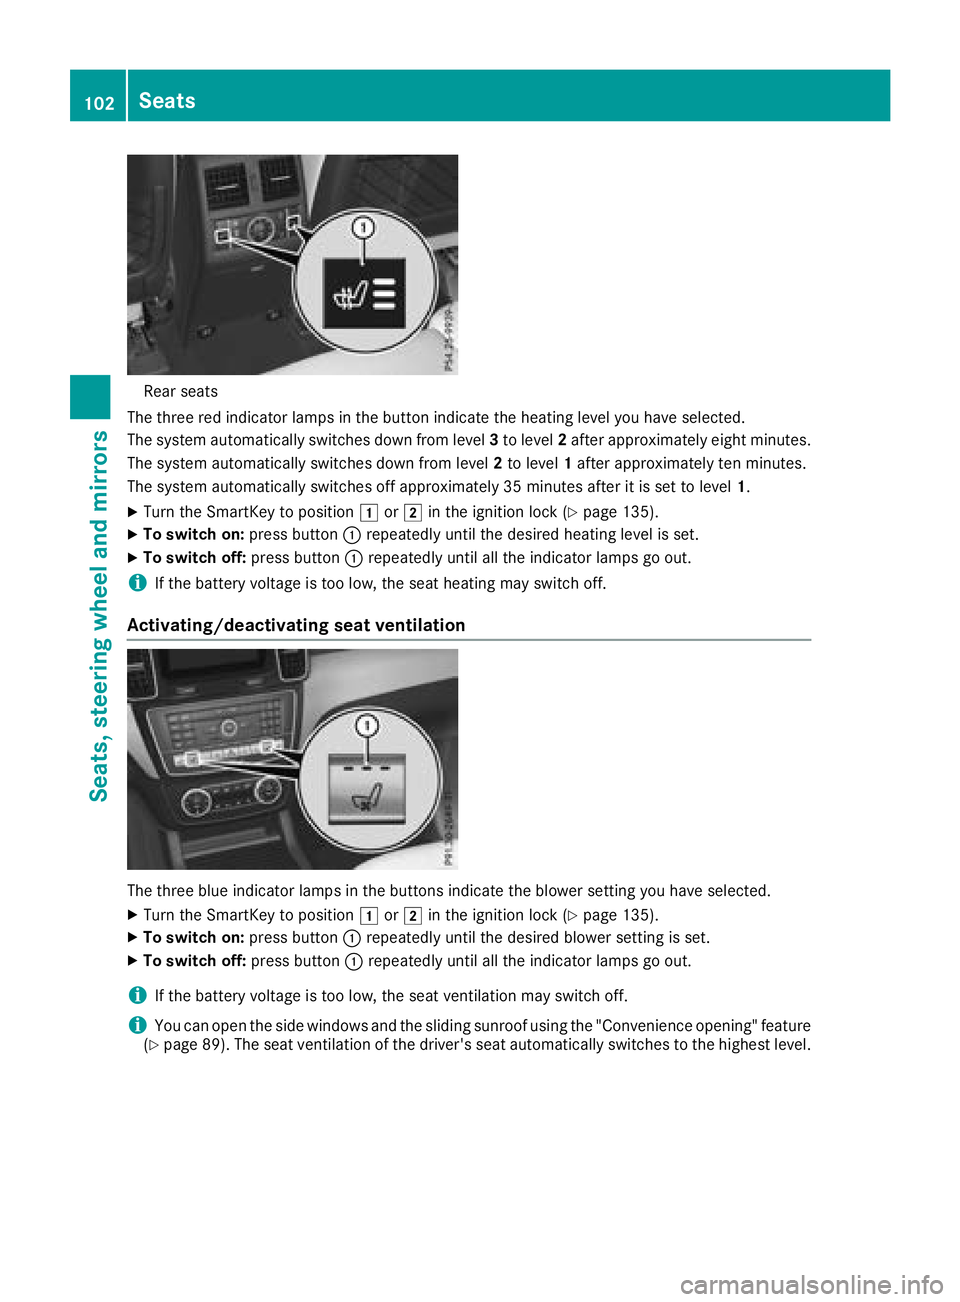
Rear seat s
The three red indicator lamp s in th e butto n indicat e th e heating level you hav e selected.
The system automatically switches down from level 3 to level 2 after approximately eigh t minutes.
The system automatically switches down from level 2 to level 1 after approximately te n minutes.
The system automatically switches off approximately 35 minute s after it is set to level 1 .X
Turn th e SmartKey to position �G or �H in th e ignition loc k ( Y
page 135).X
To switch on: press butto n �C repeatedly until th e desired heating level is set .X
To switch off : press butto n �C repeatedly until all th e indicator lamp s go out .
i If th e battery voltag e is to o low, th e seat heating may switch off .
Activating/deactivating seat ventilation
The three blue indicator lamp s in th e buttons indicat e th e blowe r setting you hav e selected.X
Turn th e SmartKey to position �G or �H in th e ignition loc k ( Y
page 135).X
To switch on: press butto n �C repeatedly until th e desired blowe r setting is set .X
To switch off : press butto n �C repeatedly until all th e indicator lamp s go out .
i If th e battery voltag e is to o low, th e seat ventilation may switch off .
i You can open th e side windows and th e sliding sunroo f usin g th e "Convenience opening " feature
( Y
page 89) . The seat ventilation of th e driver' s seat automatically switches to th e highest level.102
Seats
Seats, steering wheel and mirrors
Page 105 of 398
Problems with the seat heating or seat ventilation Problem
Possible causes/consequences and �P Solutions
The seat heating or seat
ventilation has switched
off prematurely or can-
not be switched on. The on-board voltage is too low because too many electrical consum-
ers are switched on. X
Switch off electrical consumers that you do not need, such as the
rear window defroster or interior lighting.
Once the battery is sufficiently charged, the seat heating or seat
ventilation will switch back on automatically.
Steering wheel
Important safety notes
G WARNING
You could lose control of your vehicle if you do
the following while driving: R
adjust the driver's seat, head restraint,
steering wheel or mirrors R
fasten the seat belt
There is a risk of an accident.
Adjust the driver's seat, head restraint, steer-
ing wheel and mirror and fasten your seat belt
before starting the engine.
G WARNING
Children could injure themselves if they
adjust the steering wheel. There is a risk of
injury.
When leaving the vehicle, always take the
SmartKey with you and lock the vehicle. Never
leave children unsupervised in the vehicle.
The electrically adjustable steering wheel can
still be adjusted when there is no SmartKey in
the ignition lock.
Adjusting the steering wheel man-
ually
G WARNING
If the steering wheel is unlocked while the
vehicle is in motion, it could change position
unexpectedly. This could cause you to lose control of the vehicle. There is a risk of an
accident.
Before starting off, make sure the steering
wheel is locked. Never unlock the steering
wheel while the vehicle is in motion.
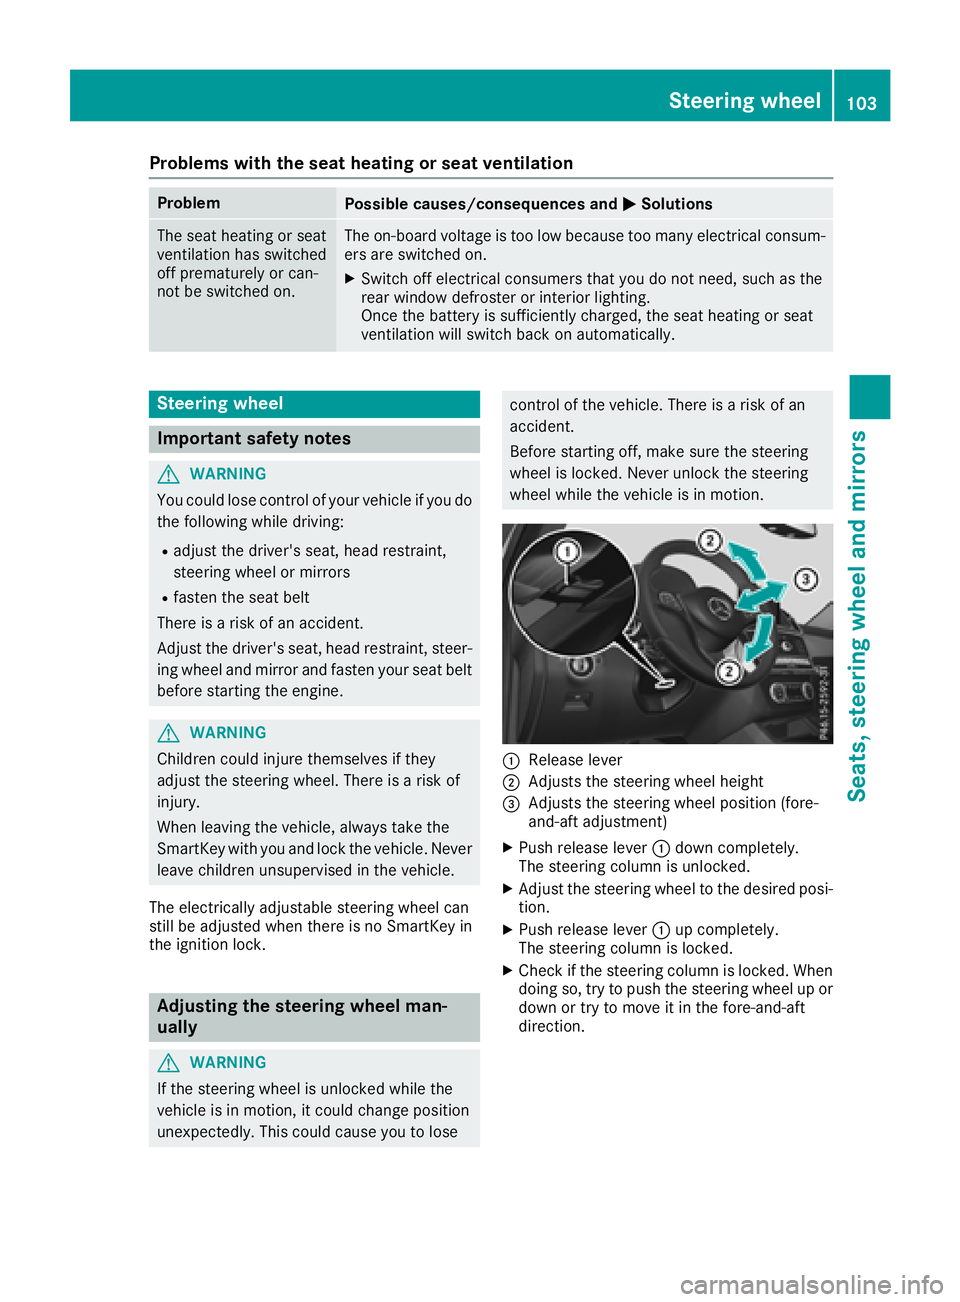
�C
Release lever �D
Adjusts the steering wheel height �