2018 MERCEDES-BENZ GLE HYBRID change time
[x] Cancel search: change timePage 222 of 398
R
is affected more by strong crosswinds R
demands more sensitive steering R
has a larger turning circle
This could impair the handling characteristics.
When towing a trailer, always adjust your speed
to the current road and weather conditions. Do
not exceed the maximum permissible speed for
your vehicle/trailer combination.
Notes on towing a trailer
General notes
! If you have a trailer tow hitch retrofitted,
changes to the cooling system and drive train
may be necessary, depending on the vehicle
type.
If you have a trailer tow hitch retrofitted,
observe the anchorage points on the chassis
frame. R
Do not exceed the legally prescribed maxi-
mum speed for vehicle/trailer combinations
in the relevant country.
This lowers the risk of an accident. R
Only install an approved trailer coupling on
your vehicle.
More information on availability and installa-
tion can be obtained at any qualified special-
ist workshop. R
The bumpers of your vehicle are not suitable
for installing detachable trailer couplings. R
Do not install hired trailer couplings or other
detachable trailer couplings on the bumpers
of your vehicle. R
If you no longer need the ball coupling,
remove it from the ball coupling recess. This
will reduce the risk of damage to the ball cou-
pling.
When towing a trailer, set the tire pressure on
the rear axle of the towing vehicle for the max-
imum load. You will find the values in the tire
pressure table in the fuel filler flap of the vehicle
( Y
page 369).
Please note that when towing a trailer, the fol-
lowing driving systems have limited availability
or are not available at all: R
Parking Assist PARKTRONIC ( Y
page 187)R
Blind Spot Assist ( Y
page 204)R
Active Lane Keeping Assist ( Y
page 210) On vehicles without level control, the height of
the ball coupling will alter according to the load
placed on the vehicle. If necessary, use a trailer
with a height-adjustable drawbar.
You will find installing dimensions and loads
under "Technical data" ( Y
page 394).
Driving tips Also observe the notes on pulling away with a
trailer ( Y
page 138).
The maximum permissible speed for vehicle/
trailer combinations depends on the type of
trailer. Before beginning the journey, check the
trailer's documents to see what the maximum
permissible speed is for your trailer. Observe the
legally permissible maximum speed in the rele-
vant country.
For certain Mercedes-Benz vehicles, the maxi-
mum permissible rear axle load is increased
when towing a trailer. See "Technical data" to
find out whether this applies to your vehicle
( Y
page 394). If you utilize any of the added
maximum rear axle load when towing a trailer,
the vehicle/trailer combination may not exceed
a maximum speed of 60 mph (100 km/h) for
reasons concerning the operating permit. This
also applies in countries in which the maximum
permissible speed for car/trailer combinations
is greater than 60 mph (100 km/h).
When towing a trailer, your vehicle's handling
characteristics will be different in comparison
with when driving without a trailer.
Use the left-hand steering wheel paddle shifter
to shift into a lower gear in good time on long
and steep downhill gradients.
This also applies if you have activated cruise
control or Distance Pilot DISTRONIC.
This will use the braking effect of the engine, so
that less braking will be required to maintain the
speed. This relieves the load on the brake sys-
tem and prevents the brakes from overheating
and wearing too quickly. If you need additional
braking, depress the brake pedal repeatedly
rather than continuously.
Driving tips
If the trailer swings from side to side: X
Do not accelerate. X
Do not counter-steer. X
Brake if necessary.220
Towing a trailer
Driving and parking
Page 240 of 398
Settings menu
Introduction Depending on the equipment installed in the
vehicle, In the Sett. menu you have the follow-
ing options: R
Changing the instrument cluster settings
( Y
page 238)R
Changing the light settings ( Y
page 238)R
Changing the vehicle settings ( Y
page 239)R
Changing the convenience settings
( Y
page 239)R
Restoring the factory settings ( Y
page 240)
Instrument cluster submenu Selecting the distance unit The Display Unit Speedometer / Odome‐
ter: function allows you to choose whether
certain displays appear in kilometers or miles in
the multifunction display. X
Press the �Y or �e button on the steering
wheel to select the Sett. menu.X
Press the �d or �c button to select the
Instrument Cluster submenu.X
Press �v to confirm.X
Press the �d or �c button to select the
Display Unit Speedometer / Odometer
function.
You will see the selected setting: km or miles .X
Press the �v button to save the setting.
The selected unit of measurement for distance
applies to: R
Digital speedometer in the Trip menuR
Odometer and the trip odometer R
Trip computer R
Current consumption and the range R
Navigation instructions in the Navi menuR
Cruise control R
Distance Pilot DISTRONIC R
ASSYST PLUS service interval display
Selecting permanent display
The Permanent Display: function allows you
to choose whether the multifunction display
always shows the outside temperature or the
speed. The speed display is inverse to the speedome-
ter. X
Press the �Y or �e button on the steering
wheel to select the Sett. menu.X
Press the �d or �c button to select the
Instrument Cluster submenu.X
Confirm by pressing �v on the steering
wheel. X
Press the �d or �c button to select the
Permanent Display: function.
The current setting, Outside Temperature ,
Speedometer [km/h] or Speedometer
[mph] appears. X
To change the setting: press �v again.
Light submenu Setting the daytime running lamps This function is not available in Canada. X
Press the �Y or �e button on the steering
wheel to select the Sett. menu.X
Press the �d or �c button to select the
Light submenu. X
Press �v to confirm. X
Press �d or �c to select the Daytime
Running Lights function.
If the Daytime Running Lights function has
been switched on, the cone of light and the
�
Page 289 of 398
General notes The multimedia system section in this Opera-
tor's Manual describes the basic principles for
operation. More information can be found in the
Digital Operator's Manual.
Important safety notes
G WARNING
If you operate information systems and com-
munication equipment integrated in the vehi-
cle when driving, you may be distracted from
the traffic situation. You could also lose con-
trol of the vehicle. There is a risk of an acci-
dent.
Only operate this equipment when the traffic
situation permits. If you are not sure that this
is possible, park the vehicle paying attention
to traffic conditions and operate the equip-
ment when the vehicle is stationary.
You must observe the legal requirements for the
country in which you are currently driving when
operating the multimedia system.
The multimedia system calculates the route to
the destination without taking the following into
account, for example: R
traffic lights R
stop and yield signs R
parking or stopping restrictions R
road narrowing R
other road and traffic rules and regulations
The multimedia system may give incorrect nav-
igation recommendations if the actual street/
traffic situation does not correspond with the
digital map's data.
For example: R
a diverted route R
the road layout or the direction of a one-way
street has been changed
For this reason, you must always observe road
and traffic rules and regulations during your
journey. Road and traffic rules and regulations
always have priority over multimedia system
driving recommendations. Navigation announcements are intended to
direct you while driving without diverting your
attention from the road and driving.
Please always use this feature instead of con-
sulting the map display for directions. Looking
at the icons or map display can distract you from
traffic conditions and driving, and increase the
risk of an accident.
This equipment complies with FCC radiation
exposure limits set forth for uncontrolled equip-
ment and meets the FCC radio frequency (RF)
Exposure Guidelines in Supplement C to OET65.
This equipment has very low levels of RF energy
that is deemed to comply without maximum
permissive exposure evaluation (MPE). How-
ever, it is recommended to insta l l it at a distance
of at least 8 inches (approx. 20 cm) between the
radiation source and a person's body (not
including limbs such as hands, wrists, feet and
legs).
G WARNING
Modifications to electronic components, their
software as well as wiring can impair their
function and/or the function of other net-
worked components. In particular, systems
relevant to safety could also be affected. As a
result, these may no longer function as inten-
ded and/or jeopardize the operating safety of
the vehicle. There is an increased risk of an
accident and injury.
Never tamper with the wiring as well as elec-
tronic components or their software. You
should have all work to electrical and elec-
tronic equipment carried out at a qualified
specialist workshop.
Function restrictions
For safety reasons, some functions are restric-
ted or unavailable while the vehicle is in motion.
You will notice this, for example, because either
you will not be able to select certain menu items
or a message will appear to this effect.Function restrictions 287
Multimedia system Z
Page 290 of 398
Operating system
Overview
General notes
! Do not use the space in front of the display
for storage. Objects placed here could dam-
age the display or impair its function. Avoid
any direct contact with the display surface.
Pressure on the display surface may result in
impairments to the display, which could be
irreversible.
Wearing polarized sunglasses may impair your
ability to read the display.
The display has an automatic temperature-con-
trolled switch-off feature. The brightness is
automatically reduced if the temperature is too
high. The display may temporarily switch off
completely.
Cleaning instructions
! Do not touch the display. The display has a
very sensitive high-gloss surface; there is a
risk of scratching. If you have to clean the
screen, however, use a mild cleaning agent
and a soft, lint-free cloth.
The display must be switched off and have
cooled down before you start cleaning. Do not
apply pressure to the display surface when
cleaning it, as this could cause irreversible dam-
age to the display.
Switching the multimedia system
on/off X
Press the �C control knob.
Adjusting the volume X
Turn the �C control knob.
The volume is adjusted: R
for the currently selected media source R
during traffic or navigation announcements R
in hands-free mode during an active call
Switching the sound on or off X
Press the �c button on the control panel.
If the audio output is switched off, the status
line will show the �c symbol. If you switch the media source or set the volume, the sound
is automatically switched on.
i Navigation announcements will be heard
even if the sound is muted.
Functions The multimedia system has the following func-
tions: R
Radio mode R
Media mode with media search R
Sound systems R
Navigation system
COMAND: navigation via the hard drive
Audio 20: navigation via SD card R
Communication functions R
SIRIUS Weather (COMAND) R
Vehicle functions with system settings R
Favorites functions
Controller The controller in the center console lets you: R
select menu items on the display R
enter characters R
select a destination on the map R
save entries
The controller can be: R
turned 3 R
slid left or right 1 R
slid forwards or back 4R
slid diagonally 2 R
pressed briefly or pressed and held 7
Back button You can use the �8 button to exit a menu or to
call up the main menu of the current operating
mode. X
To exit the menu: briefly press the �8
button.
The multimedia system changes to the next
higher menu level in the current operating
mode. X
To call up the main menu: press the �8
button for longer than two seconds.
The multimedia system changes to the main
menu of the current operating mode.288
Operating system
Multimedia system
Page 293 of 398
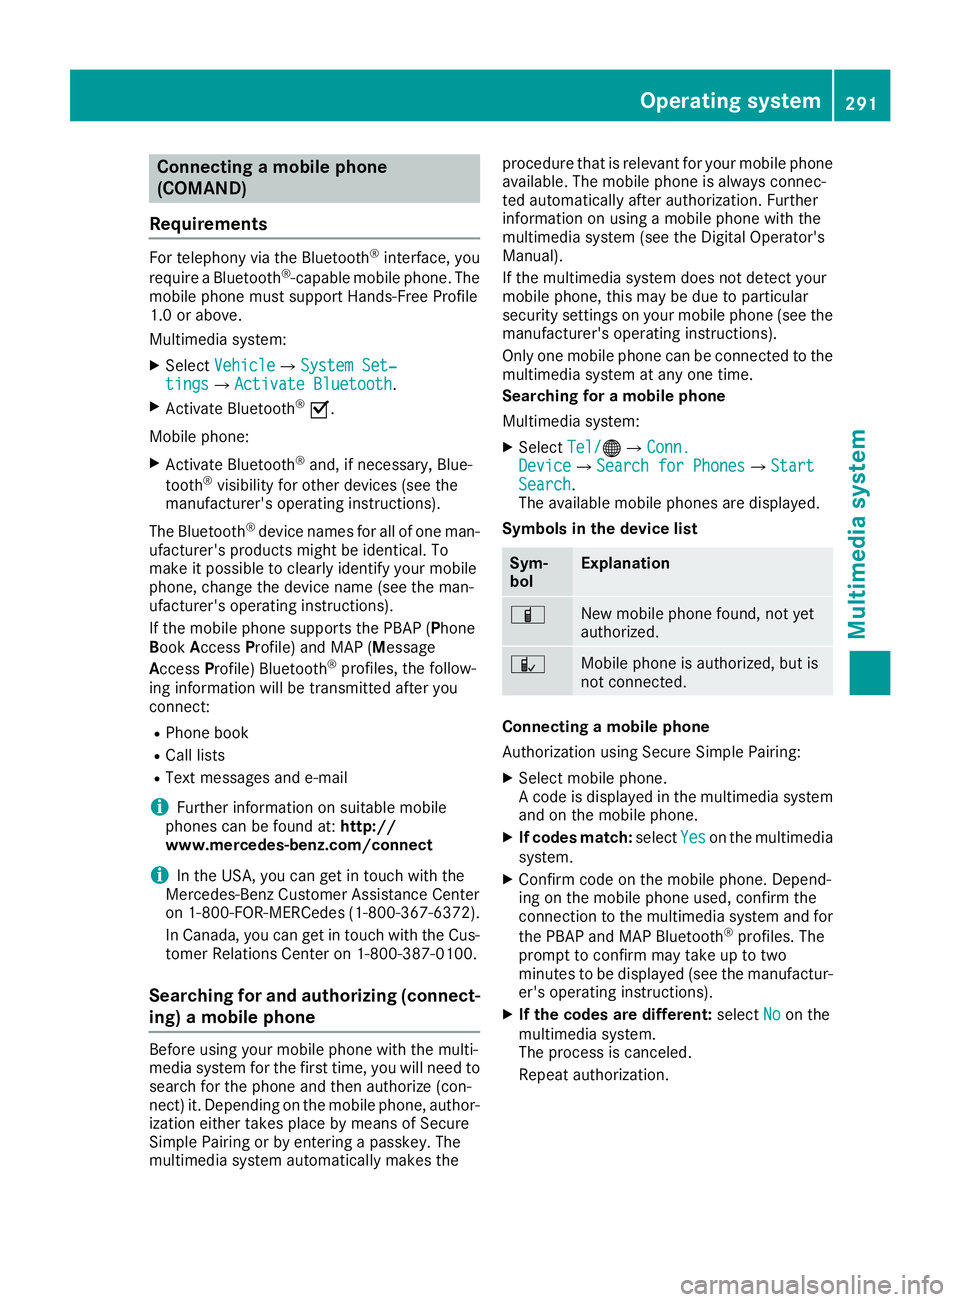
Connecting a mobile phone
(COMAND)
Requirements For telephony via the Bluetooth ®
interface, you
require a Bluetooth ®
-capable mobile phone. The
mobile phone must support Hands-Free Profile
1.0 or above.
Multimedia system: X
Select Vehicle �{ System Set‐
tings �{ Activate Bluetooth .X
Activate Bluetooth ®
�s .
Mobile phone: X
Activate Bluetooth ®
and, if necessary, Blue-
tooth ®
visibility for other devices (see the
manufacturer's operating instructions).
The Bluetooth ®
device names for all of one man-
ufacturer's products might be identical. To
make it possible to clearly identify your mobile
phone, change the device name (see the man-
ufacturer's operating instructions).
If the mobile phone supports the PBAP ( P hone
B ook A ccess P rofile) and MAP ( M essage
A ccess P rofile) Bluetooth ®
profiles, the follow-
ing information will be transmitted after you
connect: R
Phone book R
Call lists R
Text messages and e-mail
i Further information on suitable mobile
phones can be found at: http://
www.mercedes-benz.com/connect
i In the USA, you can get in touch with the
Mercedes-Benz Customer Assistance Center
on 1-800-FOR-MERCedes (1-800-367-6372 ).
In Canada, you can get in touch with the Cus-
tomer Relations Center on 1-800-387-0100.
Searching for and authorizing (connect-
ing) a mobile phone
Before using your mobile phone with the multi-
media system for the first time, you will need to
search for the phone and then authorize (con-
nect) it. Depending on the mobile phone, author-
ization either takes place by means of Secure
Simple Pairing or by entering a passkey. The
multimedia system automatically makes the procedure that is relevant for your mobile phone
available. The mobile phone is always connec-
ted automatically after authorization. Further
information on using a mobile phone with the
multimedia system (see the Digital Operator's
Manual).
If the multimedia system does not detect your
mobile phone, this may be due to particular
security settings on your mobile phone (see the
manufacturer's operating instructions).
Only one mobile phone can be connected to the
multimedia system at any one time.
Searching for a mobile phone
Multimedia system: X
Select Tel/ �
Page 294 of 398
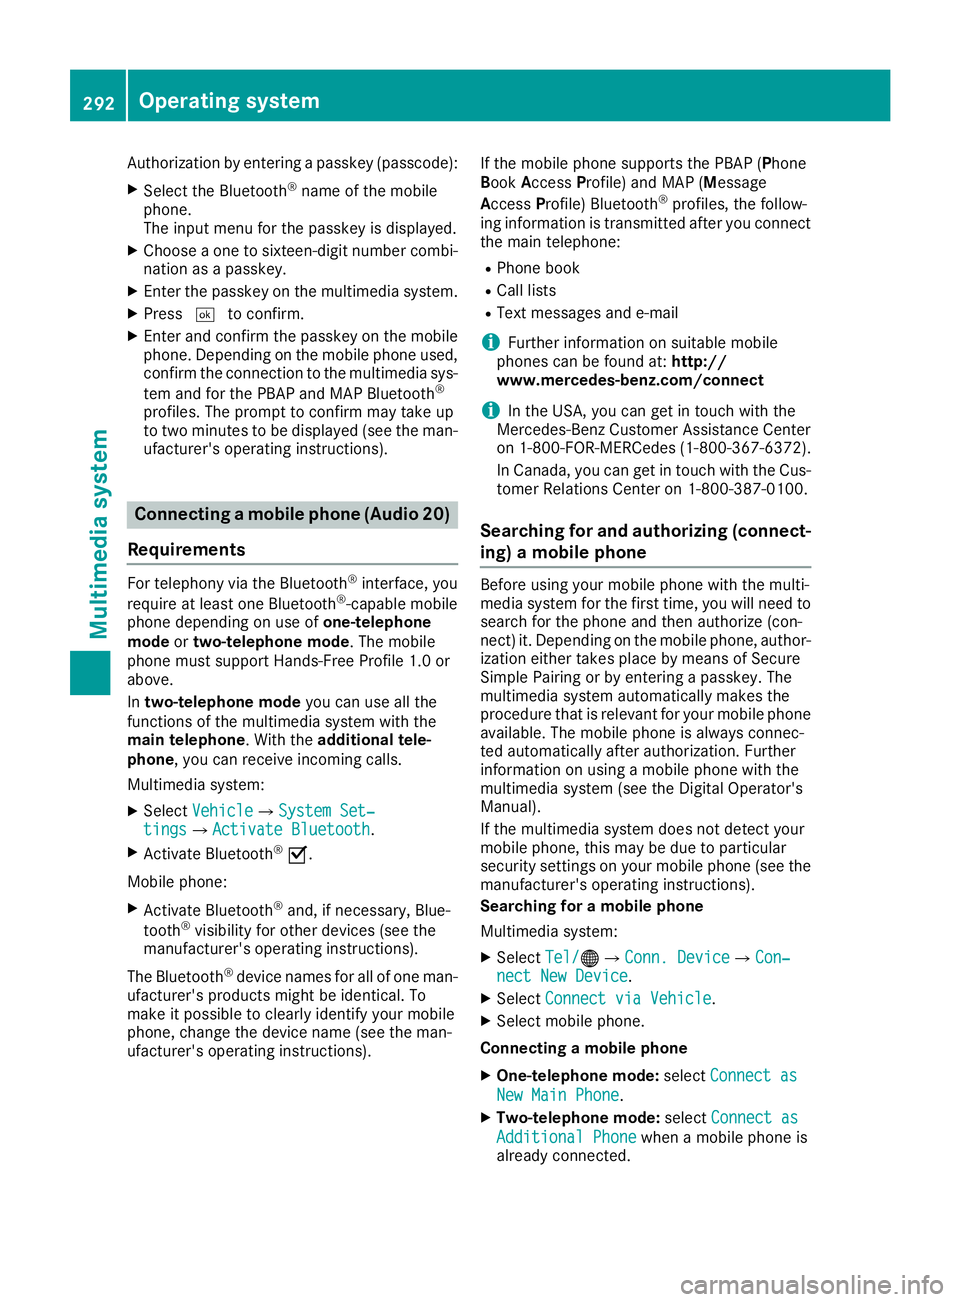
Authorization by entering a passkey (passcode): X
Select the Bluetooth ®
name of the mobile
phone.
The input menu for the passkey is displayed. X
Choose a one to sixteen-digit number combi-
nation as a passkey. X
Enter the passkey on the multimedia system. X
Press �T to confirm.X
Enter and confirm the passkey on the mobile
phone. Depending on the mobile phone used,
confirm the connection to the multimedia sys-
tem and for the PBAP and MAP Bluetooth ®
profiles. The prompt to confirm may take up
to two minutes to be displayed (see the man-
ufacturer's operating instructions).
Connecting a mobile phone (Audio 20)
Requirements For telephony via the Bluetooth ®
interface, you
require at least one Bluetooth ®
-capable mobile
phone depending on use of one-telephone
mode or two-telephone mode . The mobile
phone must support Hands-Free Profile 1.0 or
above.
In two-telephone mode you can use all the
functions of the multimedia system with the
main telephone . With the additional tele-
phone , you can receive incoming calls.
Multimedia system: X
Select Vehicle �{ System Set‐
tings �{ Activate Bluetooth .X
Activate Bluetooth ®
�s .
Mobile phone: X
Activate Bluetooth ®
and, if necessary, Blue-
tooth ®
visibility for other devices (see the
manufacturer's operating instructions).
The Bluetooth ®
device names for all of one man-
ufacturer's products might be identical. To
make it possible to clearly identify your mobile
phone, change the device name (see the man-
ufacturer's operating instructions). If the mobile phone supports the PBAP ( P hone
B ook A ccess P rofile) and MAP ( M essage
A ccess P rofile) Bluetooth ®
profiles, the follow-
ing information is transmitted after you connect
the main telephone: R
Phone book R
Call lists R
Text messages and e-mail
i Further information on suitable mobile
phones can be found at: http://
www.mercedes-benz.com/connect
i In the USA, you can get in touch with the
Mercedes-Benz Customer Assistance Center
on 1-800-FOR-MERCedes (1-800-367-6372).
In Canada, you can get in touch with the Cus-
tomer Relations Center on 1-800-387-010 0.
Searching for and authorizing (connect-
ing) a mobile phone Before using your mobile phone with the multi-
media system for the first time, you will need to
search for the phone and then authorize (con-
nect) it. Depending on the mobile phone, author-
ization either takes place by means of Secure
Simple Pairing or by entering a passkey. The
multimedia system automatically makes the
procedure that is relevant for your mobile phone
available. The mobile phone is always connec-
ted automatically after authorization. Further
information on using a mobile phone with the
multimedia system (see the Digital Operator's
Manual).
If the multimedia system does not detect your
mobile phone, this may be due to particular
security settings on your mobile phone (see the
manufacturer's operating instructions).
Searching for a mobile phone
Multimedia system: X
Select Tel/ �
Page 295 of 398
X
Authorization using Secure Simple Pai r-
ing:
A co de is displayed in the multimed ia system
and on the mob ile phone.X
Confirm co de on the mob ile phone. Depen d-
ing on the mob ile phone used, confirm the
connection to the multimed ia system and for
the PBAP and MAP Bluetooth ®
pro file s. The
prompt to confirm may take up to two
minutes to be displ ayed (see the manufactur-
er's operating instructions). X
If the codes are diff erent: select No on the
multimed ia system.
The process is canceled.
Repeat authorization.
or X
Authorization by entering a passkey
(passcode): enter any one- to sixteen-digit
number sequence whic h you have chosen
yourself into the passkey input menu. X
Press �T to confirm.X
Enter and confirm the passkey on the mob ile
phone. Depen din g on the mob ile phone used,
confirm the connection to the multimed ia sys-
tem and for the PBAP and MAP Bluetooth ®
pro file s. The prompt to confirm may take up
to two minutes to be displ ayed (see the man-
ufacturer's operating instructions).
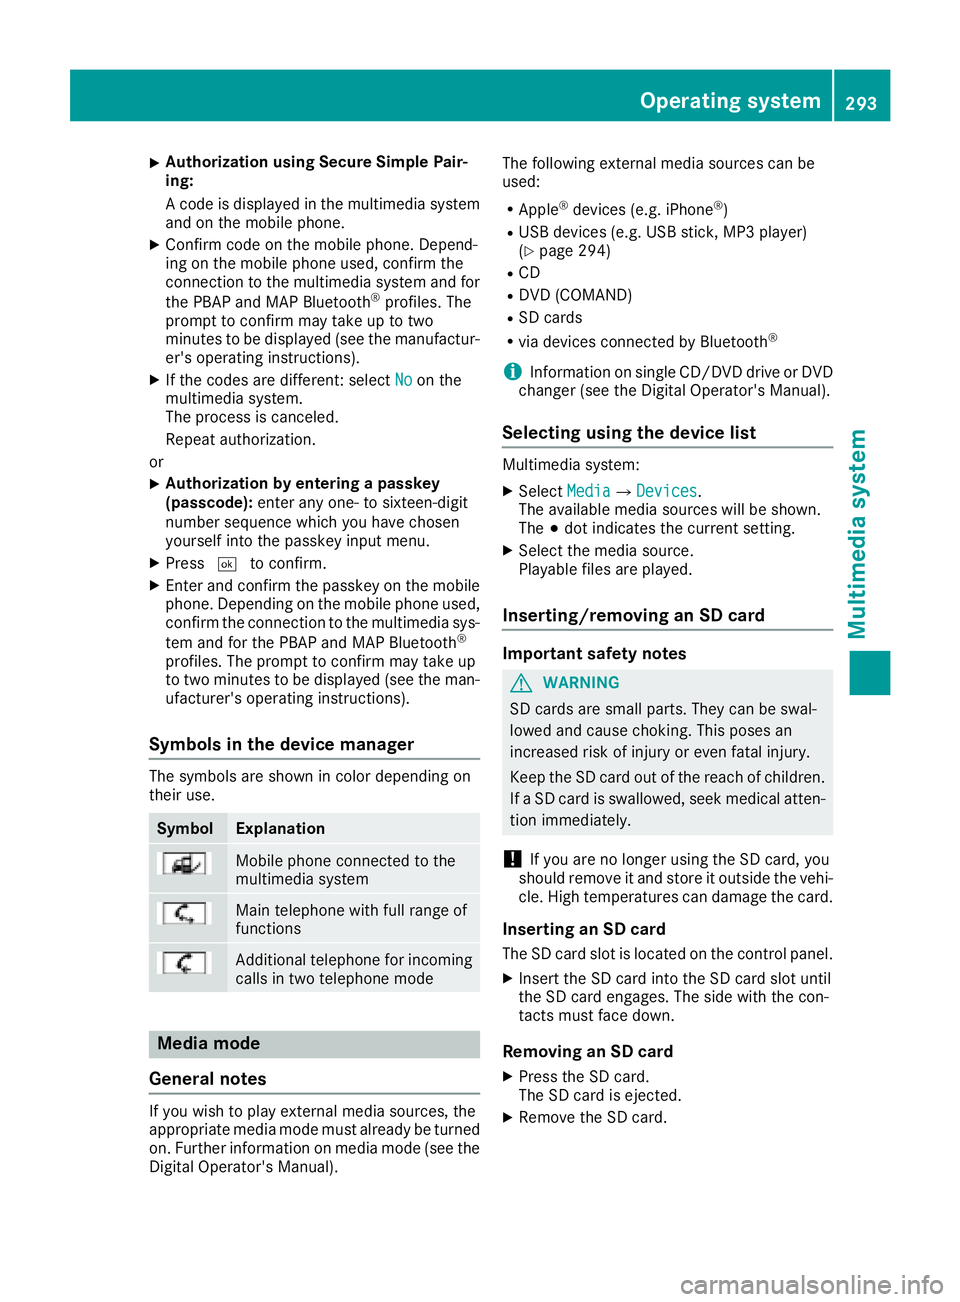
Symbols in the device manager The symbols are sho wn in color depen din g on
their use.
Symbol Explanation
Mobi le phone connected to the
multimed ia system
Main telephone wit h full range of
functions
Ad dit ional telephone for incoming
calls in two telephone mode
Media mode
General notes
If you wish to play external media sources, the
appropriate media mode must already be turned
on. Further information on media mode (see the
Digital Operator's Manual). The following external media sources can be
used: R
Apple ®
devices (e.g. iPhone ®
)R
USB devices (e.g. USB stick, MP3 player)
( Y
page 294) R
CD R
DVD (COMAND) R
SD cards R
via devices connected by Bluetooth ®
i In formation on single CD/DVD drive or DVD
changer (see the Digital Operator's Manual).
Selecting using the device list Multimed ia system: X
Select Media �{ Devices .
The available media sources will be shown.
The �; dot indicates the current setting. X
Select the media source.
Playable file s are played.
Inserting/removing an SD card
Important safety notes
G WARNING
SD car ds are small parts. They can be swal-
lowed and cause choking. This poses an
increased risk of injury or even fatal injury.
Keep the SD card out of the reach of ch ildr en.
If a SD card is swallo wed, seek medical atten-
tion immediately.
! If you are no longer using the SD car d, you
should remove it and store it out side the veh i-
cle. High temperatures can damage the card.
Inserting an SD card
The SD card slot is located on the control panel. X
In sert the SD card into the SD card slot until
the SD card engages. The side wit h the con-
tacts must face down.
Removing an SD card X
Press the SD card.
The SD card is ejected. X
Remo ve the SD car d.Operating system 293
Multimedia system Z
Page 314 of 398
The indicator lamp in Roadside Assistance
button �C flashes while the call is active. The
Connecting Call message appears in the
multifunction display. The audio output is
muted.
If a connection can be established, the Call
Connected message appears in the multifunc-
tion display.
If a mobile phone network and GPS reception
are available, the system transfers data to the
Mercedes-Benz Customer Assistance Center,
for example: R
Current location of the vehicle R
Vehicle identification number
The multimedia system display indicates that a
call is active. During the call, you can change to
the navigation menu by pressing the NAVI but-
ton on the multimedia system, for example.
Voice output is not available in this case.
A voice connection is established between the
Mercedes-Benz Customer Assistance Center
and the vehicle occupants.
From the remote malfunction diagnosis, the
Mercedes-Benz Customer Assistance Center
can ascertain the nature of the problem
( Y
page 315).
The Mercedes-Benz Customer Assistance Cen-
ter either sends a qualified Mercedes-Benz tech-
nician or makes arrangements for your vehicle
to be transported to the nearest Mercedes-Benz
Service Center.
You may be charged for services such as repair
work and/or towing.
You can find more information in the separate
mbrace manual.
The system has not been able to initiate a Road-
side Assistance call, if: R
the �R indicator lamp for the Roadside
Assistance call button is flashing continu-
ously. R
no voice connection to the Mercedes-Benz
Customer Assistance Center was estab-
lished.
This can occur if the relevant mobile phone net-
work is not available, for example.
The Call Failed message appears in the mul-
tifunction display. X
To end a call: press the �v button on the
multifunction steering wheel.
or X
Press the corresponding multimedia system
button for ending a phone call.
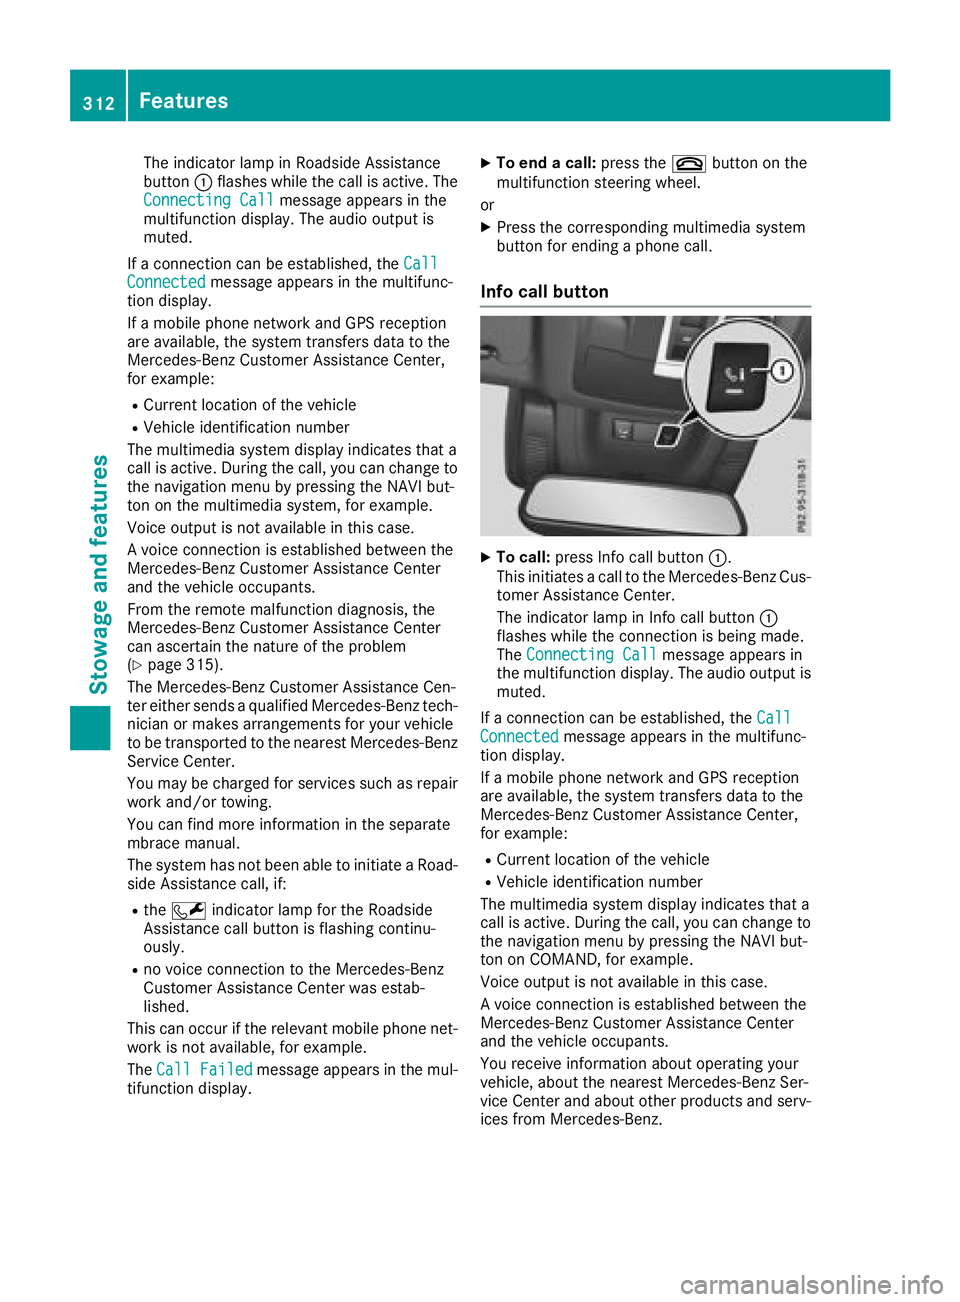
Info call button X
To call: press Info call button �C .
This initiates a call to the Mercedes-Benz Cus-
tomer Assistance Center.
The indicator lamp in Info call button �C
flashes while the connection is being made.
The Connecting Call message appears in
the multifunction display. The audio output is
muted.
If a connection can be established, the Call
Connected message appears in the multifunc-
tion display.
If a mobile phone network and GPS reception
are available, the system transfers data to the
Mercedes-Benz Customer Assistance Center,
for example: R
Current location of the vehicle R
Vehicle identification number
The multimedia system display indicates that a
call is active. During the call, you can change to
the navigation menu by pressing the NAVI but-
ton on COMAND, for example.
Voice output is not available in this case.
A voice connection is established between the
Mercedes-Benz Customer Assistance Center
and the vehicle occupants.
You receive information about operating your
vehicle, about the nearest Mercedes-Benz Ser-
vice Center and about other products and serv-
ices from Mercedes-Benz.312
Features
Stowage and features