2018 MERCEDES-BENZ E-CLASS COUPE oil pressure
[x] Cancel search: oil pressurePage 193 of 593
Fu
nction of thera dar senso rs Some driving and driving sa
fety sy stems use
ra dar sensors tomonitor the area in front of,
behind or next totheve hicle (depending on the
ve hicle's equipment).
Depending on theve hicle's equipment, thera dar
sensors are integrated behind the bumpers
and/or behind the Mercedes star. Keep these
parts free of dirt, ice and slush (→ page414).
The sensors must not be co vered, forex ample
by cycle rack s, ove rhanging loads, sticke rs,fo il
or foils toprotect against stone chipping. In the
eve nt of dama getothe bumpers or radiator
grille, or following a collision impacting the
bumpers or radiator grille, ha vethe function of
th era dar sensors checked at a qualified special‐
ist workshop. The driver assis tance sy stem may
no longer workproper ly. Overview of driving sy
stems and driving
saf ety sy stems In
this section, you will find information about
th efo llowing driving sy stems and driving saf ety
sy stems:
R 360° Camera (→ page 228)
R ABS (A nti-lock Braking System)
(→ page 190)
R Active Dis tance Assi stDISTRONIC
(→ page 205)
R Adaptive brake lights (→ page 201)
R AIR BODY CONTROL (→ page218)
R Active Brake Assi st (→page 196)
R Active Lane Keeping Assist (→ page 250)
R ATTENTION ASSIST (→ page243)
R BAS (Brak eAssist System) (→ page191)
R Hill Start Assist (→ page216)
R DYNA MIC BODY CONTROL (→ page218)
R EBD ( Electronic Brakeforc eDistribution)
(→ page 195) R
ESP ®
(Electronic Stability Program)
(→ page 191)
R Active Speed Limit Assi st (→page 208)
R HOLD function (→ page217)
R STEER CONTROL (→ page 196)
R Active Steering Assist (→ page211)
R Speed limi ter (→ page 202)
R Active Parking Assist (→ page 232)
R Parking Assist PARKTRONIC (→ page 221)
R Reversing camera (→ page 225)
R Cruise control (→ page 201)
R Blind Spot Assist and Active Blind Spot Assi st
( → page 247)
R Traf fic Sign Assi st (→page 245) Fu
nction of ABS (Anti-lock Braking Sy stem) ABS
regulates the brake pressure in critical driv‐
ing situations:
R During braking, e.g. at full brake application
or insuf ficient tyre traction, the wheels are
pr eve nted from lo cking. 19 0
Driving and pa rking
Page 268 of 593
Ve
hicles with Traf fic Sign Assis t:de tected
instructions and traf fic signs (→ page 245). Ad
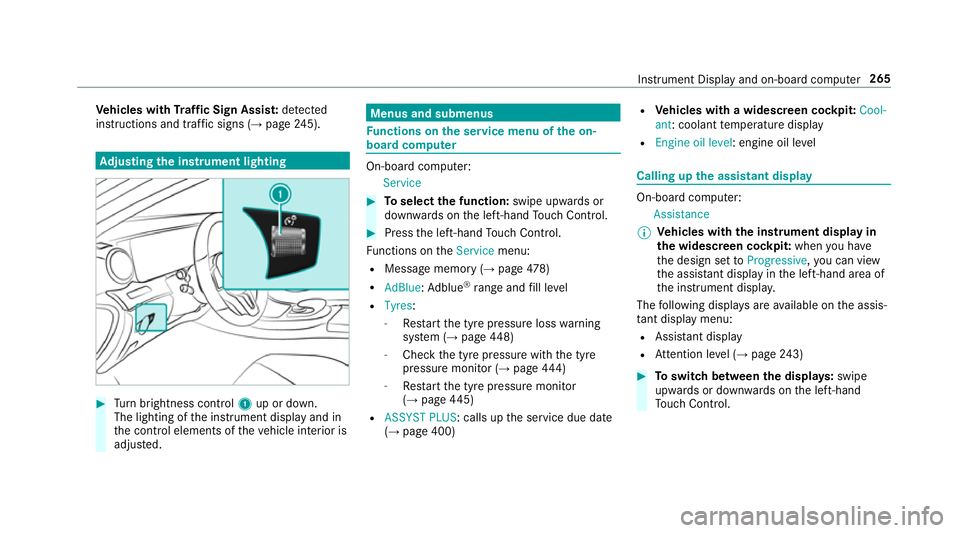
justing the in stru ment lighting #
Turn brightness control 1up or down.
The lighting of the instrument display and in
th e control elements of theve hicle interior is
adjus ted. Menus and submenus
Fu
nctions on the service menu of the on-
board compu ter On-board computer:
Service #
Toselect the function: swipe upwards or
down wards on the left-hand Touch Control. #
Press the left-hand Touch Control.
Fu nctions on theService menu:
R Message memory (→ page478)
R AdBlue :Ad blue ®
ra nge and fill le vel
R Tyres:
- Restart the tyre pressure loss warning
sy stem (→ page448)
- Che ckthe tyre pressure with the tyre
pressure monitor (→ page444)
- Restart the tyre pressure monitor
(→ page 445)
R ASSYST PLUS: calls up the service due date
(→ page 400) R
Vehicles with a widescreen cock pit:Cool-
ant : coolant temp erature display
R Engine oil level: engine oil le vel Calling up
the assistant display On-board computer:
Assistance
% Ve
hicles with the instrument display in
th e widescreen cockpit: whenyou ha ve
th e design set toProgressive ,yo u can view
th e assis tant displ ayinthe left-hand area of
th e instrument displa y.
The following displa ysare available on the assis‐
ta nt displ aymenu:
R Assis tant displ ay
R Attention le vel (→ page 243) #
Toswitch between the displa ys:swipe
upwards or down wards on the left-hand
To uch Control. In
stru ment Display and on-board computer 265
Page 413 of 593
R
vehicles with deco rative foil: parts of your
ve hicle are co vered with a decorative foil.
Maintain a dis tance of at least 70 cm
between thefo il-c ove red parts of theve hicle
and the nozzle of the high-pressure cleaner.
Mo vethe high-pressure cleaner nozzle
around whilst cleaning. The waterte mp era‐
ture of the high-pressure cleaner must not
exc eed 60 °C.
R obser vethe information on the cor rect dis‐
ta nce in the equipment manufacturer's oper‐
ating instructions. R
do not point the nozzle of the high-pressure
cleaner directly at sensitive parts such as
tyres, slits, electrical components, bat teries,
light bulbs and ventilation sl ots. Wa
shing the vehicle byhand Obser
vethe legal requirements, e.g. in a number
of countries, washing byhand is only permitted
in specially designated wash ba ys. #
Use a mild cleaning agent, e.g. car shampoo. #
Washtheve hicle with luk ewarmwate r using
a soft car sponge. When doing so, do not
ex pose theve hicle todirect sunlight. #
Carefully hose theve hicle off with water and
dry using a chamois. Take care not topoint
th ewate r jet directly towa rdsth e air inlet
grille. 41 0
Maintenance and care
Page 418 of 593

Note
s on cleaning and car eA voiding vehicle damage
Exterior lighting Cleanthe lenses with a wet sponge and mild cleaning agent,
e.g. car sha mpoo. Only use cleaning agents or cleaning clo
thsth at are suitable
fo r plast ic lenses.
Sensors Cleanthe sensors in the front and rear bumper and in the
ra diator grille with a soft clo thand car shampoo. When using a high-pressure cleaner, main
tain a minimum dis‐
ta nce of 30 cm.
Re versing camera
and 360° Camera R
Open the camera co ver with the multimedia sy stem
(→ page 231).
R Use clean water and a soft clo thtoclean the camera lens. Do not use a high-pressure cleaner.
Ta ilpipes
Clean with cleaning agents recommended byMercedes-Benz,
particular lyin the winter and af terwa shing theve hicle. Do not use acidic cleaning agents.
Tr ailer hitch R
Remo vetraces of rust on the ball, e.g. with a wire brush.
R Remo vedirt with a lint-free clo th.
R After cleaning, oil or grease the ball head lightl y.
R Obser vethe no tes on care in the trailer hitch manufactur‐
er's operating instructions. Do not clean
the ball neck with a high-pressure cleaner or sol‐
ve nt. Maintenance and care
415
Page 455 of 593
R
Obser vethe maximum permissible speed for
th e M+S tyres fitted.
If th is is below theve hicle's maximum speed,
th is must be indicated byan appropriate
label in the driver's field of vision.
R Run in new tyres at moderate speeds forthe
fi rs t10 0 km.
R Replace the tyres af ter six years at the latest,
re ga rdless of wear.
R When replacing with tyres that do not
fe ature run-flat characteristics: vehicles
with MOExtended tyres are not equipped
with a TIREFIT kit at thefa ctor y.Equip the
ve hicle with a TIREFIT kit af terre placing with
tyres that do not feature run-flat characteris‐
tics, e.g. winter tyres.
Fo r more information on wheels and tyres, con‐
ta ct a qualified specialist workshop.
Be sure toalso obse rveth efo llowing fur ther
re lated subjects:
R Notes on tyre pressure (→ page442)
R Tyre pressure table (→ page443) R
Notes on the emer gency spa rewheel
(→ page 459) Note
s on inter changing wheels &
WARNING Risk of inju rythro ugh dif fer‐
ent wheel sizes
Inter changing the front and rear wheels if the
wheels or tyres ha vediffere nt dimensions
may se verely impair the driving characteris‐
tics.
The disk brakes or wheel suspension compo‐
nents may also be damaged. #
Rotate front and rear wheels on lyifthe
wheels and tyres are of the same
dimensions. Inter
changing the front and rear wheels if the
wheels or tyres ha vediffere nt dimensions can
re nder thege neral operating pe rmit in valid. The
wear pat tern s on the front and rear wheels
dif fer:
R Front wheels wear more on the shoulder of
th e tyre
R Rear wheels wear more in the cent reofthe
tyre
On vehicles with the same front and rear wheel
size, you can inter change the wheels every
5,000 to10,000 km, depending on thewe ar.
Ensure the direction of rotation is maintained for
th e wheels.
It is imperative toobser vethe instructions and
saf ety no tes on "Changing a wheel" when doing
so Preparing theve hicle for a wheel
ch ange( →page 453). Note
s onstoring wheels When
storing wheels, obser vethefo llowing
no tes:
R Afterre moving wheels, store them in a cool,
dry and preferably dark place.
R Protect the tyres from conta ct withoil,
grease or fuel. 452
Wheels and tyres
Page 512 of 593
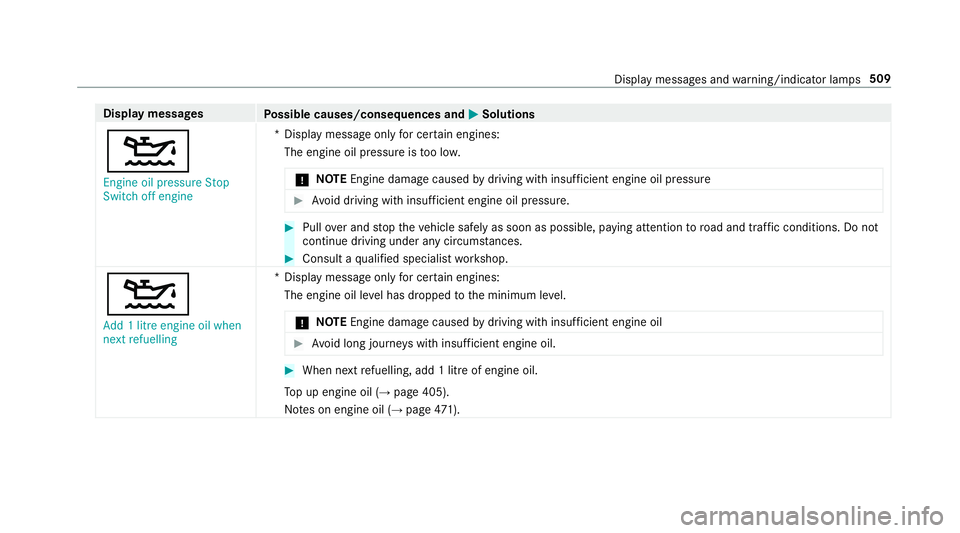
Display messages
Possible causes/consequences and M
MSolutions
4 Engine oil pressure Stop
Switch off engine *D
isplay message only for cer tain engines:
The engine oil pressure is too lo w.
* NO
TEEngine dama gecaused bydriving with insuf ficient engine oil pressure #
Avoid driving with insuf ficient engine oil pressure. #
Pull over and stop theve hicle safely as soon as possible, paying attention toroad and traf fic conditions. Do not
continue driving under any circums tances. #
Consult a qualified specialist workshop.
4 Add 1 litre engine oil when
next refuelling *D
isplay message only for cer tain engines:
The engine oil le vel has dropped tothe minimum le vel.
* NO
TEEngine dama gecaused bydriving with insuf ficient engine oil #
Avoid long journe yswith insuf ficient engine oil. #
When next refuelling, add 1 litre of engine oil.
To p up engine oil (→ page 405).
No tes on engine oil (→ page471). Displ
aymessa ges and warning/indicator lamps 509
Page 560 of 593

4Engine oil le
velSt op vehicle
Switch engine off ................................ 508
4Engine oil pressure Stop Switch
off engine ............................................ 509
6Example: Left windowbag mal‐
function Consult workshop ................. 487
Fa ult Drive at max. 80 km/h ...............497
6 Front left malfunction Consult
wo rkshop (Example) ............................4 91
_ Front left seat backrest not
loc ked (Example) .................................5 22
Fr ont-passenger airbag disabled See
Owner's Manual ..................................4 89
Fr ont-passenger airbag enabled See
Owner's Manual ..................................4 88
b Hazard warning lamps mal‐
functioning .......................................... 529
&inoperative Bat tery low .............. .527
& inope rative Refuel vehicle ........... 527
&inoperative See Owner's Man. ....527 !
inope rative See Owner's Man‐
ual ....................................................... 486
÷inoperati veSee Owner's Man‐
ual ....................................................... 486
Tinoperati veSee Owner's Man‐
ual ....................................................... 483
GInoperati ve.................................. 490
bIntelli gent Light Sy stem inoper‐
ative ....................................................5 28
ÁKe y not de tected (red displ ay
messa ge).............................................5 19
Á Key not de tected (white dis‐
pl ay messa ge).....................................5 20
bLeft dipped beam (Example) ....... 528
6Left wind owbag malfunction
Consult workshop (Example) ............... 487
Let fresh air into theve hicle interior!
Air conditioning malf. Visit workshop .. 526
Limiter inoperative .............................. 500
Limiter passive .................................... 501 ¢
Lowe ring .................................... 498
bMalfunction See Owner's Man‐
ual ....................................................... 529
ðMaximum speed exceeded ..........5 01
Mercedes me connect Services limi‐
te d See Owner's Manual .....................490
Mo tor can be star ted again .................5 05
N permanently active Risk of vehicle
ro lling .................................................. .513
ç Off............................................... 499
ëOff ............................................... 496
Only select Park (P) when vehicle is
st ationary ............................................ .514
ï Operation only possible in
transmission position N ....................... 522
ïOperation only possible in
transmission position P ....................... 522
!Pa rking brake See Owner's
Manual ................................................ 480 Index
557