2018 MERCEDES-BENZ E-CLASS COUPE turn signal
[x] Cancel search: turn signalPage 237 of 593

#
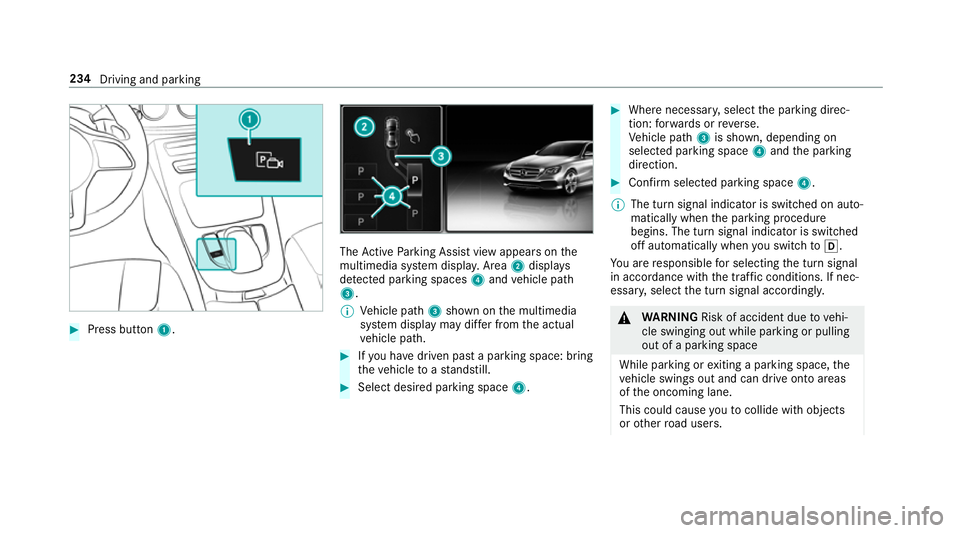
Press button 1. The
Active Parking Assist view appears on the
multimedia sy stem displa y.Area 2displ ays
de tected pa rking spaces 4and vehicle path
3.
% Vehicle path 3shown on the multimedia
sy stem display may dif fer from the actual
ve hicle path. #
Ifyo u ha vedriven past a parking space: bring
th eve hicle toast andstill. #
Select desired parking space 4. #
Where necessar y,select the parking direc‐
tion: forw ards or reve rse.
Ve hicle path 3is shown, depending on
selected parking space 4and the parking
direction. #
Confirm selected parking space 4.
% The turn signal indicator is switched on auto‐
matically when the parking procedure
begins. The turn signal indicator is switched
off automatically when you swit chtoh .
Yo u are responsible for selecting the turn signal
in accordance with the traf fic conditions. If nec‐
essar y,select the turn signal accordingly. &
WARNING Risk of accident due tovehi‐
cle swinging out while parking or pulling
out of a parking space
While parking or exiting a parking space, the
ve hicle swings out and can drive onto areas
of the oncoming lane.
This could cause youto collide wi thobjects
or other road users. 234
Driving and parking
Page 239 of 593

#
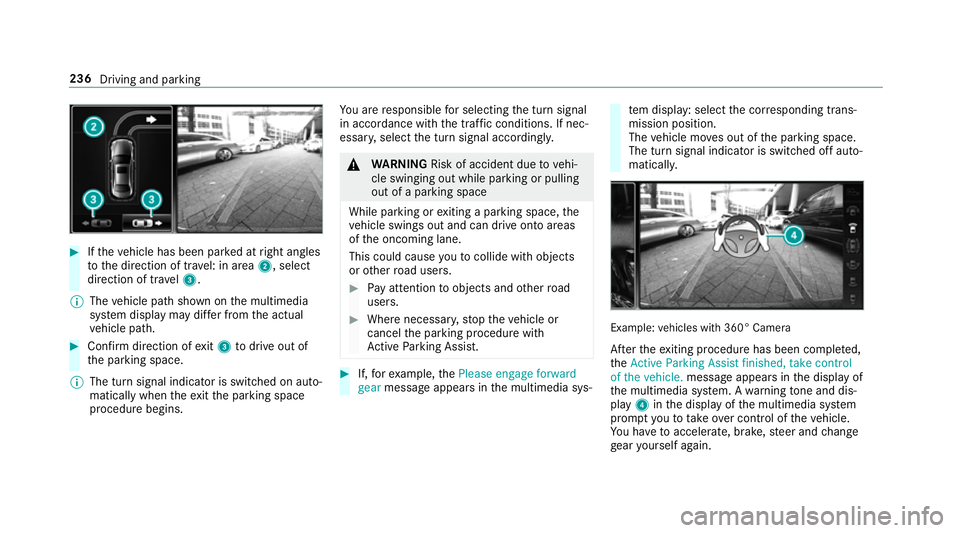
Ifth eve hicle has been par ked at right angles
to the direction of tra vel: in area 2, select
direction of tra vel3.
% The vehicle path shown on the multimedia
sy stem display may dif fer from the actual
ve hicle path. #
Confirm direction of exit3 todrive out of
th e parking space.
% The turn signal indicator is switched on auto‐
matically when theex itth e parking space
procedure begins. Yo
u are responsible for selecting the turn signal
in accordance with the traf fic conditions. If nec‐
essar y,select the turn signal accordingly. &
WARNING Risk of accident due tovehi‐
cle swinging out while parking or pulling
out of a parking space
While parking or exiting a parking space, the
ve hicle swings out and can drive onto areas
of the oncoming lane.
This could cause youto collide wi thobjects
or other road users. #
Pay attention toobjects and other road
users. #
Where necessar y,stop theve hicle or
cancel the parking procedure with
Ac tive Parking Assist. #
If,forex ample, thePlease engage forward
gear message appears in the multimedia sys‐ te
m display: select the cor responding trans‐
mission position.
The vehicle mo ves out of the parking space.
The turn signal indicator is switched off auto‐
maticall y. Example:
vehicles with 360° Camera
Af terth eex iting procedure has been comple ted,
th eActive Parking Assist finished, take control
of the vehicle. message appears in the display of
th e multimedia sy stem. A warning tone and dis‐
pl ay 4 inthe display of the multimedia sy stem
prom ptyouto take ove r control of theve hicle.
Yo u ha vetoaccelerate, brake, steer and change
ge ar yourself again. 236
Driving and parking
Page 250 of 593

#
Select Adopt limit . #
Activate Oor deacti vate ª the function.
The speed limits de tected byTraf fic Sign
Assi stare automatically adop tedby Active
Dis tance Assi stDISTRONIC.
Displ aying de tected traf fic signs in the
media display #
Select Display in COMAND .#
Activate Oor deacti vate ª the function.
% When DISTRONIC, cruise control or theva ri‐
able limiter are activated, the speed de tec‐
te d can be manually adop ted as the speed
limit (→ page 207).
Ad justing the type of warning #
Select Visual & audible ,Visual orNone.
Ad justing the warning threshold
This value de term ines the speed at which a
wa rning is issued when exceeded. #
Select Warning threshold. #
Set the desired speed. Blind Spot Assist and
Active Blind Spot
Assi st Fu
nction of Blind Spot Assist and Active
Blind Spot Assi stwith exitwa rning
Blind Spot Assist and Active Blind Spot Assi st
use two lateral, rear-facing radar sensors to
monitor the area up to40 m behind your vehicle
and 3 m directly next to yourvehicle.
If a vehicle is de tected at speeds ab ove appr ox‐
imately 12km/h and this vehicle subsequently
enters the monitoring range di rectly next to your
ve hicle, thewa rning lamp in the outside mir ror
lights up red.
If a vehicle is de tected close tothe side of your
ve hicle, there dwa rning lamp in the outside mir‐
ro rflashes. If you swit chon the turn signal indi‐
cator in the cor responding direction, a warning
to ne sounds once. If the turn signal indicator
re mains switched on, all other de tected vehicles
are indicated only bytheflashing of thered
wa rning lamp.
If yo uove rtake a vehicle quickl y,no warning is
given. &
WARNING Risk of accident despi teBlind
Spot Assi st
Blind Spot Assi stdoes not react tovehicles
approaching and overtaking you at a greatly
di fferent speed.
As a result, Blind Spot Assist cannot warn
drivers in this situation. #
Alw ays pay careful attention tothe traf‐
fi c situation and maintain a safe dis‐
ta nce at the side of theve hicle. Blind Spot Assist and
Active Blind Spot Assi st
are on lyaids. They may failto detect some vehi‐
cles and are no substitute for attentive driving.
Alw ays ensure that there is suf ficient di stance to
th e side forot her road users and obs tacles.
Exit warning
The exitwa rning is an additional function of
Blind Spot Assist and can warnvehicle occu‐
pants about approaching vehicles when leaving
th eve hicle when stationar y. Driving and pa
rking 247
Page 254 of 593

speed,
for braking in good time and forst ay ing
in lane.
Ac tive Lane Keeping Assist can bring theve hicle
back into the lane with a lane-cor recting brake
application. In the case of a broken lane marking
being de tected, a brake application will only be
made if a vehicle has been de tected in the adja‐
cent lane. Oncoming tra ffic can be de tected.
Ve hicles with Driving Assistance pac kageor
Driving Assistance Plus pa ckage: overtaking
ve hicles and vehicles in adjacent lanes can also
be de tected.
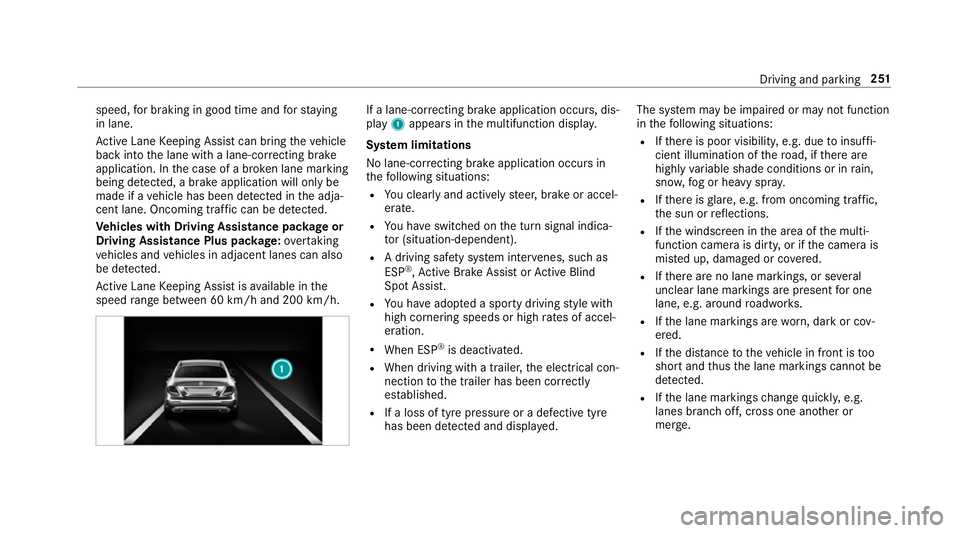
Ac tive Lane Keeping Assist is available in the
speed range between 60 km/h and 200 km/h. If a lane-co
rrecting brake application occurs, dis‐
play 1appears in the multifunction displa y.
Sy stem limitations
No lane-cor recting brake application occu rsin
th efo llowing situations:
R You clear lyand actively steer, brake or accel‐
erate.
R You ha veswitched on the turn signal indica‐
to r (situation-dependent).
R A driving saf ety sy stem inter venes, su chas
ESP ®
,Ac tive Brake Assi stor Active Blind
Spot Assi st.
R You ha veadop ted a sporty driving style with
high cornering speeds or high rates of accel‐
eration.
R When ESP ®
is deactivated.
R When driving with a trailer, the electrical con‐
nection tothe trailer has been cor rectly
es tablished.
R If a loss of tyre pressure or a defective tyre
has been de tected and displ ayed. The sy
stem may be impaired or may not function
in thefo llowing situations:
R Ifth ere is poor visibility, e.g. due toinsuf fi‐
cient illumination of thero ad, if there are
highly variable shade conditions or in rain,
sno w,fog or heavy spr ay.
R Ifth ere is glare, e.g. from oncoming traf fic,
th e sun or reflections.
R Ifth e windscreen in the area of the multi‐
function camera is dirty, or if the camera is
mis ted up, damaged or co vered.
R Ifth ere are no lane markings, or se veral
unclear lane markings are present for one
lane, e.g. around roadwor ks.
R Ifth e lane markings are worn, dark or cov‐
ered.
R Ifth e dis tance totheve hicle in front is too
short and thus the lane markings cann otbe
de tected.
R Ifth e lane markings change quickl y,e.g.
lanes branch off, cross one ano ther or
mer ge. Driving and pa
rking 251
Page 259 of 593

The operation of
thefo llowing sy stems depends
on the trailer being connected cor rectly:
R Active Lane Keeping Assist
R ESP ®
R Parking Assist PARKTRONIC
R Active Parking Assist
R Blind Spot Assist or Active Blind Spot Assi st
Coupling up a trailer
* NO
TEDama getotheve hicle battery due
to full dischar ge Charging
the trailer battery using the po wer
supply of the trailer can damage theve hicle
batter y. #
Do not use theve hicle's po wer supply
to charge the trailer batter y.#
Remo vethe co ver from the ball head and
st ore it in a safe place (→ page113). #
Position the trailer on a le vel sur face behind
th eve hicle and couple it up totheve hicle. #
Open the soc ket cap. #
Inse rtthe plug with lug 1in groo ve3 on
th e soc ket. #
Turn the ba yonet coupling 2clockwise as
fa r as it will go. #
Let the cap engage. #
Secure the cable tothe trailer with cable ties
(only if you are using an adap ter cable). #
Make sure that the cable is alw ays slack for
ease of mo vement during cornering. #
Push the combination switch upwards/down‐
wa rds and check whe ther the cor responding
turn signal light on the trailer is flashing. A display message may appear on
the multifunc‐
tion display even if the trailer has been connec‐
te d cor rectly:
R LEDs ha vebeen ins talled in the trailer light‐
ing sy stem
R the cur rent has fallen below the trailer light‐
ing sy stem's minimum cur rent (50 mA)
% Accessories can be connected tothe perma‐
nent po wer supp lyup to180W, and tothe
po we r supp lythat is swit ched on via the igni‐
tion loc k.
Un coupling a trailer &
WARNING Risk of being crushed and
becoming trapped when uncoupling a
trailer
When uncoupling a trailer wi than engaged
ine rtia-activated brake, your hand may
become trapped between theve hicle and the
trailer dr awbar. #
Do not uncouple trailers with an
engaged overrun brake. 256
Driving and pa rking
Page 585 of 593

Tr
anspo rting
Ve hicle ................................................ 435
Tr im element (Care) .................................416
Tr ip
Menu (on-board computer) .................. 266
Tr ip computer
Displaying ............................................ 266
Re setting ............................................. 268
Tr ip distance ............................................ 266
Displaying ............................................ 266
Re setting ............................................. 268
Tr ip me ter
see Trip dis tance
Tu rn signal indicator
see Turn signal lights
Tu rn signal lights .....................................1 30
Switching on/off ................................. 13 0
TV ............................................................. 282
Ac tivating ............................................ 390
Ad justing the brightness ..................... 396
Calling up the menu (CI+ module) .......3 96
Displ ays in theTV control menu .......... 392 Fu
nction/no tes (audio language,
subtitles) ............................................. 394
Information .......................................... 388
Overview ..............................................3 91
Picture settings ................................... 396
Picture settings overview .................... 396
Setting subtitles .................................. 395
Setting the audio language .................. 395
Showing telete xt ................................. .395
Showing/hiding full screen ................. 392
Te lete xt overview ................................. 395
Vo ice commands (LINGU ATRO NIC) .....2 82
TV channel
Ac tivating/deactivating channel fix ..... 393
Channel fix .......................................... 393
Channel li stove rview .......................... 393
EPG (elect ronic programme guide) ...... 393
Overview of favo urites ........................ .393
Quick sa ve........................................... 394
Selecting from thech annel list ............ 392
Selecting from the control menu ......... 392
Selecting from thefa vo urites .............. 392
Selecting in the bac kground ................ 392
St oring .................................................3 94
Using a voice tag ................................. 394 Tw
o phone mode
see Second telephone
Tw o-w ayradios
Fr equencies ......................................... 462
No tes on ins tallation ............................ 461
Tr ansmission output (maximum) ........ .462
Ty re inflation compressor
see TIREFIT kit
Ty re pressure ........................................... 443
Checking (tyre pressure monitoring
sy stem) ............................................... 444
No tes .................................................. 442
Re starting the tyre pressure loss
wa rning sy stem ................................... 448
Re starting the tyre pressure monitor‐
ing sy stem ...........................................4 45
TIREFIT kit .......................................... .422
Ty re pressure loss warning sy stem
(function) ............................................. 448
Ty re pressure monitoring sy stem
(function) ............................................. 444
Ty re pressure table .............................. 443
Ty re pressure loss warning sy stem
Fu nction .............................................. 448582
Index