2018 MERCEDES-BENZ E-CLASS COUPE Trunk release
[x] Cancel search: Trunk releasePage 65 of 486
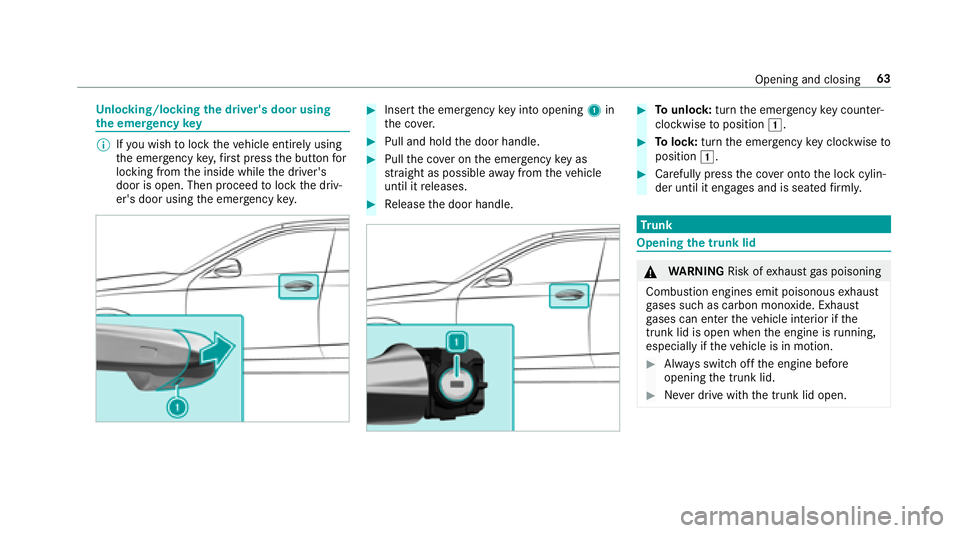
Unlocking/locking the driver's door using
th e emer gency key
%
Ifyo uwish tolock theve hicle entirely using
th e emer gency key,firs t press the button for
locking from the inside while the driver's
door is open. Then proceed tolock the driv‐
er's door using the emer gency key.
#Insert the emer gency keyin to opening 1in
th e co ver.
#Pull and hold the door handle.
#Pull the co ver on the emer gency keyas
st ra ight as possible away from theve hicle
until it releases.
#Re lease the door handle.
#To unlock :turn the emer gency keycounter -
clo ckwise toposition 1.
#Tolock: turnthe emer gency keyclo ckwise to
position 1.
#Carefully press the co ver onto the lock cylin‐
der until it engages and is seated firm ly.
Tr unk
Opening the trunk lid
&
WARNING Risk ofexhaust gas poisoning
Combustion engines emit poisonous exhaust
ga ses such as carbon monoxide. Exhaust
ga ses can enter theve hicle interior if the
trunk lid is open when the engine is running,
especially if theve hicle is in motion.
#Alw ays switch off the engine before
opening the trunk lid.
#Ne ver drive with the trunk lid open.
Opening and closing 63
Page 66 of 486
*NO
TEDama getothe trunk lid byobs ta‐
cles ab ovetheve hicle
The trunk lid swings upwards when it is
opened.
#Therefore, make sure that there is suf fi‐
cient clearance ab ovethe trunk lid.
Yo u ha vethefo llowing options toopen the trunk
lid:
#Wi th th e trunk lid unloc ked, press theto p of
th est ar.
#Ve hicles with trunk lid co nvenience clos‐
ing feature: withthe trunk lid stopped in an
intermediate position, pull it up and release
as soon as it begins toopen.
% Toopen the trunk lid, pull on thefo lded-out
st ar when there ar view camera is activated.
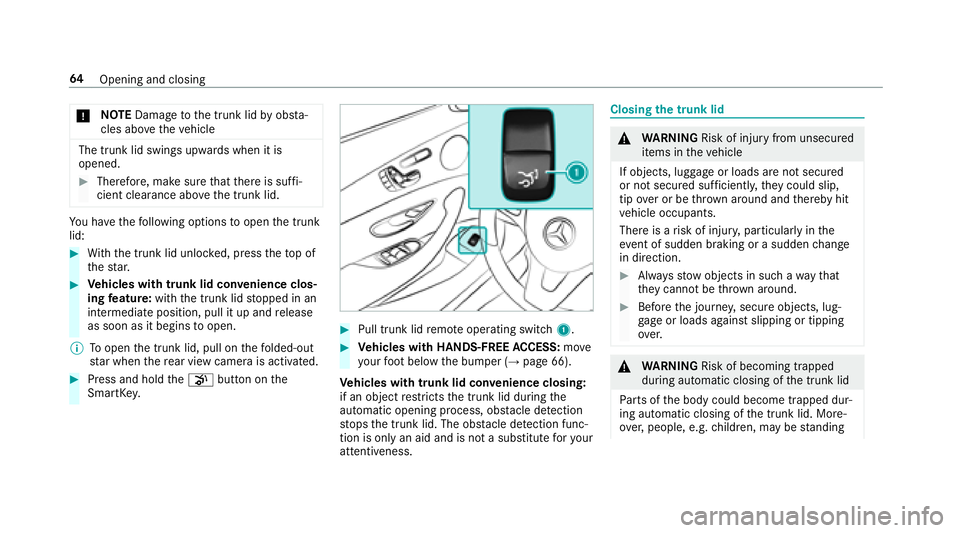
#Press and hold thep button on the
SmartK ey.
#Pull trunk lid remo teoperating switch 1.
#Vehicles with HANDS-FREE ACCESS: move
yo ur foot below the bumper (→page 66).
Ve hicles with trunk lid co nvenience closing:
if an object restricts the trunk lid during the
automatic opening process, obs tacle de tection
st ops the trunk lid. The obs tacle de tection func‐
tion is only an aid and is not a substitute foryo ur
attentiveness.
Closing the trunk lid
&
WARNING Risk of injury from unsecured
items in theve hicle
If objects, luggage or loads are not secured
or not secured suf ficientl y,they could slip,
tip ove r or be throw n around and thereby hit
ve hicle occupants.
There is a risk of injur y,particularly in the
ev ent of sudden braking or a sudden change
in direction.
#Alw aysstow objects in such a wayth at
th ey cannot be thro wn around.
#Before the journe y,secure objects, lug‐
ga ge or loads against slipping or tipping
ove r.
&
WARNING Risk of becoming trapped
duri ng au tomatic closing of the trunk lid
Pa rts of the body could become trapped dur‐
ing automatic closing of the trunk lid. More‐
ove r,people, e.g. children, may be standing
64
Opening and closing
Page 70 of 486

The trunk lid could be opened or closed uninten‐
tionally,in thefo llowing situations:
RIf persons' arms or legs mo veinthe sensor
de tection range, e.g. when polishing theve hi‐
cle, sitting on the edge of the trunk, or pick‐
ing up objects.
RIf objects are guided behind or placed behind
th eve hicle, e.g. charging cables, tensioning
st ra ps or luggage.
RWhen working on the trailer coupling, trailers
or rear bicycle rack s.
Deactivate KEYLESS-GO (
→page 56) or do not
car rythe SmartK eyabout your person insuch
situations.
Switch ing separate trunk locking on/off
Ifyo u centrally unlo cktheve hicle while separate
locking is activated, the trunk remains loc ked.
#To switch on: slidethe switch toposition
1.
#To switch off: slidethe switch toposition
2.
% If an accident has been de tected, the trunk
unloc kseve n if separate lo cking is switched
on.
Un locking the trunk with the emer gency
re lease from inside
Re quirement:RThe 12Vve hicle battery is connected and
ch arge d.
#Press emer gency release button 1brief ly.
The trunk lid unloc ksand opens.
68
Opening and closing
Page 98 of 486
#Toopen: press button 1.
Rear ben chseat through-loading feature
Fo lding there ar seat backrests forw ard
&
WARNING Risk of injury ifth ere ar
bench seat/rear seat and seat backrest
are not engaged
If th ere ar bench seat/rear seat and seat
backrest are not engaged they could fold for‐
wa rds, e.g. when braking suddenly or in the
ev ent of an accident.
RIfth is is the case, theve hicle occupant
wo uld beforc ed into the seat belt bythe
re ar bench seat/rear seat or bythe seat
backrest. The seat belt cann otprotect as
intended and could result in additional
injur y.
RObjects or loads in the trunk cannot be
re stra ined bythe seat backrest.
#Make sure that the seat backrest and
th ere ar bench seat/rear seat are
engaged before everytrip.
Re quirement:RThe rear seat backrest head restra ints are
fully inse rted.
The center and outer seat backrests can be fol‐
ded forw ards separatel y.
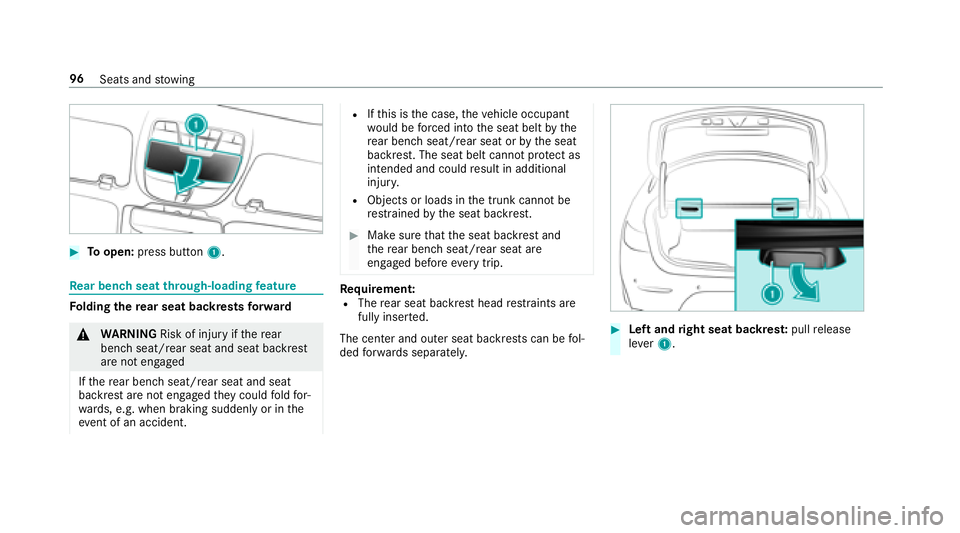
#Left andright seat backres t:pull release
le ve r1.
96
Seats and stowing
Page 151 of 486
shift from transmission positionjtoh or
k.
RIf th e transmission is in position k,the
trunk lid must be closed.
If th e seat belt tongue is not inser ted into the
seat belt buckle of the driver's seat, thefo llow‐
ing conditions must be fulfilled:
RThe driver's door is closed.
RYo u mo vethe transmission out of transmis‐
sion position joryou ha veprev iously
driven fasterthan 2 mph (3 km/h).
RIfth e transmission is in position k,the
trunk lid must be closed.
If th e electric parking brake is released, the
F (USA) or !(CANADA) indicator lamp in
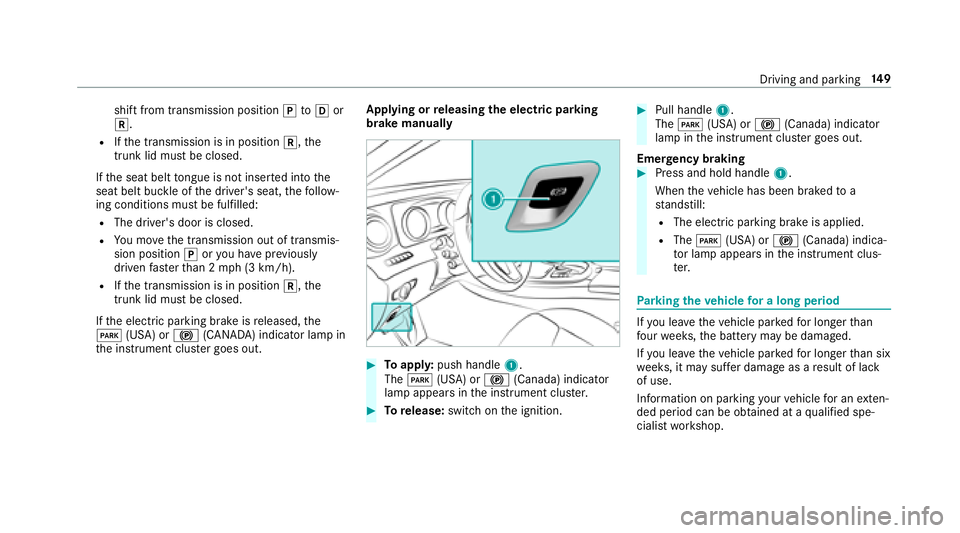
th e instrument clus ter goes out. Applying or
releasing the electric pa rking
brake manually
#To appl y:push handle 1.
The F (USA) or !(Canada) indicator
lamp appears in the instrument clus ter.
#To release: switch on the ignition.
#Pull handle 1.
The F (USA) or !(Canada) indicator
lamp in the instrument clus ter goes out.
Emer gency braking
#Press and hold handle 1.
When theve hicle has been braked toa
st andstill:
RThe electric parking brake is applied.
RThe F (USA) or !(Canada) indica‐
to r lamp appears in the instrument clus‐
te r.
Pa rking theve hicle for a long period
Ifyo u lea vetheve hicle par kedfo r longer than
fo ur we eks, the battery may be damaged.
If yo u lea vetheve hicle par kedfo r longer than six
we eks, it may suf fer dama geas a result of lack
of use.
Information on parking your vehicle for an exten‐
ded pe riod can be obtained at a qualified spe‐
cialist workshop.
Driving and parking 14
9
Page 369 of 486
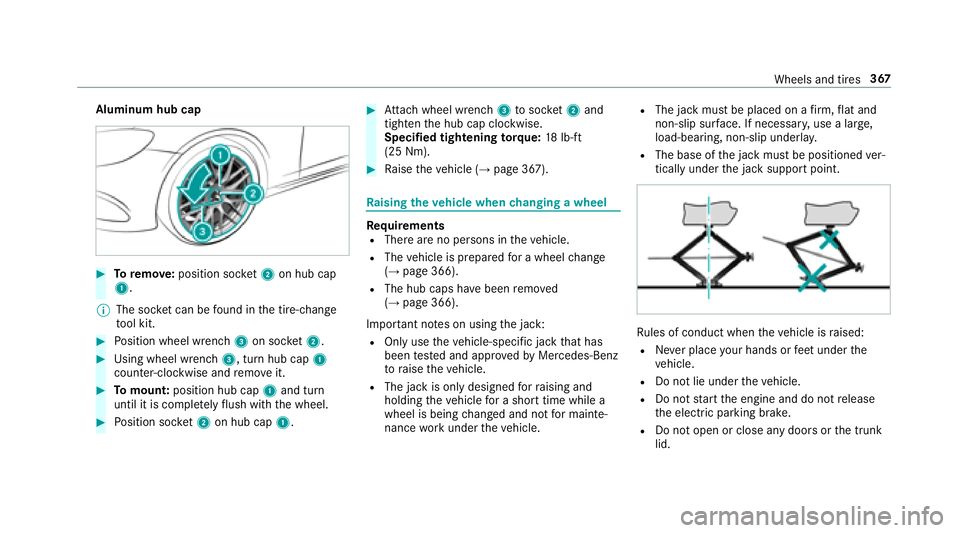
Aluminum hub cap
#Toremo ve:position soc ket2 on hub cap
1.
% The soc ket can be found inthe tire-change
to ol kit.
#Po sition wheel wrench 3on soc ket2.
#Using wheel wrench 3, turn hub cap1
counter-clo ckwise and remo veit.
#To mount: position hub cap 1and turn
until it is compl etely flush withth e wheel.
#Po sition soc ket2 on hub cap 1.
#Attach wheel wrench 3tosoc ket2 and
tighten the hub cap clockwise.
Specified tightening torq ue: 18lb-ft
(25 Nm).
#Ra ise theve hicle (→page 367).
Ra ising theve hicle when changing a wheel
Re quirementsRThere are no persons in theve hicle.
RThe vehicle is prepared for a wheel change
(→page 366).
RThe hub caps ha vebeen remo ved
(→page 366).
Impor tant no tes on using the jack:
ROnly use theve hicle-specific jack that has
been tested and appr ovedby Mercedes-Benz
to raise theve hicle.
RThe jack is only designed forra ising and
holding theve hicle for a short time while a
wheel is being changed and not for mainte‐
nance workunder theve hicle.
RThe jack must be placed on a firm ,fl at and
non-slip sur face. If necessar y,use a lar ge,
load-bearing, non-slip underla y.
RThe base ofthe jack must be positioned ver‐
tically under the jack support point.
Ru les of conduct when theve hicle is raised:
RNe ver place your hands or feet under the
ve hicle.
RDo not lie under theve hicle.
RDo not start the engine and do not release
th e electric parking brake.
RDo not open or close any doors or the trunk
lid.
Wheels and tires 367
Page 481 of 486
Traf fic Sign Assist .................................. .196
Fu nction/no tes ................................... 196
Setting ................................................. 198
Sy stem limits ....................................... 196
Tr ansfer redve hicle data
Android Auto ........................................ 276
Apple CarPlay ™ ................................... 276
Tr ansmission position display ................136
Tr ansport ing
Ve hicle ................................................ 336
Tr ead weargrade ..................................... 354
Tr im element (Care) .................................319
Tr ip
Menu (on-board computer) .................. 210
Tr ip computer
Displaying ............................................ 210
Re setting ..............................................2 11
Tr ip distance
Displaying ............................................ 210
Re setting ..............................................2 11
Tr ip distance
see Dis tance recorder
see Trip me ter Tr
ip me ter ................................................. 210
Tr unk lid ..................................................... 63
Ac tivating/deactivating the trunk lid
opening height restriction ..................... 69
Closing .................................................. 64
Emergency release (from inside) .......... .68
HANDS-FREE ACCESS .......................... .66
Loc ked separatel y .
................................6
8
Opening .................................................6 3
Opening dimensions ............................3 82
Tr unk lid
see Locking/unlo cking
see Trunk lid
Tu rn signal indicator
see Turn signal light
Tu rn signal light ....................................... 109
Ac tivating/deactivating .......................1 09
Tw o-w ayradios ........................................ 372
Fr equencies ......................................... 373
No tes on ins tallation ............................ 372
Tr ansmission output (maximum) .......... 373
Ty pes of voice commands (Voice Con‐
trol Sy stem) .............................................. 218
U
Un its of measurement
Setting ................................................ .241
Un locking setting ...................................... 56
USB devices Connecting .......................................... 290
User profile .............................................. 242
Cr eating .............................................. .242
Options ................................................ 242
Selecting ............................................. 242
Using thete lephone
see Calls
V
Ve hicle .............................................. 129, 130
Ac tivating/deactivating standby
mode .................................................. .150
Cor rect use ........................................... 25
Data acquisition .................................... 26
Diagnostics connection ......................... 24
Equipment ............................................. 20
Limited Warranty .................................. .26
Locking (auto matically) ......................... 62
Index47
9