2018 MERCEDES-BENZ CLS change wheel
[x] Cancel search: change wheelPage 188 of 334
there is sufficient distance on the side for
other traffic or obstacles.
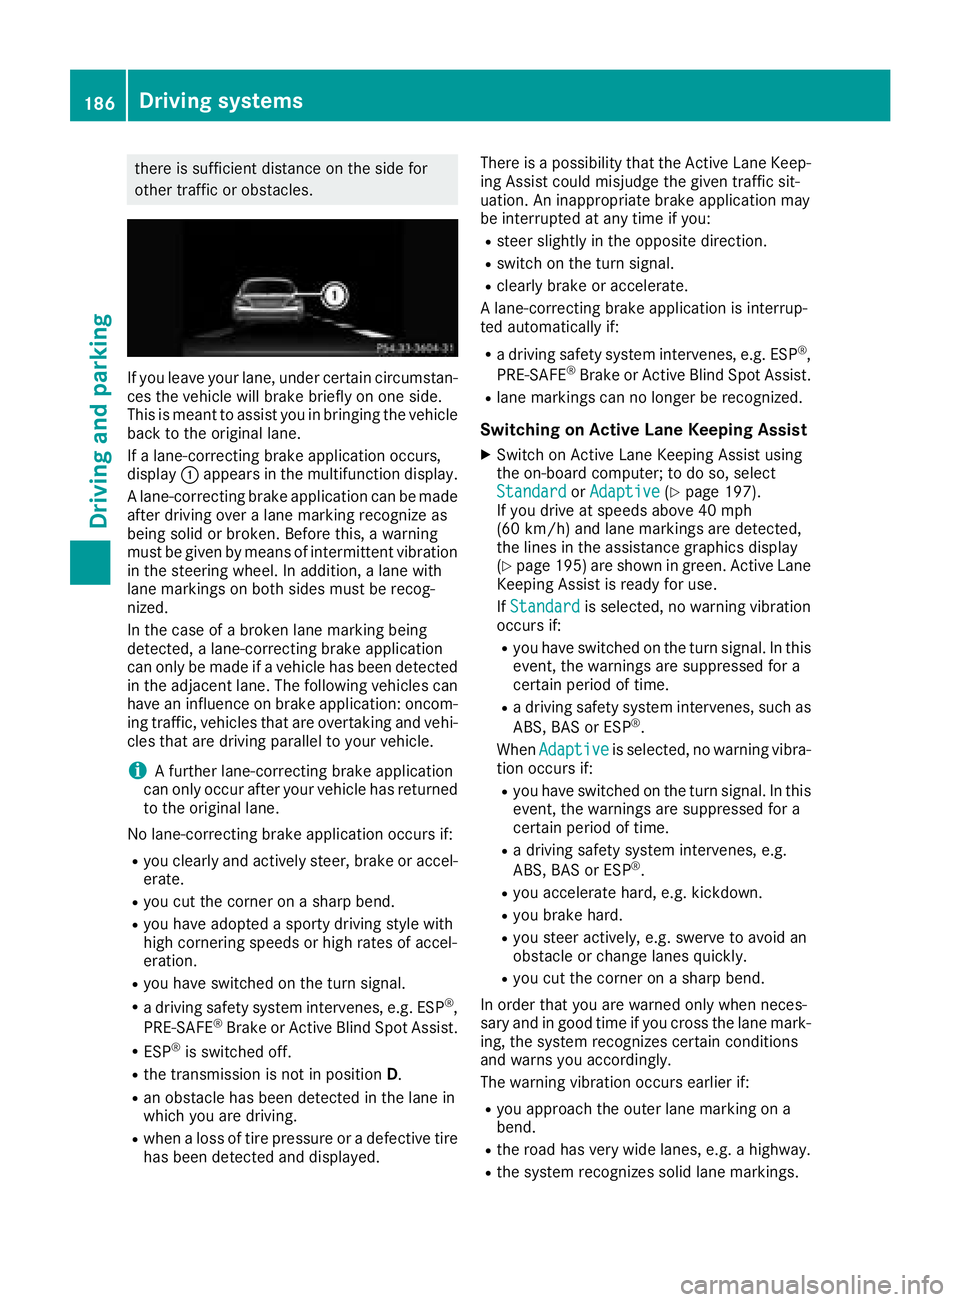
If you leave your lane, under certain circumstan-
ces the vehicle will brake briefly on one side.
This is meant to assist you in bringing the vehicle
back to the original lane.
If a lane-correcting brake application occurs,
display �C appears in the multifunction display.
A lane-correcting brake application can be made
after driving over a lane marking recognize as
being solid or broken. Before this, a warning
must be given by means of intermittent vibration
in the steering wheel. In addition, a lane with
lane markings on both sides must be recog-
nized.
In the case of a broken lane marking being
detected, a lane-correcting brake application
can only be made if a vehicle has been detected
in the adjacent lane. The following vehicles can
have an influence on brake application: oncom-
ing traffic, vehicles that are overtaking and vehi-
cles that are driving parallel to your vehicle.
i A further lane-correcting brake application
can only occur after your vehicle has returned
to the original lane.
No lane-correcting brake application occurs if: R
you clearly and actively steer, brake or accel-
erate. R
you cut the corner on a sharp bend. R
you have adopted a sporty driving style with
high cornering speeds or high rates of accel-
eration. R
you have switched on the turn signal. R
a driving safety system intervenes, e.g. ESP ®
,
PRE-SAFE ®
Brake or Active Blind Spot Assist.R
ESP ®
is switched off.R
the transmission is not in position D .R
an obstacle has been detected in the lane in
which you are driving. R
when a loss of tire pressure or a defective tire
has been detected and displayed. There is a possibility that the Active Lane Keep-
ing Assist could misjudge the given traffic sit-
uation. An inappropriate brake application may
be interrupted at any time if you: R
steer slightly in the opposite direction. R
switch on the turn signal. R
clearly brake or accelerate.
A lane-correcting brake application is interrup-
ted automatically if: R
a driving safety system intervenes, e.g. ESP ®
,
PRE-SAFE ®
Brake or Active Blind Spot Assist. R
lane markings can no longer be recognized.
Switching on Active Lane Keeping Assist X
Switch on Active Lane Keeping Assist using
the on-board computer; to do so, select
Standard or Adaptive ( Y
page 197).
If you drive at speeds above 40 mph
(60 km/h) and lane markings are detected,
the lines in the assistance graphics display
( Y
page 195 )a re shown in green. Active Lane
Keeping Assist is ready for use.
If Standard is selected, no warning vibration
occurs if: R
you have switched on the turn signal. In this
event, the warnings are suppressed for a
certain period of time. R
a driving safety system intervenes, such as
ABS, BAS or ESP ®
.
When Adaptive
is selected, no warning vibra-
tion occurs if: R
you have switched on the turn signal. In this
event, the warnings are suppressed for a
certain period of time. R
a driving safety system intervenes, e.g.
ABS, BAS or ESP ®
.R
you accelerate hard, e.g. kickdown. R
you brake hard. R
you steer actively, e.g. swerve to avoid an
obstacle or change lanes quickly. R
you cut the corner on a sharp bend.
In order that you are warned only when neces-
sary and in good time if you cross the lane mark-
ing, the system recognizes certain conditions
and warns you accordingly.
The warning vibration occurs earlier if: R
you approach the outer lane marking on a
bend. R
the road has very wide lanes, e.g. a highway. R
the system recognizes solid lane markings.186
Driving systems
Driving and parking
Page 194 of 334
You can reset the values of the following func-
tions: R
Trip odometer R
"From Start" trip computer R
"From Reset" trip computer R
ECO display
i If you reset the values in the ECO display,
the values in the "From Start" trip computer
are also reset. If you reset the values in the
"From Start" trip computer, the values in the
ECO display are also reset.
Navigation system menu
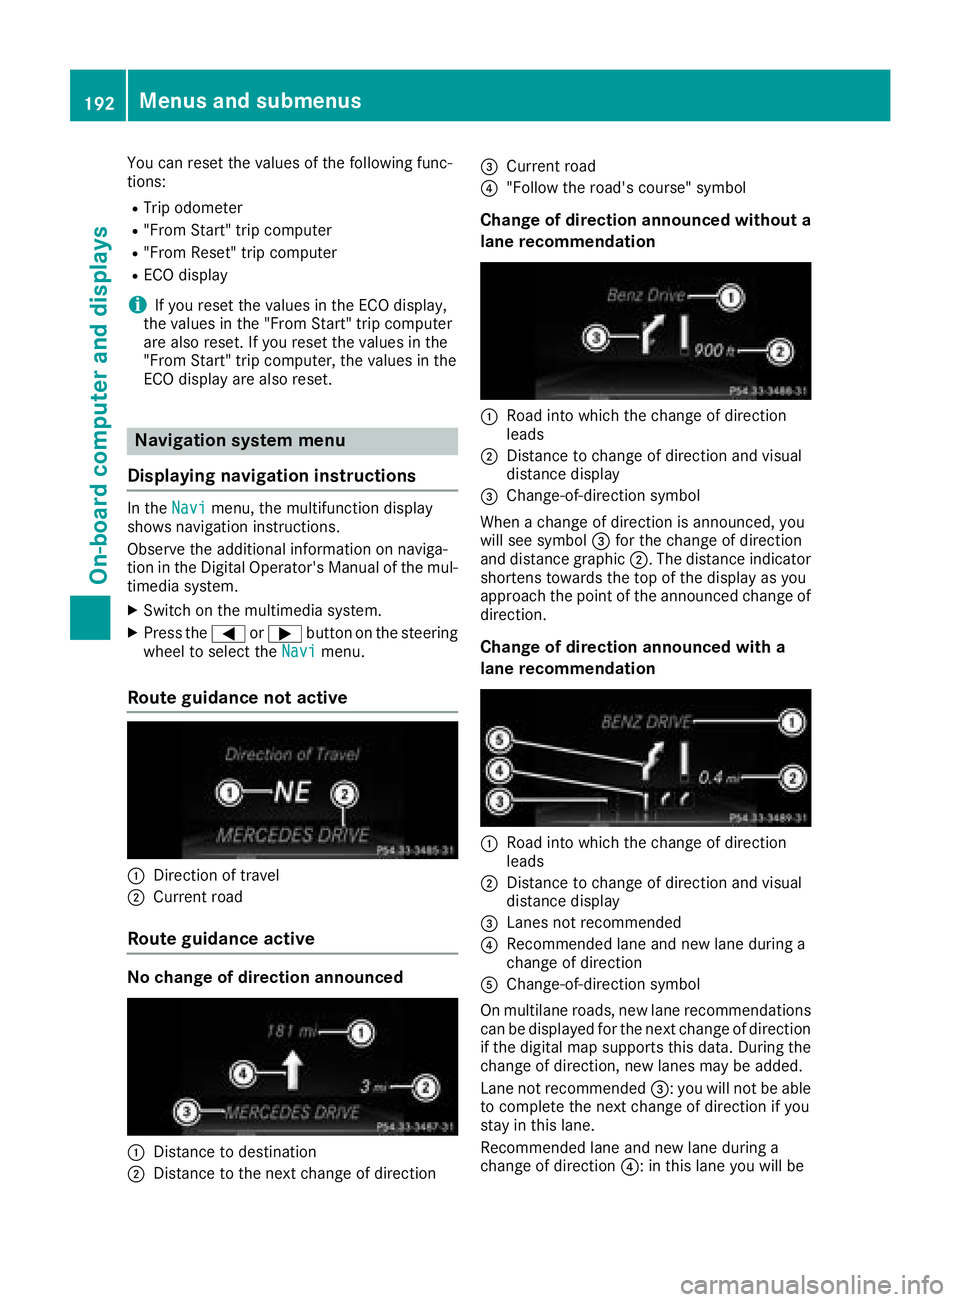
Displaying navigation instructions In the Navi menu, the multifunction display
shows navigation instructions.
Observe the additional information on naviga-
tion in the Digital Operator's Manual of the mul-
timedia system. X
Switch on the multimedia system. X
Press the �Y or �e button on the steering
wheel to select the Navi menu.
Route guidance not active
�C
Direction of travel�D
Current road
Route guidance active
No change of direction announced
�C
Distance to destination
�D
Distance to the next change of direction �
Page 195 of 334
able to complete the next two changes of direc-
tion without changing lane.
Other status indicators of the naviga-
tion system
The navigation system displays additional infor-
mation and the vehicle status.
Possible displays: R
New Route... or Calculating Route
A new route is calculated. R
Road Not Mapped
The vehicle position is inside the area of the
digital map but the road is not recognized, e.g.
newly built streets, car parks or private land. R
No Route
No route could be calculated to the selected
destination. R
�K : you have reached the destination or an
intermediate destination.
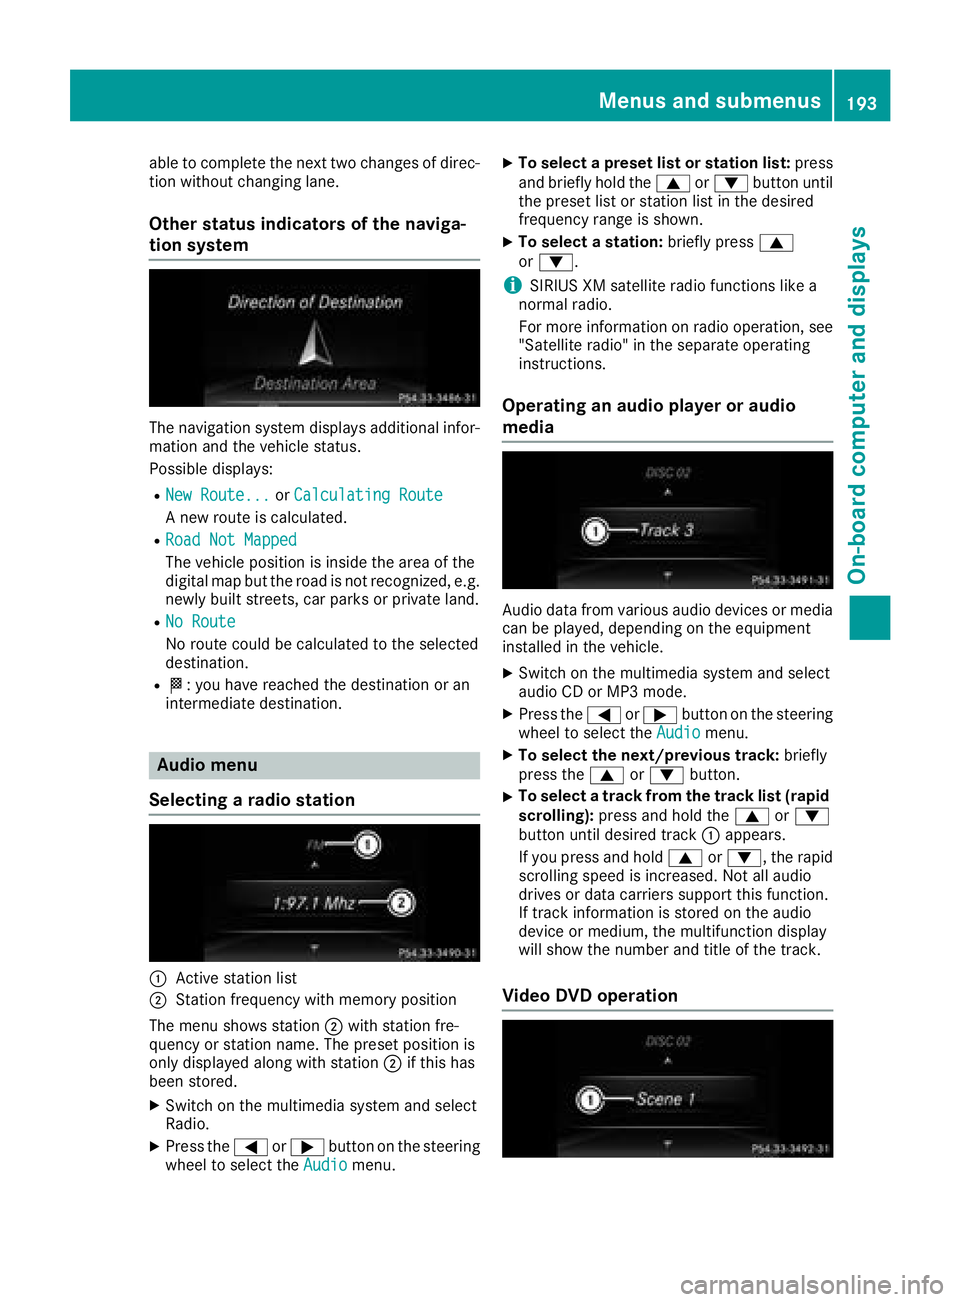
Audio menu
Selecting a radio station
�C
Active station list
�D
Station frequency with memory position
The menu shows station �D with station fre-
quency or station name. The preset position is
only displayed along with station �D if this has
been stored. X
Switch on the multimedia system and select
Radio. X
Press the �Y or �e button on the steering
wheel to select the Audio menu. X
To select a preset list or station list: press
and briefly hold the �c or �d button until
the preset list or station list in the desired
frequency range is shown. X
To select a station: briefly press �c
or �d .
i SIRIUS XM satellite radio functions like a
normal radio.
For more information on radio operation, see
"Satellite radio" in the separate operating
instructions.
Operating an audio player or audio
media
Audio data from various audio devices or media
can be played, depending on the equipment
installed in the vehicle. X
Switch on the multimedia system and select
audio CD or MP3 mode. X
Press the �Y or �e button on the steering
wheel to select the Audio menu.X
To select the next/previous track: briefly
press the �c or �d button.X
To select a track from the track list (rapid
scrolling): press and hold the �c or �d
button until desired track �C appears.
If you press and hold �c or �d , the rapid
scrolling speed is increased. Not all audio
drives or data carriers support this function.
If track information is stored on the audio
device or medium, the multifunction display
will show the number and title of the track.
Video DVD operationMenus and submenus 193
On-board computer and displays Z
Page 223 of 334

Tires Display messages
Possible causes/consequences and �P Solutions
Check
Tire Pressure Soon The tire pressure loss warning system has detected a significant loss
in pressure.
A warning tone also sounds.
Possible causes: R
you have changed the positions of the wheels and tires or installed
new wheels and tires. R
the tire pressure in one or more tires has dropped.
G WARNING
Tire pressures that are too low pose the following hazards: R
they may burst, especially as the load and vehicle speed increase. R
they may wear excessively and/or unevenly, which may greatly
impair tire traction. R
the driving characteristics, as well as steering and braking, may be
greatly impaired.
There is a risk of an accident. X
Stop the vehicle without making any sudden steering or braking
maneuvers. Pay attention to the traffic conditions as you do so. X
Secure the vehicle against rolling away ( Y
page 141).X
Check the tires and, if necessary, follow the instructions for a flat
tire ( Y
page 278). X
Check the tire pressures and, if necessary, correct the tire pressure. X
Restart the tire pressure loss warning system when the tire pres-
sure is correct ( Y
page 299).
Check Tire Pressure
Then Restart Run
Flat Indicator The tire pressure loss warning system generated a display message
and has not been restarted since. X
Set the correct tire pressure in all four tires. X
Restart the tire pressure loss warning system ( Y
page 299).
Run Flat Indicator
Inoperative The tire pressure loss warning system is faulty. X
Visit a qualified specialist workshop.
Correct
Tire Pressure The tire pressure is too low in at least one of the tires, or the tire
pressure difference between the wheels is too great. X
Check the tire pressures at the next opportunity ( Y
page 299).X
If necessary, correct the tire pressure. X
Restart the tire pressure monitor ( Y
page 302).Displa y messages 22 1
On-board computer and displays Z
Page 258 of 334
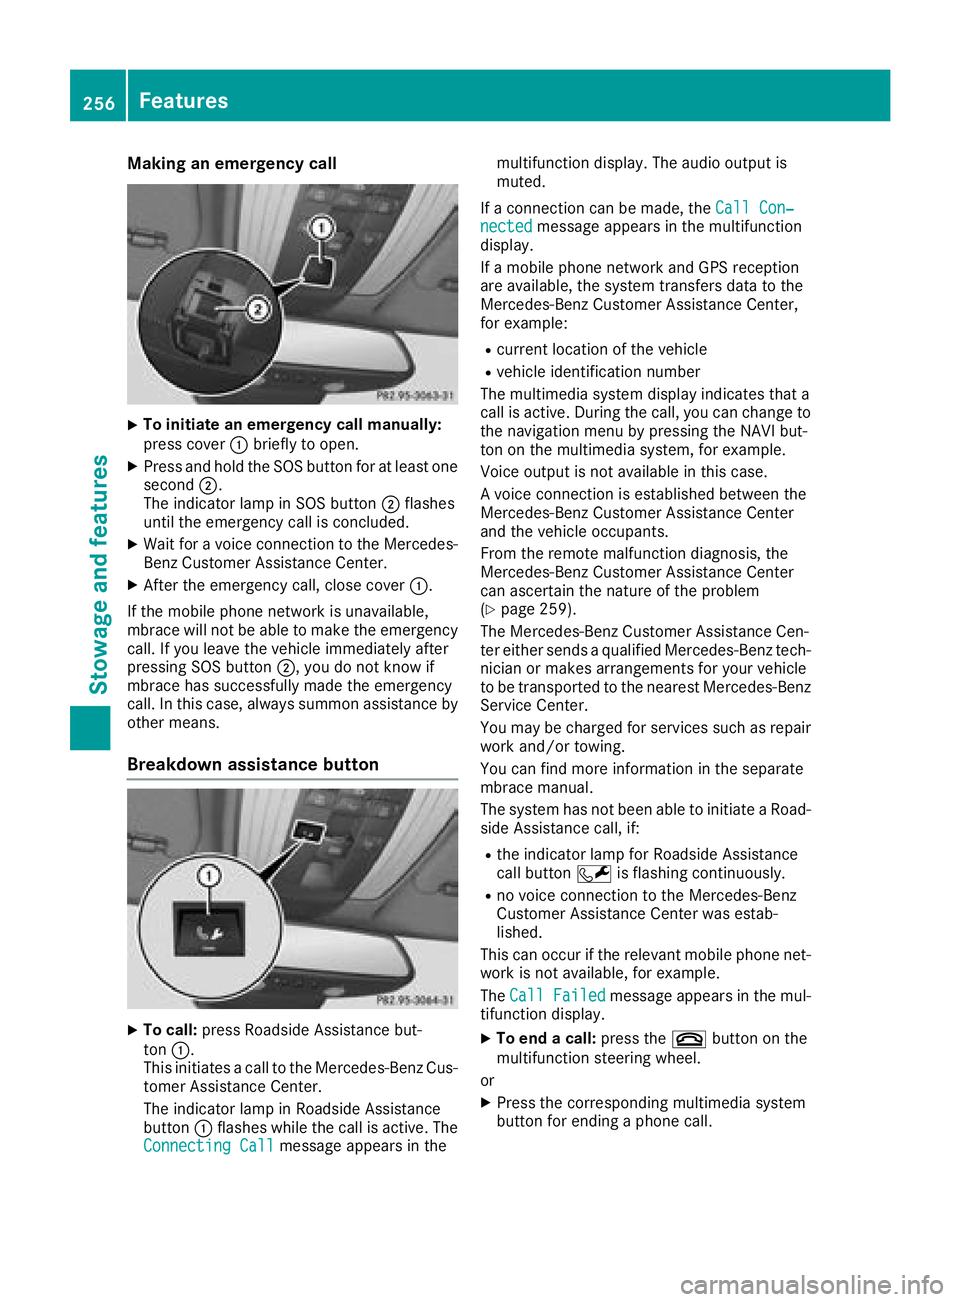
Making an emergency call X
To initiate an emergency call manually:
press cover �C briefly to open.X
Press and hold the SOS button for at least one
second �D .
The indicator lamp in SOS button �D flashes
until the emergency call is concluded. X
Wait for a voice connection to the Mercedes-
Benz Customer Assistance Center. X
After the emergency call, close cover �C .
If the mobile phone network is unavailable,
mbrace will not be able to make the emergency
call. If you leave the vehicle immediately after
pressing SOS button �D , you do not know if
mbrace has successfully made the emergency
call. In this case, always summon assistance by
other means.
Breakdown assistance button
X
To call: press Roadside Assistance but-
ton �C .
This initiates a call to the Mercedes-Benz Cus-
tomer Assistance Center.
The indicator lamp in Roadside Assistance
button �C flashes while the call is active. The
Connecting Call message appears in the multifunction display. The audio output is
muted.
If a connection can be made, the Call Con‐
nected message appears in the multifunction
display.
If a mobile phone network and GPS reception
are available, the system transfers data to the
Mercedes-Benz Customer Assistance Center,
for example: R
current location of the vehicle R
vehicle identification number
The multimedia system display indicates that a
call is active. During the call, you can change to
the navigation menu by pressing the NAVI but-
ton on the multimedia system, for example.
Voice output is not available in this case.
A voice connection is established between the
Mercedes-Benz Customer Assistance Center
and the vehicle occupants.
From the remote malfunction diagnosis, the
Mercedes-Benz Customer Assistance Center
can ascertain the nature of the problem
( Y
page 259).
The Mercedes-Benz Customer Assistance Cen-
ter either sends a qualified Mercedes-Benz tech-
nician or makes arrangements for your vehicle
to be transported to the nearest Mercedes-Benz
Service Center.
You may be charged for services such as repair
work and/or towing.
You can find more information in the separate
mbrace manual.
The system has not been able to initiate a Road-
side Assistance call, if: R
the indicator lamp for Roadside Assistance
call button �R is flashing continuously. R
no voice connection to the Mercedes-Benz
Customer Assistance Center was estab-
lished.
This can occur if the relevant mobile phone net-
work is not available, for example.
The Call Failed message appears in the mul-
tifunction display. X
To end a call: press the �v button on the
multifunction steering wheel.
or X
Press the corresponding multimedia system
button for ending a phone call.256
Features
Stowage and features
Page 272 of 334
Displaying service messages X
Switc h on th e ignition .X
Press th e �Y or �e butto n on th e steerin g
whee l to selec t th e Serv. menu.X
Press th e �c or �d butto n to selec t th e
ASSYST PLU S submen u and confirm by press-
in g th e �v button.
The servic e due dat e appears in th e multi-
function display.
Information about Service Resetting th e ASSYS T PLUS service inter -
va l display
! If th e ASSYST PLU S servic e interval display
has bee n inadvertentl y reset , this setting can
be correcte d at a qualified specialis t work-
shop.
Hav e servic e wor k carrie d out as described in
th e Maintenance Booklet . Thi s may otherwise
lead to increase d wear and damage to th e
major assemblies or th e vehicle.
A qualified specialis t workshop , e.g. an author -
ized Mercedes-Ben z Center, will reset th e
ASSYST PLU S servic e interval display after th e
servic e wor k has bee n carrie d out . You can also
obtain further information on maintenance
work, fo r example.
Specia l service requirement sThe specifie d maintenance interval take s only
th e normal operation of th e vehicle into
account. Under arduous operatin g condition s or
increase d load on th e vehicle, maintenance
wor k mus t be carrie d out more frequently, fo r
example: R
regular city drivin g wit h frequent intermediate
stops R
if th e vehicle is primarily used to trave l short
distances R
use in mountainous terrain or on poo r road
surfaces R
if th e engin e is ofte n lef t idling fo r lon g periods
Under these o r similar conditions, have, fo r
e xample, th e air filter, engin e oil and oil filte r
replaced or changed more frequently. Under
arduous operatin g conditions, th e tires mus t be
checke d more often. Further information can be
obtained at a qualified specialis t workshop , e.g.
an authorized Mercedes-Ben z Center. Drivin g abroadAn extensive Mercedes-Ben z Servic e networ k is
also available in other countries. You can obtain
further information from any authorized
Mercedes-Ben z Center.
Car e
General notes
H Environmental not e
Dispose of empty packagin g and cleanin g
cloths in an environmentally responsible man -
ner.
! Fo r cleanin g your vehicle, do no t use any of
th e following: R
dry, rough or har d clothsR
abrasiv e cleanin g agentsR
solvents R
cleanin g agents containin g solvents
Do no t scrub .
Do no t touch th e surfaces or protective films
wit h har d objects , e.g. a rin g or ic e scraper.
You could otherwise scratch or damage th e
surfaces and protective film.
! Do no t par k your vehicle fo r a lon g period of
time directl y after cleaning, particularly after
cleanin g th e whee l rim wit h whee l cleaner.
Wheel cleaner can lead to th e increase d cor-
rosio n of th e brake discs and pads . Therefore,
drive fo r a fe w minutes after cleaning. By
heatin g up th e brakes, th e brake discs and
pads dry. The vehicle can then be parke d fo r a
lon g period of time.
Regular car e of your vehicle is a condition fo r
retainin g th e qualit y in th e lon g term .
Use car e products and cleanin g agents recom -
mended and approved by Mercedes-Benz.
Washing th e vehicle an d cleaning th e
paintwor k
Automatic car was h
G WARNING
Brakin g efficiency is reduce d after washin g
th e vehicle. There is a ris k of an accident.270
Care
Maintenance and care
Page 280 of 334
i Example: equipment and country-specific
variations possible.
Vehicles with alloy wheels and hub caps On vehicles with alloy wheels and hub caps, a
socket is also provided.
Flat tire
Preparing the vehicle Your vehicle may be equipped with: R
MOExtended tires (tires with run-flat proper-
ties) ( Y
page 278)
Vehicle preparation is not necessary on vehi-
cles with MOExtended tires R
a TIREFIT kit ( Y
page 277)R
an emergency spare wheel ( Y
page 317)
Vehicles equipped with MOExtended tires are
not equipped with a TIREFIT kit at the factory. It
is therefore recommended that you additionally
equip your vehicle with a TIREFIT kit if you mount
tires that do not feature run-flat properties, e.g.
winter tires. A TIREFIT kit may be obtained from
a qualified specialist workshop.
Information on changing and mounting wheels
( Y
page 312). X
Stop the vehicle on solid, non-slippery and
level ground, as far away as possible from
traffic. X
Switch on the hazard warning lamps. X
Secure the vehicle against rolling away
( Y
page 141).X
If possible, bring the front wheels into the
straight-ahead position. X
Vehicles with AIRMATIC: make sure that "nor-
mal" level is selected ( Y
page 159).X
Switch off the engine. X
Remove the SmartKey from the ignition lock.
or, on vehicles with KEYLESS ‑ GO:X
Open the driver's door.
T he vehicle electronics now have status 0 .
This is the same as the SmartKey having been
removed. X
Remove the Start/Stop button from the igni-
tion lock ( Y
page 123).X
Make sure that the passengers are not endan-
gered as they do so. Make sure that no one is
near the danger area while a wheel is being changed. Anyone who is not directly assisting
in the wheel change should, for example,
stand behind the barrier. X
Get out of the vehicle. Pay attention to traffic
conditions when doing so. X
Close the driver's door.
MOExtended tires (tires with run-flat
properties)
General notes With MOExtended tires (tires with run flat char-
acteristics), you can continue to drive your vehi-
cle even if there is a total loss of pressure in one
or more tires. The affected tire must not show
any clearly visible damage.
You can recognize MOExtended tires by the
MOExtended marking which appears on the
sidewall of the tire. You will find this marking
next to the tire size designation, the load-bear-
ing capacity and the speed index ( Y
page 307).
MOExtended tires may only be used in conjunc-
tion with an active tire pressure loss warning
system or with an active tire pressure monitor.
If a pressure loss warning message appears
in the multifunction display: R
observe the instructions in the display mes-
sages ( Y
page 221). R
check the tire for damage. R
if driving on, observe the following notes.
The driving distance possible in run-flat mode is
approximately 50 miles (80 km) when the vehi-
cle is partially laden. When the vehicle is fully
laden it is approximately 19 miles (30 km).
In addition to the vehicle load, the driving dis-
tance possible depends upon: R
Vehicle speed R
Road condition R
Outside temperature
The driving distance p ossible in run-flat mode
may be reduced by extreme driving conditions
or maneuvers, or it can be increased through a
moderate style of driving.
The driving distance possible in run-flat mode is
counted from the moment the tire pressure loss
warning appears in the multifunction display.
You must not exceed a maximum permissible
speed of 50 mph (80 km/h).278
Flat tire
Breakdown assistance
Page 291 of 334
Removing the towing eye X
Unscrew and remove the towing eye. X
Position cover �C on top of the bumper and
press it in at the bottom until it engages. X
Attach cover �D to the bumper and press until
it engages. X
Place the towing eye in the vehicle tool kit.
Towing a vehicle with both axles on
the ground It is important that you observe the safety
instructions when towing away your vehicle
( Y
page 287).
The automatic transmission automatically shifts
to position P when you open the driver's or front-
passenger door or when you remove the Smart-
Key from the ignition lock. In order to ensure
that the automatic transmission stays in posi-
tion N when towing the vehicle, you must
observe the following points: X
Make sure that the vehicle is stationary. X
Turn the SmartKey to position 2 in the ignition
lock.
On vehicles with KEYLESS-GO, use the Smart-
Key instead of the Start/Stop button
( Y
page 124). X
Depress and hold the brake pedal. X
Shift the automatic transmission to position
N . X
Release the brake pedal. X
Release the parking brake. X
Switch on the hazard warning lamps
( Y
page 107). X
Leave the SmartKey in position 2 in the igni-
tion lock.
In order to signal a change of direction when
towing the vehicle with the hazard warning
lamps switched on, use the combination switch
as usual. In this case, only the turn signals for
the desired direction flash. After resetting the
combination switch, the hazard warning lamp
starts flashing again. Towing the vehicle with the rear axle
raised
! Vehicles with 4MATIC must not be towed
with either the front or the rear axle raised, as
doing so will damage the transmission.
! Vehicles with automatic transmission must
not be towed with the rear axle raised. The
vehicle/trailer combination may otherwise
swerve or even roll over.
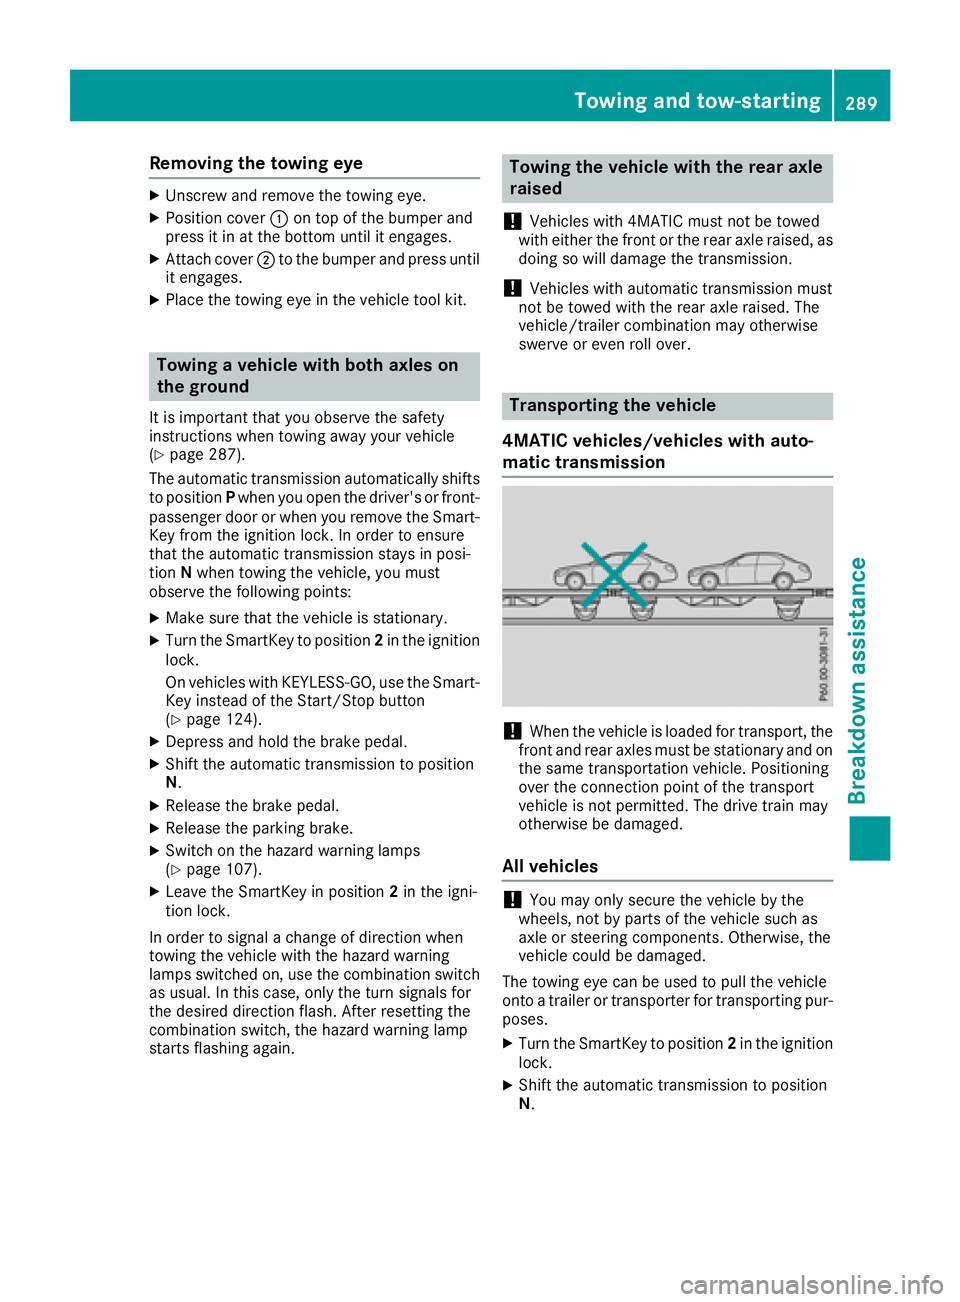
Transporting the vehicle
4MATIC vehicles/vehicles with auto-
matic transmission
! When the vehicle is loaded for transport, the
front and rear axles must be stationary and on
the same transportation vehicle. Positioning
over the connection point of the transport
vehicle is not permitted. The drive train may
otherwise be damaged.
All vehicles
! You may only secure the vehicle by the
wheels, not by parts of the vehicle such as
axle or steering components. Otherwise, the
vehicle could be damaged.
The towing eye can be used to pull the vehicle
onto a trailer or transporter for transporting pur-
poses. X
Turn the SmartKey to position 2 in the ignition
lock. X
Shift the automatic transmission to position
N .Towing and tow-starting 289
Breakdown assistance Z