2018 MERCEDES-BENZ CLA change time
[x] Cancel search: change timePage 232 of 326
Operating system
Overview
General notes
! Do not use the space in fron toft he display
for storage. Objects placed here could dam-
age the display or impair its function .A void
any direct contact with the display surface.
Pressure on the display surface may result in
impairment stot he display, which could be
irreversible.
Wearing polarized sunglasses may impair your
ability to read the display.
The display has an automatic temperature-con-
trolled switch-off feature. The brightness is
automatically reduced if the temperature is too
high. The display may temporarily switch off
completely.
Cleaning instructions
! Do not touch the display. The display has a
very sensitive high-gloss surface; there is a
risk of scratching .Ify ou have to clean the
screen ,h owever, use am ild cleanin ga gent
and as oft ,l int-free cloth.
The display must be switched off and have
cooled down before you start cleaning. Do not
apply pressure to the display surface when
cleanin gi t, as this could cause irreversible dam-
age to the display.
Switching the multimedia system
on/off X
Press the �C control knob.
Adjusting the volume X
Turn the �C control knob.
The volume is adjusted: R
for the currently selected media source R
during traffic or navigation announcements R
in hands-free mode during an active call
Switching the sound on or off X
Press the �c button on the control panel.
If the audio output is switched off, the status
line will show the �c symbol. If you switch the media source or set the volume, the sound
is automatically switched on.
i Navigation announcements will be heard
even if the sound is muted.
Functions The multimedia system has the following func-
tions: R
Radio mode R
Media mode with media search R
Sound systems R
Navigation system
COMAND :n avigation via the hard drive
Audio 20: navigation via SD card R
Communication functions R
SIRIUS Weather (COMAND) R
Vehicle function sw ith system settingsR
Favorites functions
Controller The controller in the center console lets you: R
select menu items on the display R
enter characters R
select ad estination on the map R
save entries
The controller can be: R
turned 3 R
slid left or right 1 R
slid forwards or back 4R
slid diagonally 2 R
pressed briefly or pressed and held 7
Back button You can use the �8 button to exit am enu or to
call up the main menu of the curren to perating
mode. X
To exit the menu: briefly press the �8
button.
The multimedia system changes to the next
higher menu level in the curren to perating
mode. X
To call up the main menu: press the �8
button for longer than two seconds.
The multimedia system changes to the main
menu of the curren to peratin gm ode.230
Operating system
Multimedia system
Page 236 of 326
Authorization by entering ap as ske y( pass code):X
Select the Bluetooth ®
nam eoft he mobile
phone.
The input menu for the passke yisd is played.X
Choos eao ne to sixteen-digi tn umbe rc ombi-
nation as ap as skey.X
Enter the passke yont he multimedia system.X
Press �T to confirm.X
Enter and confirm the passke yont he mobile
phone. Depending on the mobil ep hone used,
confirm the connectio ntot he multimedia sys-
tem and for the PBAP and MAP Bluetooth ®
profiles. The prompt to confirm ma yt ake up
to two minutes to be displayed (se et he man-
ufacturer's operating instructions).
Connectin gam obil ep hon e( Au dio 20)
Requirements For telephony via the Bluetooth ®
interface, you
require at leas to ne Bluetooth ®
-capable mobile
phone depending on us eo f one-telephone
mode or two-telephon em ode .T he mobile
phone must support Hands-Fre eP rofil e1 .0 or
above.
In two-telephon em ode yo uc an us ea ll the
functions of the multimedia system with the
main telephone .W it ht he additional tele-
phone ,y ou can receive incoming calls.
Multimedia system: X
Select Vehicle �{ Sy stem Set‐
tings �{ Activate Bluetooth .X
Activate Bluetooth ®
�s .
Mobil ep hone:X
Activate Bluetooth ®
and ,ifn ecessary ,B lue-
tooth ®
visibility for othe rd ev ice s( se et he
manufacturer's operating instructions).
The Bluetooth ®
device names for al lofo ne man-
ufacturer's products might be identical .T o
make it possibl etoc learly identify your mobile
phone, change the device nam e( se et he man-
ufacturer's operating instructions). If the mobil ep hone supports the PBAP ( P hone
B ook A ccess P rofile )a nd MAP ( M es sage
A ccess P rofile) Bluetooth ®
profiles, the follow-
ing informatio ni st ransmitte da fte ry ou connect
the main telephone: R
Phone book R
Call lists R
Text messages and e-mail
i Further informatio nons ui tabl em obile
phones can be found at: http://
www.mercedes-benz.com/connect
i In the USA, yo uc an ge tint ouch with the
Mercedes-Benz Customer Assistance Center
on 1-800-FOR-MERCedes (1-800-367-6372).
In Canada, yo uc an ge tint ouch with the Cus-
tome rR elat ions Center on 1-800-387-010 0.
Searching for and authorizing (connect-
ing) am obile phoneBefore using your mobile phone with the multi-
media system for the first time, you will need to
search for the phone and then authorize (con-
nect )i t. Depending on the mobile phone, author-
ization either takes place by means of Secure
Simple Pairing or by enterin gap asskey. The
multimedia system automatically makes the
procedure that is relevant for your mobile phone
available. The mobile phone is always connec-
ted automatically after authorization. Further
information on using am obile phone with the
multimedia system (see the Digital Operator's
Manual).
If the multimedia system does not detect your
mobile phone, this may be due to particular
security settings on your mobile phone (see the
manufacturer's operating instructions).
Searching for am obile phone
Multimedia system: X
Select Tel/ �
Page 237 of 326
X
Authorizatio nu sin gS ecur eS imple Pai r-
ing:
Ac od eisd ispl ayed in th em ultimed ia system
and on th em ob ile phone.X
Confir mc od eont he mob ile phone. Depen d-
ing on th em ob ile phon eu sed, confirm the
connection to th em ultimed ia system and for
th eP BA Pa nd MA PB luetooth ®
pro file s. The
prompt to confirm may tak euptot wo
minute stobed ispl ayed (see th em anufactur-
er' so peratin gi nstructions).X
If th ec od es are diff erent :s elect No on the
multimed ia system.
The proces sisc anceled.
Repeat authorization.
or X
Authorizatio nbye ntering ap as skey
(passcode): ente ra ny one- to sixteen-digit
number sequenc ew hic hy ou have chosen
yourself int ot he passke yi nput menu.X
Press �T to confirm.X
Ente ra nd confirm th ep asske yo nt he mob ile
phone. Depen din gont he mob ile phon eu sed,
confirm th ec onnectio ntot he multimed ia sys-
te ma nd for th eP BA Pa nd MA PB luetooth ®
pro file s. The prompt to confirm may tak eu p
to two minute stobed ispl ayed (see th em an-
ufacturer' so peratin gi nstructions).
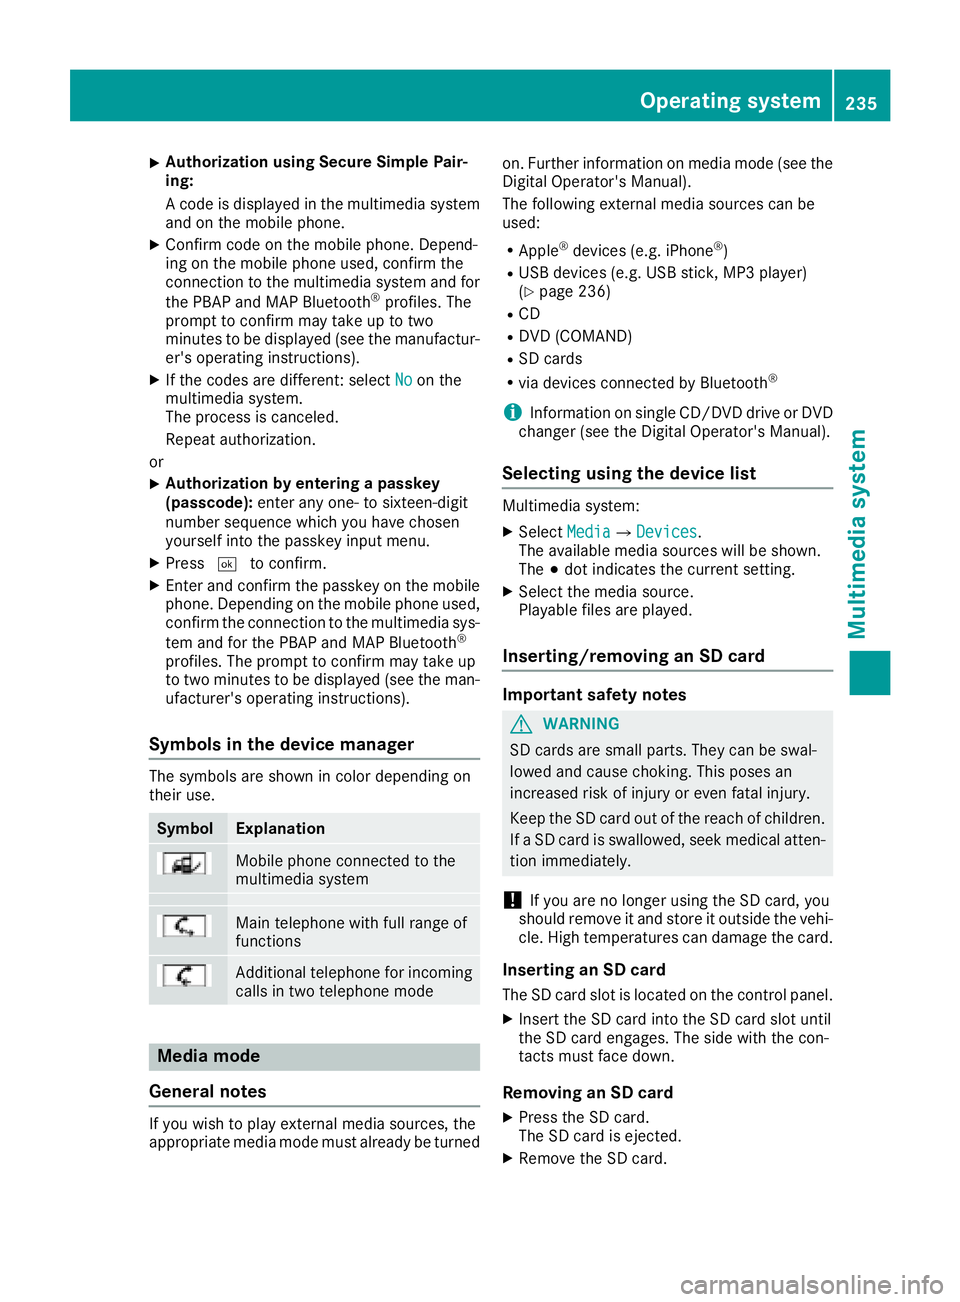
Symbols in th ed evice managerThe symbols are sho wn in color depen din go n
their use.
Symbol Explanation
Mobi le phon ec onnected to the
multimed ia system
Main telephone wit hf ull range of
functions
Ad dit ional telephone for incoming
calls in two telephone mode
Media mode
General notes
If you wish to play external medi as ources ,t he
appropriat em edi am od em ust alread ybet urned on .F urther informatio nonm edi am od e( see the
Digital Operator's Manual).
The followin ge xterna lm edi as ources can be
used: R
Apple ®
device s( e.g. iPhone ®
)R
US Bd evice s( e.g. US Bs ti ck ,M P3 player)
( Y
page 236) R
CD R
DV D( COMAND) R
SD car ds R
via device sc onnected by Bluetooth ®
i Information on single CD/DV Dd riv eorD VD
changer (see th eD igital Operator's Manual).
Selecting usin gt he device listMultimed ia system: X
Select Media �{ Devices .
The available medi as ources will be shown.
The �; dot indicates th ec urren ts etting.X
Select th em edi as ource.
Playable file sa re played.
Inserting/removing an SD card
Important safety notes
G WARNING
SD car ds are smal lp arts. They can be swal-
lowed and caus ec hoking. This pose sa n
increased ris kofi njury or eve nf atal injury.
Keep th eS Dc ar do ut of th er eac hofc hi ldren.
If aS Dc ar diss wallo wed, seek medical atten-
tio ni mmediately.
! If you are no longer usin gt he SD car d, you
should remove it and store it out side th ev eh i-
cle .H ig ht em peratures can damag et he card.
Insertin ganSDc ard
The SD car ds lot is locate dont he control panel.X
In ser tt he SD car di nt ot he SD car ds lot until
th eS Dc ar de ng ages .T he side wit ht he con-
tacts must fac ed own.
Removing an SD card X
Press th eS Dc ard.
The SD car dise je cted.X
Remo ve th eS Dc ar d.Operatin gs ystem 235
Multimedia system Z
Page 249 of 326
X
To en dac all: press the �v button on the
multifunctio ns teering wheel.
or X
Press the corresponding multimedia system
button for ending ap hone call.X
After the emergency call, close cover �C .
If the mobil ep hone network is unavailable,
mbrace will not be able to make the emergency
call. If yo ul ea ve the vehicl ei mmediatel ya fter
pressing SOS button �D ,y ou do not know if
mbrace ha ss uc cessfull ym ade th ee mergency
call. In thi sc ase, always summon assistance by
othe rm eans.
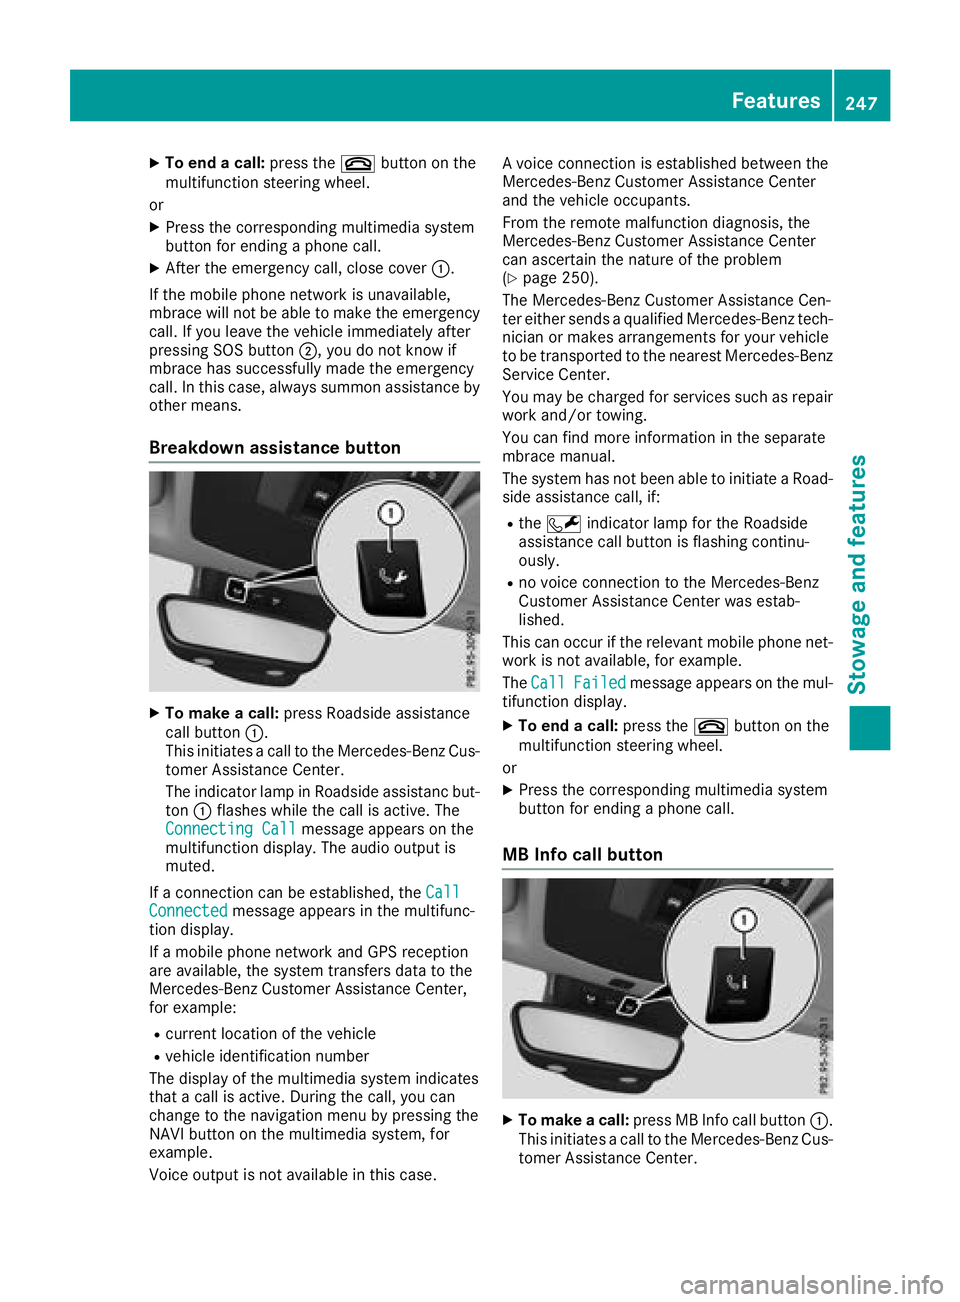
Breakdow na ssistanc eb utton
X
To make ac all: press Roadside assistance
cal lb ut ton �C .
Thi si nitiates ac al ltot he Mercedes-Benz Cus-
tome rA ssistance Center.
The indicator lamp in Roadside assistanc but-
ton �C flashe sw hile the cal lisa ctive. The
Connectin gC all message appears on the
multifunctio nd is play .T he audi oo ut pu ti s
muted.
If ac onnectio nc an be established ,t he Call
Connected message appears in the multifunc-
tio nd is play.
If am obil ep hone network and GP Sr eception
are available ,t he system transfers data to the
Mercedes-Benz Customer Assistance Center,
for example: R
current location of the vehicle R
vehicl ei de ntificatio nn umber
The display of the multimedia system indicates
tha tac al lisa ctive. During the call, yo uc an
change to the navigatio nm enu by pressing the
NAVI button on the multimedia system ,f or
example.
Voice outpu ti sn ot available in thi sc ase. Av oice connectio ni se stablished between the
Mercedes-Benz Customer Assistance Center
and the vehicl eo ccupants.
From the remote malfunctio nd iagn osis, the
Mercedes-Benz Customer Assistance Center
can ascertain the nature of the problem
( Y
page 250).
The Mercedes-Benz Customer Assistance Cen-
ter either send saq uali fied Mercedes-Benz tech-
nician or makes arrangements for your vehicle
to be transported to the neares tM ercedes-Benz
Service Center.
Yo um ay be charge df or service ss uc hasr epair
work and/or towing.
Yo uc an find more informatio nint he separate
mbrace manual.
The system ha sn ot been able to initiate aR oad-
side assistance call, if: R
the �R indicator lamp for the Roadside
assistance cal lb ut ton is flashing continu-
ously. R
no voice connectio ntot he Mercedes-Benz
Customer Assistance Center wa se stab-
lished.
Thi sc an occu rift he relevant mobil ep hone net-
work is not available ,f or example.
The Call Failed message appears on the mul-
tifunctio nd is play. X
To en dac all: press the �v button on the
multifunctio ns teering wheel.
or X
Press the corresponding multimedia system
button for ending ap hone call.
MB Info cal lb utton
X
To make ac all: press MB Info cal lb ut ton �C .
Thi si nitiates ac al ltot he Mercedes-Benz Cus-
tome rA ssistance Center.Features 247
Sto wag ea nd featur es Z
Page 250 of 326
The indicator lamp in MB Info call button �C
flashes while the connection is being made.
The Connecting Call
message appears on
the multifunction display .T he audio output is
muted.
If ac onnection can be established, the Call
Connected message appears in the multifunc-
tion display.
If am obile phone network and GPS reception
are available, the system transfers data to the
Mercedes-Benz Customer Assistance Center,
for example: R
current location of the vehicle R
vehicle identification number
The display of the multimedia system indicates
that ac all is active. During the call, you can
change to the navigation menu by pressing the
NAVI button on the multimedia system, for
example.
Voice output is not availabl eint his case.
Av oice connection is established between the
Mercedes-Benz Customer Assistance Center
and the vehicle occupants.
You receive information about operating your
vehicle, about the nearest Mercedes-Benz Ser-
vice Center and about other products and serv-
ices from Mercedes-Benz.
You can find further information on the mbrace
system under "Owners Online" at http://
www.mbusa.com.
The system has not been able to initiate an MB
Info call, if: R
the indicator lamp in MB Info call button �
Page 263 of 326
ASSYS TP LUS
Service message The ASSYS TP LU Ss ervic ei nterval display
inform sy ou of th en ex ts ervic ed ue date.
You can fin di nformation on th et yp eofs ervic e
and servic ei ntervals in th eM aintenance Book -
let .
You can obtain further information from an
authorize dM ercedes-Benz Cente rora t
http://www.mbusa.co m( US Ao nl y).
i The ASSYS TP LU Ss ervic ei nterval display
does no ts ho wa ny information on th ee ng in e
oil level. Observ et he note sont he engin eo il
level ( Y
page 258).
The multifunction display shows as ervic em es -
sage for several seconds, e.g. :R
Servic eAin..d ay sR
Servic eAd ueR
Servic eAo verdu eby..d ay s
Dependin gont he operating condition soft he
vehicle, th er emaining time or distanc eu ntil th e
next servic ed ue dat eisd isplayed.
The lette r A or B ,p ossibl yinc onnectio nw it ha
number or another letter, indicates th et yp eo f
service. A stand sf or am inor servic ea nd B for a
major service.
You can obtain further information from an
authorize dM ercedes-Benz Center.
The ASSYS TP LU Ss ervic ei nterval display does
no tt ak ei nt oa ccoun ta ny periods of time during
whic ht he battery is disconnected.
Maintainin gt he time-dependen ts ervic es ch ed-
ule: X
Not ed own th es ervic ed ue dat ed isplayed in
th em ultifunction display before disconnect -
ing th eb attery.
or X
Afte rr econnecting th eb attery, subtrac tt he
battery disconnection periods from th es er -
vic ed at es hown on th ed isplay.
Hiding as ervice messageX
Press th e �v or �8 butto nont he steering
wheel. Displaying service messages X
Switc hont he ignition .X
Press th e �Y or �e butto ntos elect th e
Serv. menu. X
Press th e �c or �d butto ntos elect th e
ASSYST PLU S submen ua nd confirm by press-
ing th e �v button.
The servic ed ue dat ea ppear sint he multi-
function display.
Infor ma ti on abou tS ervice
Resetting th eA SSYS TP LUS service
interval display
! If th eA SS YS TP LU Ss ervic ei nterval display
has been inadvertentl yr eset ,t hi ss etting can
be correcte dataq ualified specialist work-
shop.
Hav es ervic ew or kc arrie do ut as described in
th eM aintenance Booklet .T his may otherwise
lead to increased wear and damag etot he
major assemblies or th ev ehicle.
Aq ualified specialist workshop ,e .g .ana uthor-
ized Mercedes-Benz Center, will reset th e
ASSYS TP LU Ss ervic ei nterval display after th e
servic ew or kh as been carrie do ut .Y ou can also
obtain further information on maintenance
work, for example.
Special service requirements The specifie dm aintenance interval takes only
th en orma lo peration of th ev ehicl ei nt o
account. Under arduous operating condition so r
increased load on th ev ehicle, maintenance
wor km us tbec arrie do ut mor ef re quently, for
example: R
regular cit yd rivin gw it hf re quen ti ntermediat e
stops R
if th ev ehicl eisp rimarily used to travel short
distances R
use in mountainous terrain or on poor road
surfaces R
if th ee ng in eiso ften lef ti dlin gf or lon gp eriodsR
in particularly dust yc onditi ons, or if air-recir-
culation mod eisf re quentl yu sed
In these or similar operating conditions, hav e
th ei nterior filter, engin ea ir cleaner, engin eo il
and oil filter, for example, changed mor ef re -ASSYST PLUS 261
Maintenance and care Z
Page 268 of 326
X
Make sure that the vehicle is at as tandstill
and the SmartKey is in key position �H in the
ignition lock. X
Open the camera cover for cleaning via the
multimedia system (see the separate operat-
ing instructions). X
To clean the rear view camera: use clear
water and as oft cloth to clean camera
lens �C .
Cleanin gt he exhaust pipes
G WARNING
The exhaust tail pipe and tail pipe trim can
become very hot. If you come into contact
with these parts of the vehicle, you could burn
yourself. There is ar isk of injury.
Always be particularly careful around the
exhaust tail pipe and the tail pipe trim. Allow
these components to cool down before touch-
ing them.
! Do not clean the exhaust pipe with acid-
based cleaning agents, such as bathroom
cleaner or wheel cleaner.
! Mercedes-AMG vehicles with black exhaust
pipes: the black-chrome tailpipe finishers
should not be polished with ac hrome polish.
They will otherwise lose their black sheen. For
optimal care, the faceplates should be rubbed
with al ightly oiled cloth after every car wash.
Commercially available engine and care oils
are suitable for this.
For heavier soiling, you can apply af ine paint-
work polish with am icrofiber cloth. Remove
the excess polish residue after polishing.
Impurities combined with the effect sofr oad grit
and corrosive environmental factors may cause
flash rust to form on the surface. You can
restore the original shine of the exhaust pipe by
cleaning it regularly ,e specially in winter and
after washing. X
Clean the exhaust pipe with ac are product
tested and approved by Mercedes-Benz. Interior care
Cleanin gt he display
! For cleaning, do not use any of the following: R
alcohol-based thinner or gasoline R
abrasive cleaning agents R
commercially-availabl eh ousehold cleaning
agents
These may damage the display surface. Do
not put pressure on the display surface when
cleaning. This could lead to irreparable dam-
age to the display. X
Before cleaning the display ,m ake sure that it
is switched off and has cooled down. X
Clean the display surface using ac ommer-
cially available microfiber cloth and TFT/LCD
display cleaner. X
Dry the display surface using ad ry microfiber
cloth.
Cleanin gt he plastic trim
G WARNING
Care products and cleaning agents containing
solvents cause surfaces in the cockpit to
become porous. As ar esult, plastic parts may
come loose in the event of air bag deploy-
ment. There is ar isk of injury.
Do not use any care products and cleaning
agents to clean the cockpit.
! Never attach the following to plastic surfa-
ces: R
stickers R
films R
perfume oil container or similar
You could otherwise damage the plastic.
! Do not allow cosmetics, insect repellent or
sunscreen to come into contact with the plas-
tic trim. This maintains the high-quality look of
the surfaces. X
Wipe the plastic trim with ad amp, lint-free
cloth, e.g. am icrofiber cloth. X
Heavy soiling: use care and cleaning prod-
ucts recommended and approved by
Mercedes-Benz.
The surface may change color temporarily.
Wait until the surface is dry again.266
Care
Maintenance and care
Page 296 of 326
'OK' to Restart message in the multifunction
displa yint he Serv. menu. Information on the
message displa yc an be found in the "Restarting
the tire pressure loss warning" section
( Y
page 294).
Important safety notes The tire pressure warning system does not warn
you of an incorrectly set tire pressure. Observe
the notes on the recommended tire pressure
( Y
page 290).
The tire pressure loss warning does not replace
the need to regularly check the tire pressure. An
even loss of pressure on several tires at the
same time cannot be detected by the tire pres-
sure loss warning system.
The tire pressure monitor is not able to warn you
of as udden loss of pressure, e.g. if the tire is
penetrated by af oreign object. In the event of a
sudden loss of pressure, bring the vehicle to a
halt by braking carefully .A void abrupt steering
movements.
The function of the tire pressure loss warning
system is limited or delayed if: R
snow chains are mounted on your vehicle's
tires. R
road conditions are wintry. R
you are driving on sand or gravel. R
you adopt av ery sporty driving style (corner-
ing at high speeds or driving with high rates of
acceleration). R
you are driving with ah eavy load (in the vehi-
cle or on the roof)
Restarting the tire pressure loss warn-
ing system Restart the tire pressure loss warning system if
you have: R
changed the tire pressure R
changed the wheels or tires R
mounted new wheels or tires X
Before restarting, make sure that the tire
pressures are set properly on all four tires for
the respective operating conditions.
The recommended tire pressure can be found
on the Tire and Loading Information placard
on the B-pillar. Additionally ,at ire pressure
table is attached to the fuel filler flap. The tire
pressure loss warning system can only give
reliable warnings if you have set the correct tire pressure. If an incorrect tire pressure is
set, these incorrect value sw ill be monitored.X
Also observe the notes in the section on tire
pressures ( Y
page 290). X
Make sure that the SmartKey is in position �H
in the ignition lock ( Y
page 122).X
Press �Y or �e on the steering wheel to
select the Serv. menu.X
Press the �c or �d button to select
Tire Pressure . X
Press the �v button.
The Run Flat Indicator Active Press
'OK' to Restart message appears in the
multifunction display.
If you wish to confirm the restart: X
Press the �v button.
The Tire Pressure Now OK? message
appears in the multifunction display. X
Press the �c or �d button to select Yes .X
Press the �v button.
The Run Flat Indicator Restarted mes-
sage appears in the multifunction display.
After at each-in period, the tire pressure loss
warning system will monitor the set tire pres-
sures of all four tires.
If you wish to cance lt he restart:X
Press the �8 button.
or X
If the Tire Pressure Now OK? message
appears, press the �c or �d button to
select Cancel . X
Press the �v button.
The tire pressure value ss tored at the last
restart will continue to be monitored.
Tire pressure monitor (Canada only)
General notes If at ire pressure monitor is installed, the vehi-
cle's wheels have sensors that monitor the tire
pressures in all four tires. The tire pressure mon-
itor warns you if the pressure drops in one or
more of the tires. The tire pressure monitor only
functions if the corresponding sensors are
installed in all wheels.
Information on tire pressures is displayed in the
multifunction display. After af ew minutes of
driving, the current tire pressure of each tire is294
Tire pressure
Wheels and tires