2018 MERCEDES-BENZ C-CLASS ESTATE lights
[x] Cancel search: lightsPage 142 of 609
R
the GPS
The function is not active: R at speeds below 80 km/h.
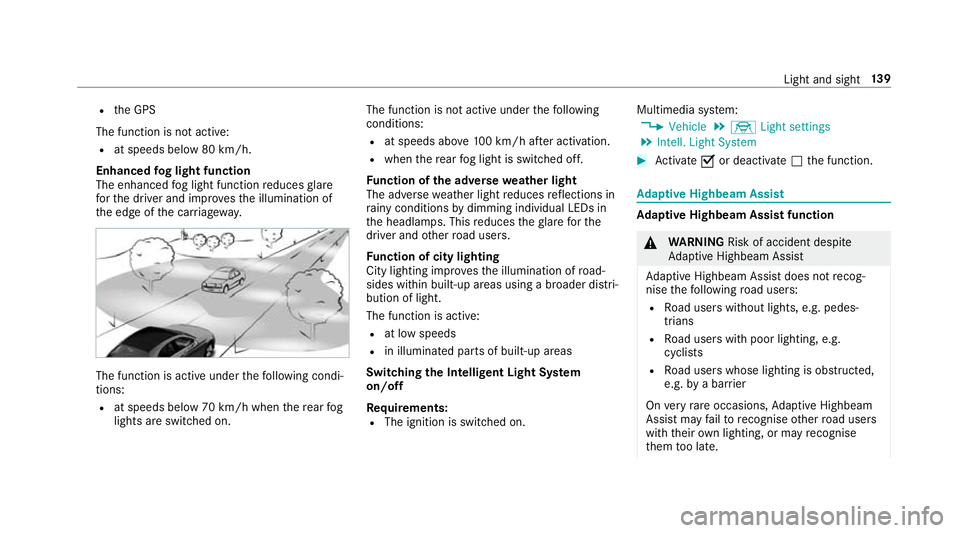
Enhanced fog light function
The enhanced fog light function reduces glare
fo rth e driver and impr ovesth e illumination of
th e edge of the car riag ewa y. The function is active under
thefo llowing condi‐
tions:
R at speeds below 70 km/h when there ar fog
lights are switched on. The function is not active under
thefo llowing
conditions:
R at speeds abo ve100 km/h af ter activation.
R when there ar fog light is switched off.
Fu nction of the ad versewe ather light
The adverse weather light reduces reflections in
ra iny conditions bydimming individual LEDs in
th e headlamps. This reduces theglare forthe
driver and other road users.
Fu nction of city lighting
City lighting impr ovesth e illumination of road‐
sides within built-up areas using a broader distri‐
bution of light.
The function is active:
R at low speeds
R in illuminated parts of built-up areas
Swit ching the Intelligent Light Sy stem
on/off
Re quirements:
R The ignition is switched on. Multimedia sy
stem:
0018 Vehicle 0019
÷ Light settings
0019 Intell. Light System 0007
Activate 0073or deacti vate 0053 the function. Ad
aptive Highbeam Assist Ad
aptive Highbeam Assist function 000A
WARNING Risk of accident despi te
Ad aptive Highbeam Assist
Ad aptive Highbeam Assist does not recog‐
nise thefo llowing road users:
R Road users without lights, e.g. pedes‐
trians
R Road users with poor lighting, e.g.
cyclists
R Road users whose lighting is obstructed,
e.g. bya bar rier
On very rare occasions, Adaptive Highbeam
Assist may failto recognise other road users
with their own lighting, or may recognise
th em too late. Light and sight
13 9
Page 144 of 609
Ad
aptive Highbeam Assist Plus Ad
aptive Highbeam Assist Plus function 000A
WARNING Risk of accident despi te
Ad aptive Highbeam Assist Plus
Ad aptive Highbeam Assist Plus does not rec‐
ognise thefo llowing road users:
R Road users without lights, e.g. pedes‐
trians
R Road users with poor lighting, e.g.
cyclists
R Road users whose lighting is obstructed,
e.g. bya bar rier
On very rare occasions, Adaptive Highbeam
Assist Plus may failto recognise other road
users that ha velights, or may recognise
th em too late.
In this, or in similar situations, the automatic
main beam will not be deactivated or will be
activated despite the presence of other road
users. 0007
Alw ays obser vethe tra ffic carefully and
switch off the main beam in good time. Ad
aptive Highbeam Assist Plus cannot take into
account road, weather or traf fic conditions.
De tection may be restricted in thefo llowing
cases:
R in poor visibilit y,e.g. fog, heavy rain or snow
R ifth ere is dirt on the sensors or the sensors
are obscured
Ad aptive Highbeam Assist Plus is on lyan aid.
Yo u are responsible for adju sting theve hicle's
lighting tothe pr evailing light, visibility and traf‐
fi c conditions. The
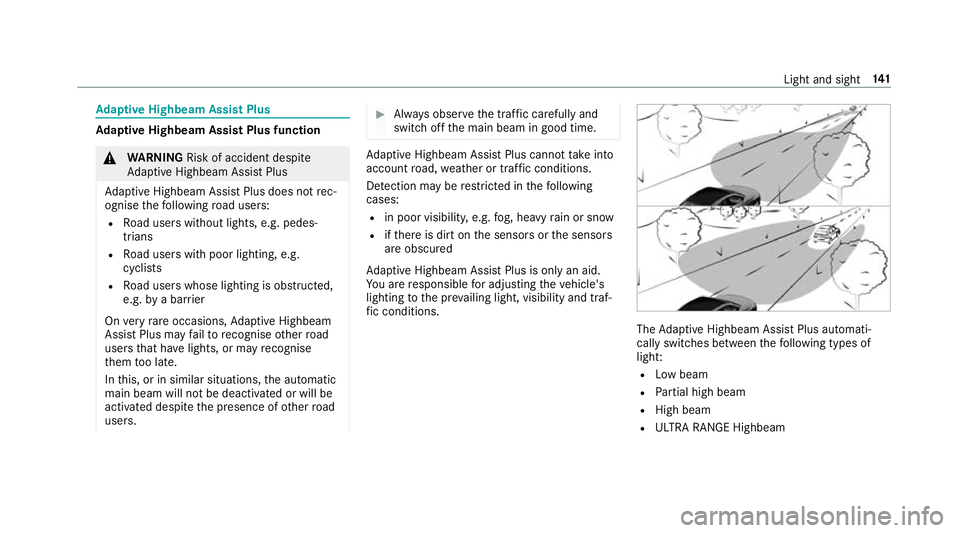
Adaptive Highbeam Assist Plus automati‐
cally swit ches between thefo llowing types of
light:
R Low beam
R Partial high beam
R High beam
R ULTRA RANGE Highbeam Light and sight
141
Page 146 of 609
ve
hicle is unloc ked. When youstart theve hicle,
th e sur round lighting is deactivated and the
automatic driving lights are activated. Interior lighting
Ad
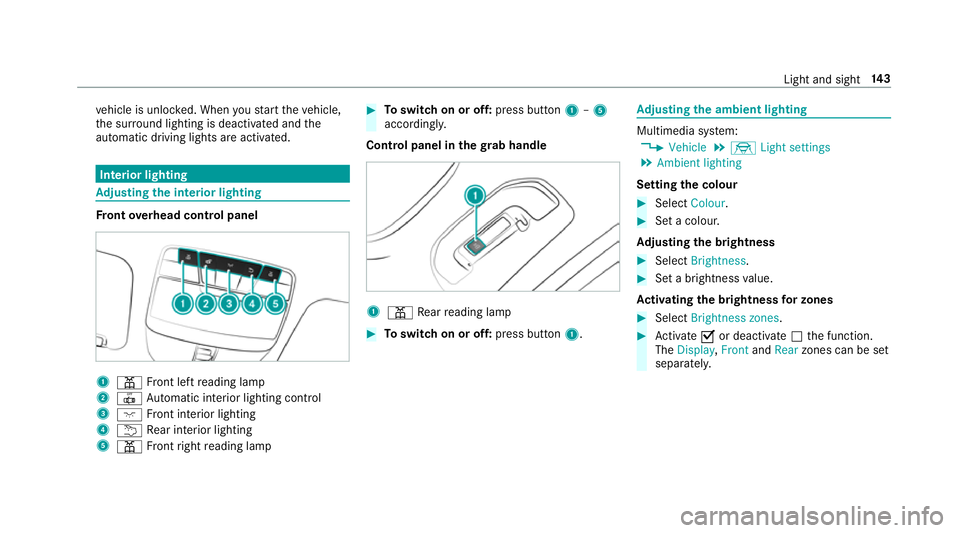
justing the in terior lighting Fr
ont overhead control panel 1
003D Front left reading lamp
2 0033 Automatic interior lighting control
3 004A Front interior lighting
4 0042 Rear interior lighting
5 003D Front right reading lamp 0007
Toswitch on or off: press button1–5
accordingly.
Control panel in thegr ab handle 1
003D Rear reading lamp 0007
Toswitch on or off: press button1. Ad
justing the ambient lighting Multimedia sy
stem:
0018 Vehicle 0019
÷ Light settings
0019 Ambient lighting
Setting the colour 0007
Select Colour. 0007
Set a colour.
Ad justing the brightness 0007
Select Brightness . 0007
Set a brightness value.
Ac tivating the brightness for zones 0007
Select Brightness zones . 0007
Activate 0073or deacti vate 0053 the function.
The Display ,Front andRear zones can be set
separately. Light and sight
14 3
Page 149 of 609
0007
Toremo ve:using a suitable object, turn the
two mounts 1ofthe co ver2 in an anti-
clockwise direction as far as they will go. 0007
Remo vethe unloc ked co ver2 from the
wheel ar chliner bypulling it upwards. 0007
Tofit: inse rtco ver 2 at bottom of the wheel
ar ch liner. 0007
Using a suitable object, turn the two mounts
1 ofthe co ver2 in clockwise direction as
fa r as they will go.
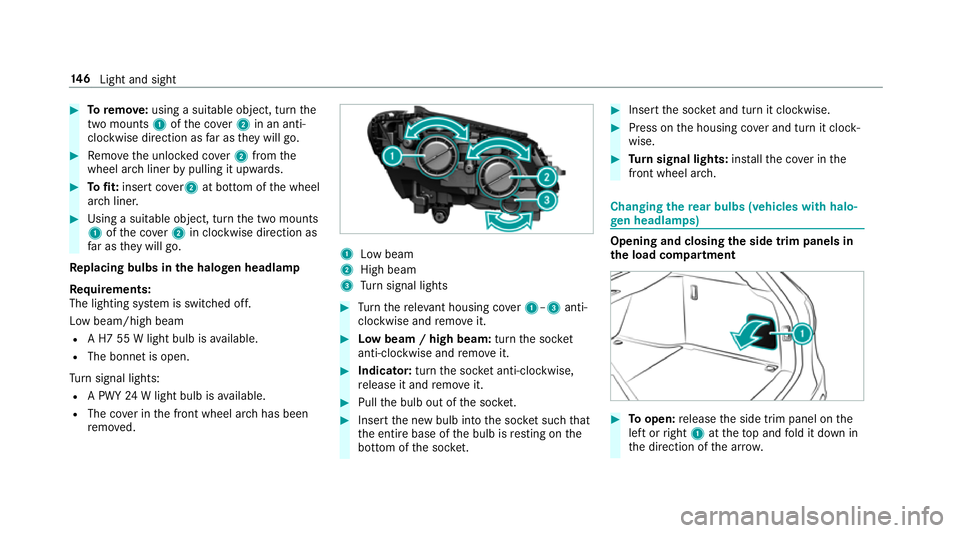
Re placing bulbs in the halo gen headla mp
Re quirements:
The lighting sy stem is switched off.
Low beam/high beam
R A H7 55 W light bulb is available.
R The bonnet is open.
Tu rn signal lights:
R A PWY 24W light bulb is available.
R The co ver in the front wheel ar chhas been
re mo ved. 1
Low beam
2 High beam
3 Turn signal lights 0007
Turn there leva nt housing co ver1–3 anti-
clockwise and remo veit. 0007
Low beam / high beam: turnthe soc ket
anti-clockwise and remo veit. 0007
Indicator: turnthe soc ket anti-clo ckwise,
re lease it and remo veit. 0007
Pull the bulb out of the soc ket. 0007
Inse rtthe new bulb into the soc ket su chthat
th e entire base of the bulb is resting on the
bottom of the soc ket. 0007
Inse rtthe soc ket and turn it clo ckwise. 0007
Press on the housing co ver and turn it clock‐
wise. 0007
Turn signal lights: installth e co ver in the
front wheel ar ch. Changing
there ar bulbs (vehicles with halo‐
ge n headla mps) Opening and closing
the side trim panels in
th e load compa rtment 0007
Toopen: release the side trim panel on the
left or right 1attheto p and fold it down in
th e direction of the ar row. 14 6
Light and sight
Page 150 of 609
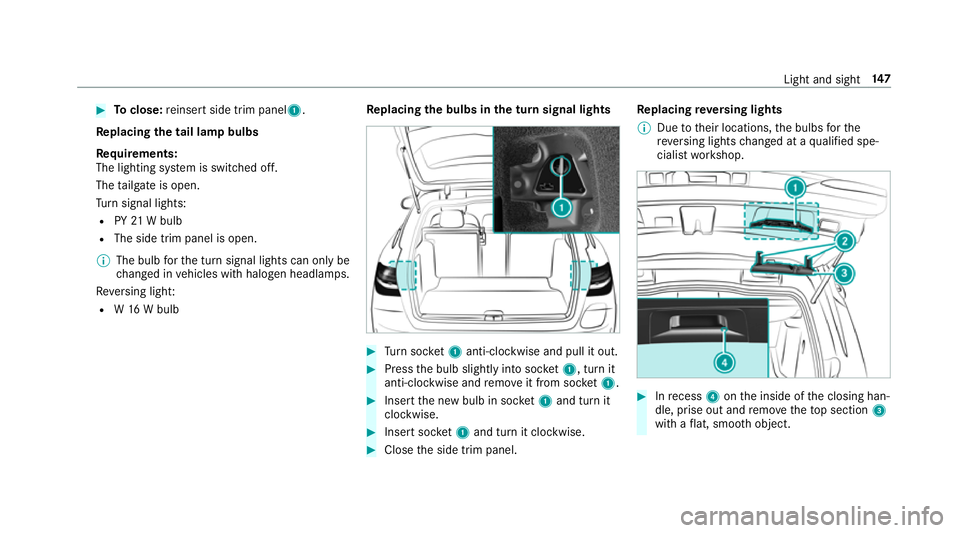
0007
Toclose: reinse rtside trim panel1.
Re placing the tail lamp bulbs
Re quirements:
The lighting sy stem is switched off.
The tailgate is open.
Tu rn signal lights:
R PY21W bulb
R The side trim panel is open.
0009 The bulb forth e turn signal lights can only be
ch anged in vehicles with halogen headlamp s.
Re versing light:
R W16 W bulb Re
placing the bulbs in the turn signal lights 0007
Turn soc ket1 anti-clo ckwise and pull it out. 0007
Press the bulb slightly into soc ket1, turn it
anti-clo ckwise and remo veit from soc ket1. 0007
Inse rtthe new bulb in soc ket1 and turn it
clo ckwise. 0007
Insert soc ket1 and turn it clo ckwise. 0007
Close the side trim panel. Re
placing reve rsing lights
0009 Due totheir locations, the bulbs forthe
re ve rsing lights changed at a qualified spe‐
cialist workshop. 0007
Inrecess 4onthe inside of the closing han‐
dle, prise out and remo vetheto p section 3
with a flat, smo oth object. Light and sight
147
Page 166 of 609
0007
Open a window on the windward side of
th eve hicle toensure an adequate sup‐
ply of fresh air. 000A
WARNING Risk offire due tohot station‐
ary heater components
When thest ationary heater is swit ched on,
parts of theve hicle can become very hot,
e.g. thest ationary heater exhaust sy stem.
Flammable materials such as lea ves, grass or
twigs may ignite if they come into contact
wi th:
R hot parts of thest ationary heater exhaust
sy stem
R theex haust gas itself
There is a risk of fire. 0007
When thest ationary heater is swit ched
on, make sure that:
R hot vehicle parts do not come into
contact with flammable materials. R
theex haust gas can flow out of the
st ationary heater exhaust pipe
unhindered.
R theex haust gas does not come into
contact with flammable materials. 000E
NO
TEBattery discharge caused bysta‐
tionary heater or stationary ventilation
operation Ope
rating thest ationary heater or stationary
ve ntilation drains the batter y. 0007
After heating or ventilating theve hicle
twice, drive for a longer period of time. Re
quirements:
R The fuel tank is filled toat least reser vefuel
le ve l. 0007
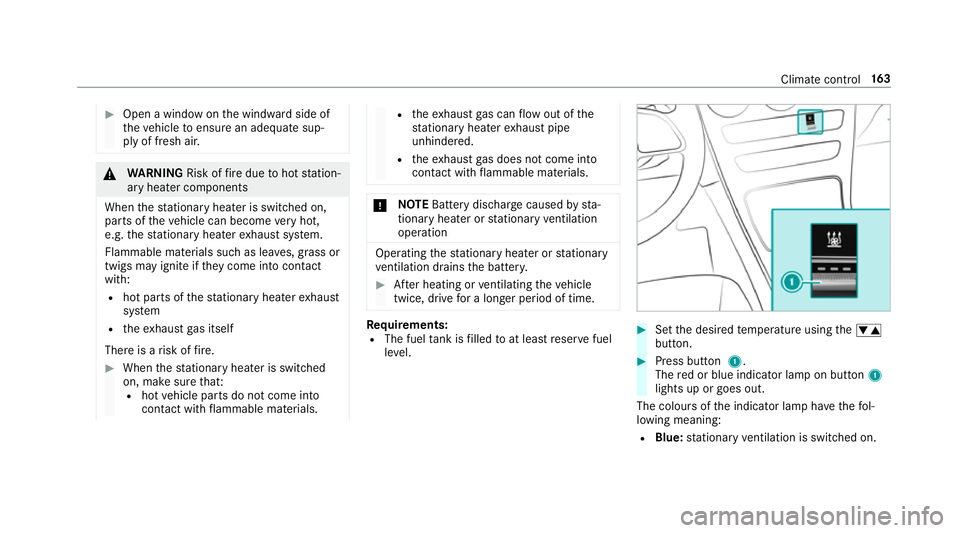
Set the desired temp erature using the0082
button. 0007
Press button 1.
The red or blue indicator lamp on button 1
lights up or goes out.
The colours of the indicator lamp ha vethefo l‐
lowing meaning:
R Blue: stationary ventilation is switched on. Clima
tecontrol 16 3
Page 175 of 609
R
The vehicle is automatically switched off
af te rte n minu tes.
Ensure thefo llowing before starting the engine:
R the legal stipulations in the area where your
ve hicle is par ked allow engine starting via
smartphone.
R it is safe tostart and runth e engine where
yo ur vehicle is par ked.
R the fuel tank is su fficiently filled.
St arting theve hicle 000A
WARNING Risk of crushing or entrap‐
ment due tounin tentional starting of the
engine
Limbs could be crushed or trapped if the
engine is star ted unintentionally during
service or maintenance work. 0007
Alw ays secure the engine against unin‐
te ntional starting before car rying out
maintenance or repair work. Re
quirements:
R park position 005Dis selected. R
the anti- theft alarm sy stem is not activated.
R the panic alarm is not activated.
R the hazard warning lights are switched off.
R the bonn etis closed.
R the doors are closed and loc ked.
R the windo wsand sliding sun roof are closed. 0007
Start theve hicle using the smartphone:
R afte reve ryvehicle start, the engine runs for
te n minu tes.
R you can car ryout a maximum of two consec‐
utive starting attem pts. The vehicle must be
st ar ted once with theke y before trying to
st art theve hicle again with the smartphone.
R you can stop theve hicle again at any time.
R further information can be found in the
smartphone app.
Securing the engine against starting before
car rying out maintenance or repair work: 0007
switch on the hazard warning lights.
or 0007
unlock the doors. or 0007
open a side window or the sliding sunroof. Ru
nning-in no tes Mercedes-AMG
vehicles: observeth e no tes in
th e Supplement. Otherwise, you may failto rec‐
ognise dangers.
To preser vethe engine during thefirs t1, 500 km:
R drive at varying road speeds and engine
speeds.
R drive theve hicle in drive program A
or ;.
R change gear before there v counter needle is
00C3 ofthewa yto there d area of there v coun‐
te r.
R do not shift down a gear manually in order to
brake.
R avoidoverstra ining theve hicle, e.g. driving at
full thro ttle.
R vehicles with automatic transmission: do
not depress the accelera tor pedal be yond the
pressure point (kickdown). 17 2
Driving and pa rking
Page 180 of 609
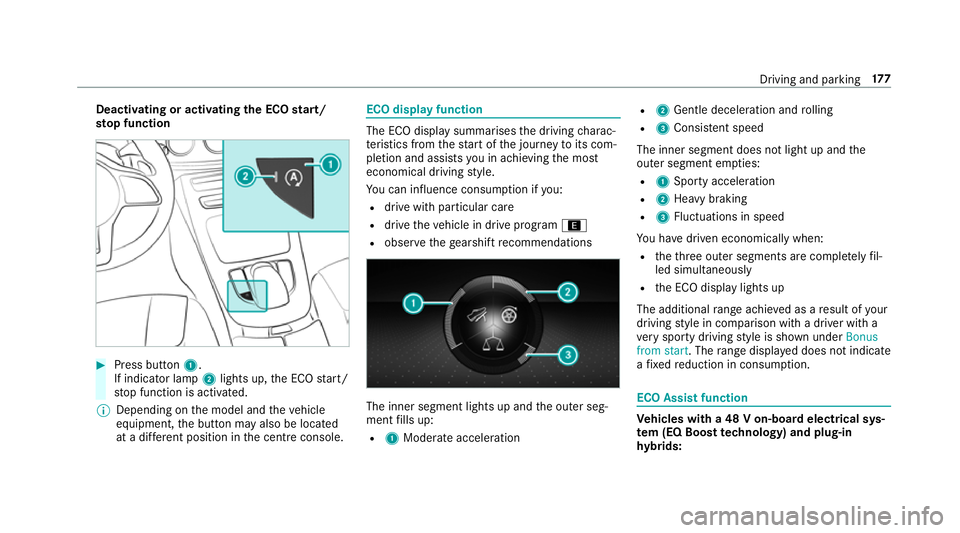
Deactivating or activating
the ECO start/
sto p function 0007
Press button 1.
If indicator la mp2lights up, the ECO start/
st op function is activated.
0009 Depending on the model and theve hicle
equipment, the button may also be located
at a dif fere nt position in the cent reconsole. ECO displ
ayfunction The ECO display summa
rises the driving charac‐
te rist ics from thest art of the journey toits com‐
pletion and assists you in achieving the most
economical driving style.
Yo u can influence consum ption if you:
R drive with particular care
R drive theve hicle in drive program ;
R obser vethege arshift recommendations The inner segment lights up and
the outer seg‐
ment fills up:
R 1 Moderate acceleration R
2 Gentle decele ration and rolling
R 3 Consis tent speed
The inner segment does not light up and the
outer segment em pties:
R 1 Sporty acceleration
R 2 Heavy braking
R 3 Fluctuations in speed
Yo u ha vedriven economically when:
R theth re e outer segments are comple tely fil‐
led simultaneously
R the ECO display lights up
The additional range achi eved as a result of your
driving style in comparison with a driver with a
ve ry sporty driving style is shown under Bonus
from start. The range displ ayed does not indicate
a fixe dre duction in consum ption. ECO Assist function
Ve
hicles with a 48 V on-board electrical sys‐
te m (EQ Boo sttech nology) and plug-in
hy brids: Driving and parking
17 7