2018 MERCEDES-BENZ C-CLASS CABRIOLET change time
[x] Cancel search: change timePage 88 of 174

XTo switch an area to avoid on/off:select an
area by turning and pressing the controller.
The area will be avoided Oor not ª.
XTo display/change an area: mark an area by
turning the controller.
XSlide 9the controller.
XTo select Display/Change: press the con-
troller.
The map with the crosshair appears.
The area currently blocked is displayed as a
red square.
XTo move the area to a new location: slide
1, 4,2the controller.
XTo change the size of the area: press the con-
troller.
XTurn the controller.
XTo accept changes: press the controller.
A message appears stating that the area has
been set.
Deleting one/all areas
XTo switch to navigation mode: press the
Ø button.
XTo show the menu: slide6the controller.
XTo select Options:turn and press the con-
troller.
XSelect Route Settings.
XSelectAvoid Options.
XSelectAvoid Area.
A list appears.
XTo delete an area: mark an area by turning
the controller.
XSlide 9the controller.
XSelect DeleteorDelete All.
A prompt appears asking whether you wish to
delete the area.
XSelect YesorNo.
After selecting Yes, the area is deleted.
XTo delete all areas: when the list appears,
slide 9 the controller.
XSelect Delete All.
A prompt appears asking whether you wish to
delete all areas.
XSelect YesorNo.
After selecting Yes, all areas are deleted.
SIRIUS XM service
Displaying SIRIUS XM service informa-
tion
You can display the SIRIUS XM service informa-
tion.
XTo switch to navigation mode: press the
Ø button.
XTo show the menu: slide6the controller.
XTo select Traffic: turn and press the con-
troller.
XSelect SIRIUS Service.
The provider's phone number (SIRIUS XM)
and the serial number of your service module
are displayed.
iAlternatively you can call up this function
using the touchpad (Ypage 24).
Registering for the SIRIUS XM traffic
report service
XCall the provider telephone number shown on
the multimedia system display.
iYou can also have the satellite service acti-
vated online. To do so, visit the SIRIUS XM
Radio website at http://www.sirius.com
(USA).
XThe connection is established: follow the
service employee's instructions.
The activation process may take up to ten
minutes.
iIf registration is not included when purchas-
ing the system, your credit card details will be
required to activate your account.
Updating the digital map
Introduction
The digital maps generated by the map software
become outdated in the same way as conven-
tional road maps. Optimal route guidance can
only be provided by the navigation system in
conjunction with the most up-to-date map soft-
ware.
Information about new versions of the digital
map can be obtained from an authorized
Mercedes-Benz Center. You can have the digital
map updated there using a data medium, or you
can update it yourself.
86Map functions
Navigation
Page 95 of 174
On the mobile phone
XSwitch on the mobile phone and enter the PIN
when prompted to do so (see the manufac-
turer's operating instructions).
XActivate Bluetooth®and, if necessary, Blue-
tooth®visibility for other devices (see the
manufacturer's operating instructions).
This visibility is for restricted periods of time
on some mobile phones (see the manufactur-
er's operating instructions).
XSet the Bluetooth®device name for the
mobile phone if necessary.
The Bluetooth
®device names for all of one man-
ufacturer's products might be identical. To
make it possible to clearly identify your mobile
phone, change the device name (see the man-
ufacturer's operating instructions). The name
can be freely selected.
If the mobile phone supports the PBAP (Phone
Book Access Profile) and MAP (M essage
Access Profile) Bluetooth
®profiles, the follow-
ing information will be transmitted after you
connect:
RPhone book
RCall lists
RMessages
Further information on allowing or suppressing
the automatic download of the phone book
(
Ypage 108).
The battery of the mobile phone should always
be kept sufficiently charged in order to prevent
malfunctions.
iNot all mobile phones available on the mar-
ket are equally suitable. You can obtain fur-
ther information about suitable mobile
phones and about the connection between
the mobile phone and the multimedia system
on the Internet at http://www.mercedes-
benz.com/connect .
You can also obtain more information by call-
ing.
In the USA, you can get in touch with the
Mercedes-Benz Customer Assistance Center
on 1-800-FOR-MERCedes (1-800-367-6372).
In Canada, you can get in touch with the Cus-
tomer Relations Center on 1-800-387-0100.
iSome displays (e.g. the signal strength) are
shown depending on the supported version of
the Hands-Free Profile.
Procedure and general information
Searching for and authorizing (connecting)
a mobile phone
Before using your mobile phone with the multi-
media system for the first time, you will need to search for the phone (
Ypage 94) and then
authorize it (Ypage 94). Depending on the
mobile phone, authorization either takes place
by means of Secure Simple Pairing or by enter-
ing a passkey. The multimedia system automat-
ically makes the procedure that is relevant for
your mobile phone available. You can recognize
Secure Simple Pairing by the fact that a code is
displayed on the mobile phone and on the mul-
timedia system. You can recognize the passkey
system by the fact that you have to enter a code
on the mobile phone and on the multimedia sys-
tem. The mobile phone is always connected
automatically after authorization.
If the multimedia system does not detect your
mobile phone, this may be due to particular
security settings on your mobile phone. You can
also start the search procedure and authoriza-
tion on the mobile phone (
Ypage 95).
Device-specific information on authorizing and
connecting Bluetooth
®-capable mobile phones
can be found on the Internet at http://
www.mercedes-benz.com/connect .
You can authorize up to 15 mobile phones. After authorization, the connection of the last two tel-
ephones used always functions automatically.
Only one mobile phone can be connected to the
multimedia system at any one time.
De-authorizing (disconnecting) a mobile
phone
The connection is terminated automatically if
you leave the receiver range of the multimedia
system or deactivate Bluetooth
®on your mobile
phone.
If you no longer want the Bluetooth
®connection
to be established automatically, the mobile
phone must be de-authorized (disconnected)
(
Ypage 96).
Connecting/disconnecting a mobile phone93
Telephone
Z
Page 105 of 174
XTo highlight a contact in the phone book: turn
the controller.
XTo selectG: slide 9the controller.
XTo select AddPhoneNo.: turn and press the
controller.
XTo select a category for the number, e.g.
Home: turn the controller and press to confirm.
XTo select a telephone category, e.g. MobilePhone: turn the controller and press to con-
firm.
If you have marked a number as favored, it
appears at the top of the list and is highligh-
ted.
XTo select Continue: turn and press the con-
troller.
An input line appears.
XEnter the telephone number.
XSelect ¬.
A maximum of five entries can be saved for one
category.
If five numbers are already stored for the entry
you are searching for, a prompt will appear ask-
ing whether you wish to overwrite one of the
existing numbers.
Overwriting an entry
XTo select Yes: turn and press the controller.
A list of the existing five phone numbers is
displayed.
XTo select the number to be overwritten from
the list: turn the controller and press to con-
firm.
The entry field for the new phone number is
displayed.
XEnter characters using the controller
(Ypage 30) or the touchpad (Ypage 26).
Canceling the overwriting of an entry
XTo select No: turn and press the controller.
The process is canceled.
Saving a contact
Saved contacts are indicated in the phone book
by different symbols (Ypage 101).
XSearch for a contact on the mobile phone
à (Ypage 101).
XTo select G: slide 9the controller.
XTo select Save: turn and press the controller.
The contact has now been saved. The contact
is identified by the Æsymbol in the phone
book.
iSaved contacts are also displayed in the
address book.
Saving or editing the contact data in the mul-
timedia system does not change the contacts
on the mobile phone. If automatic calling-up
of phone contacts is activated, the multime-
dia system displays the copy Æwith the
changed data.
To add additional data, such as additional
phone numbers or e-mail addresses, select
this contact. In this way, you avoid creating
additional copies of the mobile phone entry.
Deleting a name
You can delete contacts that have been added,
supplemented, saved or imported in the multi-
media system.
If there are only phone numbers saved under the
contact, the contact is deleted from the phone
book and the address book.
If there are additional entries under the contact,
such as a navigable destination, only the phone
numbers are deleted. The contact is retained in
the address book with the remaining entries.
XTo highlight a contact in the phone book: turn
the controller.
XTo select G: slide 9the controller.
XTo select Delete Entry: turn and press the
controller.
A prompt appears asking whether the contact
should be deleted.
XTo select Yes: turn and press the controller.
The phone number is deleted.
Closing the phone book
XTo select &from the character bar: turn the
controller and press to confirm.
or
XPress the %button.
Phone book103
Telephone
Z
Page 110 of 174
XTo selectVoiceTag: turn and press the con-
troller.
XTo select Listen: turn and press the control-
ler.
You hear the voice tag.
Changing the display and sorting cri-
teria for contacts
XCall up the address book (Ypage 104).
XTo show the menu bar: slide 6the control-
ler.
XTo select Options: turn and press the con-
troller.
XTo select Display and Sorting: turn and
press the controller.
You have the following options:
RLast Name, First Name(default setting)
The contacts are sorted by surname and dis-
played with a comma.
RLast Name First Name
The contacts are sorted by surname and dis-
played without a comma.
RFirst Name Last Name
The contacts are sorted by first name and dis-
played without a comma.
XTo select the required option: turn and press
the controller.
The contacts are sorted and displayed
according to the selection.
Automatically importing contacts
from the phone
Depending on the mobile phone used, you can
set whether the contacts should be called up
automatically after the mobile phone is connec-
ted to the multimedia system.
XConnect a mobile phone (Ypage 92).
XCall up the address book (Ypage 104).
XTo show the menu bar: slide 6the control-
ler.
XTo select Options: turn and press the con-
troller.
XTo select Automatically Import Con‐tacts from Phone: turn and press the con-
troller.
You can allow Oor deactivate ªthe auto-
matic download.
Saving a contact
Saved contacts are indicated in the phone book
by different symbols (Ypage 101).
XCall up the address book (Ypage 104).
XTo select a contact: turn and press the con-
troller.
The details for the contact are displayed.
XTo select G: slide 9the controller.
XTo select Save: turn and press the controller.
The contact has now been saved.
iIf the saved address book entry contains a
phone number, the entry is also displayed in
the phone book.
Saving or editing the contact data in the mul-
timedia system does not change the contacts
on the mobile phone. If automatic download-
ing of phone contacts is activated, the multi-
media system displays the copy ¥with the
changed data. To add additional data, such as additional phone numbers or e-mail
addresses, select this contact. In this way,
you avoid creating additional copies of the
mobile phone entry.
Deleting a name
XCall up the address book (Ypage 104).
XSearch for a contact (Ypage 104).
XTo select G: slide 9the controller.
XTo select Delete Entry: turn and press the
controller.
XTo select Yes: turn and press the controller.
The contact is deleted.
108Address book
Telephone
Page 125 of 174

Managing existing access data
Calling up the device list
XCall up Internet functions (Ypage 124).
XTo switch to the menu bar: slide 6the con-
troller.
XTo select Settings: turn and press the con-
troller.
XTo select Configure Internet Settings:
turn and press the controller.
The device list is displayed.
Editing the access data
The mobile phone must be connected with the
system for the access data to be changed.
When the Internet connection is active, you can-
not edit or delete the access data of the cur-
rently set mobile phone network provider.
XCall up the device list (Ypage 123).
XTo highlight the desired mobile phone in the
device list: turn the controller.
XTo select G: slide 9the controller.
XTo select Change Configuration: turn and
press the controller.
XSelect Predefined SettingsorManualSettings.
The provider settings are displayed.
In order to edit the access data of the mobile
phone network provider you have two options:
ROption 1: select the predefined access data of
the mobile phone network provider
(
Ypage 121).
ROption 2: manually set the access data of the
mobile phone network provider (Ypage 122).
Canceling Internet access permission
for a mobile phone
XCall up the device list (Ypage 123).
XTo highlight the desired mobile phone in the
device list: turn the controller.
XTo select G: slide 9the controller.
XTo select Delete Configuration: turn and
press the controller.
A prompt appears asking whether you wish to
delete the Internet configuration.
XTo select Yes: turn and press the controller.
The Internet access permission for the mobile
phone is now canceled. The mobile phone can now no longer be used by the system for
Internet functions.
Setting automatic disconnection of
the Internet connection
If a preset time has elapsed during which the
Internet functions have not been used, the Inter-
net automatically disconnects.
XCall up the device list (Ypage 123).
XTo highlight the desired mobile phone in the
device list: turn the controller.
XTo select
G: slide 9the controller.
XTo select Disconnect AutomaticallyWhen Inactive: turn and press the control-
ler.
XTo select 5 Minutes,10 Minutesor 20Minutes: turn and press the controller.
Managing all Internet devices
If multiple mobile phones have been enabled for
Internet usage, these can be given priorities.
The system then selects the mobile phone with
the highest priority to establish an Internet con-
nection.
XCall up the device list (Ypage 123).
XTo highlight the mobile phone: turn the con-
troller.
XTo select G: slide 9the controller.
XTo select Manage All Internet Devices:
turn and press the controller.
A menu appears.
XTo highlight a mobile telephone: turn the con-
troller.
XTo select G: slide 9the controller.
XTo select Change Device Priority: turn
and press the controller.
XTo move the desired mobile phone up or
down: turn and press the controller.
The mobile phone's priority is changed.
The priority of the mobile phones is deter-
mined by the hierarchy. The mobile phone at
the top of the list has the highest priority.
Setting up an Internet connection (Canada)123
Online and Internet functions
Z
Page 127 of 174

Door-to-door navigation
Mercedes-Benz Companion
The Mercedes-BenzCompanion app is available
in th eUSA.
Mercedes-Ben zCompanion enable sdoor-to -
doo rnavigation .
Door-to-doo rnavigation means :
RThe currentdestination is transferred from
th evehicle' smultimedia syste mto an exter-
nal devic e(mobile phone or smartwatch).
Thi senable syou to continue navigatin gto a
destination whic his in apedestrian zone ,fo r
example.
RConversely, adestination can be selecte don
th eexternal devic eand transferred to th e
vehicle' smultimedia system.
Other functions:
RNavigatin gto th evehicle' slocation
RDisplayin gvarious information about th evehi-
cl e
Mor einformation on suitable mobile phones:
http://www.mercedes-benz.com/connec t
Further information on Mercedes-Ben zCom -
panion (se eAp pStor edescription).
Web browser
Calling up awebsite
Function restrictions
Internet page scanno tbe shown whil eth evehi-
cl e is in motion .
Enteringaweb address
XCall up Internet function s (Ypage 124).
XTo selectwww:turn and press th econtroller .
An input men ufo rth eweb address is dis -
played.
XEnte rcharacters usin gth econtroller or th e
number keypad.
XTo finish entr yand cal lup awebsite: selec t
¬.
Selecting aweb address from th elist
XWhe nth echaracte rbar is displayed, slid e
5 thecontroller .
XTo selectth edesire dweb address :turn and
press th econtroller .
The web address can still be changed as
desired.
XTo cal lup awebsite: selec t¬.
The websit eis called up.
Navigating th ewebsite
StepResult
XTur nth econtroller .Navigates from on e
selectable item (e.g.
link, text field or
menu) to th enext and
highlight sth erespec -
tive elemen ton th e
website.
Slidin gth econtroller :
XLeftor right 1
XUp or down 4
XDiagonally2
Moves thepointe ron
th epage .
XPress th econtrol-
ler .Opens th eselecte d
item.
XPress %.Calls up th emenu.
Web browser125
Online and Internet functions
Z
Page 129 of 174
XTo navigate on the web page: slide1,
4 or2 the controller.
XTo zoom in on the web page: turn the control-
ler.
Jumping from link to link
You can use this function to skip from one link to
the next on a website.
XTo show the menu: press the%button.
XTo select 3: turn and press the controller.
A menu appears. The #dot indicates the cur-
rent setting.
XSelect Jump From Link To Link.
If a website has been called up and the con-
troller is turned, the cursor jumps from link to
link.
Directional scrolling
You can use this function to scroll up and down
on the web page.
XTo show the menu: press the%button.
XTo select 3: turn and press the controller.
A menu appears. The #dot indicates the cur-
rent setting.
XSelect Directional Scrolling.
If a website has been called up and the con-
troller is turned, the cursor moves up or down
depending on the direction of the turn.
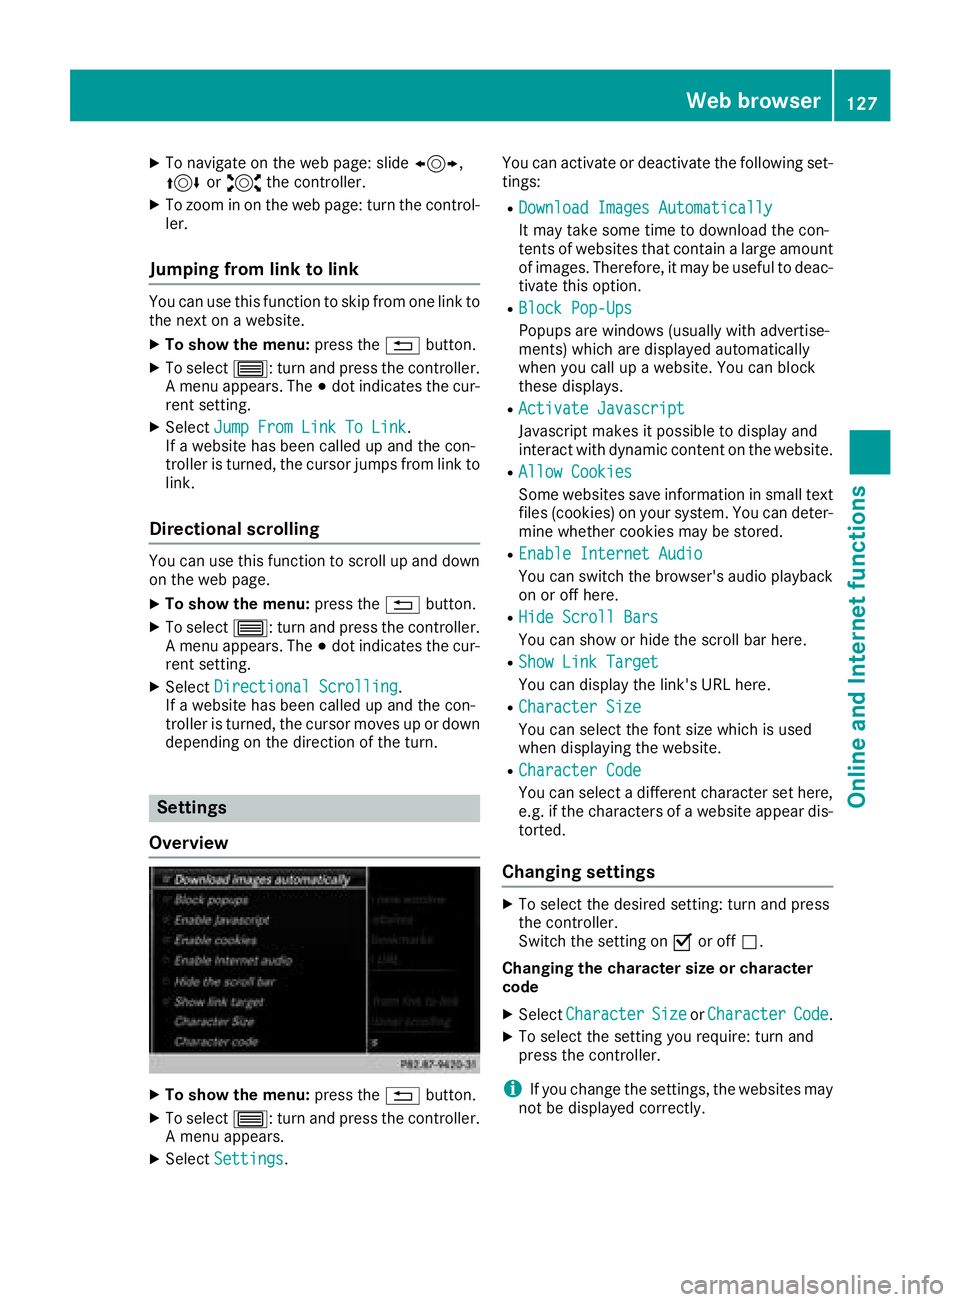
Settings
Overview
XTo show the menu: press the%button.
XTo select 3: turn and press the controller.
A menu appears.
XSelect Settings. You can activate or deactivate the following set-
tings:
RDownload Images Automatically
It may take some time to download the con-
tents of websites that contain a large amount
of images. Therefore, it may be useful to deac-
tivate this option.
RBlock Pop-Ups
Popups are windows (usually with advertise-
ments) which are displayed automatically
when you call up a website. You can block
these displays.
RActivate Javascript
Javascript makes it possible to display and
interact with dynamic content on the website.
RAllow Cookies
Some websites save information in small text
files (cookies) on your system. You can deter-
mine whether cookies may be stored.
REnable Internet Audio
You can switch the browser's audio playback
on or off here.
RHide Scroll Bars
You can show or hide the scroll bar here.
RShow Link Target
You can display the link's URL here.
RCharacter Size
You can select the font size which is used
when displaying the website.
RCharacter Code
You can select a different character set here,
e.g. if the characters of a website appear dis-
torted.
Changing settings
XTo select the desired setting: turn and press
the controller.
Switch the setting on
Oor off ª.
Changing the character size or character
code
XSelect CharacterSizeorCharacterCode.
XTo select the setting you require: turn and
press the controller.
iIf you change the settings, the websites may
not be displayed correctly.
Web browser127
Online and Internet functions
Z
Page 134 of 174
Station list
XIn radio mode, press the controller.
The station list appears with the stations cur-
rently available.
Saving a station
Storing current stations
XIn radio mode: slide6the controller.
The radio menu bar appears.
XTo select Preset: press the controller.
XTo select the SaveCurrentStation/Chan‐neloption: turn and press the controller.
XTo select the position of the required preset
entry: turn and press the controller.
The currently set station is stored in the selec-
ted preset position. A tone signals a success-
ful preset entry.
Storing a station using the controller
XSet the desired station in radio mode.
XPress and hold the controller until the preset
list appears.
XTo select the preset number: turn and press
the controller.
iFrequencies have already been stored in the
multimedia system. There are 100 preset
positions available.
Moving highlighted stations
XIn radio mode: slide 6the controller.
The radio menu bar appears.
XTo select Preset: press the controller.
XSelectEdit Station Preset.
XTo select the required preset entry: turn the
controller.
XSlide9the controller.
An additional menu appears.
XTo select Move Highlighted Station/Channel: turn and press the controller.
The list of stored stations appears again.
XTo move the highlighted station to the new
position: turn the controller and press to con-
firm.
Deleting highlighted stations
XIn radio mode: slide 6the controller.
The radio menu bar appears.
XTo select Preset: turn and press the control-
ler.
XSelect Edit Station Preset.
XTo select the required preset entry: turn the
controller.
XSlide9the controller.
XTo select Delete Highlighted Station/Channel: turn and press the controller.
XTo selectYes: turn and press the controller.
The highlighted station is deleted.
Activating/deactivating the station
presets display
You can use this function to change to the sta-
tion presets display.
Activating
XIn radio mode: slide 6the controller.
XTo select Preset: turn and press the control-
ler.
XTo select Station Preset View: On: turn
and press the controller.
The station preset display appears.
XTo switch between the stored stations: turn
the controller.
Deactivating
XIn radio mode: slide 6the controller.
XTo select Preset: turn and press the control-
ler.
XTo select StationPresetView:Off: turn
and press the controller.
The view of the last heard waveband appears.
Tagging music tracks
If an Apple®device is connected, the music
tracks and artist displayed in the radio text can be stored. You have the option of purchasing
this track using iTunes Store
®. Not all radio sta-
tions support this function.
132Tagging music tracks
Radio