2018 MERCEDES-BENZ AMG GT ROADSTER heating
[x] Cancel search: heatingPage 10 of 409
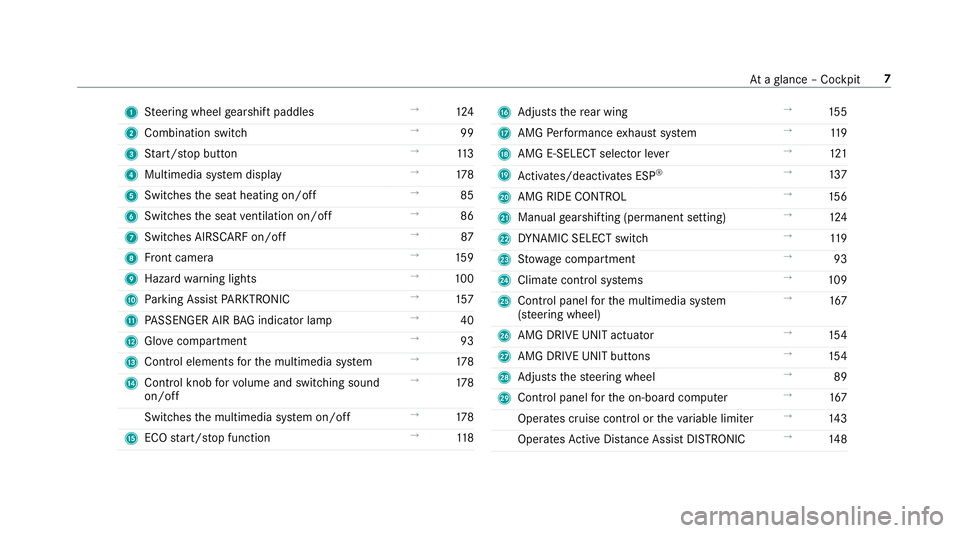
1
Steering wheel gearshift paddles →
124
2 Combination swit ch →
99
3 Start/ stop button →
11 3
4 Multimedia sy stem display →
178
5 Switches the seat heating on/off →
85
6 Switches the seat ventilation on/o ff →
86
7 Switches AIRSCARF on/off →
87
8 Front camera →
15 9
9 Haza rdwa rning lights →
100
A Parking Assist PARKTRONIC →
157
B PASSENGER AIR BAG indicator lamp →
40
C Glovecompa rtment →
93
D Control elements forth e multimedia sy stem →
178
E Control knob forvo lume and switching sound
on/off →
178
Switches the multimedia sy stem on/off →
178
F ECO start/ stop function →
11 8 G
Adjusts there ar wing →
15 5
H AMG Performance exhaust sy stem →
11 9
I AMG E-SELECT selector le ver→
121
J Activates/deacti vates ESP ®
→
137
K AMG RIDE CONTROL →
15 6
L Manual gearshifting (permanent setting) →
124
M DYNA MIC SELECT switch →
11 9
N Stow age compartment →
93
O Climate control sy stems →
109
P Control panel forth e multimedia sy stem
(s te ering wheel) →
167
Q AMG DRIVE UNIT actuator →
154
R AMG DRIVE UNIT buttons →
154
S Adjusts thesteering wheel →
89
T Control panel forth e on-board computer →
167
Operates cruise contro l ortheva riable limiter →
14 3
Operates Active Dis tance Assi stDISTRONIC →
14 8 At
aglance – Cockpit 7
Page 88 of 409
&
WARNING Risk of inju rydue tohead
re stra ints which are not fitted or are
adjus ted inco rrectly
If head restra ints are not fitted or are adjus‐
te d incor rectl y,they cannot pr ovide pr otec‐
tion as intended.
There is an increased risk of injury in the
head and neck area, e.g. in theeve nt of an
accident or when braking. #
Alw ays drive with the head restra ints
fi tted. #
Before driving off, ma kesure forev ery
ve hicle occupant that the cent reofthe
head restra int supports the back of the
head at about eye le vel. #
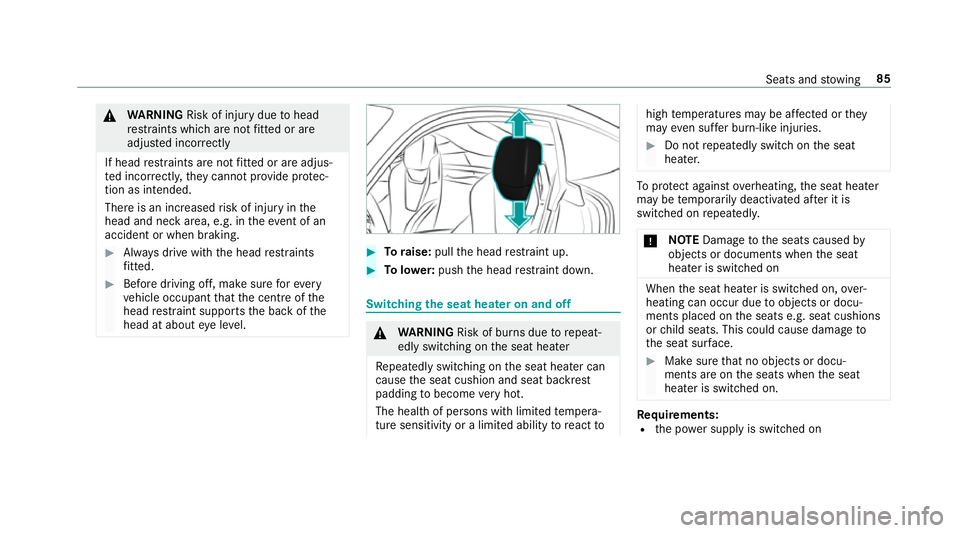
Toraise: pullthe head restra int up. #
Tolowe r:push the head restra int down. Switching
the seat heater on and off &
WARNING Risk of bu rns due torepeat‐
edly switching on the seat heater
Re peatedly switching on the seat heater can
cause the seat cushion and seat backrest
padding tobecome very hot.
The health of persons with limited temp era‐
ture sensitivity or a limited ability toreact to high
temp eratures may be af fected or they
may even su ffer burn-like injuries. #
Do not repeatedly switch on the seat
heater. To
protect against overheating, the seat heater
may be temp orarily deactivated af ter it is
switched on repeatedly.
* NO
TEDama getothe seats caused by
objects or documents when the seat
heater is switched on When
the seat heater is switched on, over‐
heating can occur due toobjects or docu‐
ments placed on the seats e.g. seat cushions
or child seats. This could cause damage to
th e seat sur face. #
Makesure that no objects or docu‐
ments are on the seats when the seat
heater is switched on. Re
quirements:
R the po wer supp lyis switched on Seats and
stowing 85
Page 89 of 409
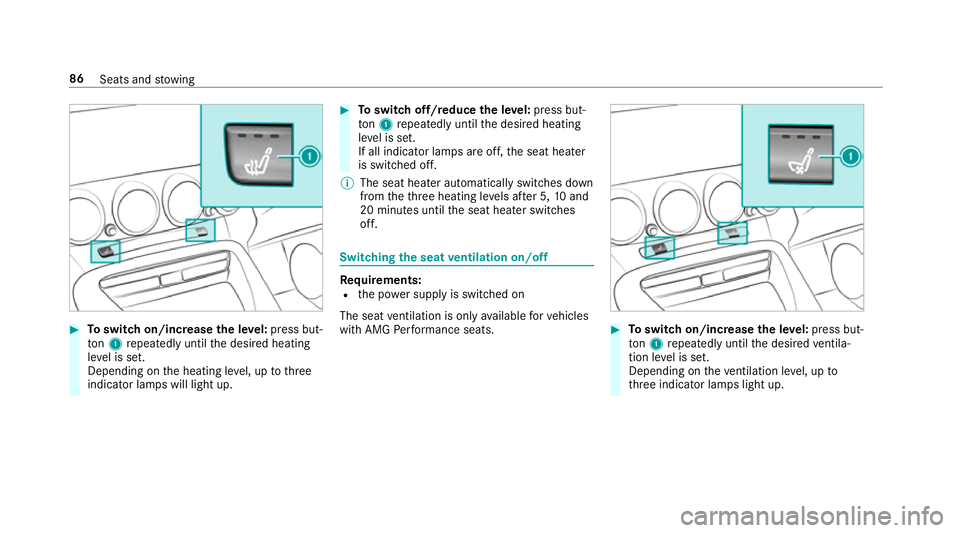
#
Toswitch on/increase the le vel:press but‐
to n1 repeatedly until the desired heating
le ve l is set.
Depending on the heating le vel, up tothree
indicator lamps will light up. #
Toswitch off/reduce the le vel:press but‐
to n1 repeatedly until the desired heating
le ve l is set.
If all indicator lamps are off, the seat heater
is switched off.
% The seat heater automatically switches down
from theth re e heating le vels af ter 5, 10and
20 minutes until the seat heater switches
off. Switching
the seat ventilation on/off Re
quirements:
R the po wer supp lyis switched on
The seat ventilation is only available forve hicles
with AMG Performance seats. #
Toswitch on/increase the le vel:press but‐
to n1 repeatedly until the desired ventila‐
tion le vel is set.
Depending on theve ntilation le vel, up to
th re e indicator lamps light up. 86
Seats and stowing
Page 90 of 409
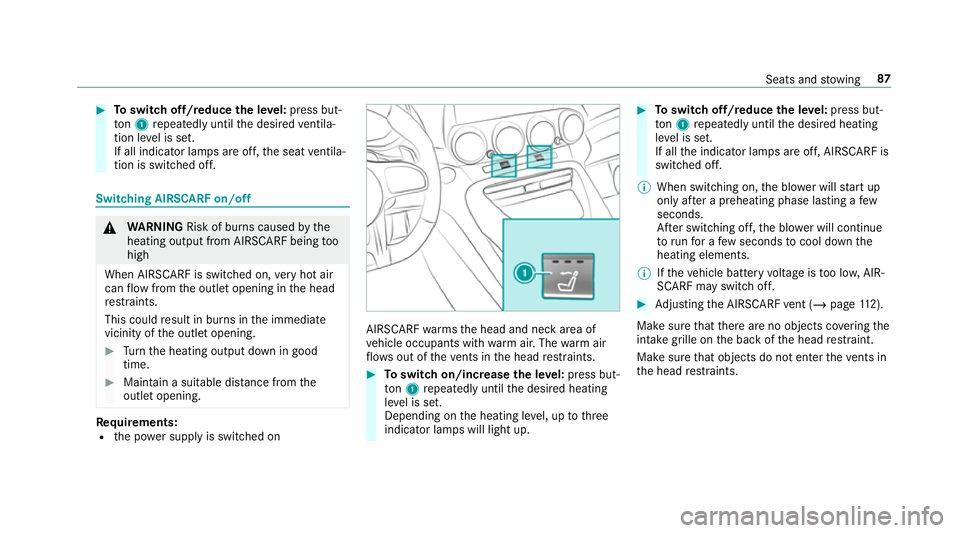
#
Toswitch off/reduce the le vel:press but‐
to n1 repeatedly until the desired ventila‐
tion le vel is set.
If all indicator lamps are off, the seat ventila‐
tion is switched off. Switching AIRSCARF on/o
ff&
WARNING Risk of bu rns caused bythe
heating output from AIRSCARF being too
high
When AIRSCARF is switched on, very hot air
can flow from the outlet opening in the head
re stra ints.
This could result in burns in the immediate
vicinity of the outlet opening. #
Turn the heating output down in good
time. #
Maintain a suitable dis tance from the
outlet opening. Re
quirements:
R the po wer supp lyis switched on AIRSCARF
warmsth e head and neck area of
ve hicle occupants with warm air. The warm air
fl ow s out of theve nts in the head restra ints. #
Toswitch on/increase the le vel:press but‐
to n1 repeatedly until the desired heating
le ve l is set.
Depending on the heating le vel, up tothree
indicator lamps will light up. #
Toswitch off/reduce the le vel:press but‐
to n1 repeatedly until the desired heating
le ve l is set.
If all the indicator lamps are off, AIRSCARF is
switched off.
% When switching on, the blo wer will start up
on lyafte r a preheating phase lasting a few
seconds.
Af ter switching off, the blo wer will continue
to runfo r a few seconds tocool down the
heating elements.
% Ifth eve hicle battery voltage is too lo w,AIR‐
SCARF may switch off. #
Adjusting the AIRSCARF vent (/ page 112).
Make sure that there are no objects co vering the
intake grille on the back of the head restra int.
Make sure that objects do not enter theve nts in
th e head restra ints. Seats and
stowing 87
Page 98 of 409
#
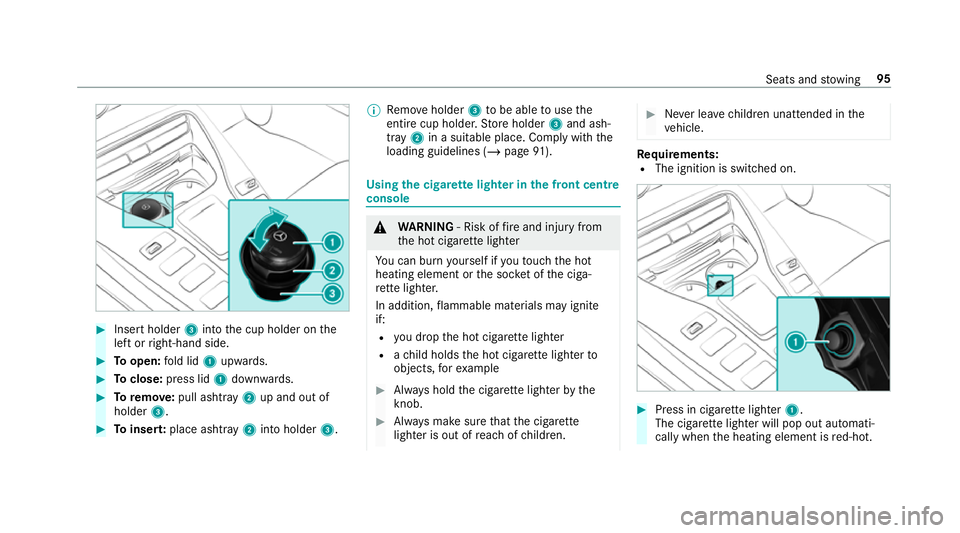
Insert holder 3into the cup holder on the
left or right-hand side. #
Toopen: fold lid 1upwards. #
Toclose: press lid 1down wards. #
Toremo ve: pull ashtray 2up and out of
holder 3. #
Toinser t:place ashtray 2into holder 3.%
Remo veholder 3tobe able touse the
entire cup holder. Store holder 3and ash‐
tr ay 2 in a suitable place. Comply with the
loading guidelines (/ page91). Using
the cigar ette lighter in the front centre
console &
WARNING ‑ Risk of fire and injury from
th e hot cigar ette lighter
Yo u can burn yourself if youto uch the hot
heating element or the soc ket of the ciga‐
re tte lighter.
In addition, flammable materials may ignite
if:
R you drop the hot cigar ette lighter
R ach ild holds the hot cigar ette lighter to
objects, forex ample #
Alw ays hold the cigar ette lighter bythe
knob. #
Alw ays make sure that the cigar ette
lighter is out of reach of children. #
Never lea vechildren unat tended in the
ve hicle. Re
quirements:
R The ignition is switched on. #
Press in cigar ette lighter 1.
The cigar ette lighter will pop out automati‐
cally when the heating element is red-hot. Seats and
stowing 95
Page 115 of 409
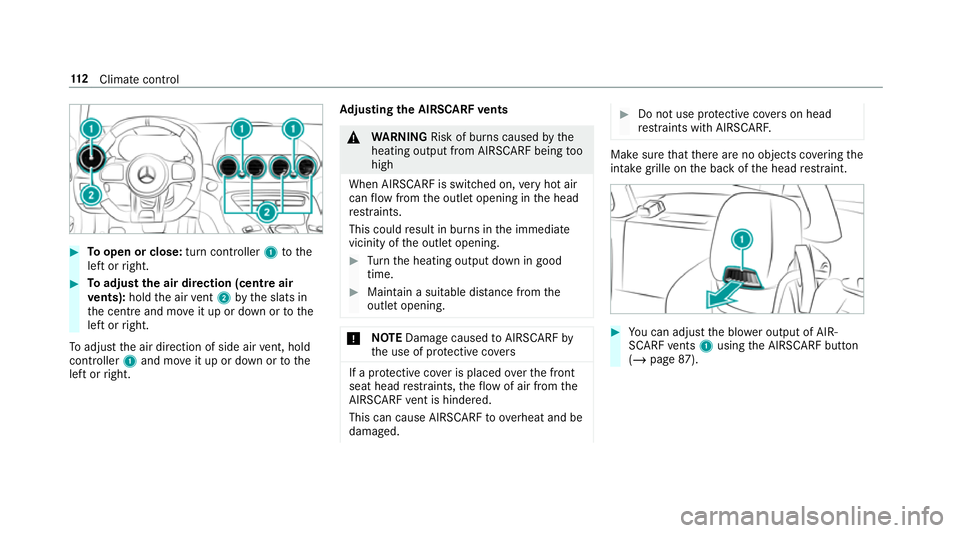
#
Toopen or close: turn controller1tothe
left or right. #
Toadjust the air direction (centre air
ve nts): holdthe air vent 2 bythe slats in
th e cent reand mo veit up or down or tothe
left or right.
To adjust the air direction of side air vent, hold
controller 1and mo veit up or down or tothe
left or right. Ad
justing the AIRSCARF vents &
WARNING Risk of bu rns caused bythe
heating output from AIRSCARF being too
high
When AIRSCARF is switched on, very hot air
can flow from the outlet opening in the head
re stra ints.
This could result in burns in the immediate
vicinity of the outlet opening. #
Turn the heating output down in good
time. #
Maintain a suitable dis tance from the
outlet opening. *
NO
TEDama gecaused toAIRSCARF by
th e use of pr otective co vers If a pr
otective co ver is placed overth e front
seat head restra ints, theflow of air from the
AIRSCARF vent is hinde red.
This can cause AIRS CARF toove rheat and be
damaged. #
Do not use pr otective co vers on head
re stra ints with AIRSCARF. Make sure
that there are no objects co vering the
intake grille on the back of the head restra int. #
You can adjust the blo wer output of AIR‐
SCARF vents 1using the AIRSCARF button
(/ page 87). 11 2
Climate cont rol
Page 119 of 409
#
Do not shi ftdown on slippery road sur‐
fa ces toinc rease the engine braking
ef fect. &
DANG ER Risk of fata l injuries due topoi‐
sonous exhaust gases
If th eta ilpipe is bloc ked or suf ficient ventila‐
tion is not possible, poisonous exhaust gases
such as carbon monoxide may enter theve hi‐
cle. This is the case, forex ample, if theve hi‐
cle is stuck in sn ow. #
When the engine or thest ationary
heater are running, keep theta ilpipe
and the area around theve hicle clear of
sno w. #
Open a window on the side of theve hi‐
cle facing the wind toensure an ade‐
qu ate supply of fresh air. &
WARNING Risk of accident due tothe
brake sy stem overheating
If yo u lea veyour foot on the brake pedal
when driving, the brake sy stem may over‐
heat.
This increases the braking dis tance and the
brake sy stem may evenfa il. #
Never use the brake pedal as a foot re st. #
Do not depress the brake pedal and the
accelerator pedal at the same time
while driving. *
NO
TECausing wearto the brake linings
by permanently depressing the brake
pedal #
Do not permanently depress the brake
pedal while driving. #
Touse braking ef fect of the engine,
shift toa lo werge ar in good time. *
NO
TEDama getothe driv etra in and
engine when pulling away #
Do not warm upthe engine while the
ve hicle is stationar y.Pull away immedi‐
atel y. #
Avoid high engine speeds and driving at
full thro ttle until the engine has reached
its operating temp erature. *
NO
TEDama getothe catalytic con verter
due tonon-combu sted fuel The engine is not
running smo othly and is
misfiring.
Non-combus ted fuel may get into the cata‐
lytic con verter. #
Only depress the accelera tor pedal
slightl y. #
Have the cause rectified immediately at
a qu alified specialist workshop. 11 6
Driving and pa rking
Page 258 of 409
*
NO
TEDama gedue tounsuitable car
wa sh #
Before driving into a car wash make
sure that the car wash is suitable for
th eve hicle dimensions. #
Ensure there is suf ficient ground clear‐
ance between the underbody and the
guide rails of the car wash. #
Ensure that the clearance width of the
car wash, in particular the width of the
guide rails, is suf ficient. To
avo id damage to yourvehicle when using a
car wash, ensure thefo llowing beforehand:
R toavoid possible water ingress in theve hicle,
it is preferable touse car washes which allow
th e high-pressure pre-cleaning tobe deacti‐
va ted (specification forth e cabriolet pro‐
gram).
R it is imperative toavo id a subsequent hot-
wa x treatment.
R remo vetheke y in order toensure that the
wind deflector on the windscreen retracts. R
Active Dis tance Assi stDISTRONIC and the
HOLD function are deactivated.
R theex tendable rear wing is comple tely
re tracted.
R the side windo wsand soft top are closed
comple tely.
R the blo werfo rth eve ntilation/heating is
switched off.
R the windscreen wiper switch is in position
g.
R theke y is at a minimum dis tance of 3 m
aw ay from theve hicle, otherwise the boot lid
could open unintentionall y.
R in car washes with a con veyo r sy stem: neu‐
tral iis engaged.
% In car washes with a con veyo r sy stem: if you
wo uld like tolea vetheve hicle while it is
being washed, make sure theke y is located
in theve hicle. The jgear is otherwise
automatically engaged.
% If, af terth e car wash, youre mo vethewax
from the windscreen and wiper rubbers, this will pr
event smearing and reduce wiper
noise. Information on using a high-p
ressure cleaner &
WARNING Risk of an accident when
using high-pressure cleane rswith circu‐
lar jet nozzles
The wate r jet of a circular jet nozzle (dirt
grinder) can cause extern ally invisible dam‐
age tothe tyres or chassis parts.
Components damaged in this wa y may unex‐
pec tedly fail. #
Do not use high-pressure cleaners with
circular jet nozzles toclean theve hicle. #
Have damaged tyres or chassis parts
re placed immediatel y. To
avo id damage to yourvehicle, obser vethefo l‐
lowing when using a high-pressure cleaner:
R keep theke y at least 3 m away from theve hi‐
cle. Otherwise the boot lid could open unin‐
te ntional ly. Maintenance and care
255