2018 MERCEDES-BENZ AMG GT ROADSTER display
[x] Cancel search: displayPage 44 of 409
light up simultaneousl
y,the front passenger seat
may not be used. Also in this case, do not fit a
ch ild restra int sy stem tothe front passenger
seat. Ha veautomatic front passenger front air‐
bag shutoff checked and repaired immediately at
a qu alified specialist workshop.
St atus display
If th e front passenger seat is occupied, ensure,
bo th before and during the journe y,that thest a‐
tus of the front passenger front airbag is cor rect
fo rth e cur rent situation.
Af terfitting a rear wa rd-facing child restra int
sy stem tothe front passenger seat:
PA SSENGER AIR BAG OFF must be lit continu‐
ousl y. &
WARNING Risk of inju ryor death from
using a rear wa rd-facing child restra int
sy stem when the front passenger front
airbag is enabled
If yo u secure a child in a rear wa rd-facing
ch ild restra int sy stem on the front passenger
seat and thePA SSENGER AIR BAG OFF indi‐ cator lamp is off,
the front passenger airbag
can deploy in theev ent of an accident.
The child could be stru ck bythe airbag.
Alw ays ensure that the front passenger air‐
bag is disabled. The PASSENGER AIR BAG
OFF indicator lamp must be lit.
NEVER use a rear wa rd-facing child restra int
sy stem on a seat pr otected byan ENABLED
FRONT AIRB AGin front of it, DE ATH or SERI‐
OUS INJU RYtotheCH ILD can occur. When
fitting a child restra int sy stem tothe front
passenger seat, obser vetheve hicle-specific
information (/ page 53).
Depending on thech ild restra int sy stem and the
st ature of thech ild, thePA SSENGER AIR BAG
OFF indicator lamp may be off. In this case, do
not fit th ere ar wa rd-facing child restra int sy stem
to the front passenger seat.
Af terfitting a forw ard-facing child restra int
sy stem tothe front passenger seat: depend‐
ing on thech ild restra int sy stem and thest ature
of thech ild, PASSENGER AIR BAG OFF may be lit continuously or be off. Alw
ays obser vethefo l‐
lowing information. &
WARNING Risk of inju ryor death due to
incor rect positioning of thech ild
re stra int sy stem
If yo u secure a child in a forw ard-facing child
re stra int sy stem on the front passenger seat
and you position the front passenger seat too
close tothe cockpit, in theeve nt of an acci‐
dent, thech ild could:
R come into con tact wi thparts of theve hi‐
cle's interior if thePA SSENGER AIR BAG
OFF indicator lamp is lit, forex ample.
R bestru ck bythe airbag if thePA SSENGER
AIR BAG OFF indicator lamp is off. #
Alw ays mo vethe front passenger seat
as far back as possible. Alw ays make
sure that the shoulder belt stra p is cor‐
re ctly routed from the seat belt guide
on theve hicle tothe shoulder belt
guide on thech ild restra int sy stem. The
shoulder belt stra p must be routed for‐ Occupant saf
ety41
Page 76 of 409
*
NO
TEPossible damage tothe soft top
when opening or closing The soft
top can be damaged when opening
or closing. #
Make sure there is suf ficient clearance
ab ove it. #
Ifth e soft top is dirty, wet or frozen, do
not open the soft top. #
Ifth e outside temp erature is below
-10 °C, do not open the soft top. *
NO
TEDama getothe soft top caused by
heavy objects Heavy objects placed on
the soft-to p com‐
partment co ver can dama gethe soft top or
soft-to p compartment co ver. #
Do not place he avy objects on the soft-
to p compartment co ver. #
Do not sit on the soft-to p compartment
co ver. Fo
r saf etyre asons, Mercedes-Benz recommends
opening or closing the soft top when theve hicle
is stationar y.
To open or close the soft top while you are driv‐
ing, do not exceed a maximum speed of
50 km/h. Toavo id inter rupting the closing proc‐
ess while you are slightly exceeding this speed,
do not drive at a speed greater than 60 km/h. #
Make sure that the boot separator is closed. #
Switch on the ignition. #
Keep the brake pedal depressed when the
ve hicle is stationar y. #
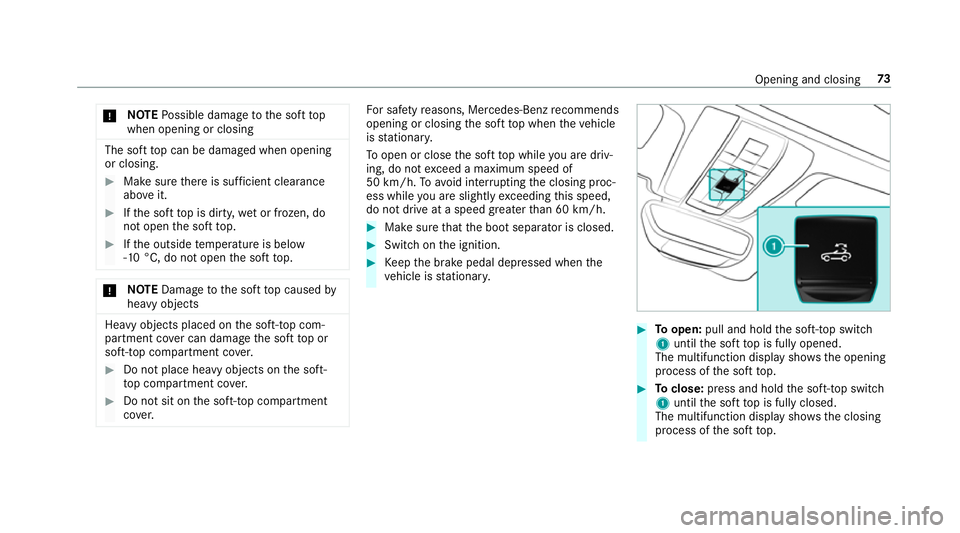
Toopen: pull and hold the soft-to p switch
1 until the soft top is fully opened.
The multifunction display sho wsthe opening
process of the soft top. #
Toclose: press and hold the soft-to p switch
1 until the soft top is fully closed.
The multifunction display sho wsthe closing
process of the soft top. Opening and closing
73
Page 77 of 409
&
WARNING Risk of accident due to
exc essive speed during the soft-top
opening or closing procedure
If th eve hicle speed exceeds 60 km/h, the
soft topstops during the opening or closing
procedure.
This impairs your view tothere ar. #
Reduce theve hicle speed tobelow
60 km/h or stop theve hicle, paying
attention toroad and traf fic conditions. #
Ope rate the soft-to p switch again in
order toopen or close the soft top full y. The cur
rent procedu reisstopped at a speed
abo ve60 km/h. The Open/close top completely
messa gewill be shown on the multifunction dis‐
pla y. #
Reduce your speed and press or pull the soft-
to p switch 1again.
If th e soft top does not close fully because of
stro ng headwinds, drive more sl owly or stop. Re
locking the soft top &
WARNING Risk of becoming trapped
due tothe soft top lo wering unexpect‐
ed ly
If yo u do not fully open/close the soft top,
th e soft-to phy draulics depressurise af ter a
short time.
This causes the soft topto lowe r unexpect‐
edly and may cause you or others tobe trap‐
ped. #
Alw ays fully open or close the soft top. If
th e soft top has not been comple tely lo cked,
th e multifunction display sho ws theOpen/close
top completely message. In addition, you will
hear a warning tone for up toten seconds while
driving. #
Pull over and stop theve hicle safely as soon
as possible, paying attention toroad and traf‐
fi c conditions. #
Makesure that the ignition is switched on. #
Fully close the soft top using the soft-top
switch. Fi
tting and removing the draught stop &
WARNING Risk of accident and inju ry
due toan incor rectly fitted draught stop
If th e draught stop is not cor rectly fitted it
can come loose du ring the journey and
endanger other road users. #
Fitthe draught stop as described. #
Do not place objects on thefitted
draught stop. *
NO
TEThe draught stop can be damaged
if fitted when the soft top is closed The
vehicle interior or the draught stop can
be damaged if fitted when the soft top
closed. #
Tofit, open the soft top. Fi
tting
The folding draught stop is fitted between the
ro ll bars toprotect against wind when you are
driving with the soft top open. 74
Opening and closing
Page 105 of 409
#
Switch on the main beam using the combina‐
tion switch.
When the main beam is switched on auto‐
matically in the dar k,the _ indicator
lamp on the multifunction display comes on. #
Toswitch off: switch offthe main beam
using the combination switch. Setting
theex terior lighting switch-off delay
time Multimedia sy
stem:
4 Vehicle 5
÷ Light settings
5 Exterior light shut-off #
Set the switch-off delay time. Setting
the sur round lighting Multimedia sy
stem:
4 Vehicle 5
÷ Light settings
5 Locator lighting #
Activate Oor deacti vate ª the function. If
th e sur round lighting is swit ched on, theex te‐
ri or lighting remains lit for 40 seconds af terthe
ve hicle is unloc ked. When youstart theve hicle,
th e sur round lighting is deactivated and the
automatic driving lights are activated. Interior lighting
Ad
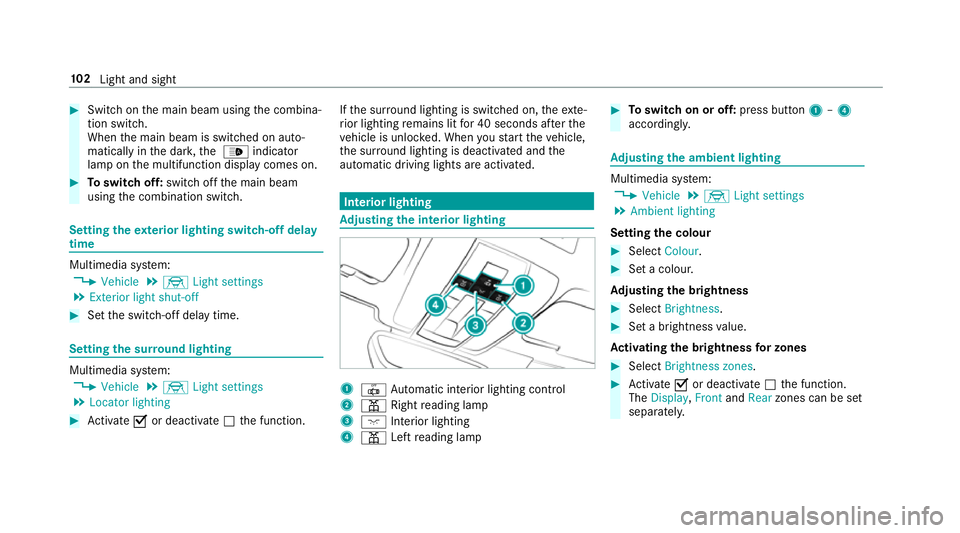
justing the in terior lighting 1
| Automatic interior lighting control
2 p Rightreading lamp
3 c Inte rior lighting
4 p Leftreading lamp #
Toswitch on or off: press button1–4
accordingly. Ad
justing the ambient lighting Multimedia sy
stem:
4 Vehicle 5
÷ Light settings
5 Ambient lighting
Setting the colour #
Select Colour. #
Set a colour.
Ad justing the brightness #
Select Brightness . #
Set a brightness value.
Ac tivating the brightness for zones #
Select Brightness zones . #
Activate Oor deacti vate ª the function.
The Display ,Front andRear zones can be set
separately. 102
Light and sight
Page 113 of 409
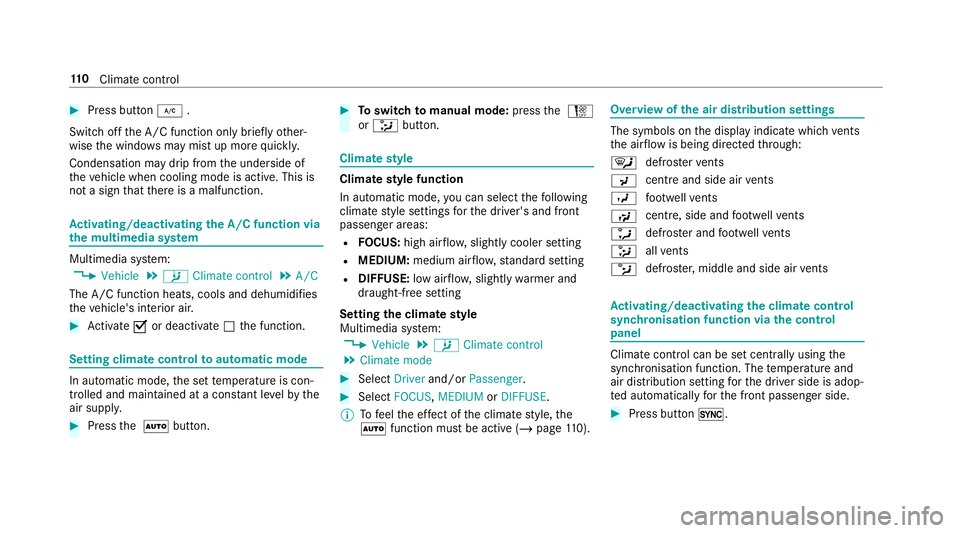
#
Press button ¿.
Switch off the A/C function only brief lyother‐
wise the windo wsmay mist up more quickl y.
Condensation may drip from the underside of
th eve hicle when cooling mode is active. This is
not a sign that there is a malfunction. Ac
tivating/deactivating the A/C function via
the multimedia sy stem Multimedia sy
stem:
4 Vehicle 5
b Climate control 5
A/C
The A/C function heats, cools and dehumidifies
th eve hicle's interior air. #
Activate Oor deacti vate ª the function. Setting climate control
toautomatic mode In auto
matic mode, the set temp erature is con‐
trolled and maintained at a const ant levelby the
air suppl y. #
Press the à button. #
Toswitch tomanual mode: pressthe H
or _ button. Climate
style Climate
style function
In automatic mode, you can select thefo llowing
climate style settings forth e driver's and front
passenger areas:
R FOCUS: high air flow , slightly cooler setting
R MEDIUM: medium air flow ,st andard setting
R DIFFUSE: low airflow , slightly warmer and
draught-f ree setting
Setting the clima testyle
Multimedia sy stem:
4 Vehicle 5
b Climate control
5 Climate mode #
Select Driverand/or Passenger. #
Select FOCUS, MEDIUM orDIFFUSE .
% Tofeel the ef fect of the climate style, the
à function must be active (/ page110). Overvi
ewofthe air distribution settings The symbols on
the display indicate which vents
th e air flow is being directed thro ugh:
¯ def
rost ervents
P centre and side air
vents
O fo
ot we llve nts
S centre, side and
foot we llve nts
a defros
ter and foot we llve nts
_ all
vents
b defros
ter,middle and side air vents Ac
tivating/deactivating the climate control
syn chro nisation function via the control
panel Climate control can be set centrally using
the
synchronisation function. The temp erature and
air distribution setting forth e driver side is adop‐
te d automatically forth e front passenger side. #
Press button 0. 11 0
Climate cont rol
Page 116 of 409
Driving
St
arting theve hicle St
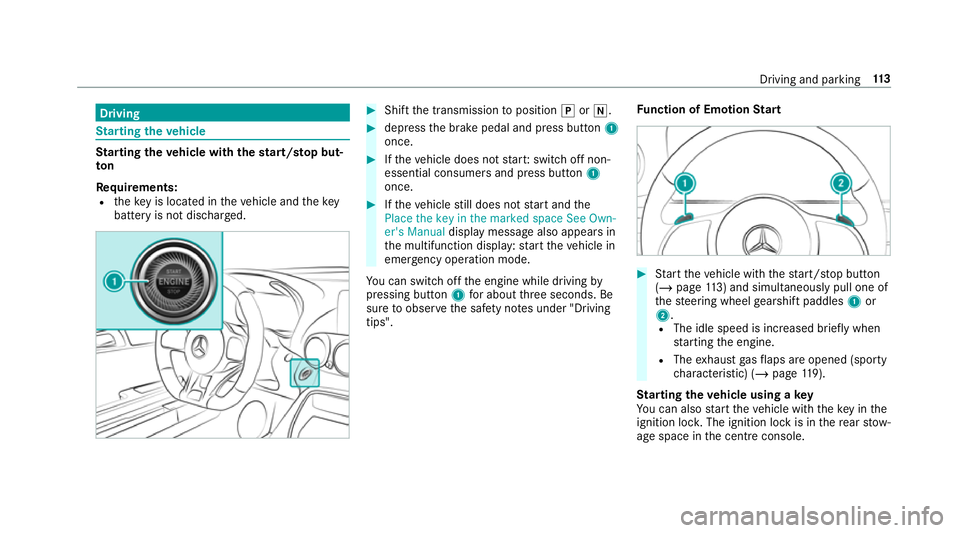
arting theve hicle with thest art/s top but‐
ton
Requ irements:
R theke y is located in theve hicle and thekey
battery is not dischar ged. #
Shift the transmission toposition jori. #
depress the brake pedal and press button 1
once. #
Ifth eve hicle does not star t:switch off non-
essential consumers and press button 1
once. #
Ifth eve hicle still does not start and the
Place the key in the marked space See Own-
er's Manual display message also appears in
th e multifunction display: start theve hicle in
emer gency operation mode.
Yo u can swit choff the engine while driving by
pressing button 1for about thre e seconds. Be
sure toobser vethe saf ety no tes under "Driving
tips". Fu
nction of Emotion Start #
Start theve hicle with thest art/ stop button
(/ page 113) and simultaneous ly pull one of
th esteering wheel gearshift paddles 1or
2.
R The idle speed is inc reased brief ly when
st arting the engine.
R The exhaust gasflaps are opened (spo rty
ch aracteristic) (/ page119).
St arting theve hicle using a key
Yo u can also start theve hicle with theke y in the
ignition loc k.The ignition lock is in there ar stow‐
age space in the cent reconsole. Driving and pa
rking 11 3
Page 121 of 409
ECO
start/s top function Ope
ration of the ECO start/s top function
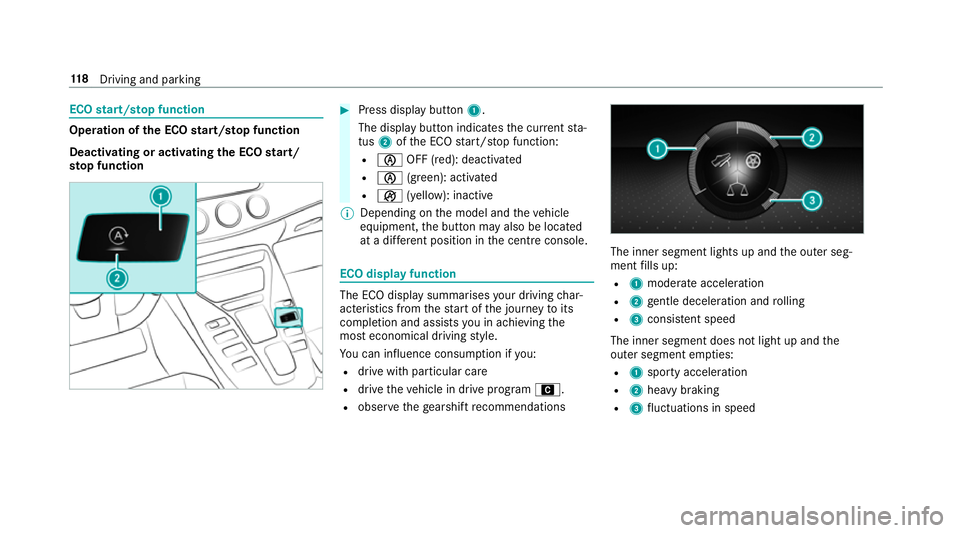
Deacti vating or acti vating the ECO start/
sto p function #
Press displ aybutton 1.
The display button indicates the cur rent sta‐
tus 2ofthe ECO start/ stop function:
R è OFF (red): deactivated
R è (green): activated
R ç (yellow): inactive
% Depending on the model and theve hicle
equipment, the button may also be located
at a dif fere nt position in the cent reconsole. ECO displ
ayfunction The ECO display summa
rises your driving char‐
acteristics from thest art of the journey toits
completion and assists you in achieving the
most economical driving style.
Yo u can influence consum ption if you:
R drive with particular care
R drive theve hicle in drive program A.
R obser vethege arshift recommendations The inner segment lights up and
the outer seg‐
ment fills up:
R 1 moderate acceleration
R 2 gentle deceleration and rolling
R 3 consis tent speed
The inner segment does not light up and the
outer segment em pties:
R 1 sporty acceleration
R 2 heavy braking
R 3 fluctuations in speed 11 8
Driving and pa rking
Page 122 of 409
Yo
u ha vedriven economically when:
R theth re e outer segments are comple tely fil‐
led simultaneously
R the ECO display lights up
The additional range achi eved as a result of your
driving style in comparison toa driver with a
ve ry sporty driving style is shown under Bonus
from start. The range displ ayed does not indicate
a fixe dre duction in consum ption. AMG
Performance exhaust sy stem Fu
nction of the AMG Performance exhaust
sy stem
Changing the position of theex haust gasflaps
allo wsyouto select the sound characteristics of
th e AMG Performance exhaust sy stem:
R closed exhaust gasflaps: com fort ch aracter‐
istic (balanced)
R open exhaust gasflaps: sporty characteristic
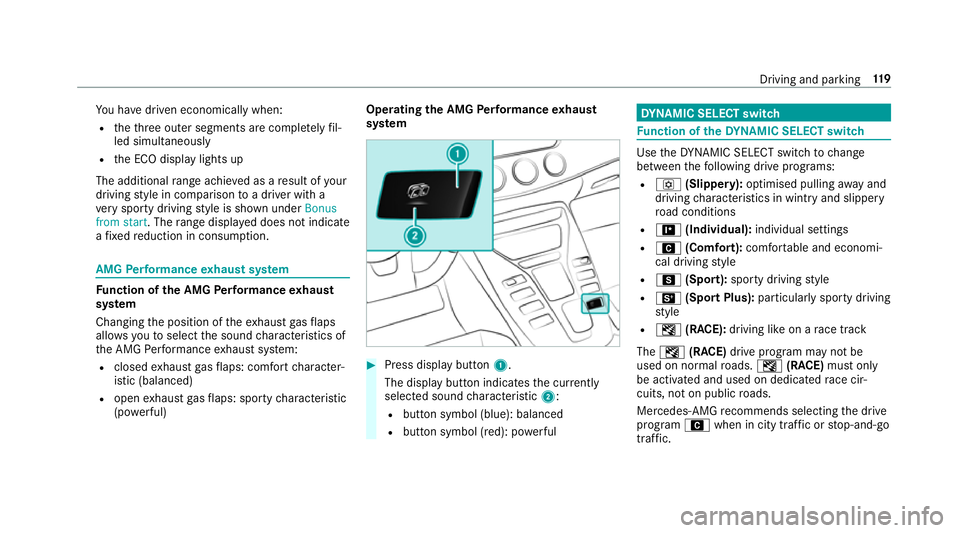
(po werful) Ope
rating the AMG Performance exhaust
sy stem #
Press display button 1.
The display button indicates the cur rently
selected sound characteristic 2:
R button symbol (blue): balanced
R button symbol (red): po werful DY
NA MIC SELECT switch Fu
nction of theDY NA MIC SELECT switch Use
theDY NA MIC SELECT switch tochange
between thefo llowing drive programs:
R o (Slippery): optimised pulling away and
driving characteristics in wint ryand slippe ry
ro ad conditions
R = (Individual): individual settings
R A (Comfort): comfortable and economi‐
cal driving style
R C (Sport): sporty driving style
R B (Sport Plus): particularly sporty driving
st yle
R I (RACE): driving like on a race track
The I (RACE) drive program may not be
used on normal roads. I (RACE) must on ly
be activated and used on dedicated race cir‐
cuits, not on public roads.
Mercedes-AMG recommends selecting the drive
prog ram A when in city traf fic or stop-and-go
traf fic. Driving and pa
rking 11 9