2018 MERCEDES-BENZ AMG GT ROADSTER ignition
[x] Cancel search: ignitionPage 231 of 294
The rear spoiler is extended automatically if you
drive faster than:
R75 mph (120 km/h) in drive programsC,S
and S+
R44 mph (70 km/h) in drive program RACE
Button :flashes until the rear spoiler has
extended and then lights up in red.
The rear spoiler is retracted automatically when
you drive slower than:
R50 mph (80 km/h) in drive programs C,Sand
S+
R19 mph (30 km/h) in drive program RACE
Button :flashes until the rear spoiler has
retracted and then goes out.
Extending and retracting the rear
spoiler manually
GWARNING
Body parts could become trapped if you man-
ually extend/retract the rear spoiler. There is a risk of injury.
Make sure that nobody is within the range of
movement of the rear spoiler.
If someone becomes trapped during retrac-
tion of the rear spoiler, release the button
immediately. The rear spoiler then extends
again.
When leaving the vehicle, always take the
SmartKey with you and lock the vehicle. Never
leave children unsupervised in the vehicle.
!Do not enter an automatic car wash with the
rear spoiler extended. Otherwise, the rear
spoiler may be damaged.
Only extend the rear spoiler in order to clean
it by hand. Retract it again when you have fin-
ished cleaning it.
You can extend and retract the rear spoiler man- ually for cleaning.
XClose the trunk lid.
XSelect key position 2with the Start/Stop
button (Ypage 111).
XTo extend: press button :.
The rear spoiler is extended.
Button :flashes until the rear spoiler has
extended and then lights up in red.
XTo retract: press and hold button :until the
rear spoiler is completely retracted.
Button :flashes until the rear spoiler has
retracted and then goes out.
Rear Spoiler Retracts Manually
appears in the display.
If you release button :while retracting the rear
spoiler, it extends again automatically.
Problems with the rear spoiler
ProblemPossible causes/consequences and MSolutions
The rear spoiler stops
before reaching the end
position when retracting
manually.You have opened the trunk lid while manually retracting the rear
spoiler.
XClose the trunk lid.
The rear spoiler extends or, if you press and hold the ¬button,
continues retracting.
The rear spoiler stops
before reaching the end
position when retract-
ing/extending manually.You have switched off the ignition.
XSwitch the ignition back on.
XPress the ¬button.
The rear spoiler extends/retracts.
Features229
Stowage and features
Z
Page 236 of 294
Engine compartment
Hood
Important safety notes
GWARNING
If the hood is unlatched, it may open up when the vehicle is in motion and block your view.
There is a risk of an accident.
Never unlatch the hood while driving. Before
every trip, ensure that the hood is locked.
GWARNING
When opening and closing the hood, it may
suddenly fall into the closed position. There is a risk of injury to persons within range of
movement of the hood.
Open and close the hood only when no one is
within its range of movement.
GWARNING
Opening the hood when the engine is over-
heated or when there is a fire in the engine
compartment could expose you to hot gases
or other service products. There is a risk of
injury.
Let an overheated engine cool down before
opening the hood. If there is a fire in the
engine compartment, keep the hood closed
and contact the fire department.
GWARNING
The engine compartment contains moving
components. Certain components, such as
the radiator fan, may continue to run or start
again suddenly when the ignition is off. There is a risk of injury.
If you need to do any work inside the engine
compartment:
Rswitch off the ignition
Rnever reach into the area where there is a
risk of danger from moving components,
such as the fan rotation area
Rremove jewelry and watches
Rkeep items of clothing and hair, for exam-
ple, away from moving parts
GWARNING
The ignition system and the fuel injection sys-
tem work under high voltage. If you touch
components which are under voltage, you
could get an electric shock. There is a risk of
injury.
Never touch components of the ignition sys-
tem or fuel injection system when the ignition
is switched on.
Opening the hood
GWARNING
Certain components in the engine compart-
ment, such as the engine, radiator and parts
of the exhaust system, can become very hot.
Working in the engine compartment poses a
risk of injury.
Where possible, let the engine cool down and touch only the components described in the
following.
GWARNING
When the hood is open and the windshield
wipers are set in motion, you can be injured by
the wiper linkage. There is a risk of injury.
Always switch off the windshield wipers and
the ignition before opening the hood.
!Make sure that the windshield wipers are
not folded away from the windshield. You
could otherwise damage the windshield wip-
ers or the hood.
234Engine compartment
Maintenance and care
Page 238 of 294
XPull oil dipstick:out of the dipstick guide
tube.
XWipe off oil dipstick :.
XSlowly slide oil dipstick :into the guide tube
to the stop, and take it out again.
If the level is between MIN mark =and MAX
mark ;, the oil level is correct.
XIf the oil level has dropped to MIN mark =or
below, add 1.1 US qt (1.0 liter) engine oil.
Checking the oil level using the on-board computer
Calling up the oil level measurement
XSelect key position 2with the Start/Stop button.
XUse ò on the steering wheel to call up the list of menus.
XPress the :or9 button on the steering wheel to select the Servicemenu.
XConfirm by pressingaon the steering wheel.
XUse: or9 to select the Engine Oil Levelsubmenu.
XPressato confirm the selection.
The Measuring Engine Oil Level Accurate Only When Vehicle Is Levelmessage
appears in the multifunction display.
The measurement takes a few seconds. You will see a message in the multifunction display. The
messages are explained in the following chapter.
Engine oil level display messages
Display messagesPossible causes/consequences and MSolutions
Engine Oil Level OKThe engine oil level is correct.
Check Engine OilLevel (Add 1 Liter)
The engine oil level is too low.
XAdd 1.1 US qt (1.0 liter) of engine oil.
Reduce Engine OilLevel
The engine oil level is too high.
XHave excess engine oil siphoned off.
For Engine OilLevelIgnitionMustBe On
The ignition is switched off.
XSelect key position2with the Start/Stop button.
Need More Time toCheck Engine OilLevel
The required waiting period was not observed.
XThe engine must be at regular operating temperature.
Measurements can only be taken within the first four minutes after
the engine has been switched off.
Engine Oil LevelNotMeasurablewithEngine Running
The engine is running; oil level measurement is not possible.
XSwitch off the engine.
XRepeat the measurement. Observe the required waiting period.
236Engine compartment
Maintenance and care
Page 242 of 294
Displaying service messages
XSwitchon th eignition .
XUseò on thesteerin gwhee lto cal lup th e
list of menus.
XPress 9or: on thesteerin gwhee lto
selec tth eServic emenuand confirm wit h
a.
XPress 9or: on thesteerin gwhee lto
selec tth eASSYST PLU Ssubmenuand con-
fir m wit ha.
The servic edue dat eappears in th emulti-
function display.
Information about Service
Resetting th eASSYS TPLUS service
interva ldisplay
!If th eASSYST PLU Sservic einterval display
has bee ninadvertentl yreset ,this setting can
be correcte dat aqualified specialis twork-
shop.
Hav eservic ewor kcarrie dout as described in
th eMaintenance Booklet .Thi smay otherwise
lead to increase dwear and damage to th e
major assemblies or th evehicle.
A qualified specialis tworkshop ,e.g. an author -
ized Mercedes-Ben zCenter, will reset th e
ASSYST PLU Sservic einterval display after th e
servic ewor khas bee ncarrie dout .You can also
obtain further information on maintenance
work, fo rexample.
Specia lservice requirement s
The specifiedmaintenance interval take sonly
th enormal operation of th evehicle into
account. Under arduous operatin gcondition sor
increase dload on th evehicle, maintenance
wor kmus tbe carrie dout more frequently, fo r
example:
RRegular city drivin gwit hfrequent intermedi-
at estops
RIf th evehicle is primarily used to trave lshort
distances
RUse in mountainous terrain or on poo rroad
surfaces
RIf th eengin eis ofte nlef tidling fo rlon gperiods
RIn racetrac kmode Under these or similar conditions, have, fo
r
example, th eair filter, engin eoil and oil filte r
replaced or changed more frequently. Under
arduous operatin gconditions, th etires mus tbe
checke dmore often. Further information can be
obtained at aqualified specialis tworkshop ,e.g.
an authorized Mercedes-Ben zCenter.
iIn racetrac kmode, th evehicle is subjec tto
higher loads, meaning that additional main -
tenance wor kis required. If you plan race-
track use, consult aqualified specialis twork-
sho pfirst .Mercedes-Ben zrecommends that
you use an authorized Mercedes-Ben zCente r
fo rthis purpose.
Drivin gabroad
An extensive Mercedes-Ben zServic enetwor kis
also available in other countries. You can obtain
further information from any authorized
Mercedes-Ben zCenter.
Car e
General notes
HEnvironmental not e
Dispose of empty packagin gand cleanin g
cloths in an environmentally responsible man -
ner.
!Whe ncleanin gyour car ,do no tuse:
Rdry, coars eor har dcloths
Rabrasiv ecleanin gagents
Rsolvents
Rcleanin gagents containin gsolvents
Do no tscrub .
Do no ttouch th esurfaces and films wit hhar d
objects ,e.g. rings or ic escrapers .Otherwise ,
you may scratch or damage th esurfaces and
films .
!Do no tpar kyour vehicle fo r alon gperiod of
time directl yafter cleaning, particularly after
cleanin gth ewhee lrim wit hwhee lcleaner.
Wheel cleaner can lead to th eincrease dcor-
rosio nof th ebrake discs and pads .Therefore,
drive fo r afew minutes after cleaning. By
heatin gup th ebrakes, th ebrake discs and
pads dry. The vehicle can then be parke dfo r a
lon gperiod of time.
240Care
Maintenance and care
Page 243 of 294

Regular careof your vehicl eis acondition for
retaining th equalit yin th elon gterm .
Use car eproducts and cleaning agents recom-
mended and approve dby Mercedes-Benz.
Washing the vehicle and cleaning the
paintwork
Automatic car wash
GWARNIN G
Braking efficiency is reduce dafter washing
th evehicle. There is aris kof an accident.
Afte rth evehicl ehas been washed, brak e
carefully while payin gattention to th etraffic
condition suntil full braking power is restored .
!When Active Brake Assist,Distanc ePilot
DISTRONI Cor th eHOLD function is activated,
th evehicl ebrakes automatically in certain
situations.
To avoi ddamag eto th evehicle, deactivat e
these systems in th efollowin gor similar sit -
uations:
Rwhen towin gth evehicl e
Rin thecar wash
!Preferably use automatic car washe swit h
adjustable high-pressur epre-cleaning .This
correspond swit hth especification for th e
Cabriolet program .In car washe sthat use
high water pressures, there is aris kthat a
small amoun tof water may leak int oth evehi-
cle .
!Mak esur ethat th evehicl eis no tsubse-
quentl ytreated wit hhot wax.
!Never clean your vehicl ein aTouchles s
Automatic Car Wash as these use special
cleaning agents .These cleaning agents can
damag eth epaintwork or plastic parts.
If you hav eyour vehicl ecleane din ahigh -
pressur eautomatic car wash, small amounts
of water may ente rth evehicle.
!If th eSmartKey is within th erear detection
ra
nge of KEYLESS-GO ,th efollowin gsitua-
tions, for example, could lead to th euninten-
tional opening of th etrunk lid:
Rwhen usin gan automatic car wash
Rwhen usin g apower washe r Mak
esur ethat th eSmartKey is at least 10 ft
(3 m) away from th evehicle.
!Mak esur ethat:
Rth eside windows are fully closed.
Rth eblowe rfor th eventilation/heating is
switched off .
Rthewindshield wiper switch is at position 0.
Rtherear vie wcamera is switched off .
The vehicl emay otherwise be damaged.
!When washing your vehicl ein atow-through
car wash, use th eSmartKey instead of th e
Start/Sto pbutton.
Start th eengin eusin gth eSmartKey. Se tth e
transmission to iwithth eE-SELECT selec-
to rlever. Switc hth eengin eoff again wit hth e
SmartKey by turnin gth eSmartKey to position
2. Mak esur ethat you then leav eth eSmart -
Key in position 2.You may otherwise dam-
age th evehicle, th etransmission or th ecar
wash.
Chec kth etransmission position in th einstru-
men tcluster.
!Befor eswitching off th eengine, set th e
transmission to iusin gth eE-SELECT selec-
to rlever. If you open th edriver' sdoor or front-
passenger door ,th etransmission rema
insin
this position for up to 30 minute sif th eSmart -
Key is in th eignition ,eve nif th eengin eis
switched off .If you do no tshif tth etransmis -
sion to iusin gth eE-SELECT selector lever
beforehand, it shifts automatically to parking
position jand locks th ewheels if th edriv -
er' sdoor or front-passenger door is opened
and th eengin eis switched off .This may dam-
age th evehicle, th etransmission or th ecar
wash.
You can wash th evehicl ein an automatic car
wash from th ever ystart .
If th evehicl eis ver ydirty, pre-was hit before
cleaning it in an automatic car wash.
Afte rusin gan automatic car wash, wipe off wax
from th ewindshield and th ewiper blades. This
will preven tsmears and reduce wipin gnoises
caused by residue on th ewindshield.
Washing by hand
In som ecountries, washing by han dis only
allowe dat specially equipped washing bays.
Observ eth elegal requirements in eac hcountry.
Care241
Maintenance and care
Z
Page 245 of 294
If water no longer forms "beads" on the paint
surface, use the paint care products recommen-
ded and approved by Mercedes-Benz. This is the
case approximately every three to five months,
depending on the climate conditions and the
care product used.
If dirt has penetrated the paint surface or if the
paint has become dull, the paint cleaner recom-
mended and approved by Mercedes-Benz
should be used.
Do not use these care products in the sun or on
the hood while the hood is hot.
XUse a suitable touch-up stick, e.g. MB Touch-
Up Stick, to repair slight damage to the paint-
work quickly and provisionally.
Matte finish care
!Never polish the vehicle or the light alloy
wheels. Polishing causes the finish to shine.
!The following can give the paint a glossy
appearance and thus reduce the matt effect:
RRubbing hard with unsuitable agents
RWashing the vehicle in direct sunlight
!Never use paint cleaner, buffing or polishing
products, or gloss preserver, e.g. wax, for the
purpose of paintwork care. These products
are only suitable for high-gloss surfaces. Their
use on vehicles with matte paintwork leads to
considerable surface damage or, more spe-
cifically, to shiny, spotted areas.
Always have paintwork repairs carried out at a
qualified specialist workshop.
!Only use automatic car washes which cor-
respond to the latest technological stand-
ards. Never use wash programs which finish
by treating the vehicle with hot wax.
Observe these notes if your vehicle has a clear
matte finish. This will help you to avoid damage
to the paintwork due to incorrect treatment.
These notes also apply to light alloy wheels with
a clear matte finish.
iUse only insect remover and car shampoo
from the range of approved Mercedes-Benz
care products.
Cleaning the vehicle parts
Cleaning the wheels
GWARNING
The water jet from a circular jet nozzle (dirt
blasters) can cause invisible exterior damage
to the tires or chassis components. Compo-
nents damaged in this way may fail unexpect-
edly. There is a risk of an accident.
Do not use power washers with circular jet
nozzles to clean the vehicle. Have damaged
tires or chassis components replaced imme-
diately.
!Do not use acidic wheel cleaning products
to remove brake dust. This could damage
wheel bolts and brake components.
!Do not park your vehicle for a long period of
time directly after cleaning, particularly after
cleaning the wheel rim with wheel cleaner.
Wheel cleaner can lead to the increased cor-
rosion of the brake discs and pads. Therefore,
drive for a few minutes after cleaning. By
heating up the brakes, the brake discs and
pads dry. The vehicle can then be parked for a
long period of time.
Cleaning the windows
GWARNING
You could become trapped by the windshield wipers if they start moving while cleaning the
windshield or wiper blades. There is a risk of
injury.
Always switch off the windshield wipers and
the ignition before cleaning the windshield or
wiper blades.
!Do not use dry cloths, abrasive products,
solvents or cleaning agents containing sol-
vents to clean the inside of the windows. Do
not touch the insides of the windows with
hard objects, e.g. an ice scraper or ring. There
is otherwise a risk of damaging the windows.
!Clean the water drainage channels of the
windshield and the rear window at regular
intervals. Deposits such as leaves, petals and pollen may under certain circumstances pre-
vent water from draining away. This can lead
Care243
Maintenance and care
Z
Page 246 of 294
to corrosion damage and damage to elec-
tronic components.
XClean the inside and outside of the windows
with a damp cloth and a cleaning product that
is recommended and approved by Mercedes-
Benz.
Cleaning the soft top
!Never use any of the following to clean the
soft top:
Rgasoline
Rthinner
Rtar or stain remover
Rother organic solvents
!Remove bird droppings immediately, as
they are corrosive and can therefore cause
the soft-top fabric to leak. Do not wash the
vehicle with a power washer or in a car wash
that uses power washers. Do not use sharp-
edged equipment to remove ice and snow.
XLight soiling: you can clean the soft top while
it is dry or rinse it with clear water.
XNormal to heavy soiling: clean the soft top
with a brush and clear water. Clean stains and
other dirt with a brush and soft top cleaning
agents that have been recommended and
approved by Mercedes-Benz. Always brush
from front to back, following the grain of the
fabric.
Frequent cleaning reduces the soft top's resist-
ance to dirt.
To restore this resistance to dirt, clean the soft
top using soft top cleaning agents that have
been recommended and approved by
Mercedes-Benz.
Incorrect cleaning and care, as well as aging,
can cause the soft-top seams to leak. In the
event of this happening, have the soft-top seams
sealed at a qualified specialist workshop.
iCover the soft top appropriately if you plan
to leave the vehicle outside for a long period
of time.
Cleaning wiper blades
GWARNING
You could become trapped by the windshield wipers if they start moving while cleaning the
windshield or wiper blades. There is a risk of
injury.
Always switch off the windshield wipers and
the ignition before cleaning the windshield orwiper blades.
!Do not pull the wiper blade. Otherwise, the
wiper blade could be damaged.
!Do not clean wiper blades too often and do
not rub them too hard. Otherwise, the graph-
ite coating could be damaged. This could
cause wiper noise.
!Hold the wiper arm securely when folding
back. The windshield could be damaged if the
wiper arm smacks against it suddenly.
XFold the windshield wiper arms away from the
windshield.
XCarefully clean the wiper blades with a damp
cloth.
XFold the windshield wiper arms back again
before switching on the ignition.
Cleaning the exterior lighting
!Only use cleaning agents or cleaning cloths
which are suitable for plastic light lenses.
Unsuitable cleaning agents or cleaning cloths
could scratch or damage the plastic light len- ses.
XClean the plastic lenses of the exterior light-
ing using a wet sponge and a mild cleaning
agent, e.g. Mercedes-Benz car shampoo or
cleaning cloths.
Cleaning the mirror turn signals
!Only use cleaning agents or cleaning cloths
that are suitable for plastic lenses. Unsuitable
cleaning agents or cleaning cloths could
scratch or damage the plastic lenses of the
mirror turn signals.
XClean the plastic lenses of the mirror turn sig-
nals in the exterior mirror housing using a wet
sponge and mild cleaning agent, e.g.
Mercedes-Benz car shampoo or cleaning
cloths.
244Care
Maintenance and care
Page 252 of 294
XIf possible, bring the front wheels into the
straight-ahead position.
XSwitch off the engine.
XWith KEYLESS-GO start function or vehi-
cles with KEYLESS-GO:open the driver's
door.
The vehicle electronics are now in key posi-
tion u. This is the same as the SmartKey
having been removed.
or
XRemove the SmartKey from the ignition lock.
XMake sure that the passengers are not endan-
gered as they do so. Make sure that no one is
near the danger area while a wheel is being
changed. Anyone who is not directly assisting
in the wheel change should, for example,
stand behind the barrier.
XGet out of the vehicle. Pay attention to traffic
conditions when doing so.
XClose the driver's door.
TIREFIT kit
Important safety notes
TIREFIT is a tire sealant.
You can use TIREFIT to seal punctures of up to
0.16 in (4 mm), particularly those in the tire
tread. You can use TIREFIT at outside tempera-
tures down to Ò4 ‡ (Ò20 †).
GWARNING
In the following situations, the tire sealant is
unable to provide sufficient breakdown assis-
tance, as it is unable to seal the tire properly:
Rthere are cuts or punctures in the tire larger
than those mentioned above.
Rthe wheel rim is damaged.
Ryou have driven at very low tire pressures or on a flat tire.
There is a risk of an accident.
Do not drive the vehicle. Contact a qualified
specialist workshop.
GWARNING
The tire sealant is harmful and causes irrita-
tion. It must not come into contact with your
skin, eyes or clothing or be swallowed. Do not
inhale TIREFIT fumes. Keep tire sealant away
from children. There is a risk of injury.
If you come into contact with the tire sealant, observe the following:
RRinse off the tire sealant from your skin
immediately with water.
RIf the tire sealant comes into contact with
your eyes, immediately rinse them thor-
oughly with clean water.
RIf tire sealant is swallowed, immediately
rinse your mouth out thoroughly and drink
plenty of water. Do not induce vomiting,
and seek medical attention immediately.
RImmediately change out of clothing which
has come into contact with tire sealant.
RIf an allergic reaction occurs, seek medical
attention immediately.
!Do not operate the tire inflation compressor
for longer than ten minutes at a time without a break. It may otherwise overheat.
The tire inflation compressor can be operated
again once it has cooled down.
Comply with the manufacturer's safety instruc-
tions on the tire inflation compressor label and
on the tire sealant bottle.
Using the TIREFIT kit
XDo not remove any foreign objects which have
penetrated the tire, e.g. screws or nails.
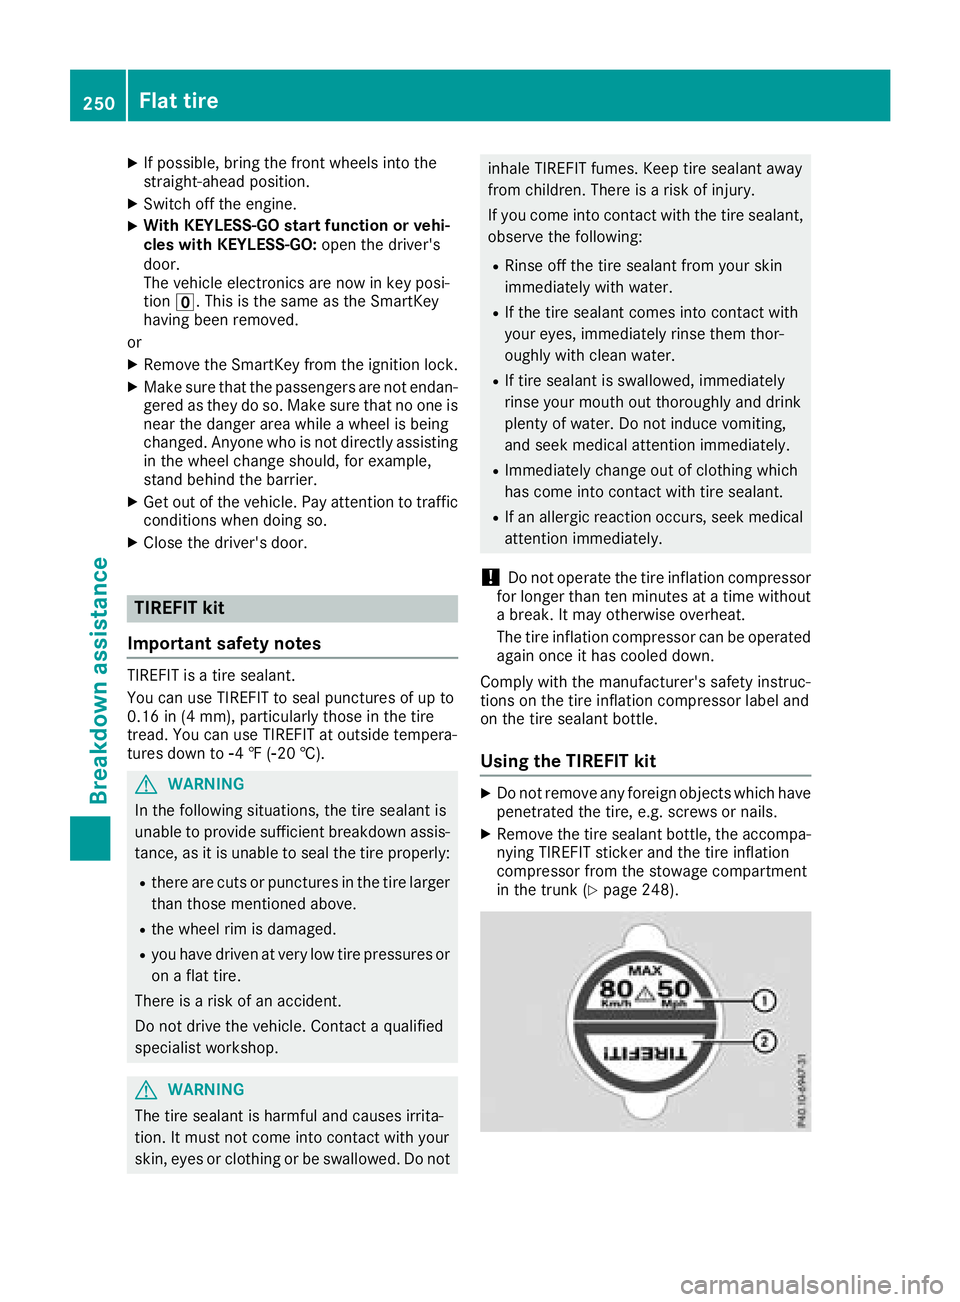
XRemove the tire sealant bottle, the accompa-
nying TIREFIT sticker and the tire inflation
compressor from the stowage compartment
in the trunk (
Ypage 248).
250Flat tire
Breakdown assistance