2018 MERCEDES-BENZ AMG GT ROADSTER ESP
[x] Cancel search: ESPPage 226 of 294
multifunction display. The audio output is
muted.
If a connection can be established, the Call
Connectedmessage appears in the multifunc-
tion display.
If a mobile phone network and GPS reception
are available, the system transfers data to the
Mercedes-Benz Customer Assistance Center,
for example:
RCurrent location of the vehicle
RVehicle identification number
The multimedia system display indicates that a
call is active. During the call, you can change to
the navigation menu by pressing the NAVI but-
ton on the multimedia system, for example.
Voice output is not available in this case.
A voice connection is established between the
Mercedes-Benz Customer Assistance Center
and the vehicle occupants.
From the remote malfunction diagnosis, the
Mercedes-Benz Customer Assistance Center
can ascertain the nature of the problem
(
Ypage 227).
The Mercedes-Benz Customer Assistance Cen-
ter either sends a qualified Mercedes-Benz tech-
nician or makes arrangements for your vehicle
to be transported to the nearest Mercedes-Benz
Service Center.
You may be charged for services such as repair
work and/or towing.
You can find more information in the separate
mbrace manual.
The system has not been able to initiate a Road- side Assistance call, if:
Rthe F indicator lamp for the Roadside
Assistance call button is flashing continu-
ously.
Rno voice connection to the Mercedes-Benz
Customer Assistance Center was estab-
lished.
This can occur if the relevant mobile phone net-
work is not available, for example.
The Call Failed
message appears in the mul-
tifunction display.
XTo end a call: press the~button on the
multifunction steering wheel.
or
XPress the corresponding multimedia system
button for ending a phone call.
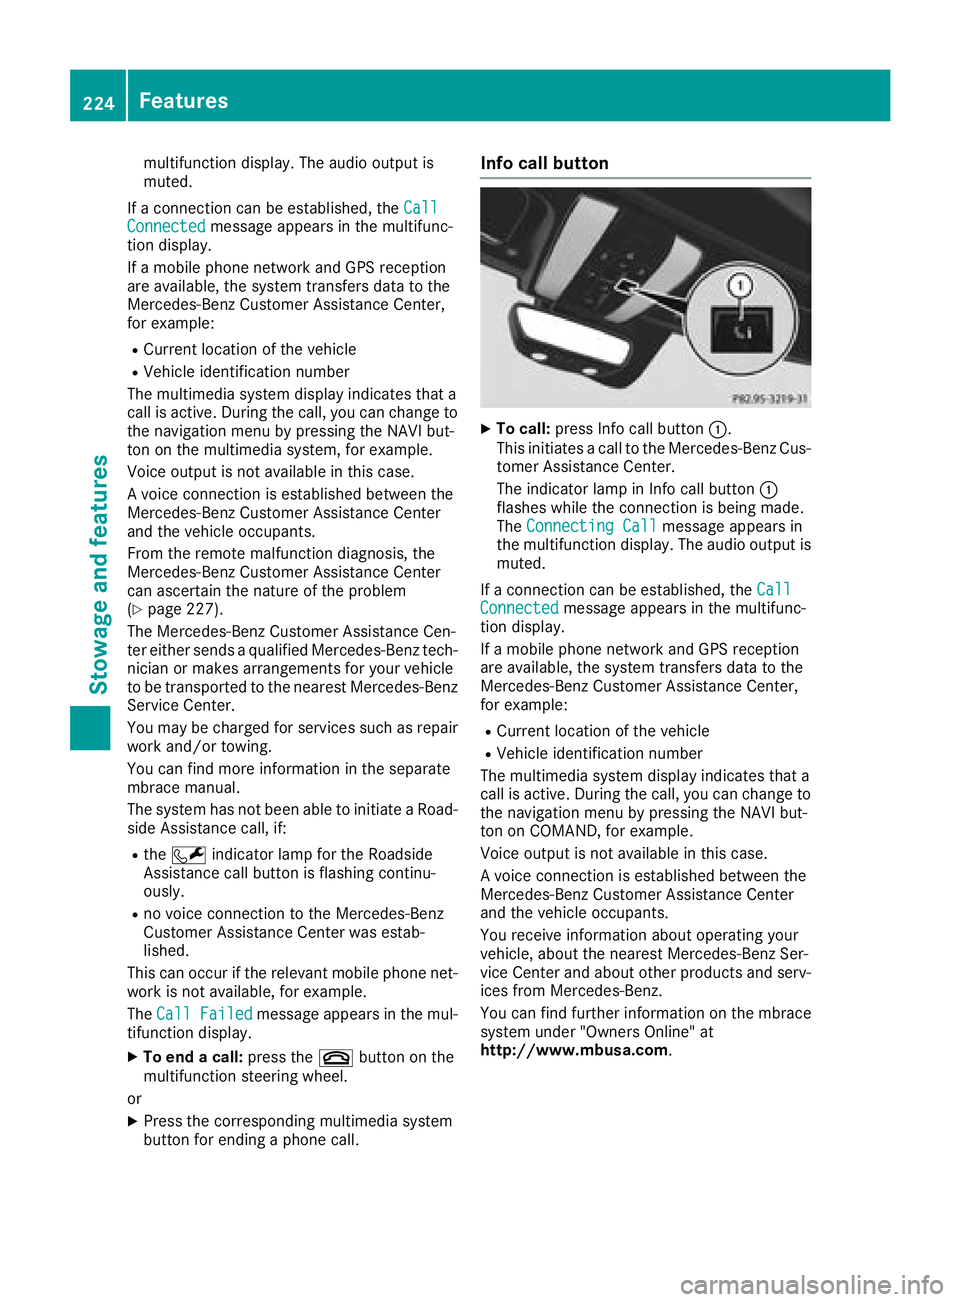
Info call button
XTo call: press Info call button :.
This initiates a call to the Mercedes-Benz Cus-
tomer Assistance Center.
The indicator lamp in Info call button :
flashes while the connection is being made.
The Connecting Call
message appears in
the multifunction display. The audio output is muted.
If a connection can be established, the Call
Connectedmessage appears in the multifunc-
tion display.
If a mobile phone network and GPS reception
are available, the system transfers data to the
Mercedes-Benz Customer Assistance Center,
for example:
RCurrent location of the vehicle
RVehicle identification number
The multimedia system display indicates that a
call is active. During the call, you can change to
the navigation menu by pressing the NAVI but-
ton on COMAND, for example.
Voice output is not available in this case.
A voice connection is established between the
Mercedes-Benz Customer Assistance Center
and the vehicle occupants.
You receive information about operating your
vehicle, about the nearest Mercedes-Benz Ser-
vice Center and about other products and serv-
ices from Mercedes-Benz.
You can find further information on the mbrace
system under "Owners Online" at
http://www.mbusa.com .
224Features
Stowage and features
Page 227 of 294
The system was unable to initiate an Info call if:
Rthe indicator lamp in theïInfo call button
is flashing continuously.
Rno voice connection to the Mercedes-Benz
Customer Assistance Center has been estab-
lished.
This can occur if the relevant mobile phone net-
work is not available, for example.
The Call Failed
message appears in the mul-
tifunction display.
XTo end a call: press the~button on the
multifunction steering wheel.
or
XPress the corresponding multimedia system
button for ending a phone call.
Call priority
When service calls are active, e.g. Roadside
Assistance or Info calls, an emergency call can
still be initiated. In this case, an emergency call
will take priority and override all other active
calls.
The indicator lamp of the respective button
flashes until the call is ended.
An emergency call can only be terminated by the
Mercedes-Benz Customer Assistance Center.
All other calls can be ended by pressing:
Rthe ~ button on the multifunction steering
wheel
Rthe corresponding button in the multimedia
system to end the voice call
When a call is initiated, the audio system is
muted.
The mobile phone is no longer connected to the multimedia system.
However, if you want to use your mobile phone,
do so only when the vehicle is stationary and in
a safe location.
Downloading destinations in COMAND
Downloading destinations
Downloading destinations gives you access to a
database with over 15 million points of interest
(POIs). These can be downloaded on the navi-
gation system in your vehicle. If you know the
destination, the address can be downloaded.
Alternatively, you can obtain the location of
Points of Interest (POIs)/important destinations
in the vicinity. Furthermore, you can download routes with up
to four way points.
You are prompted to confirm route guidance to
the address entered.
XSelect
Yesby turning 3or sliding 1
the controller and confirm with 7.
The system calculates the route and subse-
quently starts the route guidance with the
address entered.
If you select No
the address can be stored in
the address book.
The destination download function is available
if:
Rthe vehicle is equipped with a navigation sys-
tem.
Rthe relevant mobile phone network is availa-
ble and data transfer is possible.
Route Assistance
This service is part of the mbrace PLUS Package
and cannot be purchased separately.
You can use the Route Assistance function even
if the vehicle is not equipped with a navigation
system.
Within the framework of this service, you receive
a professional and reliable form of navigation
support without having to leave your vehicle.
The customer service representative finds a
suitable route depending on your vehicle's cur-
rent position and the desired destination. You
will then be guided live through the current route
section.
Search and Send
General notes
To use "Search & Send", your vehicle must be
equipped with mbrace and a navigation system.
Additionally, an mbrace service subscription
must be completed.
"Search & Send" is a service for entering desti-
nations in the navigation system. A destination
address which is found on Google Maps
®can be
transferred via mbrace directly to your vehicle's
navigation system.
Features225
Stowage and features
Z
Page 228 of 294

Specifying and sending the destination
address
XGo to the website http://maps.google.com
and enter a destination address into the entry
field.
XTo send the destination address to the e-
mail address of your mbrace account:
click on the corresponding button on the web-
site.
Example:
If you select "Send to vehicle" and then
"Mercedes-Benz", the destination address
will be sent to your vehicle.
XWhen the "Send" dialog window appears:
Enter the e-mail address you specified when
setting up your mbrace account into the cor-
responding field.
XClick "Send".
Information on specific commands such as
"Address entry" or "Send" can be found on the
website.
Calling up a transmitted destination
address
XTurn the SmartKey to position 2in the igni-
tion lock (Ypage 111).
The transmitted destination address is loaded
into the vehicle's navigation system.
A display message appears, asking whether
navigation should be started.
XSelectYesby turning 3or sliding 1
the controller and confirm with 7.
The system calculates the route and subse-
quently starts the route guidance with the
address entered.
If you select No
the address can be stored in
the address book.
If you have sent more than one destination
address, each individual destination must be
confirmed separately.
Destination addresses are loaded in the same
order as the order in which they were sent.
If you have multiple Mercedes-Benz vehicles
with mbrace and active mbrace accounts:
If multiple vehicles are registered under the
same e-mail address, the destination will be
sent to all the vehicles.
Vehicle remote opening
You can use the vehicle remote unlocking if you
have unintentionally locked your vehicle and a
replacement SmartKey is not available.
The vehicle can then be unlocked by the
Mercedes-Benz Customer Assistance Center.
The vehicle can be immediately unlocked
remotely within four days of the ignition being
turned off. After this time, the remote unlocking
may be delayed by 15 to 60 minutes. After
30 days, the vehicle can no longer be unlocked
remotely.
The vehicle remote unlocking feature is availa-
ble if the relevant mobile phone network is avail-
able and a data connection is possible.
XContact the following service hotlines:
Mercedes-Benz Customer Assistance Center
at 1-800 FOR-MERCEDES (1-800-367-6372)
or 1-866-990-9007
You will be asked for your password.
XReturn to your vehicle at the time agreed upon
with the Mercedes-Benz Customer Assis-
tance Center.
Alternatively, the vehicle can be opened via:
Rthe Internet, under the "Owners Online" sec-
tion
Rtelephone applications (e.g. for iPhone®,
Android™)
To do this, you will need your identification num-
ber and password.
Vehicle remote closing
The vehicle remote closing feature can be used
when you have forgotten to lock the vehicle and you are no longer nearby.
The vehicle can then be locked by the Mercedes-
Benz Customer Assistance Center.
The vehicle can be immediately remotely locked
within four days of the ignition being turned off.
After this time, remote closing may be delayed
by 15 to 60 minutes. After 30 days the vehicle
can no longer be locked remotely.
The vehicle remote closing feature is available if
the relevant mobile phone network is available
and a data connection is possible.
XContact the following service hotlines:
226Features
Stowage and features
Page 233 of 294
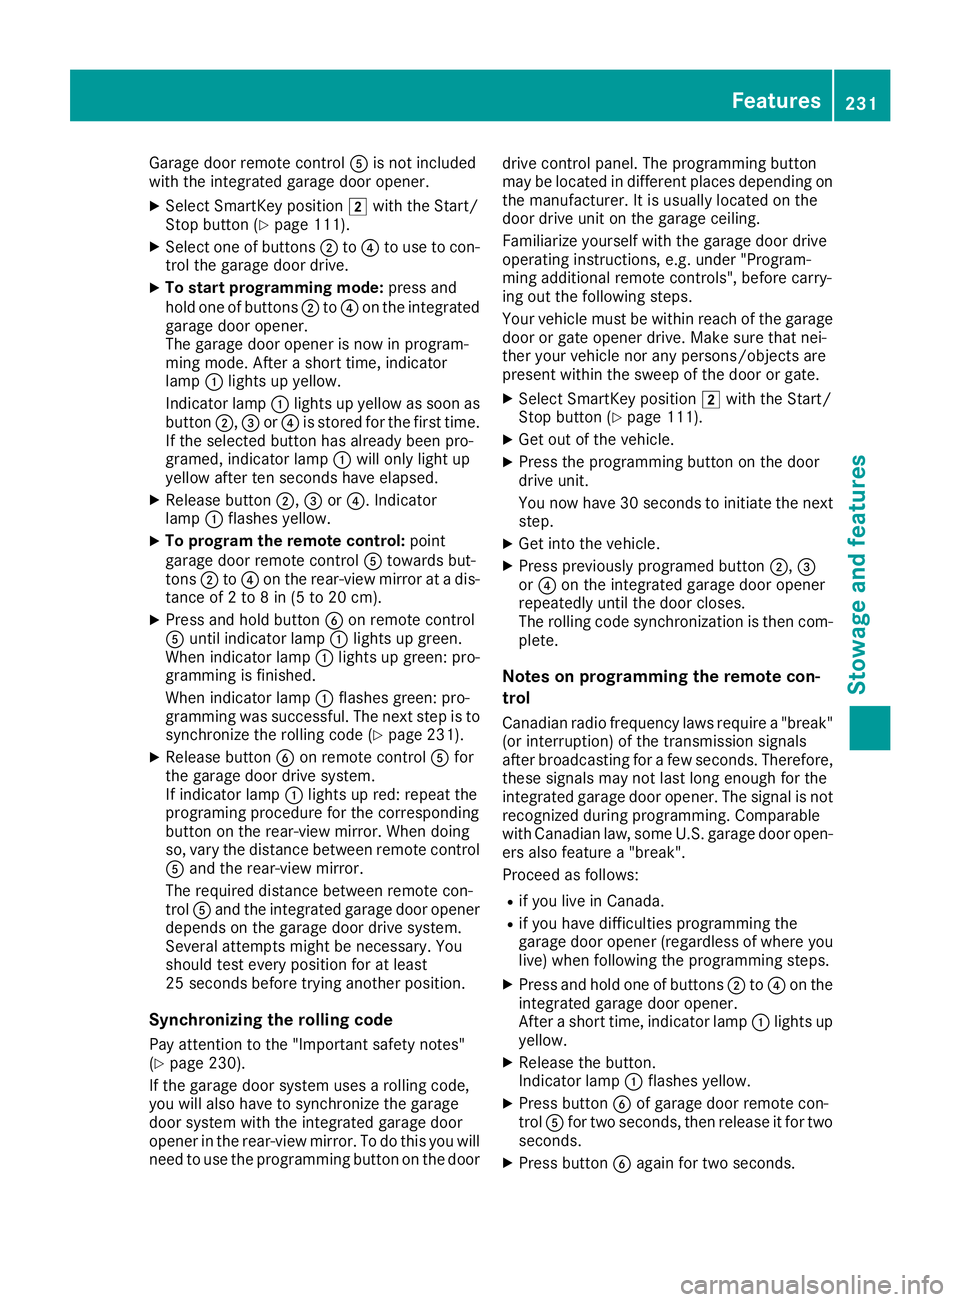
Garage door remote controlAis not included
with the integrated garage door opener.
XSelect SmartKey position 2with the Start/
Stop button (Ypage 111).
XSelect one of buttons ;to? to use to con-
trol the garage door drive.
XTo start programming mode: press and
hold one of buttons ;to? on the integrated
garage door opener.
The garage door opener is now in program-
ming mode. After a short time, indicator
lamp :lights up yellow.
Indicator lamp :lights up yellow as soon as
button ;,=or? is stored for the first time.
If the selected button has already been pro-
gramed, indicator lamp :will only light up
yellow after ten seconds have elapsed.
XRelease button ;,=or?. Indicator
lamp :flashes yellow.
XTo program the remote control: point
garage door remote control Atowards but-
tons ;to? on the rear-view mirror at a dis-
tance of 2 to 8 in (5 to 20 cm).
XPress and hold button Bon remote control
A until indicator lamp :lights up green.
When indicator lamp :lights up green: pro-
gramming is finished.
When indicator lamp :flashes green: pro-
gramming was successful. The next step is to
synchronize the rolling code (
Ypage 231).
XRelease button Bon remote control Afor
the garage door drive system.
If indicator lam
p :lights up red: repeat the
programing procedure for the corresponding
button on the rear-view mirror. When doing
so, vary the distance between remote control
A and the rear-view mirror.
The required distance between remote con-
trol Aand the integrated garage door opener
depends on the garage door drive system.
Several attempts might be necessary. You
should test every position for at least
25 seconds before trying another position.
Synchronizing the rolling code
Pay attention to the "Important safety notes"
(Ypage 230).
If the garage door system uses a rolling code,
you will also have to synchronize the garage
door system with the integrated garage door
opener in the rear-view mirror. To do this you will
need to use the programming button on the door drive control panel. The programming button
may be located in different places depending on
the manufacturer. It is usually located on the
door drive unit on the garage ceiling.
Familiarize yourself with the garage door drive
operating instructions, e.g. under "Program-
ming additional remote controls", before carry-
ing out the following steps.
Your vehicle must be within reach of the garage
door or gate opener drive. Make sure that nei-
ther your vehicle nor any persons/objects are
present within
the sweep of t
he door or gate.
XSelect SmartKey position 2with the Start/
Stop button (Ypage 111).
XGet out of the vehicle.
XPress the programming button on the door
drive unit.
You now have 30 seconds to initiate the next
step.
XGet into the vehicle.
XPress previously programed button ;,=
or ? on the integrated garage door opener
repeatedly until the door closes.
The rolling code synchronization is then com- plete.
Notes on programming the remote con-
trol
Canadian radio frequency laws require a "break"(or interruption) of the transmission signals
after broadcasting for a few seconds. Therefore,
these signals may not last long enough for the
integrated garage door opener. The signal is not recognized during programming. Comparable
with Canadian law, some U.S. garage door open-
ers also feature a "break".
Proceed as follows:
Rif you live in Canada.
Rif you have difficulties programming the
garage door opener (regardless of where you
live) when following the programming steps.
XPress and hold one of buttons ;to? on the
integrated garage door opener.
After a short time, indicator lamp :lights up
yellow.
XRelease the button.
Indicator lamp :flashes yellow.
XPress button Bof garage door remote con-
trol Afor two seconds, then release it for two
sec onds.
XPress button Bagain for two seconds.
Features231
Stowage and features
Z
Page 234 of 294
XRepeat this sequenceon butto nB of remot e
control Auntil indicator lamp :lights up
green .
When indicator lamp :lights up green :pro -
grammin gis finished.
When indicator lamp :flashes green :pro -
grammin gwas successful. The next step is to
synchroniz eth erollin gcode.
XReleas ebutto nB of remot econtrol Aof th e
garage door drive.
When indicator lamp :lights up red :repeat
th eprogrammin gprocess for th ecorrespond -
ing butto non th erear-view mirror .When
doin gso, var yth edistanc ebetween remot e
control Aand th erear-view mirror .
The require ddistanc ebetween remot econ-
trol Aand th eintegrate dgarage door opener
depend son th egarage door driv esystem.
Several attempts might be necessary. You
should test every position for at least
25 seconds before trying another position .
Problemswhen programming
If you are experiencin gproblem sprogrammin g
th eintegrate dgarage door opener on th erear -
vie wmirror ,tak enote of th efollowin ginstruc-
tions:
RChec kth etransmitte rfrequency used by
garage door driv eremot econtrol Aand
whether it is supported. The transmitte rfre-
quency can usually be foun don th ebac kof
remot econtrol Afor th egara ge d
oor drive.
The integrate dgarage door opener is com-
patible wit hdevice sthat hav eunit swhic h
operate in th efrequency range of 28 0to
43 3MHz.
RReplac eth ebatterie sin garage door remot e
control A.This increases th elikelihood that
garage door remot econtrol Awill transmit a
stron gand precis esignal to th eintegrate d
garage door opener.
RWhen programming, hold remot econtrol A
at varying distances and angles from but -
tons ;to? whic hyou are programming. Try
various angles at adistanc ebetween 2an d
8 inches (5t o20 cm) or at th esam eangle but
at varying distances.
RIf afurther remot econtrol Ais available for
th esam egarage door drive, repeat th esam e
programmin gsteps wit hthis remot econtrol
A. Before performin gthese steps, mak esur e
that ne wbatterie shav ebeen installed in
garage door driv eremot econtrol A.
RNotethat som eremot econtrol sonly transmit
for alimite damoun tof time (the indicator
lamp on th eremot econtrol goes out). Press
butto nB on remot econtrol Aagain before
transmission ends.
RAlign th eantenna cable of th egarage door
opener unit. This can improve signal recep-
tion/transmission.
Opening/closing the garage door
Afte rit has been programmed ,th eintegrate d
garage door opener performs th efunction of th e
garage door system remot econtrol .Pleas ealso
read th eoperating instruction sfor th egarage
door system.
XSelec tke yposition 2withth eStart/Sto p
butto n (Ypage 111).
XPress butto n;, =or? whic hyou pro -
grammed to operate th egarage door .
Garag edoor system wit h afixed code: indi-
cator lamp :lights up green .
Garag edoor system wit h arollin gcode: indi-
cator lamp :flashes green .
The transmitte rwill transmit asignal as lon g
as th ebutto nis pressed. The transmission is
halted after amaximum of te nseconds and
indicator lamp :lights up yellow .
XPress button;, =or? again if necessary.
Clearing the memory
Mak esur ethat you clear th ememory of th e
integrate dgarage door opener before selling th e
vehicle.
XSelec tke yposition 2withth eStart/Sto p
butto n (Ypage 111).
XPress and hold buttons ;and ?.
Indicato rlamp :initially lights up yellow and
then green .
XReleasebuttons ;and ?.
The memory of th eintegrate dgarage door
opener in th erear-view mirror is cleared .
Floormats
GWARNING
Objects in th edriver' sfootwell can restrict th e
pedal travel or obstruct adepressed pedal .
232Features
Stowage and features
Page 238 of 294
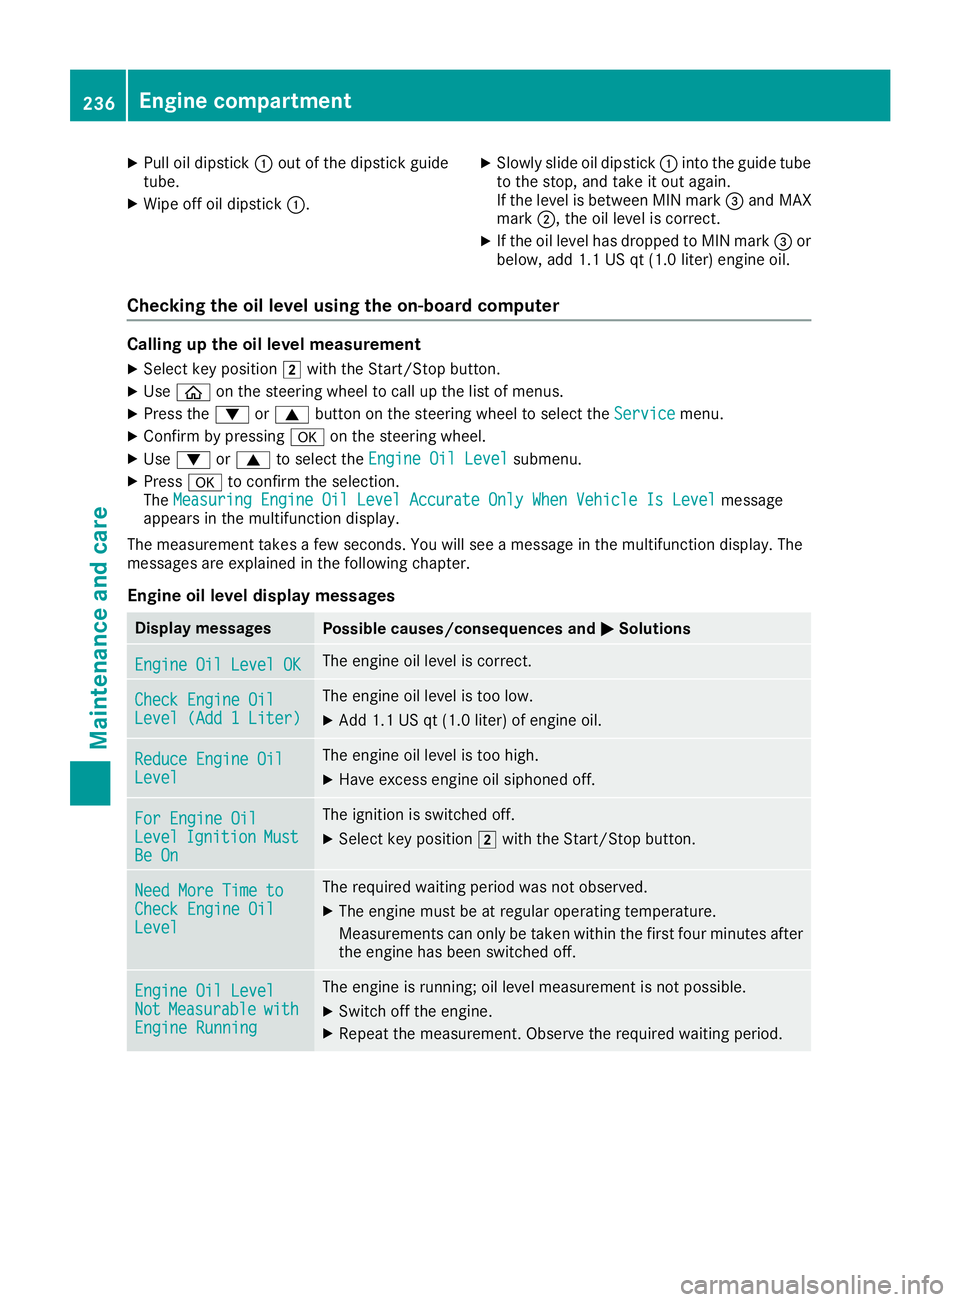
XPull oil dipstick:out of the dipstick guide
tube.
XWipe off oil dipstick :.
XSlowly slide oil dipstick :into the guide tube
to the stop, and take it out again.
If the level is between MIN mark =and MAX
mark ;, the oil level is correct.
XIf the oil level has dropped to MIN mark =or
below, add 1.1 US qt (1.0 liter) engine oil.
Checking the oil level using the on-board computer
Calling up the oil level measurement
XSelect key position 2with the Start/Stop button.
XUse ò on the steering wheel to call up the list of menus.
XPress the :or9 button on the steering wheel to select the Servicemenu.
XConfirm by pressingaon the steering wheel.
XUse: or9 to select the Engine Oil Levelsubmenu.
XPressato confirm the selection.
The Measuring Engine Oil Level Accurate Only When Vehicle Is Levelmessage
appears in the multifunction display.
The measurement takes a few seconds. You will see a message in the multifunction display. The
messages are explained in the following chapter.
Engine oil level display messages
Display messagesPossible causes/consequences and MSolutions
Engine Oil Level OKThe engine oil level is correct.
Check Engine OilLevel (Add 1 Liter)
The engine oil level is too low.
XAdd 1.1 US qt (1.0 liter) of engine oil.
Reduce Engine OilLevel
The engine oil level is too high.
XHave excess engine oil siphoned off.
For Engine OilLevelIgnitionMustBe On
The ignition is switched off.
XSelect key position2with the Start/Stop button.
Need More Time toCheck Engine OilLevel
The required waiting period was not observed.
XThe engine must be at regular operating temperature.
Measurements can only be taken within the first four minutes after
the engine has been switched off.
Engine Oil LevelNotMeasurablewithEngine Running
The engine is running; oil level measurement is not possible.
XSwitch off the engine.
XRepeat the measurement. Observe the required waiting period.
236Engine compartment
Maintenance and care
Page 239 of 294

Display messagesPossible causes/consequences andMSolutions
Engine Oil LevelCorrectMeasurementOnlyif Vehicl eIson Level Ground
The vehicl eis no tparked on alevel surface.
XPark th evehicl eon alevel surface.
Engine Oil LevelNot Measurabl e
Oil level measuremen twit hth eoil dipstick is possible. The measurin g
system is malfunctioning .
XVisitaqualified specialist workshop .
Adding engine oil
GWARNING
Certain component sin th eengin ecompart-
ment, suc has th eengine, radiato rand part s
of th eexhaust system, can become ver yhot .
Working in th eengin ecompartmen tposes a
ris kof injury.
Where possible, let th eengin ecool down and
touch only th ecomponent sdescribed in th e
following.
GWARNIN G
If engin eoil comes int ocontact wit hhot com-
ponents in th eengin ecompartment, it may
ignite. There is aris kof fir eand injury.
Mak esur ethat engin eoil is no tspilled next to
th efiller neck .Let th eengin ecool down and
thoroughly clean th eengin eoil off th ecom-
ponents before starting th eengine.
HEnvironmenta lnot e
Whe naddin goil, tak ecar eno tto spil lany. If
oil enters th esoil or waterways, it is harmful to
th eenvironment.
!Use only engin eoils and oil filters that are
approve dfor vehicles wit h aservic esystem. A
list of th eengin eoils and oil filters that hav e
been tested and approve din accordanc ewit h
Mercedes-Ben zSpecification sfor Service
Products is available at any authorize d
Mercedes-Ben zCenter. The followin
gcaus eengin efailure or damag e
to th eexhaust system:
RUse of engin eoils and oil filters that hav e
no tbeen expressl yapprove dfor th eservic e
system
RReplacement of engin eoil and oil filter after
th ereplacemen tinterval specified by th e
servic esystem has expired
RUse of engin eoil additive s
!Do notadd to omuc hoil. If th eoil level is
abov eth e"max "mar kon th edipstick ,to o
muc hoil has been added .This can lead to
damag eto th eengin eor th ecatalytic con-
verter. Hav eexcess oil siphoned off .
Example: engineoil cap
XTurn cap :counter-clockwise and remove it .
XAddengin eoil.
If th eoil level is at or belo wtheMIN mar kon
th eoil dipstick ,add 1. 1US qt (1. 0liter) of
engin eoil.
XReplac ecap :on th efiller neck and tur n
clockwise .
Ensur ethat th ecap locks int oplac esecurely.
XChec kth eoil level again wit hth eoil dipstick
(Ypage 235).
Further information on engin eoil (
Ypage 289).
Engine compartment237
Maintenance and care
Z
Page 242 of 294
Displaying service messages
XSwitchon th eignition .
XUseò on thesteerin gwhee lto cal lup th e
list of menus.
XPress 9or: on thesteerin gwhee lto
selec tth eServic emenuand confirm wit h
a.
XPress 9or: on thesteerin gwhee lto
selec tth eASSYST PLU Ssubmenuand con-
fir m wit ha.
The servic edue dat eappears in th emulti-
function display.
Information about Service
Resetting th eASSYS TPLUS service
interva ldisplay
!If th eASSYST PLU Sservic einterval display
has bee ninadvertentl yreset ,this setting can
be correcte dat aqualified specialis twork-
shop.
Hav eservic ewor kcarrie dout as described in
th eMaintenance Booklet .Thi smay otherwise
lead to increase dwear and damage to th e
major assemblies or th evehicle.
A qualified specialis tworkshop ,e.g. an author -
ized Mercedes-Ben zCenter, will reset th e
ASSYST PLU Sservic einterval display after th e
servic ewor khas bee ncarrie dout .You can also
obtain further information on maintenance
work, fo rexample.
Specia lservice requirement s
The specifiedmaintenance interval take sonly
th enormal operation of th evehicle into
account. Under arduous operatin gcondition sor
increase dload on th evehicle, maintenance
wor kmus tbe carrie dout more frequently, fo r
example:
RRegular city drivin gwit hfrequent intermedi-
at estops
RIf th evehicle is primarily used to trave lshort
distances
RUse in mountainous terrain or on poo rroad
surfaces
RIf th eengin eis ofte nlef tidling fo rlon gperiods
RIn racetrac kmode Under these or similar conditions, have, fo
r
example, th eair filter, engin eoil and oil filte r
replaced or changed more frequently. Under
arduous operatin gconditions, th etires mus tbe
checke dmore often. Further information can be
obtained at aqualified specialis tworkshop ,e.g.
an authorized Mercedes-Ben zCenter.
iIn racetrac kmode, th evehicle is subjec tto
higher loads, meaning that additional main -
tenance wor kis required. If you plan race-
track use, consult aqualified specialis twork-
sho pfirst .Mercedes-Ben zrecommends that
you use an authorized Mercedes-Ben zCente r
fo rthis purpose.
Drivin gabroad
An extensive Mercedes-Ben zServic enetwor kis
also available in other countries. You can obtain
further information from any authorized
Mercedes-Ben zCenter.
Car e
General notes
HEnvironmental not e
Dispose of empty packagin gand cleanin g
cloths in an environmentally responsible man -
ner.
!Whe ncleanin gyour car ,do no tuse:
Rdry, coars eor har dcloths
Rabrasiv ecleanin gagents
Rsolvents
Rcleanin gagents containin gsolvents
Do no tscrub .
Do no ttouch th esurfaces and films wit hhar d
objects ,e.g. rings or ic escrapers .Otherwise ,
you may scratch or damage th esurfaces and
films .
!Do no tpar kyour vehicle fo r alon gperiod of
time directl yafter cleaning, particularly after
cleanin gth ewhee lrim wit hwhee lcleaner.
Wheel cleaner can lead to th eincrease dcor-
rosio nof th ebrake discs and pads .Therefore,
drive fo r afew minutes after cleaning. By
heatin gup th ebrakes, th ebrake discs and
pads dry. The vehicle can then be parke dfo r a
lon gperiod of time.
240Care
Maintenance and care