2018 MERCEDES-BENZ AMG GT ROADSTER stop start
[x] Cancel search: stop startPage 206 of 294
Warning/
indicator
lampNSignal type
Possible causes/consequences and M
Solutions
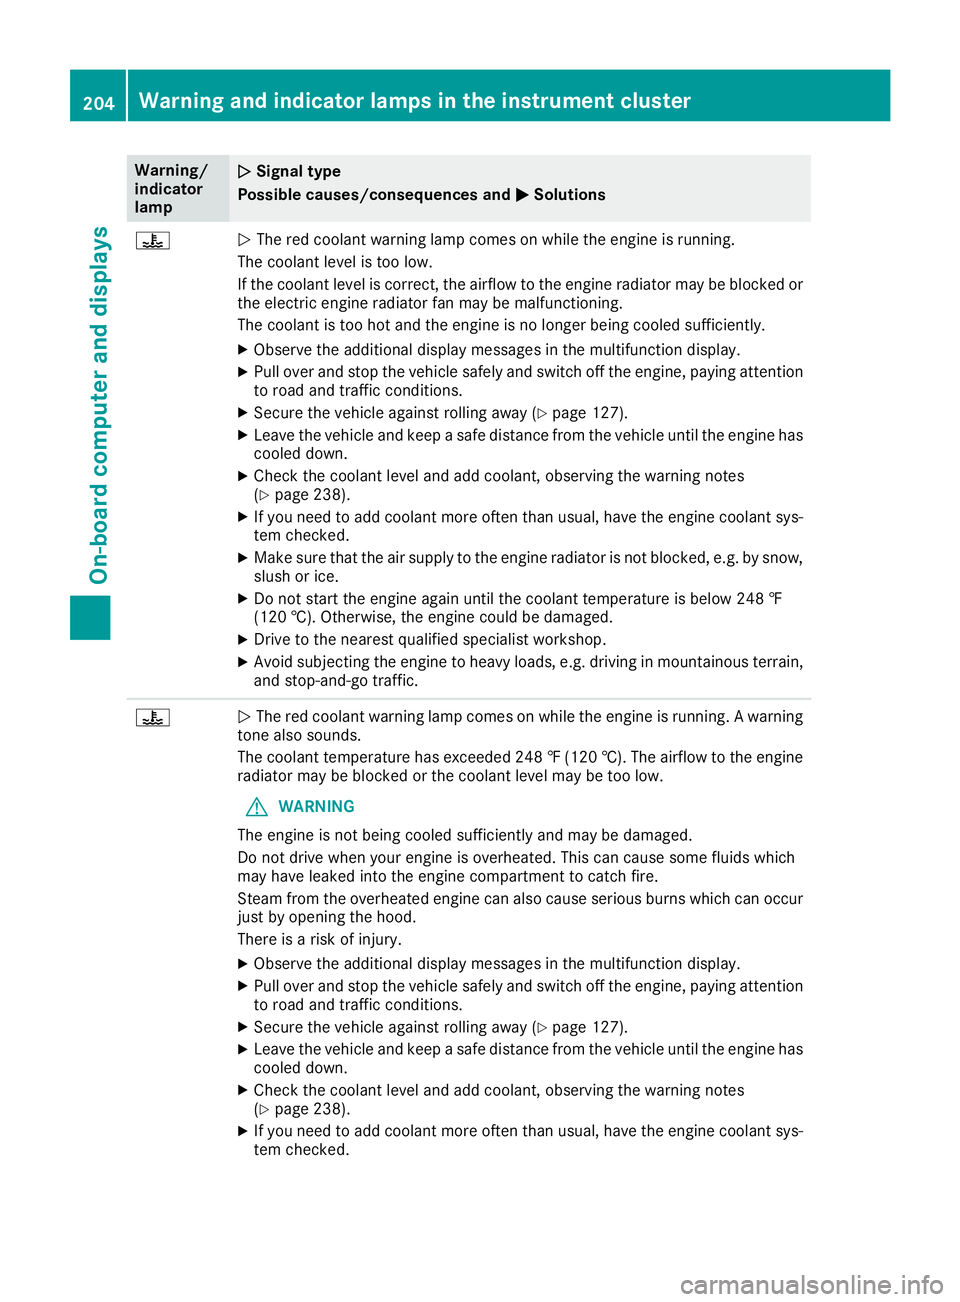
?NThe red coolant warning lamp comes on while the engine is running.
The coolant level is too low.
If the coolant level is correct, the airflow to the engine radiator may be blocked or
the electric engine radiator fan may be malfunctioning.
The coolant is too hot and the engine is no longer being cooled sufficiently.
XObserve the additional display messages in the multifunction display.
XPull over and stop the vehicle safely and switch off the engine, paying attention
to road and traffic conditions.
XSecure the vehicle against rolling away (Ypage 127).
XLeave the vehicle and keep a safe distance from the vehicle until the engine has cooled down.
XCheck the coolant level and add coolant, observing the warning notes
(Ypage 238).
XIf you need to add coolant more often than usual, have the engine coolant sys-
tem checked.
XMake sure that the air supply to the engine radiator is not blocked, e.g. by snow,
slush or ice.
XDo not start the engine again until the coolant temperature is below 248 ‡
(120 †). Otherwise, the engine could be damaged.
XDrive to the nearest qualified specialist workshop.
XAvoid subjecting the engine to heavy loads, e.g. driving in mountainous terrain,
and stop-and-go traffic.
?N The red coolant warning lamp comes on while the engine is running. A warning
tone also sounds.
The coolant temperature has exceeded 248 ‡(120 †). The airflow to the engine
radiator may be blocked or the coolant level may be too low.
GWARNING
The engine is not being cooled sufficiently and may be damaged.
Do not drive when your engine is overheated. This can cause some fluids which
may have leaked into the engine compartment to catch fire.
Steam from the overheated engine can also cause serious burns which can occur
just by opening the hood.
There is a risk of injury.
XObserve the additional display messages in the multifunction display.
XPull over and stop the vehicle safely and switch off the engine, paying attention
to road and traffic conditions.
XSecure the vehicle against rolling away (Ypage 127).
XLeave the vehicle and keep a safe distance from the vehicle until the engine has
cooled down.
XCheck the coolant level and add coolant, observing the warning notes
(Ypage 238).
XIf you need to add coolant more often than usual, have the engine coolant sys-
tem checked.
204Warning and indicator lamps in the instrument cluster
On-board computer and displays
Page 223 of 294

Cigarette lighter
GWARNING
You can burn yourself if you touch the hot
heating element or the socket of the cigarette lighter.
In addition, flammable materials can ignite if:
Rthe hot cigarette lighter falls
Ra child holds the hot cigarette lighter to
objects, for example
There is a risk of fire and injury.
Always hold the cigarette lighter by the knob.
Always make sure that the cigarette lighter is
out of reach of children. Never leave children
unsupervised in the vehicle.
Your attention must always be focused on the
traffic conditions. Only use the cigarette lighter when road and traffic conditions permit.
XSelect key position 2with the Start/Stop
button (Ypage 111).
XTo open: slide cover :forward until it
engages.
XPress in cigarette lighter ;.
Cigarette lighter ;will pop out automatically
when the heating element is red-hot.
XTo close: briefly press cover :at the front.
12 V sockets
General notes
XSelect key position 1with the Start/Stop
button (Ypage 111).
The sockets can be used for accessories with a
maximum draw of 180 W (15 A). Accessories include such items as chargers for mobile
phones.
If you use the sockets for long periods when the
engine is switched off, the battery may dis-
charge.
An emergency cut-out ensures that the on-
board voltage does not drop too low. If the on-
board voltage is too low, the power to the sock-
ets is automatically cut. This ensures that there
is sufficient power to start the engine.
Socket in the trunk
XLift up the cover of socket
:.
mbrace
General notes
The mbrace system is only available in the USA.
A license agreement must be in place in order to
activate the mbrace service. Make sure that
your system is activated and operational. To
register, press the ïInfo call button. If any of
the steps mentioned are not carried out, the
system may not be activated.
If you have questions about the activation, con-
tact one of the following telephone hotlines:
Mercedes-Benz Customer Assistance Center at
1-800 FOR-MERCEDES (1-800-367-6372) or
1-866-990-9007
Shortly after successfully registering with the
mbrace service, a user ID and password will be
sent to you by mail. You can use this password
to log onto the mbrace area under "Owners
Online" at http://www.mbusa.com.
Features221
Stowage and features
Z
Page 231 of 294
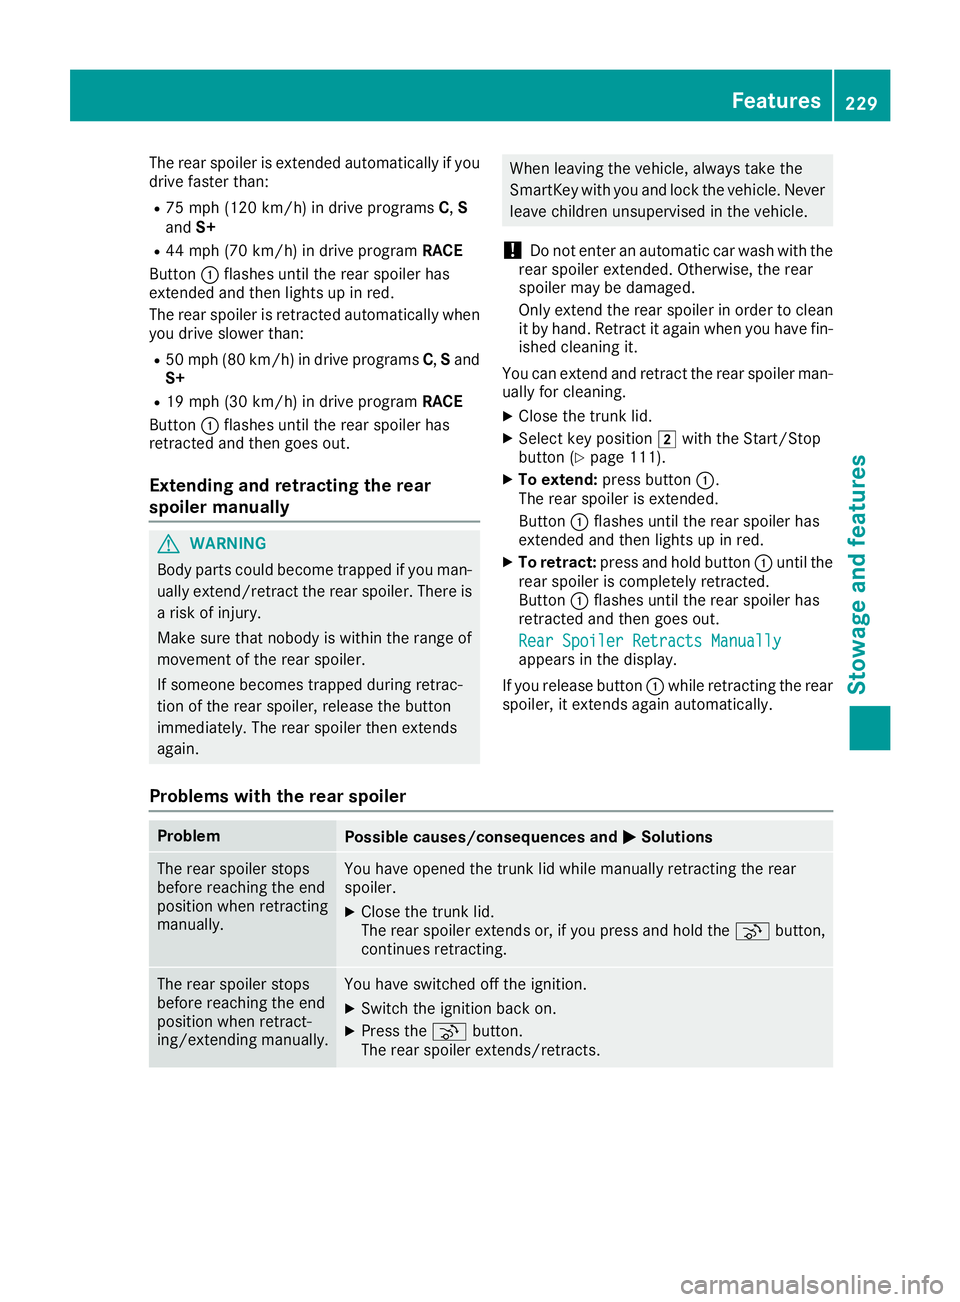
The rear spoiler is extended automatically if you
drive faster than:
R75 mph (120 km/h) in drive programsC,S
and S+
R44 mph (70 km/h) in drive program RACE
Button :flashes until the rear spoiler has
extended and then lights up in red.
The rear spoiler is retracted automatically when
you drive slower than:
R50 mph (80 km/h) in drive programs C,Sand
S+
R19 mph (30 km/h) in drive program RACE
Button :flashes until the rear spoiler has
retracted and then goes out.
Extending and retracting the rear
spoiler manually
GWARNING
Body parts could become trapped if you man-
ually extend/retract the rear spoiler. There is a risk of injury.
Make sure that nobody is within the range of
movement of the rear spoiler.
If someone becomes trapped during retrac-
tion of the rear spoiler, release the button
immediately. The rear spoiler then extends
again.
When leaving the vehicle, always take the
SmartKey with you and lock the vehicle. Never
leave children unsupervised in the vehicle.
!Do not enter an automatic car wash with the
rear spoiler extended. Otherwise, the rear
spoiler may be damaged.
Only extend the rear spoiler in order to clean
it by hand. Retract it again when you have fin-
ished cleaning it.
You can extend and retract the rear spoiler man- ually for cleaning.
XClose the trunk lid.
XSelect key position 2with the Start/Stop
button (Ypage 111).
XTo extend: press button :.
The rear spoiler is extended.
Button :flashes until the rear spoiler has
extended and then lights up in red.
XTo retract: press and hold button :until the
rear spoiler is completely retracted.
Button :flashes until the rear spoiler has
retracted and then goes out.
Rear Spoiler Retracts Manually
appears in the display.
If you release button :while retracting the rear
spoiler, it extends again automatically.
Problems with the rear spoiler
ProblemPossible causes/consequences and MSolutions
The rear spoiler stops
before reaching the end
position when retracting
manually.You have opened the trunk lid while manually retracting the rear
spoiler.
XClose the trunk lid.
The rear spoiler extends or, if you press and hold the ¬button,
continues retracting.
The rear spoiler stops
before reaching the end
position when retract-
ing/extending manually.You have switched off the ignition.
XSwitch the ignition back on.
XPress the ¬button.
The rear spoiler extends/retracts.
Features229
Stowage and features
Z
Page 233 of 294
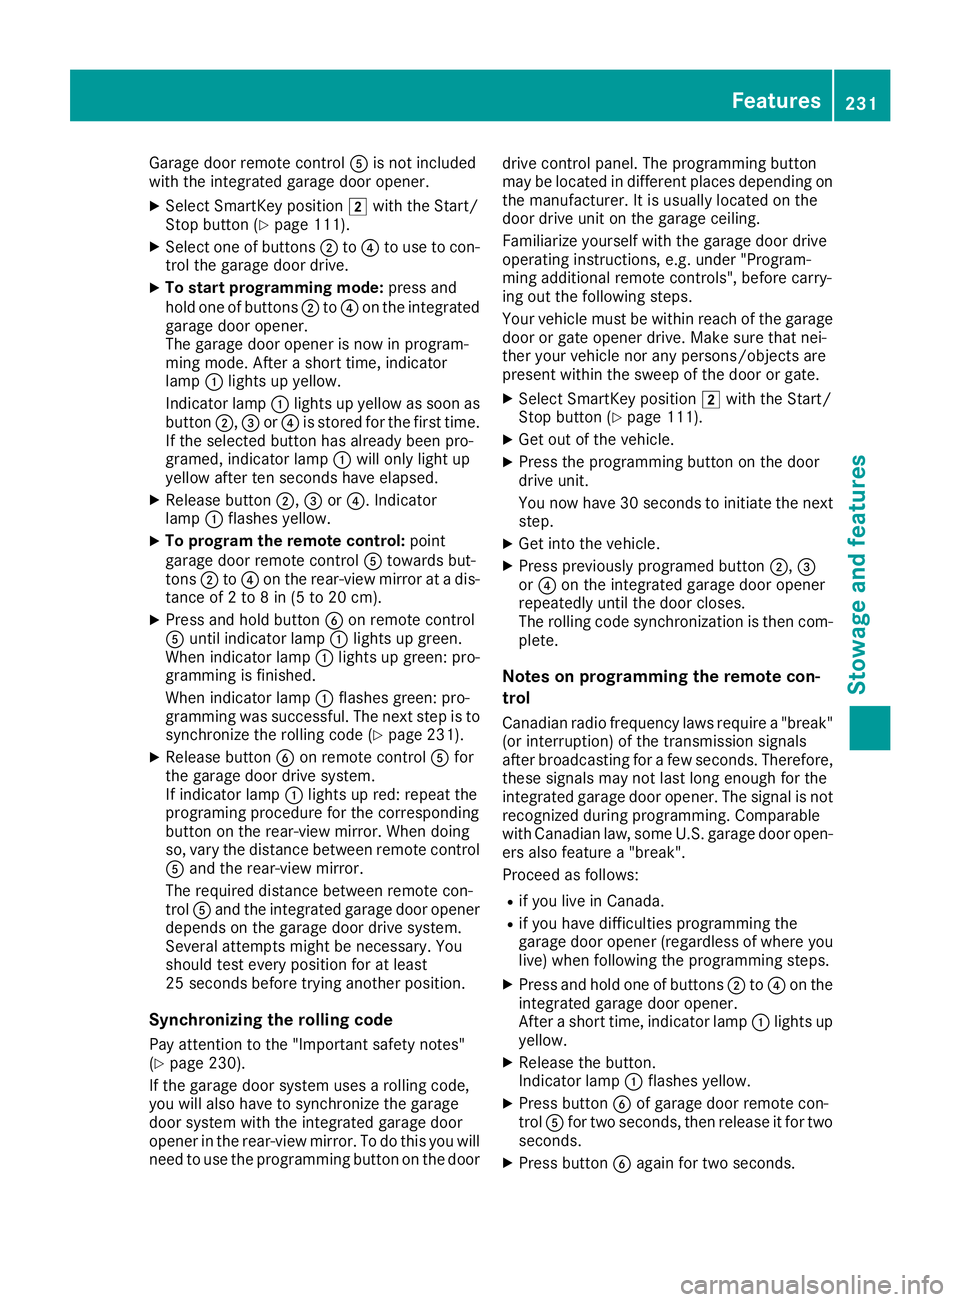
Garage door remote controlAis not included
with the integrated garage door opener.
XSelect SmartKey position 2with the Start/
Stop button (Ypage 111).
XSelect one of buttons ;to? to use to con-
trol the garage door drive.
XTo start programming mode: press and
hold one of buttons ;to? on the integrated
garage door opener.
The garage door opener is now in program-
ming mode. After a short time, indicator
lamp :lights up yellow.
Indicator lamp :lights up yellow as soon as
button ;,=or? is stored for the first time.
If the selected button has already been pro-
gramed, indicator lamp :will only light up
yellow after ten seconds have elapsed.
XRelease button ;,=or?. Indicator
lamp :flashes yellow.
XTo program the remote control: point
garage door remote control Atowards but-
tons ;to? on the rear-view mirror at a dis-
tance of 2 to 8 in (5 to 20 cm).
XPress and hold button Bon remote control
A until indicator lamp :lights up green.
When indicator lamp :lights up green: pro-
gramming is finished.
When indicator lamp :flashes green: pro-
gramming was successful. The next step is to
synchronize the rolling code (
Ypage 231).
XRelease button Bon remote control Afor
the garage door drive system.
If indicator lam
p :lights up red: repeat the
programing procedure for the corresponding
button on the rear-view mirror. When doing
so, vary the distance between remote control
A and the rear-view mirror.
The required distance between remote con-
trol Aand the integrated garage door opener
depends on the garage door drive system.
Several attempts might be necessary. You
should test every position for at least
25 seconds before trying another position.
Synchronizing the rolling code
Pay attention to the "Important safety notes"
(Ypage 230).
If the garage door system uses a rolling code,
you will also have to synchronize the garage
door system with the integrated garage door
opener in the rear-view mirror. To do this you will
need to use the programming button on the door drive control panel. The programming button
may be located in different places depending on
the manufacturer. It is usually located on the
door drive unit on the garage ceiling.
Familiarize yourself with the garage door drive
operating instructions, e.g. under "Program-
ming additional remote controls", before carry-
ing out the following steps.
Your vehicle must be within reach of the garage
door or gate opener drive. Make sure that nei-
ther your vehicle nor any persons/objects are
present within
the sweep of t
he door or gate.
XSelect SmartKey position 2with the Start/
Stop button (Ypage 111).
XGet out of the vehicle.
XPress the programming button on the door
drive unit.
You now have 30 seconds to initiate the next
step.
XGet into the vehicle.
XPress previously programed button ;,=
or ? on the integrated garage door opener
repeatedly until the door closes.
The rolling code synchronization is then com- plete.
Notes on programming the remote con-
trol
Canadian radio frequency laws require a "break"(or interruption) of the transmission signals
after broadcasting for a few seconds. Therefore,
these signals may not last long enough for the
integrated garage door opener. The signal is not recognized during programming. Comparable
with Canadian law, some U.S. garage door open-
ers also feature a "break".
Proceed as follows:
Rif you live in Canada.
Rif you have difficulties programming the
garage door opener (regardless of where you
live) when following the programming steps.
XPress and hold one of buttons ;to? on the
integrated garage door opener.
After a short time, indicator lamp :lights up
yellow.
XRelease the button.
Indicator lamp :flashes yellow.
XPress button Bof garage door remote con-
trol Afor two seconds, then release it for two
sec onds.
XPress button Bagain for two seconds.
Features231
Stowage and features
Z
Page 238 of 294
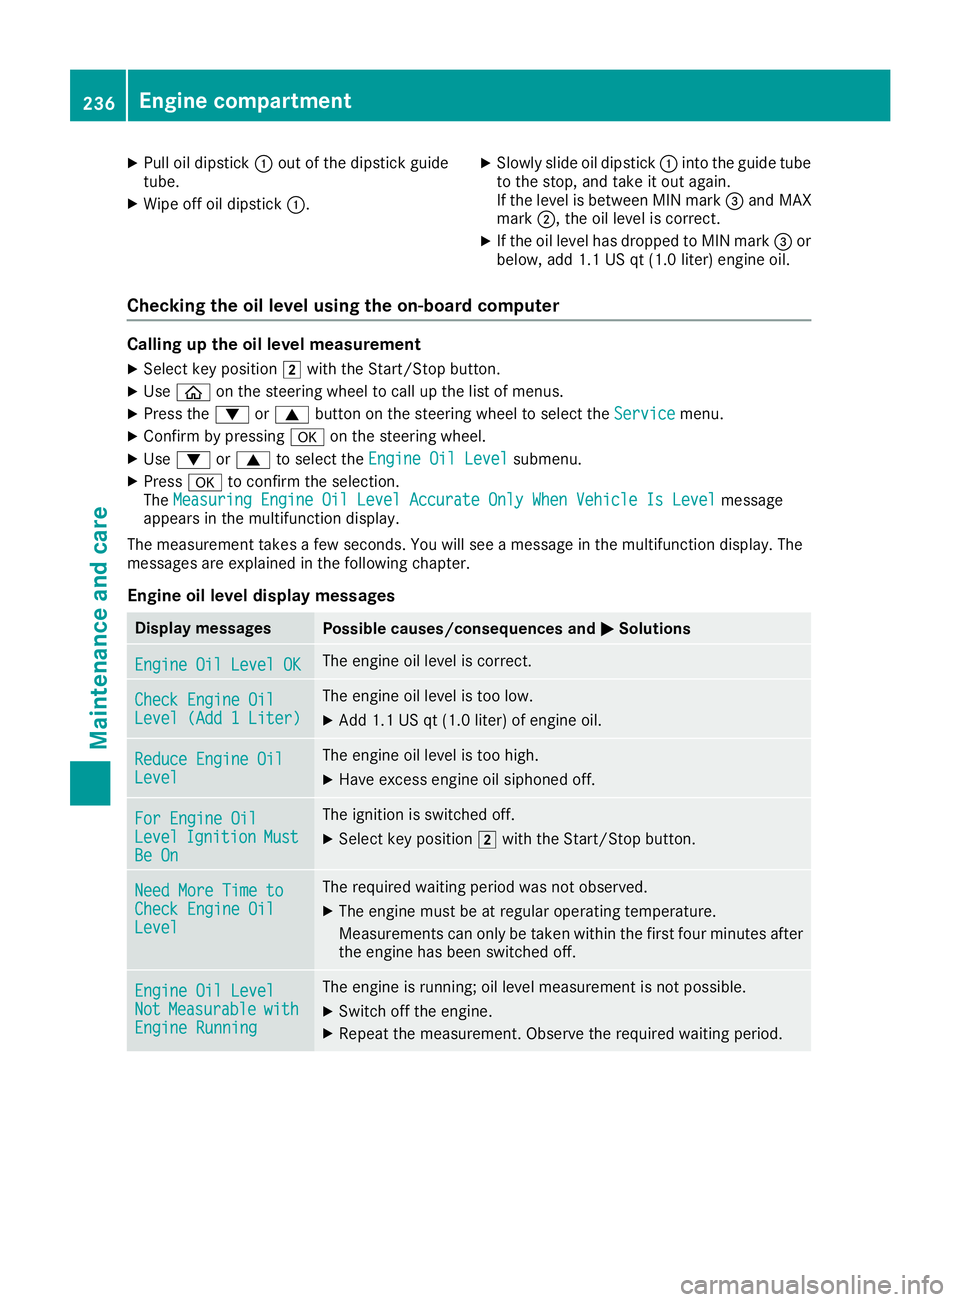
XPull oil dipstick:out of the dipstick guide
tube.
XWipe off oil dipstick :.
XSlowly slide oil dipstick :into the guide tube
to the stop, and take it out again.
If the level is between MIN mark =and MAX
mark ;, the oil level is correct.
XIf the oil level has dropped to MIN mark =or
below, add 1.1 US qt (1.0 liter) engine oil.
Checking the oil level using the on-board computer
Calling up the oil level measurement
XSelect key position 2with the Start/Stop button.
XUse ò on the steering wheel to call up the list of menus.
XPress the :or9 button on the steering wheel to select the Servicemenu.
XConfirm by pressingaon the steering wheel.
XUse: or9 to select the Engine Oil Levelsubmenu.
XPressato confirm the selection.
The Measuring Engine Oil Level Accurate Only When Vehicle Is Levelmessage
appears in the multifunction display.
The measurement takes a few seconds. You will see a message in the multifunction display. The
messages are explained in the following chapter.
Engine oil level display messages
Display messagesPossible causes/consequences and MSolutions
Engine Oil Level OKThe engine oil level is correct.
Check Engine OilLevel (Add 1 Liter)
The engine oil level is too low.
XAdd 1.1 US qt (1.0 liter) of engine oil.
Reduce Engine OilLevel
The engine oil level is too high.
XHave excess engine oil siphoned off.
For Engine OilLevelIgnitionMustBe On
The ignition is switched off.
XSelect key position2with the Start/Stop button.
Need More Time toCheck Engine OilLevel
The required waiting period was not observed.
XThe engine must be at regular operating temperature.
Measurements can only be taken within the first four minutes after
the engine has been switched off.
Engine Oil LevelNotMeasurablewithEngine Running
The engine is running; oil level measurement is not possible.
XSwitch off the engine.
XRepeat the measurement. Observe the required waiting period.
236Engine compartment
Maintenance and care
Page 253 of 294
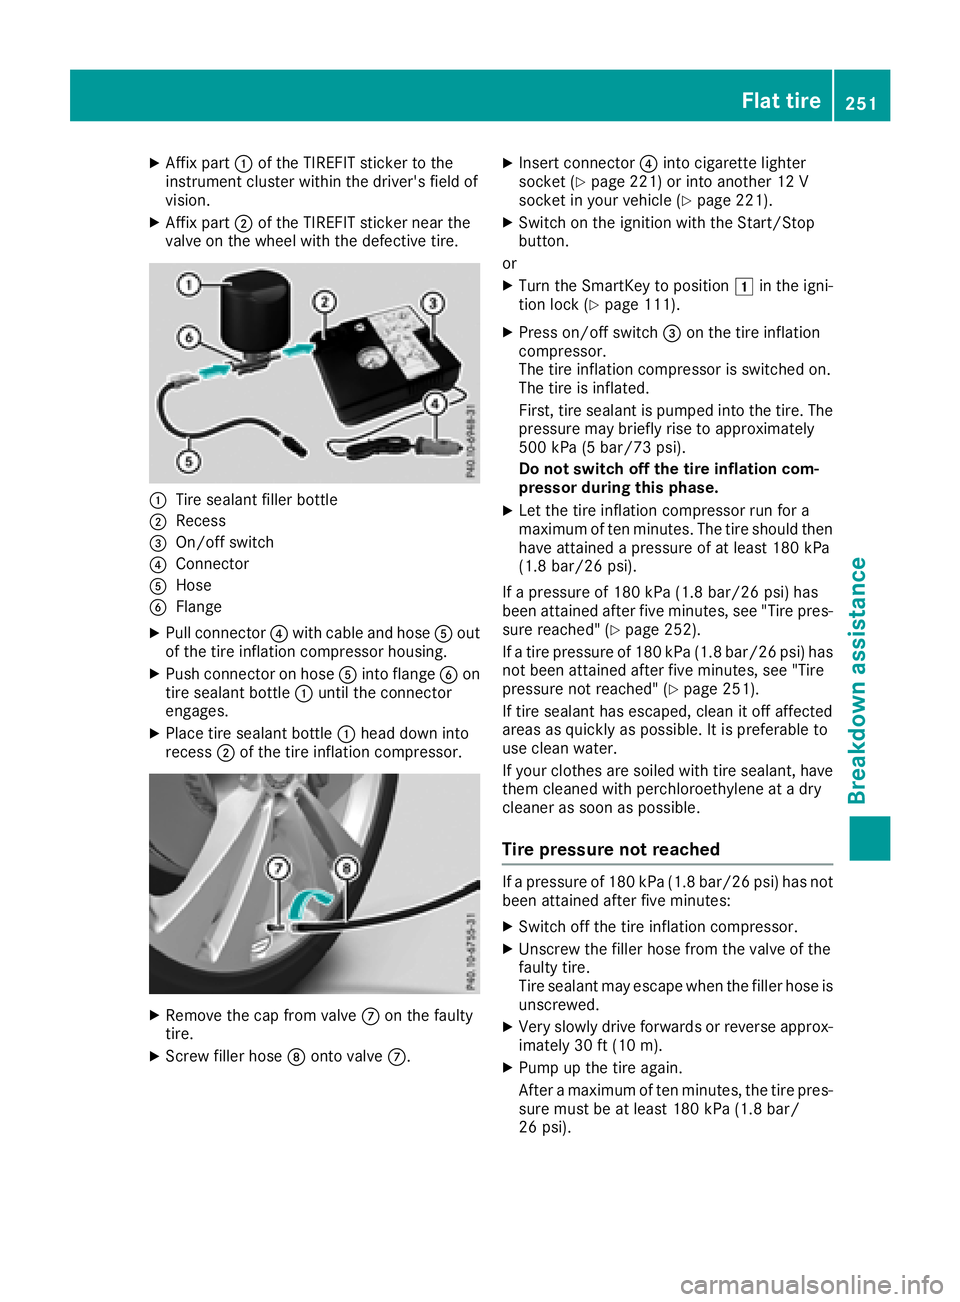
XAffix part:of the TIREFIT sticker to the
instrument cluster within the driver's field of
vision.
XAffix part ;of the TIREFIT sticker near the
valve on the wheel with the defective tire.
:Tire sealant filler bottle
;Recess
=On/off switch
?Connector
AHose
BFlange
XPull connector ?with cable and hose Aout
of the tire inflation compressor housing.
XPush connector on hose Ainto flange Bon
tire sealant bottle :until the connector
engages.
XPlace tire sealant bottle :head down into
recess ;of the tire inflation compressor.
XRemove the cap from valve Con the faulty
tire.
XScrew filler hose Donto valve C.
XInsert connector ?into cigarette lighter
socket (Ypage 221) or into another 12 V
socket in your vehicle (Ypage 221).
XSwitch on the ignition with the Start/Stop
button.
or
XTurn the SmartKey to position 1in the igni-
tion lock (Ypage 111).
XPress on/off switch =on the tire inflation
compressor.
The tire inflation compressor is switched on.
The tire is inflated.
First, tire sealant is pumped into the tire. The
pressure may briefly rise to approximately
500 kPa (5 bar/73 psi).
Do not switch off the tire inflation com-
pressor during this phase.
XLet the tire inflation compressor run for a
maximum of ten minutes. The tire should then
have attained a pressure of at least 180 kPa
(1.8 bar/26 psi).
If a pressure of 180 kPa (1.8 ba r/26 psi) has
been at tained after five minutes, see "Tire pres-
sure reached" (
Ypage 252).
If a tire pressure of 180 kPa (1.8 bar/26 psi) has
not been attained after five minutes, see "Tire
pressure not reached" (
Ypage 251).
If tire sealant has escaped, clean it off affected
areas as quickly as possible. It is preferable to
use clean water.
If your clothes ar e s
oiled with tire sealant, have
them cleaned with perchloroethylene at a dry
cleaner as soon as possible.
Tire pressure not reached
If a pressure of 180 kPa (1.8 bar/26 psi) has not
been attained after five minutes:
XSwitch off the tire inflation compressor.
XUnscrew the filler hose from the valve of the
faulty tire.
Tire sealant may escape when the filler hose is
unscrewed.
XVery slowly drive forwards or reverse approx- imately 30 ft (10 m).
XPump upthe tire again.
After a maximum of ten minutes, the tire pres-
sure must be at least 180 kPa (1.8 ba r/
26 psi) .
Flat tire251
Breakdown assis tance
Z
Page 259 of 294

Towing and tow-starting
Important safety notes
GWARNING
The rear axle locks when:
Rthe engine is not running
Rthe engine stalls while the vehicle is being
towed
Rthere is a malfunction in the power supply
or the vehicle's electrical system
There is a risk of an accident.
In the event of a breakdown, you should
always have the vehicle transported.
GWARNING
If the brake system or power steering is mal-
functioning and your vehicle is then towed
away, significantly more effort may be
required to steer and brake than is normally
required. There is a risk of an accident.
In such cases, use a tow bar. Before towing,
make sure that the steering moves freely.
GWARNING
When towing or tow-starting another vehicle
and its weight is greater than the permissible
gross weight of your vehicle, the:
Rthe towing eye could detach itself
Rthe vehicle/trailer combination could roll-
over.
There is a risk of an accident.
When towing or tow-starting another vehicle,
its weight should not be greater than the per- missible gross weight of your vehicle.
Details on the permissible gross vehicle weight
of your vehicle can be found on the vehicle iden-
tification plate (
Ypage 285).
!Use the SmartKey instead of the Start/Stop
button when towing the vehicle.
Start the engine and keep it running. The
SmartKey is in position 2in the ignition lock.
Set the transmission to iusing the E-
SELECT selector lever. Make sure that you
then leave the SmartKey in position 2.Check the transmission position in the instru-
ment cluster.
!Make sure that the electric parking brake is
released. If the electric parking brake is faulty,
visit a qualified specialist workshop.
!Secure the tow rope or tow bar to the towing
eye only. Otherwise, the vehicle could
become damaged.
!When Active Brake Assist, Distance Pilot
DISTR ONIC or the HOLD function is activated,
the vehicle brakes automatically in certain
situations.
To avoid damage to the vehicle, deactivate
these systems in the following or similar sit-
uations:
Rwhen towing the vehicle
Rin the car wash
!Do not use the towing eyes for recovery pur-
poses as this could damage the vehicle. If in
doubt, recover the vehicle with a crane.
!When towing, pull away slowly and
smoothly. If the tractive power is too high, the
vehicles could be damaged.
!Shift the automatic transmission to position
i and do not open the driver's or front-
passenger door when towing the vehicle
away. Otherwise, the automatic transmission
may shift to position jwhich can cause
damage to both vehicles.
!Do not tow with sling-type equipment. This
could damage the vehicle.
!The vehicle can be towed a maximum of
30 miles (50km). The towing speed of 30 mph
(50 km/h) must not be exceeded.
If the vehicle has to be towed more than
30 miles (50km), the entire vehicle must be
raised and transported.
!Observe the transmission fluid temperature
(AMG menu) in the on-board computer when
towing. The transmission fluid temperature
must not exceed 250 ‡ (
120 †). If this
occurs, you must stop towing immediately.
!Tow-starting the vehicle is not permitted.
The transmission may otherwise be damaged.
Towing and tow-starting257
Breakdown assistance
Z
Page 260 of 294

Also observe the following notes:
RIf the engine does not start, try jump-starting
it (Ypage 254). Tow-starting the vehicle is not
permitted.
RIf it is not possible to jump-start the vehicle,
have it transported to the nearest qualified
specialist workshop, e.g. an authorized
Mercedes-Benz Center.
If the vehicle can no longer be driven because of
an accident or breakdown, you have the follow-
ing options:
Rtransporting the vehicle
As a rule, you should have the vehicle trans-
ported.
Rtowing the vehicle with a tow rope or tow bar
Only tow the vehicle in exceptional cases. The
engine must be running if you tow the vehicle
with a tow rope or tow bar.
If the vehicle has suffered transmission damage,
have it transported on a transporter or trailer.
Observe the display messages in the instrument
cluster.
The battery must be connected and charged.
Otherwise, you:
Rwill not be able to switch on the ignition with
the Start/Stop button
Rcannot start the engine
Rcannot release the electric parking brake
Rcannot shift the automatic transmission to
position i
Disarm the automatic locking feature before the
vehicle is towed (
Ypage 72). You could other-
wise be locked out when pushing or towing the
ve
hicle.
Installing/removing the towing eye
Installing the towing eye
The bracket for the screw-in towing eye is
behind the radiator trim.
XRemove the towing eye from the vehicle tool
kit (Ypage 248).
XPull out cover :.
XScrew in the towing eye clockwise to the stop.
Removing the towing eye
XLoosen the towing eye and unscrew it.
XFully reinsert cover :.
XPut the towing eye back into the vehicle tool
kit.
Towing a vehicle with both axles on
the ground
It is important that you observe the safety
instructions when towing away your vehicle
(
Ypage 257).
The automatic transmission automatically shifts
to position jwhen you open the driver's or
front-passenger door or when you remove the
SmartKey from the ignition lock. In order to
ensure that the automatic transmission stays in
position iwhen towing away the vehicle, you
must observe the following points:
XInsert the SmartKey into the ignition lock. You
must use the SmartKey instead of the Start/
Stop button (
Ypage 111).
XStart the engine and leave it running during
the entire towing procedure.
XDepress and hold the brake pedal.
XMove the transmission to position iwith the
E-SELECT lever.
XCheck the transmission position using the
indicator in the multifunction display
(
Ypage 119).
XRelease the brake pedal.
XRelease the electric parking brake.
XSwitch on the hazard warning lamps
(Ypage 98).
258Towing and tow-starting
Breakdo wn assis tance