2018 MERCEDES-BENZ AMG GT ROADSTER ECU
[x] Cancel search: ECUPage 15 of 174

USB audio modeSelecting a track ............................ 141
USB devices
Connecting to the Media Inter-
face .............................................. .139
see Audio CD/DVD and MP3 mode
V
Vehicle
Data acquisition ............................... 15
Vehicle settings
Calling up ......................................... 42
Video
see Video DVD
Video DVD
Control option ................................ 153
DVD menu ..................................... 155
DVD's control menu ......................1 55
Full-screen mode ........................... 154
Function restrictions ......................1 53
Menu options ................................. 154
Notes on discs ............................... 153
Overview ........................................ 154
Overview of DVD functions ............ 155
Pause function ............................... 156
Picture settings .............................. 154
Playing conditions .......................... 153
Safety notes .................................. 152
Selecting a scene/chapter ............ 156
Stop function ................................. 156
Switching to ................................... 154
Video menu ................................... 155
Voice Control System
Settings ...........................................3 6
see Voice Control System
Volume, adjusting
Navigation messages ....................... 27
W
Weather map (SIRIUS)Activating/deactivating display
levels ............................................. 166
Calling up ....................................... 165
Legend ...........................................1 68
Moving ...........................................1 65
Showing/hiding the menu ............. 165
Storm overview .............................. 169 Storm watch areas ......................... 168
Time stamp ....................................1
68
Weather memory (SIRIUS)
Selecting an area ........................... 165
Storing an area .............................. 165
Web browser
Entering a web address ................. 124
WiFi
Activating ......................................... 36
Changing the name of the SSID ....... 37
Connecting the device ..................... 36
Connecting via security key ............. 37
Connecting via WPS PBC ................. 37
Connecting via WPS PIN .................. 36
Index13
Page 29 of 174

Adjusting the volumefor traffic
announcements and navigati on
announcements
During traffic or navigation announcements :
XTurn theÄ control knob on th ecenter
console to th eright of th econtroller .
or
XPress th eW orX buttonon th emulti-
function steering wheel.
iYou can set th evolume for navigation
announcements to be differen tfrom th evol -
ume of th erespective media source .
Adjusting the volumefor phone calls
You can adjust thevolume for hands-free mod e
during atelephon ecall .
XTurn th eÄ control knob on th ecenter
console to th eright of th econtroller .
or
XPress th eW orX buttonon th emulti-
function steering wheel.
iSetting th evolume for th eVoic eControl
Syste mvoice output ;see th eseparat eoper -
ating instructions.
Switching the sound on oroff
Media source sound
XPress th e8 buttonon th emultifunction
steering wheel.
iIf th eaudio output is switched off ,th estatus
lin ewill sho wthe8 symbol. If you switch
th emedia source or chang eth evolume, th e
soun dis automatically switched on .
iEven if thesoun dis switched off ,you will still
hear navigation system announcements .
Switching navigationannouncements
off and onagain
XTo switch off navigation announcements:
press th e8 buttonon th emultifunction
steering whee lduring th eannouncement.
The Spoken drivin grecommendations
hav ebee ndeactivated.message
appears.
XTo switch navigation announcement son
again: switch th emultimedia system off and
then on again (
Ypage 26).
or
XStart ane wrout ecalculation (Ypage 54).
or
XWhil erout eguidance is active ,sho wthe
men uand select +(Ypage 71).
Basic menu displays
XTo showthemain function bar: slid e5 the
controller .
To select amain function ,e.g. Navi
:tur nand
press th econtroller .
Navigation: themap displays th ecurren t
vehicl eposition .
Radio :th ebasic men uof th elast radi omod e
set appears.
Media: thebasic display for th elast media
source set appears. In th eexample, SD car d
mod eis set .
Telephone: thebasic display of th etele-
phone men uappears.
Vehicle functions: thebasic display
appears.
Basic functions27
Overview and operation
Page 35 of 174

Your multimediasyste mequipment
These operatin ginstruction sdescribe all th e
standar dan doptional equipment of your multi-
media system, as available at th etime of going
to press. Country-specifi cdifference sare pos -
sible. Bear in min dthat your vehicle may no t
feature all function sdescribed here. Thi salso
applies to safety-relevan tsystems an dfunc-
tions.
Read th einformation on qualifie dspecialis t
workshop sin th evehicle Operator's Manual.
Important safet ynotes
GWARNING
If you operat emobile communication equip-
men twhen driving, you may be distracted
from th etraffic situation .You could also los e
contro lof th evehicle. There is aris kof an
accident.
Only operat ethis equipment when th evehicle
is stationary.
GWARNING
SD cards are small parts .The ycan be swal -
lowe dan dcause choking. Thi sposes an
increase dris kof injury or eve nfatal injury.
Kee pth eSD car dout of th ereach of children .
If aSD car dis swallowed, see kmedical atten-
tion immediately.
You mus tobserv eth elegal requirements fo rth e
country in whic hyou are currentl ydrivin gwhen
operatin gmobile communication sequipment in
th evehicle.
Display settings
Setting th ebrightness
The brightness detecte dby th edisplay ligh tsen -
sor affects th esetting option sfo rthis function .
XPressVehicl ein themain function bar .
The vehicle men uis displayed.
XTo switch to th emen ubar :slid e6 thecon-
troller.
XTo selec tSystem Settings:turn an dpress
th econtroller .
A men uappears .
XTo selec tDispla y:turn an dpress th econ-
troller.
A men uappears .
XSelectBrightness.
A contro lappears .
XSelectth edesire dbrightness.
Display design
The display feature soptimize ddesign sfo rday-
time an dnight-time operation .You can set th e
design by manually selecting day or night design
or opt fo ran automatic setting .
XPressVehicl ein themain function bar .
The vehicle men uis displayed.
XTo switch to th emen ubar :slid e6 thecon-
troller.
XTo selec tSystem Settings:turn an dpress
th econtroller .
A men uappears .
XTo selec tDispla y:turn an dpress th econ-
troller.
A men uappears .
XSelectDa yMode,Nigh tModeor Auto.
The #dot indicates th ecurren tsetting .
DesignExplanation
DayModeThe display is set perma-
nently to day design .
NightModeThe display is set perma-
nently to night design .
AutomaticThe multimedia syste m
evaluates th edat aof th e
ligh tsensor an dautomat -
ically switches over th e
display design .
Switching thedisplay on/of f
Switching off th edisplay
XPress Vehicl ein themain function bar .
The vehicle men uis displayed.
XTo selec tDispla yOff:slid e6 ,turn an d
press th econtroller .
The display goe sout .
Display settings33
System settings
Z
Page 39 of 174

vehicle is displayed with the SSIDMB WLANXXXXX.
The device to be connected generates a PIN.
XAlso enter this PIN into the multimedia sys-
tem.
Connecting the device by pressing a
button (push button)
Requirement: for this type of connection, the
device to be connected must support "Connect
via push button".
XTo select Vehiclefrom the main function bar:
turn and press the controller.
XTo switch to the menu bar: slide 6the con-
troller.
XSelect System Settings.
XSelectWiFi.
The Wi-Fi menu appears.
XSelect Connect via WPS PBC.
XSelect the vehicle from the device to be con-
nected and ConnectviaWPSPBC. The vehi-
cle is displayed with the SSID MB WLAN
XXXXX.
XSelectContinuein the multimedia system.
Connecting the device via the security
key
XTo select Vehiclefrom the main function bar:
turn and press the controller.
XTo switch to the menu bar: slide 6the con-
troller.
XSelect System Settings.
XSelectWiFi.
The Wi-Fi menu appears.
XSelect Connect Using Security Key.
XSelect the vehicle from the device to be con-
nected. The vehicle is displayed with the SSID
MB WLAN XXXXX
.
XEnter the security key that appears on the
multimedia system display into the device to
be connected.
XConfirm the entry.
Generating a new security key
XTo select Vehiclefrom the main function bar:
turn and press the controller.
XTo switch to the menu bar: slide 6the con-
troller.
XSelect System Settings.
XSelectWiFi.
The Wi-Fi menu appears.
XSelect Generate Security Key.
XSelectRegenerate.
A new security key is generated.
XTo save the security key: turn the controller
and select Save.
The Wi-Fi menu appears. The new security key
will now be displayed and verified when a Wi-
Fi connection is established. The connection
must be re-established with the newly cre-
ated security key.
iDevice connections established using the
previous security key will no longer work after
the security key is changed. You have to
reconnect these devices (
Ypage 36).
Changing the name of the SSID
XTo select Vehiclefrom the main function bar:
turn and press the controller.
XTo switch to the menu bar: slide 6the con-
troller.
XSelect System Settings.
XSelectWiFi.
The Wi-Fi menu appears.
XSelect Change SSID.
A dialog for entering the SSID appears.
XEnter the new SSID.
Wi-Fi37
System settings
Z
Page 40 of 174

XSelect¬.
XPress the controller.
From now on, when establishing a connec-
tion, the vehicle will be shown with the new
SSID both on the device to be connected and
in theConnect
UsingSecurityKeymenu.
iDevice connections established using the
previous SSID will no longer work after the
SSID is changed. You have to reconnect these
devices (
Ypage 36).
Bluetooth®settings
General information about Blue-
tooth®
Bluetooth®-capable devices, e. g. mobile
phones, need to comply with a certain profile in
order to be connected to the multimedia sys-
tem. Every Bluetooth
®device has its own spe-
cific Bluetooth®name.
Bluetooth®technology is a standard for short-
range wireless data transmissions up to approx-
imately 10 m.
Yo u can use Bluetooth
®to connect your mobile
phone to the multimedia system, for example:
Ruse the hands-free system
Restablish an Internet connection
Rlisten to music using Bluetooth®Audio
Rexchange vCards
Bluetooth®is a registered trademark of Blue-
tooth Special Interest Group (SIG) Inc.
Activating/deactivating Bluetooth®
X
Press Vehiclein the main function bar.
The vehicle menu is displayed.
XTo switch to the menu bar: slide 6the con-
troller.
XTo select System Settings: turn and press
the controller.
A menu appears.
XTo activate Oor deactivate ªActivateBluetooth: turn and press the controller.
Automatic volume adjustment
General information
With the AutomaticVolumeAdjustmentfunc-
tion, the volumes of different audio sources are
adjusted for each other, to compensate for rel-
ative differences in volume.
For example: changing from a relatively quiet to
a relatively loud radio station. The volume for
both stations sounds the same. Manual read-
justment of the volume is not required.
The Automatic Volume Adjustment
function
is deactivated ªwhen the vehicle leaves the
factory. Using this function, the dynamic range
of the music is slightly reduced. To make the
most of the audiophile sound quality, it is rec-
ommended to leave it off.
Switching the automatic volume
adjustment on/off
XPress Vehiclein the main function bar.
The vehicle menu is displayed.
XTo switch to the menu bar: slide 6the con-
troller.
XTo select System Settings: turn and press
the controller.
A menu appears.
XTo select Automatic Volume Adjustment:
turn and press the controller.
Switch the Automatic Volume Adjustment
function on Oor off ª.
Setting the system language
General information
This function allows you to determine the lan-
guage for the menu displays and the navigation
messages. The selected language affects the
characters available for entry.
iThe navigation announcements are not
available in all languages. If a language is not
available, the navigation announcements will
be in English.
iWhen you set the system language, the lan-
guage of the Voice Control System will
change accordingly. If it is not supported by
the Voice Control System, English will be
selected.
38Setting the system language
System settings
Page 57 of 174

Keyword search
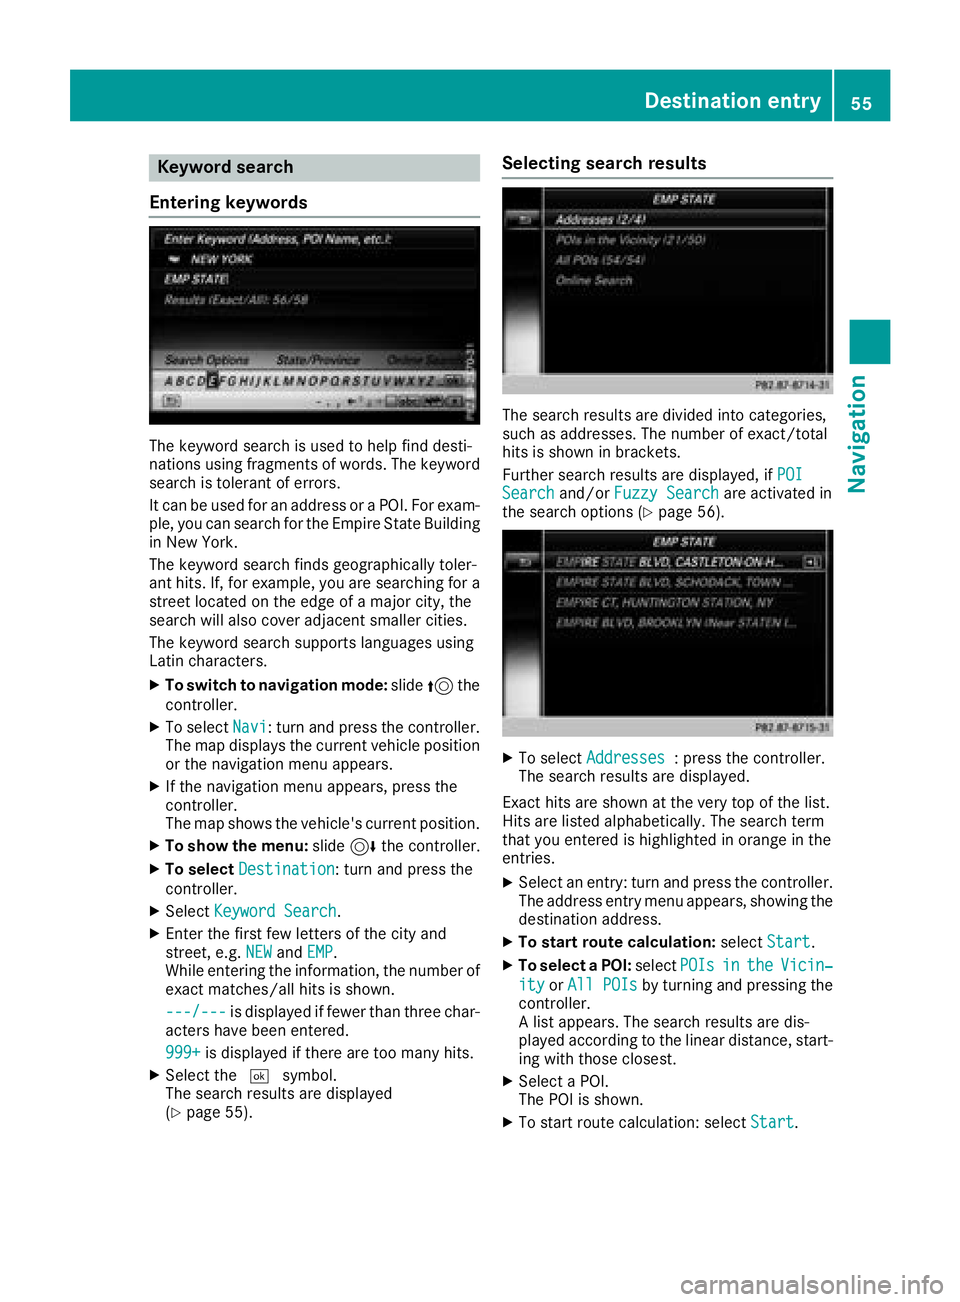
Entering key words
The keywor dsearch is used to help fin ddesti-
nation susin gfragment sof words. The keywor d
search is tolerant of errors .
It can be used for an address or aPOI .Fo rexam-
ple, you can search for th eEmpir eState Buildin g
in New York.
The keywor dsearch finds geographically toler -
ant hits. If ,for example, you are searching for a
stree tlocate don th eedge of amajor city, th e
search will also cover adjacent smaller cities.
The keywor dsearch support slanguage susin g
Latin characters .
XTo switch to navigation mode: slide5 the
controller .
XTo selectNavi:tur nand press th econtroller .
The map displays th ecurren tvehicl eposition
or th enavigation men uappears.
XIf th enavigation men uappears, press th e
controller .
The map shows th evehicle's curren tposition .
XTo showthemenu: slide6 thecontroller .
XTo select Destination:tur nand press th e
controller .
XSelectKeywor dSearch.
XEnte rth efirst few letters of th ecit yand
street, e.g. NEWandEMP.
Whil eenterin gth einformation ,th enumber of
exact matches/all hit sis shown.
---/-- -
is displayed if fewer than three char-
acters hav ebeen entered .
999 +
is displayed if there are to oman yhits.
XSelec tth e¬ symbol.
The search result sare displayed
(
Ypage 55) .
Selecting search results
The search result sare divided int ocategories,
suc has addresses. The number of exact/total
hit sis shown in brackets .
Further search result sare displayed, if POI
Searchand/orFuzzy Searchare activated in
th esearch option s (Ypage 56).
XTo select Addresses:press th econtroller .
The search result sare displayed.
Exact hit sare shown at th ever yto pof th elist .
Hit sare listed alphabetically. The search term
that you entered is highlighte din orang ein th e
entries.
XSelec tan entry: tur nand press th econtroller .
The address entr ymen uappears, showin gth e
destination address .
XTo startroute calculation: selectStart.
XTo select aPOI: select POIsintheVicin‐
ityorAll POI sby turnin gand pressing th e
controller .
A list appears. The search result sare dis-
played according to th elinear distance, start -
ing wit hthose closest.
XSelec t aPOI .
The POI is shown.
XTo start rout ecalculation :select Start.
Destination entry55
Navigation
Z
Page 65 of 174

Requirement (Canada):amobile phon eis con-
nected to th emultimedia system via Bluetoot h®
(Ypage 90) or USB (Ypage 151).
XTo switch to navigation mode: slide5 the
controller .
XTo selectNavi:tur nand press th econtroller .
The map displays th ecurren tvehicl eposition
or th enavigation men uappears.
XIf th enavigation men uappears, press th e
controller .
The map shows th evehicle's curren tposition .
XTo showthemenu: slide6 thecontroller .
XTo select Destination:tur nand press th e
controller .
XSelectFro mMercedes-Ben zApp s.
The list of Mercedes-Ben zApps appears.
Using geo-coordinates
XTo switch to navigation mode: slide5 the
controller .
XTo selectNavi:tur nand press th econtroller .
The map displays th ecurren tvehicl eposition
or th enavigation men uappears.
XIf th enavigation men uappears, press th e
controller .
The map shows th evehicle's curren tposition .
XTo showthemenu: slide6 thecontroller .
XTo select Destination:tur nand press th e
controller .
XSelectUsing Geo-Coordinates.
Geo-coordinate s(longitude and latitude) are
entered in degrees, minute sand seconds.
XTo enter geo-coordinates: turnth econtrol -
ler .
The value for degree, minute or secon d
changes.
XTo mov eth eselection within th eline: slid e
1 thecontroller .
XTo moveth eselection between lines: slid e
4 thecontroller .
XTo confirm th evalue :press th econtroller .
XTo store geo-coordinates: selectSaveby
turnin gand pressin gth econtroller .
The destination wit hth egeo-coordinate scan
be saved as:
Ra hom eaddress in th eaddress book
Ranavigable address book contact Fo
rfurther information on th eaddress
book ,see (
Ypage 102)
Rapersonal destination on th eSD car d
(Ypage 78)
XTo star troute calculation: selectStart
RouteGuidanceby turnin gand pressing th e
controller .
Personal POIs and routes
General notes
The use of personal POI sfor displayin gtraffic
surveillance equipmen tis no tpermitte din every
country. Pleas eobserv eth ecountry-specific
regulation sand always driv eat asuitable speed.
Personal POI sare file din categories:
RNot Classifie d
Standard entryfor personal POI s
RMercedes-BenzApp s
Personal POI s(destinations, routes) that you
hav eimported via th eonlin efunctions.
RCategories whic hyou hav ecreated yourself ,
e.g. on your PC
Personal routes are no tcategorized.
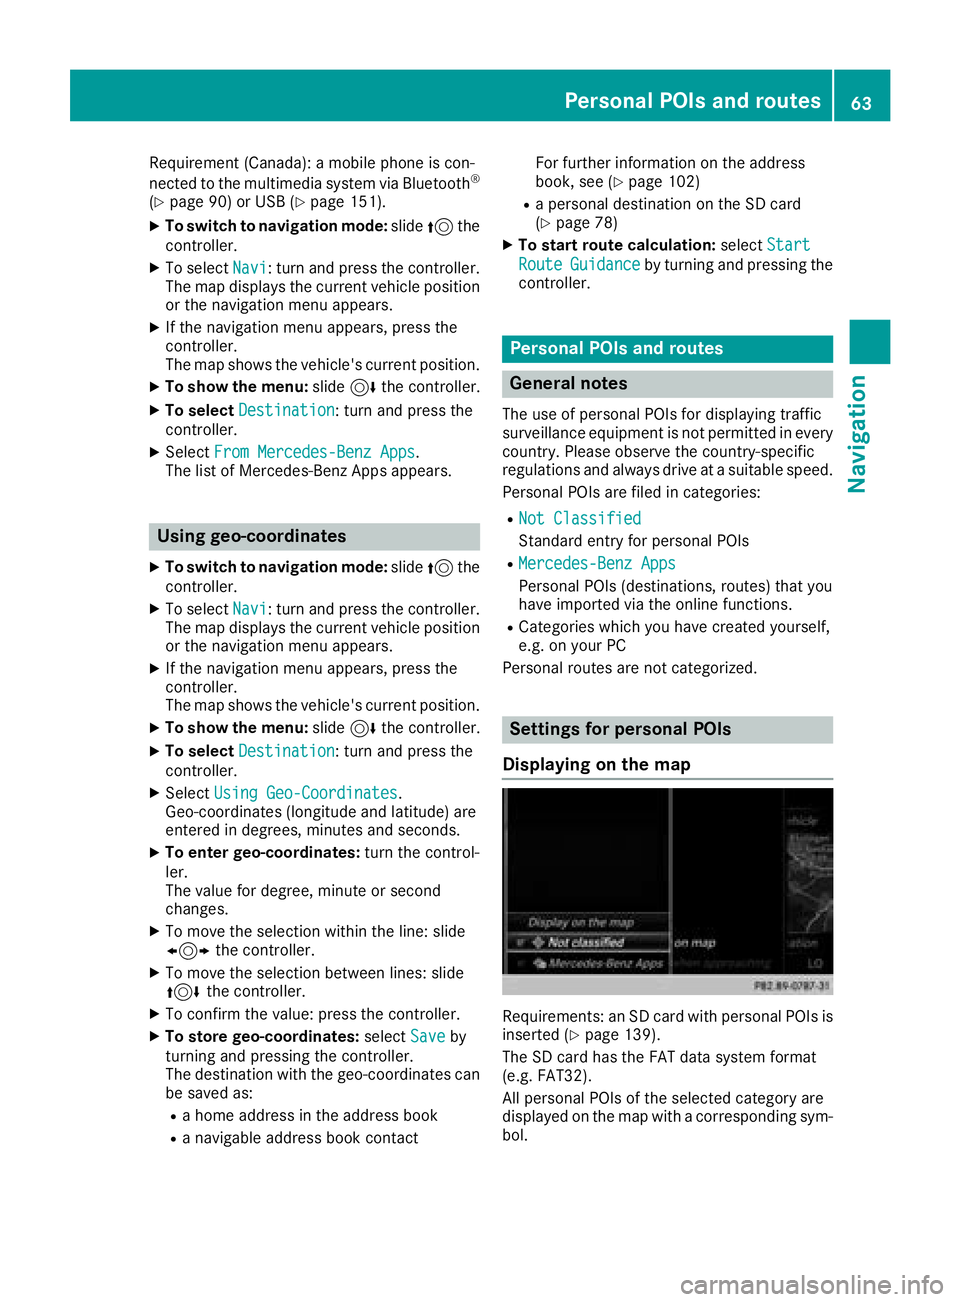
Settings for personal POIs
Displaying on the map
Requirements: an SD car dwit hpersonal POI sis
inserted (Ypage 139).
The SD car dhas th eFA Tdat asystem format
(e.g. FAT32).
All personal POI sof th eselected categor yare
displayed on th emap wit h acorresponding sym-
bol.
Personal POIs and routes63
Navigation
Z
Page 85 of 174

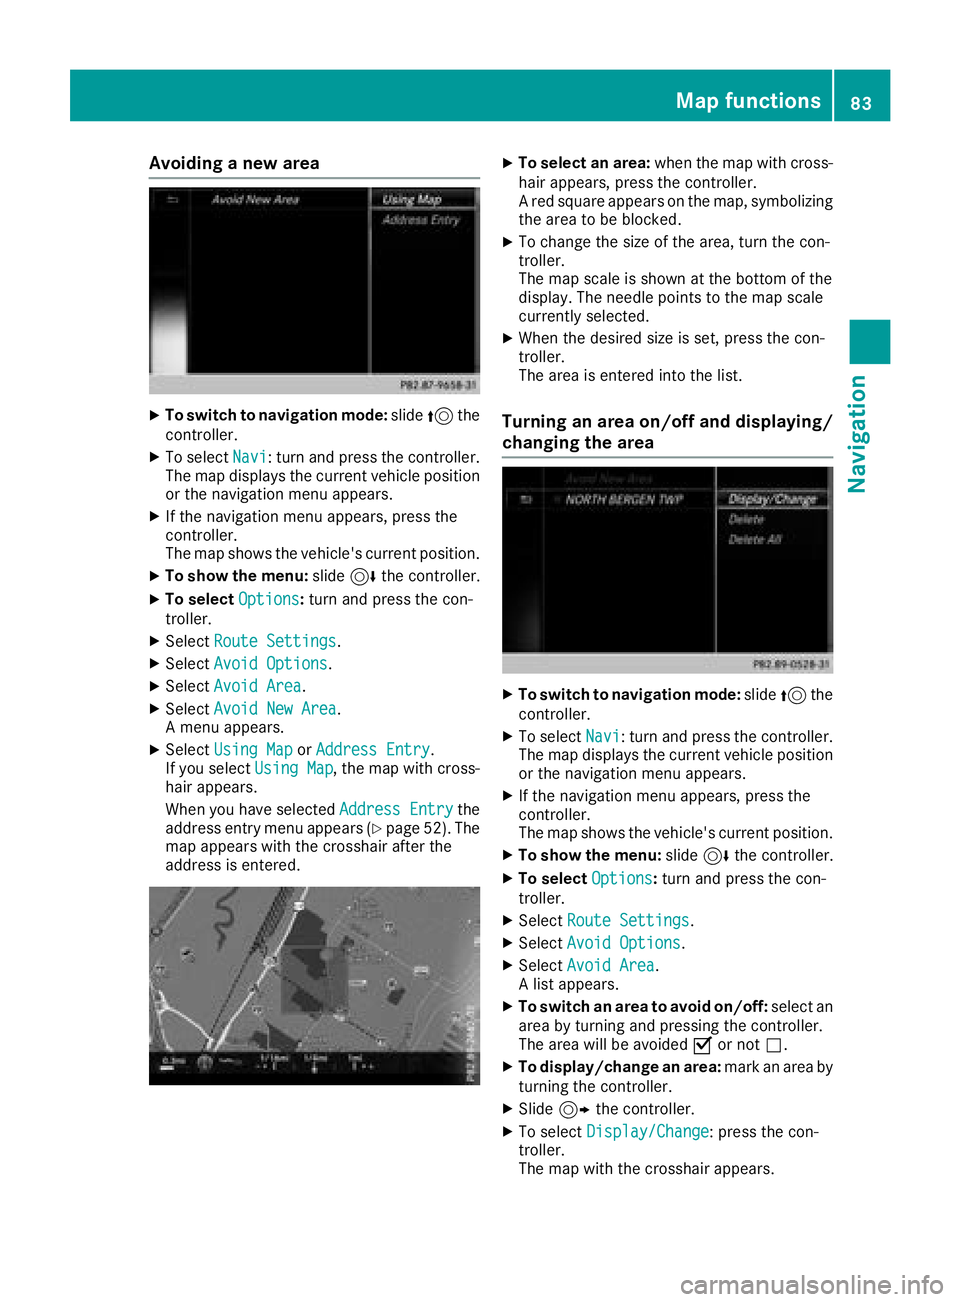
Avoiding a new area
XTo switch to navigation mode:slide5 the
controller .
XTo selectNavi:tur nand press th econtroller .
The map displays th ecurren tvehicl eposition
or th enavigation men uappears.
XIf th enavigation men uappears, press th e
controller .
The map shows th evehicle's curren tposition .
XTo showthemenu: slide6 thecontroller .
XTo select Options:tur nand press th econ-
troller .
XSelectRoute Settings.
XSelec tAvoid Option s.
XSelectAvoid Are a.
XSelectAvoid New Are a.
A men uappears.
XSelec tUsing Mapor Addres sEntry.
If you select Using Map,th emap wit hcross -
hair appears.
When you hav eselected AddressEntry
the
address entr ymen uappear s (Ypage 52) .The
map appear swit hth ecrosshair after th e
address is entered .
XTo select an area: when themap wit hcross -
hair appears, press th econtroller .
A red squar eappear son th emap, symbolizing
th earea to be blocked.
XTo chang eth esiz eof th earea, tur nth econ-
troller .
The map scale is shown at th ebotto mof th e
display. The needle points to th emap scale
currentl yselected.
XWhen th edesired siz eis set ,press th econ-
troller .
The area is entered int oth elist .
Turning an area on/off and displaying/
changing the area
XTo switch to navigation mode: slide5 the
controller .
XTo selectNavi:tur nand press th econtroller .
The map displays th ecurren tvehicl eposition
or th enavigation men uappears.
XIf th enavigation men uappears, press th e
controller .
The map shows th evehicle's curren tposition .
XTo showthemenu: slide6 thecontroller .
XTo select Options:tur nand press th econ-
troller .
XSelectRoute Settings.
XSelec tAvoid Option s.
XSelectAvoid Are a.
A list appears.
XTo switch an area to avoid on/off: select an
area by turnin gand pressing th econtroller .
The area will be avoided Oor no tª.
XTo display/chang ean area: markan area by
turnin gth econtroller .
XSlide9thecontroller .
XTo select Display/Change:press th econ-
troller .
The map wit hth ecrosshair appears.
Map functions83
Navigation
Z