2018 MERCEDES-BENZ AMG GT ROADSTER warning
[x] Cancel search: warningPage 120 of 174

Your multimediasyste mequipment
These operatin ginstruction sdescribe all th e
standar dan doptional equipment of your multi-
media system, as available at th etime of going
to press. Country-specifi cdifference sare pos -
sible. Bear in min dthat your vehicle may no t
feature all function sdescribed here. Thi salso
applies to safety-relevan tsystems an dfunc-
tions.
Read th einformation on qualifie dspecialis t
workshop sin th evehicle Operator's Manual.
Important safet ynotes
GWARNING
If you operat einformation systems an dcom-
munication equipment integrated in th evehi-
cl e when driving, you may be distracted from
th etraffic situation .You could also los econ-
trol of th evehicle. There is aris kof an acci-
dent.
Only operat ethis equipment when th etraffic
situation permits. If you are no tsur ethat this
is possible, par kth evehicle payin gattention
to traffic condition san doperat eth eequip-
men twhen th evehicle is stationary.
You mus tobserv eth elegal requirements fo rth e
country in whic hyou are drivin gwhen operatin g
th esystem.
General notes
Connection difficulties whil eth evehi-
cle is in motion
The connection may be los tif:
Rth emobile phone networ kcoverage is insuf -
ficien t
Rthevehicle has moved into amobile phone
cell wit hno free channels
Rth eSI M car dused is no tcompatible wit hth e
networ kavailable
Function restrictions (Canada)
You will no tbe able to use th eMercedes-Ben z
Apps an dInternet connection ,or will no longer
be able to use them, or may hav eto wait befor e
usin gthem, in th efollowin gsituations:
Rif your mobile phone is switched of f
Rif your mobile phone has notbee nenable dfo r
Internet access
Rif th eBluetoot h®function is switched of fon
th emultimedia syste man dth edesire dphone
is suppose dto be connecte dvia Bluetoot h
®
Rif theBluetoot h®function is switched of fon
th emobile phone an dth ephone is suppose d
to be connecte dvia Bluetoot h
®
Rif themobile phone is no tconnecte dvia US B
an dth ephone is suppose dto be connecte d
via US B
Rif either th emobile phone networ kor th e
mobile phone doe sno tallo wsimultaneous
use of aphone an dan Internet connection
Rif th emobile phone has no tbee nenable dfo r
Internet access via Bluetoot h®and/or USB
The driver is no tpermitte dto cal lup websites
whil edrivin gan duse of th eMercedes-Ben z
Apps is restricted.
iIt is possible that you may no tbe able to
receiv ecalls when an In ternet connection is
active .Thi sdepends on th emobile phone an d
th emobile phone networ kused .
Conditions for access
USA: to use Mercedes-Ben zApps an dInternet
access ,mbrace mus tbe activated an dopera-
tional. Furthermore, mbrace mus tbe activated
fo rMercedes-Ben zApps an dInternet access .
Tak enote of th econnection priorities .An emer-
gency cal lhas th ehighes tpriority. Whe n aser-
vic ecall, e.g. abreakdown servic ecal lor th eMB
Info Call, is active ,an emergency cal lcan still be
initiated. Aservic ecall, on th eother hand, has
priorit yover acurren tInternet connection .
Therefore, you canno testablis han Internet con-
nection durin g aservic ecall.
Canada: amobile phone mus tbe connecte dvia
Bluetoot h
®(Ypage 90) or US B (Ypage 151)
wit hth emultimedia system. Furthermore, you
need avalid mobile servic econtrac twit h a data
118Conditions for access
Online and Internet functions
Page 139 of 174

rupted and the CD or DVD mode menu will
appear. If another function, such as navigation,
is being operated, the media menu does not
change. Only the music from the last inserted
CD or DVD will be played.
Audio/video mode
Important safety notes
GWARNING
The CD/DVD drive is a class 1 laser product.
If you open the housing of the CD/DVD drive,
there is a risk of exposure to invisible laser
radiation. This laser radiation could damage
your retina. There is a risk of injury.
Never open the housing. Always have main-
tenance and repair work carried out at a quali- fied specialist workshop.
GWARNING
If you handle a disc while driving, you may be
distracted from the traffic situation. You could
also lose control of the vehicle. There is a risk of an accident.
Only handle a disc when the vehicle is sta-
tionary.
Bear in mind that at a speed of only 30 mph
(approximately 50 km/h), the vehicle covers a
distance of 44 ft (approximately 14 m)per sec-
ond.
Notes on audio/video mode
Permissible data carriers
RCD audio, CD-R and CD-RW
RDVD-R, DVD-V and DVD-RW
RSD card
RUSB storage device
Permissible file systems
RISO 9660/Joliet standard for CDs
RUDF for video DVDs
RFAT16, FAT32, exFAT and NTFS for SD card
and USB storage media
Multisession CDs
For multisession CDs, the content of the first
session determines how the multimedia system
processes the CD. The multimedia system plays
only one CD session and gives priority to CD
sessions with audio files.
File structure of a data carrier
When you create a disc with compressed music
files, the tracks can be organized in folders. A
folder may also contain subfolders. The disc
may contain no more than eight directory levels.
Files beyond the eighth level will not be recog-
nized by the system.
iThe multimedia system supports data carri-
ers with up to 50,000 files.
In the case of a data carrier with more than
64 GB of stored data, only files in folders with
the following names are supported: Music,
Pictures, Video.
Track and file names
When you create a disc with compressed music
files, you can assign names to the tracks and
folders.
If MP3 or WMA files are stored in the root direc- tory itself, the root directory will also be treated
as a folder.
You should observe the following when assign-
ing track names:
Rtrack names must have at least one character
Rtrack names must have an extension of a sup-
ported audio or video format, e.g. mp3, aac orm4v
Rthere must be a dot between the track name
and the extension
Example of a correct track name:
"Track1.mp3".
Permissible formats
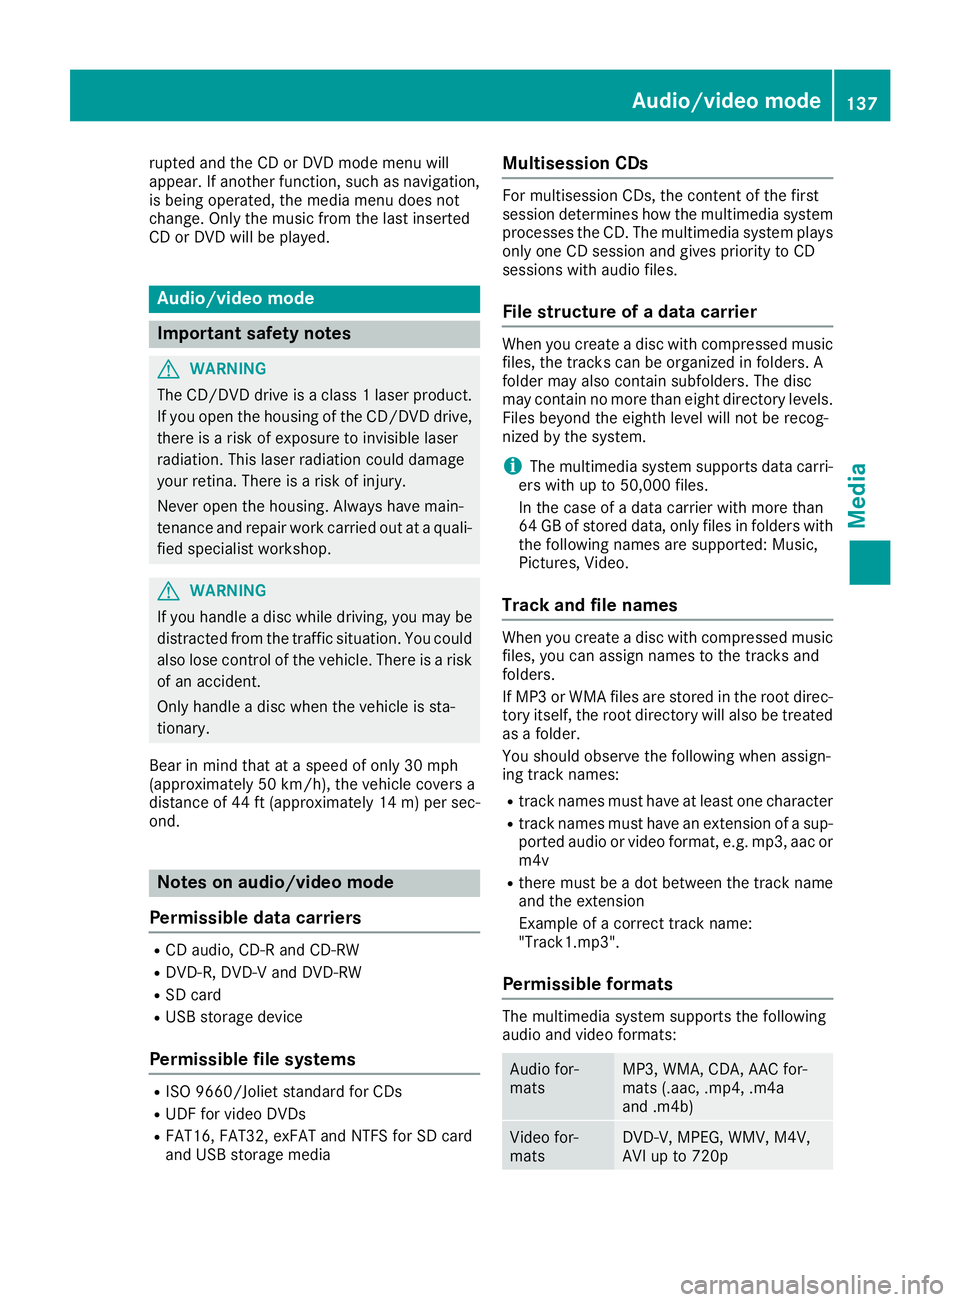
The multimedia system supports the following
audio and video formats:
Audio for-
matsMP3, WMA, CDA, AAC for-
mats (.aac, .mp4, .m4a
and .m4b)
Video for-
matsDVD-V, MPEG, WMV, M4V,
AVI up to 720p
Audio/video mode137
Media
Z
Page 141 of 174

AArtist and album
BNumerical time display
CGraphic time display
DCover view (if available)
Inserting and removing a disc from
the single CD/DVD drive
Before inserting or removing a CD or DVD,
ensure that the cup holder is empty.
Before removing a disc, be aware that the CD or
DVD can become hot.
Inserting
XInsert a disc into the disc slot with the printed
side facing up.
The drive closes and the disc is played.
If the CD or DVD is started in media mode, the
corresponding media menu is shown. If the
CD or DVD is started from another application
(e.g. navigation), the display will not change.
iThe drive may not be able to play discs with
copy protection.
Removing
XIn the CD mode menu, slide 6the control-
ler.
XTo select þ: turn and press the controller.
The drive ejects the disc. If you do not take the disc out of the slot, it is drawn in again auto-
matically after a short while.
or
XTo select Mediain media mode: slide 5and
press the controller.
XTo select Eject: turn and press the controller.
Inserting and removing an SD card
Important safety notes
GWARNING
SD cards are small parts. They can be swal-
lowed and cause choking. This poses an
increased risk of injury or even fatal injury.
Keep the SD card out of the reach of children. If a SD card is swallowed, seek medical atten-
tion immediately.
!If you are no longer using the SD card, you
should remove it and store it outside the vehi-
cle. High temperatures can damage the card.
The multimedia system supports the following
memory cards:
RSD cards ( SecureDigital)
RSDHC cards ( Secure Digital HighCapacity)
RSDXC cards (Secure Digital e Xtended Capac-
ity)
Inserting an SD card
XInsert the SD card into the SD card slot until
the SD card engages. The side with the con-
tacts must face down.
If the memory card has been selected as a
media source, the medium is played and the
files are loaded in the background. If there are
no supported audio or video files, you will see
a message to this effect.
iIf the SD card for navigation is inserted into
the SD card slot, you can still select the mem-
ory card as a media source. The No Playa‐
ble Filesmessage then appears.
Removing an SD card
XPress the SD card.
The SD card is ejected.
XRemove the SD card.
Connecting USB devices
There are two USB ports in the stowage space
under the armrest (Ypage 136).
XConnect the USB device to the USB port.
If the corresponding media menu is visible,
the medium is played and the files are loaded
in the background. If there are no supported
audio or video files, you will see a message to
this effect.
iMP3 players must support Media Transfer
Protocol (MTP).
Audio/video mode139
Media
Z
Page 154 of 174

RPlaylists
RArtists
RAlbums
RTrack
RGenres
RYear
RComposers
RVideos
RPhotos
RPodcasts
RAudiobooks
iThe functions are available as soon as the
entire media content has been read and ana-
lyzed.
If the same device is reconnected with
unchanged media content, these functions
are available more quickly.
The audio books and podcasts categories are
only available for Apple
®devices.
When connecting Apple®devices, the cate-
gories “Folder”, “Year” and “Photos” are not
available.
Searching for a track
XIn media mode, slide 6the controller.
The media menu bar is shown.
XTo select Search: turn and press the control-
ler.
The category list appears.
XTo select a category, e.g. Current Track‐list: turn and press the controller.
A selection list appears.
XSelect the required track.
Using the keyword search
XTo select KeywordSearchfrom the category
list : turn and press the controller.
XEnter and confirm the characters of the
desired search using the controller
(
Ypage 143).
Search results are sorted according to the
available categories, displayed and can then
be selected.
Selecting the playback option
XIn media mode, slide 6the controller.
The media menu bar is shown.
XTo select Options: turn and press the con-
troller.
XTo select the desired playback option: turn
and press the controller.
Additional information on playback options
(
Ypage 140).
Selecting video settings
Video files from Apple®devices cannot be
played.
If playable video files are found, they will be
played by the multimedia system.
XTo activate full-screen mode: press the con-
troller in the Media Interface menu.
XTo show the video menu: slide 6the con-
troller in full-screen mode.
The Media Interface menu bar appears.
XTo select Options: turn and press the con-
troller.
XSelect Video Settings.
XChange the settings (Ypage 154).
Video DVD mode
Important safety notes
GWARNING
The CD/DVD drive is a class 1 laser product.
If you open the housing of the CD/DVD drive,
there is a risk of exposure to invisible laser
radiation. This laser radiation could damage
your retina. There is a risk of injury.
Never open the housing. Always have main-
tenance and repair work carried out at a quali- fied specialist workshop.
GWARNING
If you handle a disc while driving, you may be
distracted from the traffic situation. You could
also lose control of the vehicle. There is a risk of an accident.
152Video DVD mode
Media
Page 164 of 174

Your multimediasyste mequipment
These operatin ginstruction sdescribe all th e
standar dan doptional equipment of your multi-
media system, as available at th etime of going
to press. Country-specifi cdifference sare pos -
sible. Bear in min dthat your vehicle may no t
feature all function sdescribed here. Thi salso
applies to safety-relevan tsystems an dfunc-
tions.
Read th einformation on qualifie dspecialis t
workshop sin th evehicle Operator's Manual.
Weather forecasts
Introduction
Thi sfunction is currentl yno tavailable fo rCan -
ada.
Fo rth ereception of weather forecast svia sat -
ellite radio, you will need aSIRIU SXM Satellite
Weather subscription .
If th emessag eappears alon gwit hth eSIRIU S
telephon ean dID numbers, you will need to hav e
th eweather servic eactivated first .
XTo selectCal lorCancel:turn an dpress th e
controller .
If amobile phone is connecte dto th emulti-
media syste m (
Ypage 90), when you selec t
Cal lacal lis placed to amember of th eSIR-
IU Sservic estaff .The ID number of th eSIRIU S
devic ewill be transferred to th etelephon e
display.
XThi swill be followed by instruction sfrom th e
servic eemployee.
Weather forecast scan be received via th esat -
ellite radio fo rth eUS A(includin gAlask aan d
Hawaii).
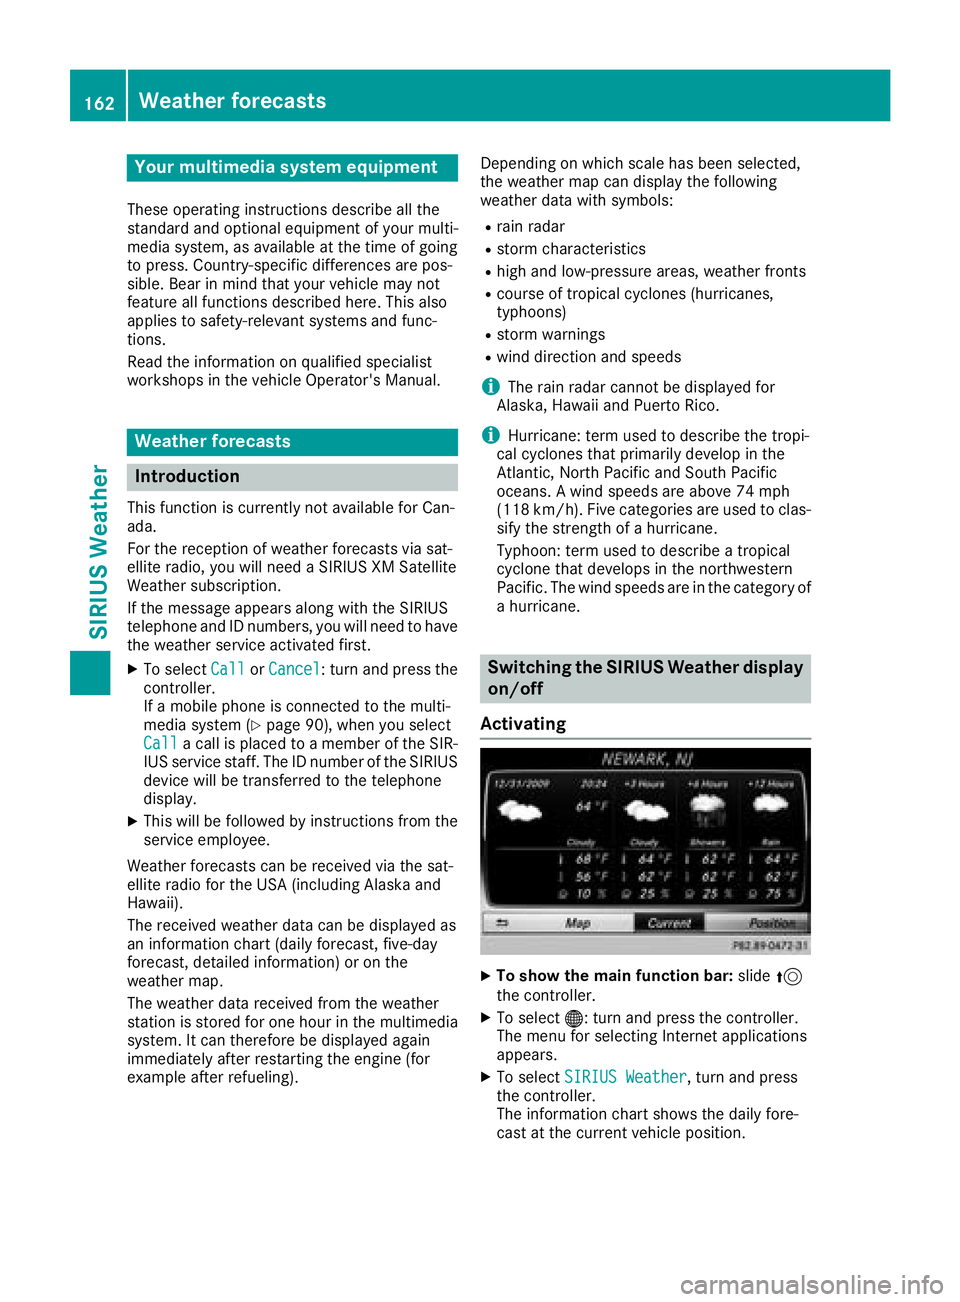
The received weather dat acan be displaye das
an information chart (dail yforecast ,five-day
forecast ,detailed information )or on th e
weather map .
The weather dat areceived from th eweather
station is stored fo ron ehour in th emultimedia
system. It can therefore be displaye dagain
immediately after restartin gth eengin e(fo r
example after refueling). Dependin
gon whic hscale has bee nselected,
th eweather map can display th efollowin g
weather dat awit hsymbols :
Rrain radar
Rstormcharacteristics
Rhig han dlow-pressure areas, weather fronts
Rcours eof tropical cyclones (hurricanes,
typhoons )
Rstormwarnings
Rwin ddirection an dspeeds
iThe rain radar canno tbe displaye dfo r
Alaska, Hawaii an dPuerto Rico.
iHurricane: term used to describe th etropi-
cal cyclones that primarily develo pin th e
At lantic, No
rth Pacifi
can dSout hPacifi c
oceans. Awin dspeeds are abov e74 mph
(11 8km/h). Five categorie sare used to clas-
sif yth estrengt hof ahurricane.
Typhoon :term used to describe atropical
cyclon ethat develops in th enorthwestern
Pacific. The win dspeeds are in th ecategory of
a hurricane.
Switching th eSIRIUS Weather display
on/of f
Activating
XTo show th emain function bar: slide5
th econtroller .
XTo select® :turn an dpress th econtroller .
The men ufo rselecting Internet application s
appears .
XTo selec tSIRIUS Weathe r,turn an dpress
th econtroller .
The information chart shows th edaily fore-
cas tat th ecurren tvehicle position .
162Weather forecasts
SIRIUS Weather
Page 171 of 174

Activating/deactivating the display of areas in
red:
XDisplay the menu on the weather map
(Ypage 165).
XTo selectView: turn and press the controller.
The list of display levels appears.
XSelect Storm Watch.
XSelectShow Symbols for Storm AreasOn Map.
Depending on the previous setting, activate
O or deactivate ªthe display of areas in
red.
Activating/deactivating the automatic display
of warning popups:
XSelect Display Storm Watch Automati‐cally.
Depending on the previous setting, activate
O or deactivate ªthe automatic display of
warning popups.
Setting the radius for the popups:
XSelect 5 Miles(5 km), 50 Miles(50 km) or
200 Miles( 200 km).
Storm overview
Displaying the Storm Guide:
XDisplay the menu on the weather map
(Ypage 165).
XTo select Guide: turn and press the controller.
A menu appears. The current storm is high-
lighted. There is information about the storm
in the status bar.
XTo select Next: turn and press the controller.
The next storm is marked.
XSelect Previous.
The previous storm is highlighted. Showing storm details:
XSelect
Details.
You see detailed information about the selec-
ted storm.
Showing detailed information (if available):
Rname of the tropical storm and category
Rtime stamp
Rdirectional movement speed and path
Propagation speed: the speed at which the
storm cell of a tropical cyclone is advanc-
ing.
Rmaximum wind speed
Weather forecasts169
SIRIUS Weather