2018 MERCEDES-BENZ AMG GT COUPE key
[x] Cancel search: keyPage 117 of 294
ANeutral
Do not shift the transmission toi
while driving. The automatic trans-
mission could otherwise be dam-
aged.
No power is transmitted from the
engine to the drive wheels.
Releasing the brakes will allow you to
move the vehicle freely, e.g. to push
it or tow it.
If ESP
®is deactivated or faulty: shift
the transmission to position iif the
vehicle is in danger of skidding, e.g.
on icy roads.
If you switch off the engine using the
SmartKey or the Start/Stop button,
the automatic transmission shifts to
neutral iautomatically.
!Coasting in neutral imay
cause damage to the drive train.
7Drive
The automatic transmission changes
gear automatically in the automatic
drive programs (
Ypage 117). All
forward gears are available.
Driving tips
Changing gear
The automatic transmission shifts through the
individual gears automatically when it is in trans-
mission position h. This automatic gear shift-
ing behavior is determined by:
Rthe selected drive program (Ypage 111)
Rthe position of the accelerator pedal
Rthe road speed
Accelerator pedal position
Your style of driving influences how the auto-
matic transmission shifts gear:
Rlittle throttle: early upshifts
Rmore throttle: late upshifts
A dynamic driving style with high longitudinal
and lateral acceleration delays the shift points
to higher engine speeds.
Double-clutch function
When shifting down, the double-clutch function
is active regardless of the currently selected
drive program. The double-clutch function
reduces load change reactions and is conducive
to a sporty driving style. The sound generated by
the double-clutch function depends on the drive
program selected.
Kickdown
Use kickdown for maximum acceleration:
XIn the automatic drive programs, depress the
accelerator pedal beyond the pressure point.
Depending on the engine speed and the selec-
ted drive program, the automatic transmis-
sion shifts to the lowest gear permissible to
give optimal acceleration.
XEase off the accelerator pedal once the
desired speed is reached.
The automatic transmission shifts back up.
Kickdown is not available in manual mode M.
Rocking the vehicle free
Rocking the vehicle free may help to free the
vehicle if it has become stuck in slush or snow.
To do so, shift back and forth repeatedly
between transmission positionshand k.
The vehicle's transmission management
restricts shifting between transmission posi-
tions hand kto speeds up to a maximum of
5 mph (9 km/h).
To shift back and forth between transmission
positions hand k, move the E-SELECT lever
up and down beyond the pressure point.
Gliding mode
AMG SPEEDSHIFT DCT 7-speed sports transmission115
Driving an d parking
Z
Page 118 of 294
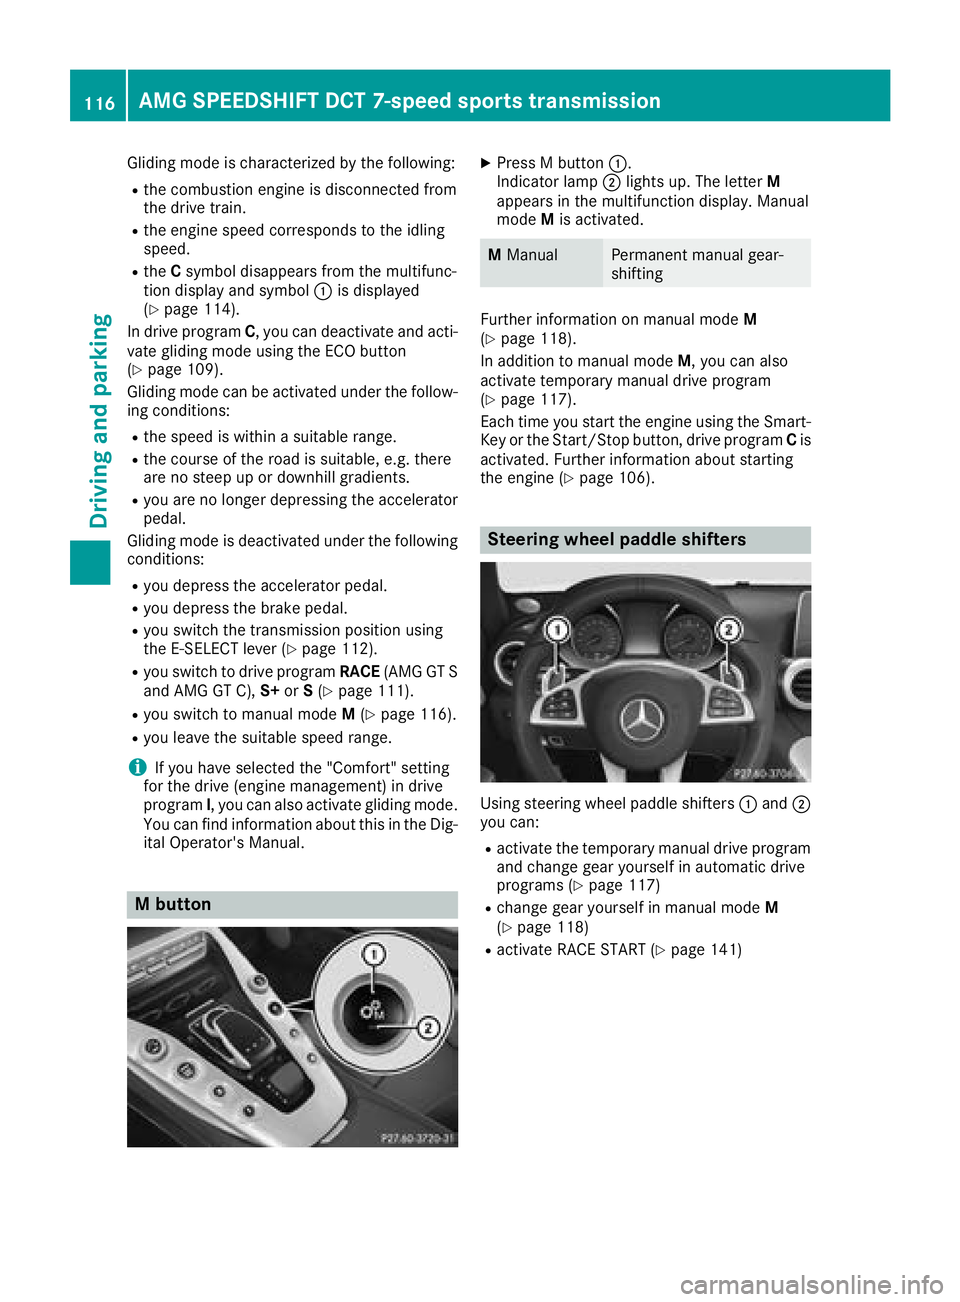
Gliding mode is characterized by the following:
Rthe combustion engine is disconnected from
the drive train.
Rthe engine speed corresponds to the idling
speed.
RtheCsymbol disappears from the multifunc-
tion display and symbol :is displayed
(
Ypage 114).
In drive program C, you can deactivate and acti-
vate gliding mode using the ECO button
(
Ypage 109).
Gliding mode can be activated under the follow-
ing conditions:
Rthe speed is within a suitable range.
Rthe course of the road is suitable, e.g. there
are no steep up or downhill gradients.
Ryou are no longer depressing the accelerator
pedal.
Gliding mode is deactivated under the following conditions:
Ryou depress the accelerator pedal.
Ryou depress the brake pedal.
Ryou switch the transmission position using
the E ‑SELECT lever (Ypage 112).
Ryou switch to drive program RACE(AMG GT S
and AMG GT C), S+orS(Ypage 111).
Ryou switch to manual mode M(Ypage 116).
Ryou leave the suitable speed range.
iIf you have selected the "Comfort" setting
for the drive (engine management) in drive
program I, you can also activate gliding mode.
You can find information about this in the Dig-
ital Operator's Manual.
M button
XPress M button :.
Indicator lamp ;lights up. The letter M
appears in the multifunction display. Manual
mode Mis activated.
MManualPermanent manual gear-
shifting
Further information on manual mode M
(Ypage 118).
In addition to manual mode M, you can also
activate temporary manual drive program
(
Ypage 117).
Each time you start the engine using the Smart-
Key or the Start/Stop button, drive program Cis
activated. Further information about starting
the engine (
Ypage 106).
Steering wheel paddle shifters
Using steering wheel paddle shifters :and ;
you can:
Ractivate the temporary manual drive program
and change gear yourself in automatic drive
programs (
Ypage 117)
Rchange gear yourself in manual mode M
(Ypage 118)
Ractivate RACE START (Ypage 141)
116AMG SPEEDSHIFT DCT 7-speed sports transmission
Driving and parking
Page 123 of 294
!Use a filter when adding fuel from a fuel can.
The fuel lines and/or the fuel injection system
could otherwise be blocked by particles from
the fuel can.
If you overfill the fuel tank, fuel could spray out
when the fuel pump nozzle is removed.
For further information on fuel and fuel quality
(
Ypage 283).
Refueling
General information
Pay attention to the important safety notes
(Ypage 120).
If you unlock/lock the vehicle from the outside, the fuel filler flap also unlocks/locks.
The position of the fuel filler cap is displayed
8 in the instrument cluster. The arrow next
to the filling pump indicates the side of the vehi-
cle.
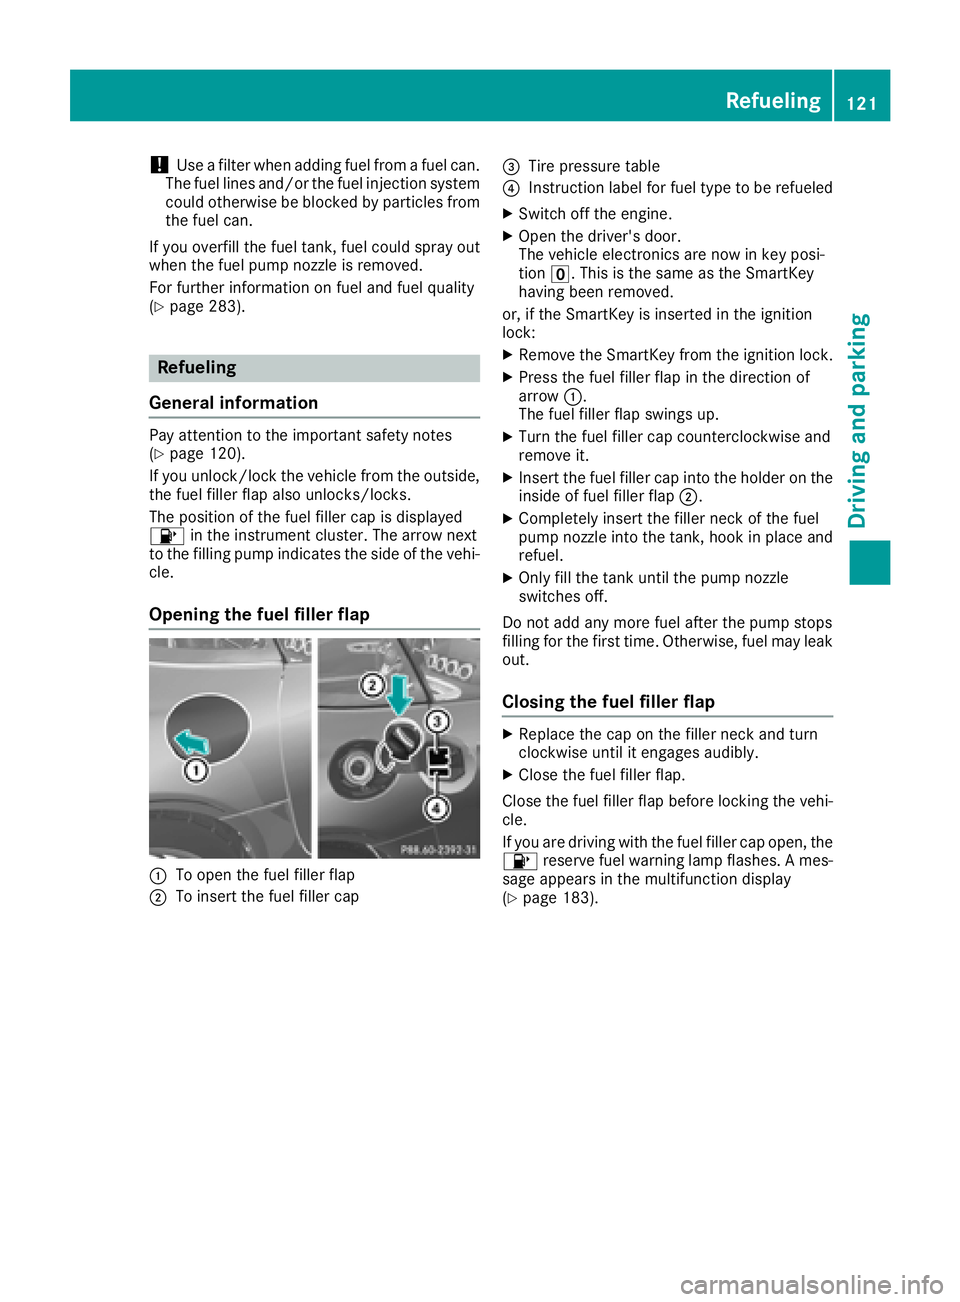
Opening the fuel filler flap
:To open the fuel filler flap
;To insert the fuel filler cap
=Tire pressure table
?Instruction label for fuel type to be refueled
XSwitch off the engine.
XOpen the driver's door.
The vehicle electronics are now in key posi-
tion u. This is the same as the SmartKey
having been removed.
or, if the SmartKey is inserted in the ignition
lock:
XRemove the SmartKey from the ignition lock.
XPress the fuel filler flap in the direction of
arrow :.
The fuel filler flap swings up.
XTurn the fuel filler cap counterclockwise and
remove it.
XInsert the fuel filler cap into the holder on the
inside of fuel filler flap ;.
XCompletely insert the filler neck of the fuel
pump nozzle into the tank, hook in place and
refuel.
XOnly fill the tank until the pump nozzle
switches off.
Do not add any more fuel after the pump stops
filling for the first time. Otherwise, fuel may leak
out.
Closing the fuel filler flap
XReplace the cap on the filler neck and turn
clockwise until it engages audibly.
XClose the fuel filler flap.
Close the fuel filler flap before locking the vehi-
cle.
If you are driving with the fuel filler cap open, the 8 reserve fuel warning lamp flashes. A mes-
sage appears in the multifunction display
(
Ypage 183).
Refueling121
Driving and parking
Z
Page 124 of 294
Problems with fuel and the fuel tank
ProblemPossible causes/consequences andMSolutions
Fuel is leaking from the
vehicle.GWARNING
The fuel line or the fuel tank is faulty.
Risk of explosion or fire.
XApply the electric parking brake.
XSwitch off the engine.
XOpen the driver's door.
The vehicle electronics are now in key position u. This is the same
as the SmartKey having been removed.
or, if the SmartKey is inserted in the ignition lock:
XRemove the SmartKey from the ignition lock.
XDo not restart the engine under any circumstances.
XConsult a qualified specialist workshop.
The fuel filler flap cannot
be opened.The fuel filler flap is not unlocked.
XUnlock the vehicle (Ypage 65).
The SmartKey battery is discharged or nearly discharged.
XUnlock the vehicle using the mechanical key (Ypage 67).
The fuel filler flap is unlocked, but the opening mechanism is jammed.
XConsult a qualified specialist workshop.
Parking
Important safety notes
GWARNING
Flammable material such as leaves, grass or
twigs may ignite if they come into contact with
hot parts of the exhaust system or exhaust
gas flow. There is a risk of fire.
Park the vehicle so that no flammable mate-
rials come into contact with parts of the vehi-
cle which are hot. Take particular care not to
park on dry grassland or harvested grain
fields.
GWARNING
If you leave children unsupervised in the vehi-
cle, they could set it in motion by, for example:
Rrelease the parking brake.
Rshift the automatic transmission out of the
parking position P.
Rstart the engine.
In addition, they may operate vehicle equip-
ment and become trapped. There is a risk of
an accident and injury.
When leaving the vehicle, always take the
SmartKey with you and lock the vehicle. Never
leave children unsupervised in the vehicle.
!If the engine speed is too high or the vehicle
is in motion, do not shift the automatic trans- mission directly from htok, from ktoh
or directly to j.
Do not open the driver's door while the vehi-
cle is in motion. At low speeds in transmission
122Parking
Driving and parking
Page 125 of 294
positionhork, otherwise park position j
is engaged automatically.
The transmission could be damaged.
!Always secure the vehicle correctly against
rolling away. Otherwise, the vehicle or its driv-
etrain could be damaged.
To ensure that the vehicle is secured against
rolling away unintentionally:
Rthe electric parking brake must be applied.
Rthe transmission must be in position j.
Rthe SmartKey must be removed from the igni-
tion lock or the Start/Stop button must be
pressed.
Rthe front wheels must be turned towards the
curb on steep uphill or downhill gradients.
Rthe empty vehicle must be secured at the
front axle with a wheel chock or similar, for
example, on uphill or downhill gradients.
Ra laden vehicle must also be secured at the
rear axle with a wheel chock or similar, for
example, on uphill or downhill gradients.
Switching off the engine
Important safety notes
GWARNING
The automatic transmission switches to neu-
tral position Nwhen you switch off the engine.
The vehicle may roll away. There is a risk of an
accident.
After switching off the engine, always switch
to parking position P. Prevent the parked vehi-
cle from rolling away by applying the parking
brake.
AMG SPEEDSHIFT DCT 7-speed sport
transmission
!Do not remove the SmartKey while the vehi-
cle is in motion. Otherwise, at low speeds,
parking lock jwill be activated automati-
cally.
Do not open the driver's door while the vehi-
cle is in motion. At low speeds, transmission
position jis engaged automatically.
This could cause damage to the transmission
and the parking lock.
XApply the electric parking brake.
XShift the transmission to jusing the button
on the center console.
Using the Start/Stop button
XPress the Start/Stop button (Ypage 105)
The engine stops and all the indicator lamps in
the instrument cluster go out.
If the driver's door is closed, this is the same
as key position 1. If the driver's door is open,
this is the same as key position u, i.e. the
SmartKey having been removed.
If you switch the engine off with the trans-
mission in position korh, the transmis-
sion automatically shifts to i.
If you move the E-SELECT lever to ibefore
switching off the engine, the transmission
remains in ifor 30 minutes.
If you open the driver's or front-passenger
door during this period, the transmission
automatically shifts to jand the electric
parking brake is automatically applied.
The engine can be switched off in an emer-
gency while the vehicle is in motion by press-
ing and holding the Start/Stop button for
three seconds. This function operates inde-
pendently of the ECO start/stop automatic
engine switch-off function.
Using the SmartKey
XTurn the SmartKey to key position uin the
ignition lock and remove it.
The immobilizer is activated.
If you move the E-SELECT lever to ibefore
switching off the engine, the transmission
remains in ifor approximately 30 minutes.
If you open the driver's or front-passenger
door during this time, the transmission shifts
automatically to j.
The t
ransmission remains in iif:
Rthe SmartKey is in the ignition lock and
Ryou use the E ‑SELECT lever to shift the
transmission to ibefore switching the
engine off
This still applies if you open the driver's or
front-passenger door.
Further information on transmission position
i when operating with a SmartKey is avail-
able under "Automatic car wash"
(
Ypage 239).
Parking123
Driving and parking
Z
Page 126 of 294
Electric parking brake
General notes
GWARNING
If you leave children unsupervised in the vehi-
cle, they could set it in motion by, for example:
Rrelease the parking brake.
Rshift the automatic transmission out of the
parking position P.
Rstart the engine.
In addition, they may operate vehicle equip-
ment and become trapped. There is a risk of
an accident and injury.
When leaving the vehicle, always take the
SmartKey with you and lock the vehicle. Never
leave children unsupervised in the vehicle.
The function of the electric parking brake is
dependent on the on-board voltage. If the on-
board voltage is low or there is a malfunction in
the system, it may not be possible to apply the
released parking brake.
XIf this is the case, only park the vehicle on
level ground and secure it to prevent it rolling
away.
XShift the automatic transmission to position
j.
It may not be possible to release an applied
parking brake if the on-board voltage is low or
there is a malfunction in the system. Contact a
qualified specialist workshop.
The electric parking brake performs a function
test at regular intervals while the engine is
switched off. The sounds that can be heard while
this is occurring are normal.
Applying or releasing manually
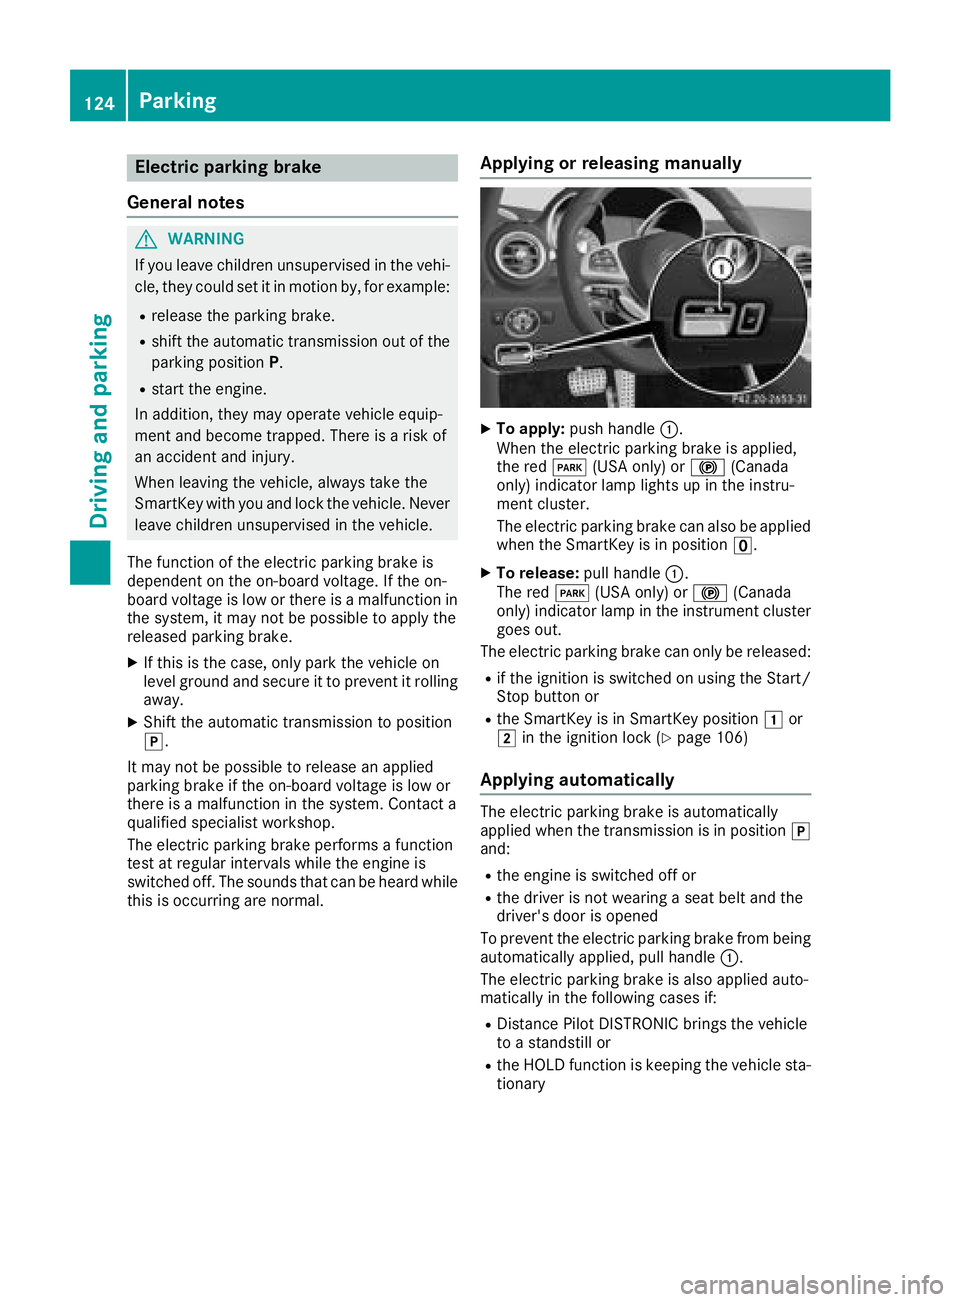
XTo apply: push handle :.
When the electric parking brake is applied,
the red F(USA only) or !(Canada
only) indicator lamp lights up in the instru-
ment cluster.
The electric parking brake can also be applied
when the SmartKey is in position u.
XTo release:pull handle:.
The red F(USA only) or !(Canada
only) indicator lamp in the instrument cluster goes out.
The electric parking brake can only be released:
Rif the ignition is switched on using the Start/
Stop button or
Rthe SmartKey is in SmartKey position 1or
2 in the ignition lock (Ypage 106)
Applying automatically
The electric parking brake is automatically
applied when the transmission is in position j
and:
Rthe engine is switched off or
Rthe driver is not wearing a seat belt and the
driver's door is opened
To prevent the electric parking brake from being
automatically applied, pull handle :.
The electric parking brake is also applied auto-
matically in the following cases if:
RDistance Pilot DISTRONIC brings the vehicle
to a standstill or
Rthe HOLD function is keeping the vehicle sta-
tionary
124Parking
Driving and parking
Page 144 of 294

START or if any of the activation conditions are
no longer fulfilled. TheRACE START Not Pos‐
sible See Operator's ManualorRACESTART Canceledmessage appears in the mul-
tifunction display.
iIf RACE START is used repeatedly within a
short period of time, it is only available again
after the vehicle has been driven a certain
distance.
AMG adaptive sport suspension sys-
tem
General notes
The electronically controlled damping system
works continuously. This improves driving
safety and ride comfort.
The damping is tuned individually to each wheel
and depends on:
Ryour driving style, e.g. sporty
Rthe road surface condition, e.g. bumps
Ryour individual selection of Sport, Sport+ or
Comfort
Each time you start the engine with the Smart-
Key or the Start/Stop button, Comfort mode is
activated. Further information about starting
the engine (
Ypage 106).
Adjusting the suspension settings
:Adjusts AMG adaptive sport suspension sys-
tem
;Right indicator lamp
=Left indicator lamp
The suspension setting is adjusted using but-
ton :on the center console.
iThe suspension setting can also be adjusted
using the DYNAMIC SELECT controller
(
Ypage 111).
Setting "Sport" mode
XPress button :repeatedly until left indicator
lamp =lights up.
You have selected Sport mode.
The AMG Suspension System SPORT
mes-
sage appears on the multifunction display.
The firmer setting of the suspension tuning in
Sport mode ensures even better contact with
the road. Select this mode when employing a
sporty driving style, e.g. on winding country
roads.
Setting "Sport +" mode
XPress button :repeatedly until indicator
lamps ;and =light up.
You have selected Sport + mode.
The AMG
SuspensionSystemSPORT +mes-
sage appears on the multifunction display.
The very firm setting of the suspension setting in
Sport + mode ensures the best possible contact
with the road. Select this mode only when driv-
ing on race circuits.
Setting "Comfort" mode
XPress button :repeatedly until indicator
lamps ;and =go out.
You have selected Comfort mode.
The AMG
SuspensionSystemCOMFORTmes-
sage appears on the multifunction display.
In Comfort mode, the driving characteristics of
your vehicle are more comfortable. Select this
mode if you prefer a more comfortable driving
style, but also when driving at speed on straight
roads, e. g. highways.
Parking Assist PARKTRONIC
Important safety notes
Parking Assist PARKTRONIC is an electronic
parking aid with ultrasound. It monitors the area around your vehicle using six sensors in the
front bumper and four sensors in the rear
bumper. Parking Assist PARKTRONIC shows you
the distance between your vehicle and a detec-
ted obstacle visually and audibly.
Parking Assist PARKTRONIC is only an aid. It is
not a replacement for your attention to your
immediate surroundings. You are always
142Driving systems
Driving and parking
Page 146 of 294

If there is an obstacle within this range, the rel-
evant warning displays light up and a warning
tone sounds. If the distance falls below the min-
imum, the distance may no longer be shown.
Warning displays
:Segments on the left-hand side of the vehi-
cle
;Segments on the right-hand side of the vehi-
cle
=Segments showing operational readiness
The warning displays show the distance
between the sensors and the obstacle. The
warning display for the front area is in the instru-
ment cluster. The warning display for the rear
area is located on the cover behind the seats in
the rear compartment.
The warning display for each side of the vehicle
is divided into five yellow and two red segments.
Parking Assist PARKTRONIC is operational if
operational readiness indicator =lights up.
The selected transmission position and the
direction in which the vehicle is rolling deter-
mine which warning display is active when the
engine is running.
Transmission posi-
tionWarning display
hFront area activated
k, ior the vehicle
is rolling backwardsRear and front areas
activated
jNo areas activated
One or more segments light up as the vehicle
approaches a detected obstacle, depending on
the vehicle's distance from the obstacle:
From the:
Rsixth segment onwards, you will hear an inter-
mittent warning tone for approximately two
seconds.
Rseventh segment onwards, you will hear a
warning tone for approximately two seconds.
This indicates that you have now reached the minimum distance.
Deactivating or activating Parking
Assist PARKTRONIC
:Indicator lamp
;Deactivates or activates Parking Assist
PARKTRONIC
If indicator lamp :lights up, Parking Assist
PARKTRONIC is deactivated.
iParking Assist PARKTRONIC is automati-
cally activated when you set the Start/Stop
button to key position 2.
144Driving systems
Driving and parking