2018 MERCEDES-BENZ AMG GT COUPE steering wheel
[x] Cancel search: steering wheelPage 120 of 294
Shifting gears
If you pull on the left-hand or right-hand steering
wheel paddle shifter, the automatic transmis-
sion switches to temporary manual drive pro-
gram for a limited amount of time. Depending on
which steering wheel paddle shifter is pulled,
the automatic transmission immediately shifts
into the next gear down or up, if permitted.
XTo shift up: pull the right-hand steering wheel
paddle shifter (Ypage 116).
The automatic transmission shifts up to the
next gear.
If the maximum engine speed in the currently
engaged gear is reached and you continue to
accelerate, the automatic transmission auto-
matically shifts up in order to prevent engine
damage.
The automatic transmission will not shift up to
the next gear when the engine speed is very
low.
XTo shift down: pull on the left-hand steering
wheel paddle shifter (Ypage 116).
The automatic transmission shifts down to
the next gear.
If the engine were to exceed the maximum
engine speed when shifting down, the auto-
matic transmission protects against engine
damage by not shifting down.
Automatic down shifting occurs when coast-
ing.
When using kickdown, the automatic trans-
mission automatically shifts to a lower gear.
Deactivating
If you have activated temporary manual drive
program, it will remain active for a certain
amount of time. Under certain conditions, the
minimum amount of time is extended, e.g. in the
case of lateral acceleration, during overrun
mode or when driving on steep terrain.
When temporary manual drive program is deac-
tivated, the automatic transmission shifts into
the automatic drive program that was last selec-
ted. You can also deactivate temporary manual drive
program yourself:
XPull on the right-hand steering wheel paddle
shifter and hold it in place (Ypage 116).
or
XUse the DYNAMIC SELECT controller to
change the drive program (Ypage 111).
Temporary manual drive program is deactiva-
ted. The automatic transmission switches
into the automatic drive program that was last
selected.
Manual mode
General notes
In manual mode M, you can permanently change
gear yourself by using the steering wheel paddle
shifters. The transmission must be in position
h to do this.
The switching times correspond to the previ-
ously active automatic drive program.
The transmission only shifts down automatically at low engine speeds depending on the respec-
tive gear.
In addition to manual mode M, you can also
activate temporary manual drive program
(
Ypage 117).
Activating
In manual mode M, you can change gear your-
self using the steering wheel paddle shifters if
the transmission is in position h. You can see
the currently selected drive program and which gear is engaged in the multifunction display.
XPress the M button (Ypage 116).
M is shown in the multifunction display and
the indicator lamp on the M button lights up.
Shift recommendation
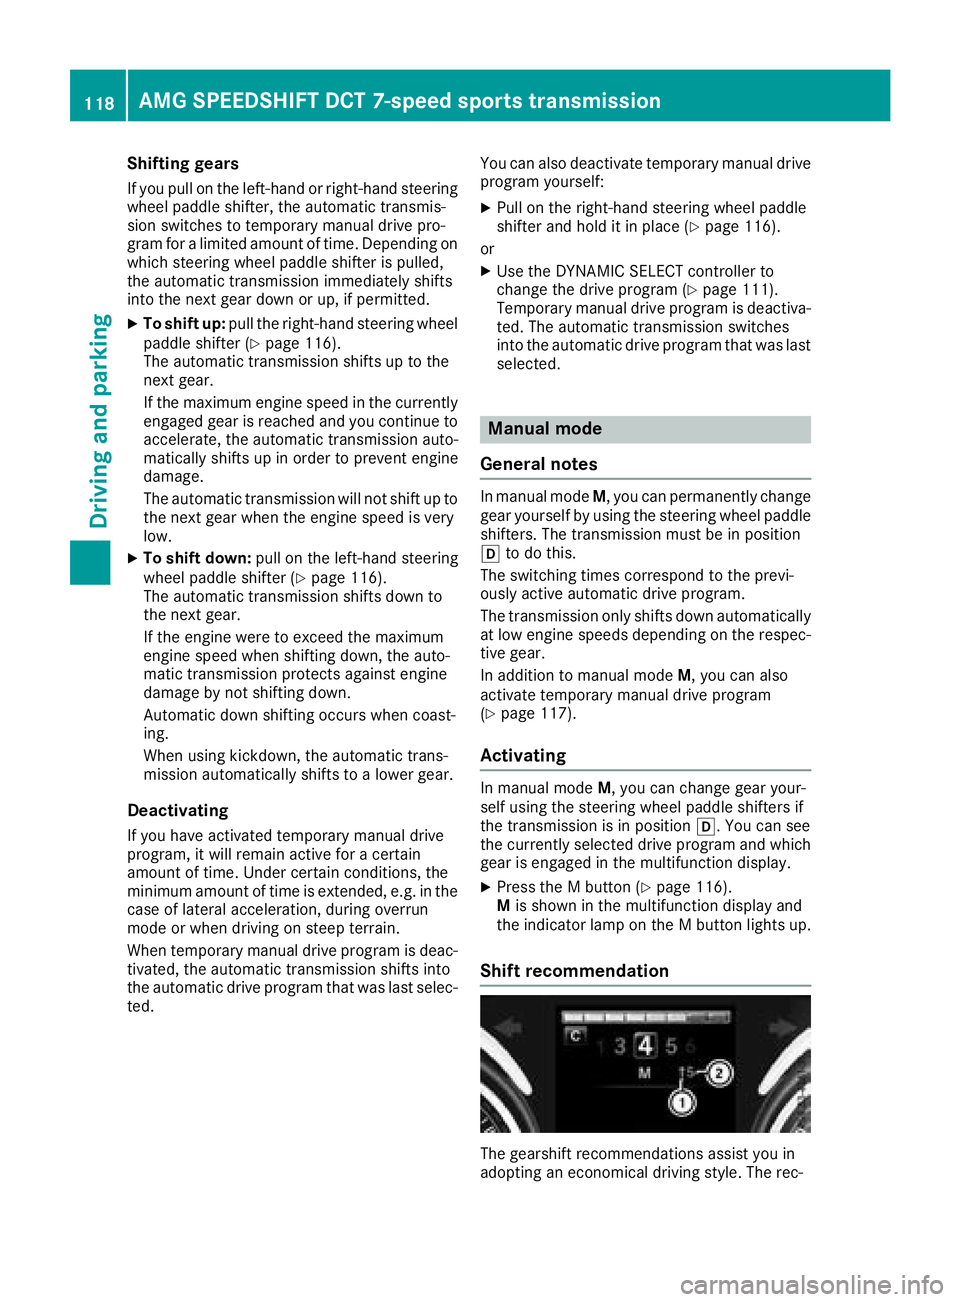
The gearshift recommendations assist you in
adopting an economical driving style. The rec-
118AMG SPEEDSHIFT DCT 7-speed sports transmission
Driving and parking
Page 121 of 294
ommended gear is shown in the multifunction
display.
XWhen the corresponding gearshift recom-
mendation:appears in the multifunction
display of the instrument cluster, shift to rec-
ommended gear ;.
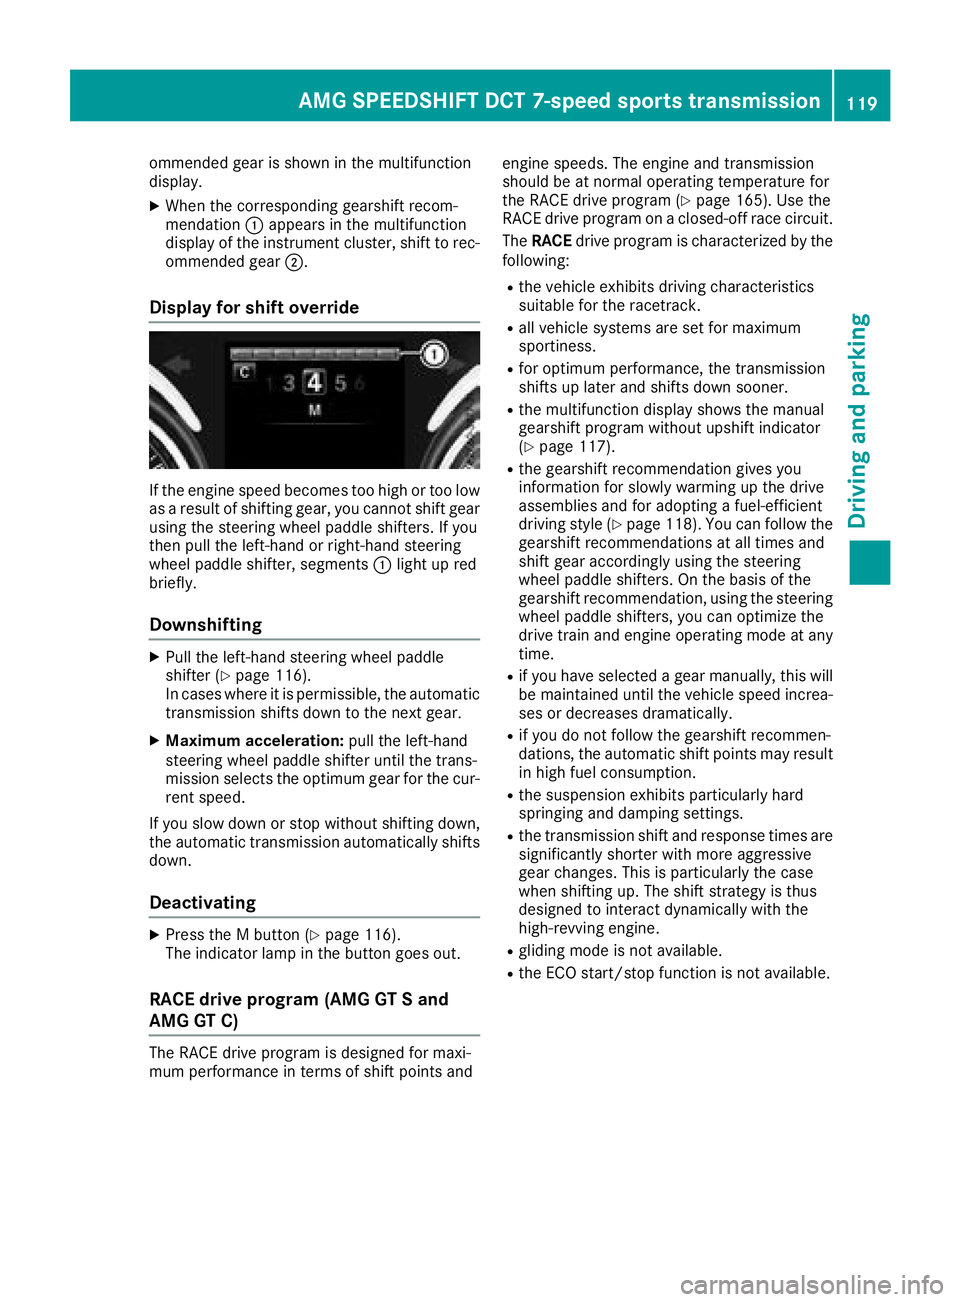
Display for shift override
If the engine speed becomes too high or too low
as a result of shifting gear, you cannot shift gear
using the steering wheel paddle shifters. If you
then pull the left-hand or right-hand steering
wheel paddle shifter, segments :light up red
briefly.
Downshifting
XPull the left-hand steering wheel paddle
shifter (Ypage 116).
In cases where it is permissible, the automatic transmission shifts down to the next gear.
XMaximum acceleration: pull the left-hand
steering wheel paddle shifter until the trans-
mission selects the optimum gear for the cur-
rent speed.
If you slow down or stop without shifting down,
the automatic transmission automatically shifts down.
Deactivating
XPress the M button (Ypage 116).
The indicator lamp in the button goes out.
RACE drive program (AMG GT S and
AMG GT C)
The RACE drive program is designed for maxi-
mum performance in terms of shift points and engine speeds. The engine and transmission
should be at normal operating temperature for
the RACE drive program (
Ypage 165). Use the
RACE drive program on a closed-off race circuit.
The RACE drive program is characterized by the
following:
Rthe vehicle exhibits driving characteristics
suitable for the racetrack.
Rall vehicle systems are set for maximum
sportiness.
Rfor optimum performance, the transmission
shifts up later and shifts down sooner.
Rthe multifunction display shows the manual
gearshift program without upshift indicator
(
Ypage 117).
Rthe gearshift recommendation gives you
information for slowly warming up the drive
assemblies and for adopting a fuel-efficient
driving style (
Ypage 118). You can follow the
gearshift recommendations at all times and
shift gear accordingly using the steering
wheel paddle shifters. On the basis of the
gearshift recommendation, using the steering
wheel paddle shifters, you can optimize the
drive train and engine operating mode at any
time.
Rif you have selected a gear manually, this will be maintained until the vehicle speed increa-
ses or decreases dramatically.
Rif you do not follow the gearshift recommen-
dations, the automatic shift points may resultin high fuel consumption.
Rthe suspension exhibits particularly hard
springing and damping settings.
Rthe transmission shift and response times are
significantly shorter with more aggressive
gear changes. This is particularly the case
when shifting up. The shift strategy is thus
designed to interact dynamically with the
high-revving engine.
Rgliding mode is not available.
Rthe ECO start/stop function is not available.
AMG SPEEDSHIFT DCT 7-speed sports transmission119
Driving and parking
Z
Page 148 of 294

Rif the camera lens is dirty or obstructed.
Observe the notes on cleaning
(
Ypage 242)
Rif the rear of your vehicle is damaged. In this
case, have the camera position and setting
checked at a qualified specialist workshop
The field of vision and other functions of the
reversing camera may be restricted due to addi-
tional accessories on the rear of the vehicle (e.g. license plate holder).
The guide lines in the multimedia system display
show the distances to your vehicle. The distan-
ces only apply to road level.
Activating/deactivating the rear view
camera
XTo activate: ensure that SmartKey position
2 has been selected with the Start/Stop
button.
XMake sure that the Activation by R gearfunction is selected in the multimedia system
(see the Digital Owner's Manual).
XEngage reverse gear.
The area behind the vehicle is shown with
guide lines in the multimedia system display.
The image from the rear view camera is avail-
able throughout the maneuvering process.
To deactivate: the rear view camera deacti-
vates if you shift the transmission to jor after
driving forwards a short distance.
Messages in the multimedia system dis-
play
The rear view camera may show a distorted view
of obstacles, show them incorrectly or not at all.
Obstacles are not shown by the rear view cam-
era in the following locations:
Rvery close to the rear bumper
Runder the rear bumper
!Objects not at ground level may appear to
be further away than they actually are, e.g.:
Rthe bumper of a parked vehicle
Rthe drawbar of a trailer
Rthe ball coupling of a trailer tow hitch
Rthe rear section of an HGV
Ra slanted post Use the guidelines only for orientation.
Approach objects no further than the bottom-
most guideline.
:Yellow guide line at a distance of approx-
imately 13 ft (4.0 m) from the rear of the
vehicle
;White guide line without steering input –
vehicle width including the exterior mirrors
(static)
=Yellow guide line for the vehicle width
including the exterior mirrors, at the current
steering wheel angle (dynamic)
?Yellow lane marking the course the tires will
take at the current steering wheel angle
(dynamic)
AYellow guide line at a distance of approx-
imately 3 ft (1.0 m) from the rear of the vehi-
cle
BVehicle center axle (marker assistance)
CBumper
DRed guide line at a distance of approximately
12 in (0.30 m) from the rear of the vehicle
The guide lines are shown when the transmis-
sion is in position k.
The distance specifications only apply to
objects that are at ground level.
146Driving systems
Driving and parking
Page 149 of 294

:Front warning display
;Additional measurement operational readi-
ness indicator for Parking Assist
PARKTRONIC
=Rear warning display
Vehicles with Parking Assist PARKTRONIC:
when Parking Assist PARKTRONIC is opera-
tional (
Ypage 144), additional measurement
operational readiness indicator ;appears in
the multimedia system display. If the Parking
Assist PARKTRONIC warning displays are active
or light up, warning displays :and =are also
active or light up correspondingly in the multi-
media system display.
"Reverse parking" function
Backing up straight into a parking space
without steering input
:White guide line without steering input –
vehicle width including the exterior mirrors
(static)
;Yellow guide line for the vehicle width
including the exterior mirrors, at the current
steering wheel angle (dynamic)
=Yellow guide line at a distance of approx-
imately 3 ft (1.0 m) fromthe rear of the vehi-
cle
?Red guide line at a distance of approximately
12 in (0.30 m) fromthe rear of the vehicle
XMake sure that the rear view camera is
switched on (Ypage 146).
The lane and the guide lines are shown.
XWith the help of white guide line :, check
whether the vehicle will fit into the parking
space.
XUsing white guide line :as a guide, carefully
back up until you reach the end position.
Red guide line ?is then at the end of parking
space. The vehicle is almost parallel in the
parking space.
Reverse perpendicular parking with steer-
ing input
:Parking space marking
;Yellow guide line for the vehicle width
including the exterior mirrors, at the current
steering wheel angle (dynamic)
XDrive past the parking space and bring the
vehicle to a standstill.
XMake sure that the rear view camera is
switched on (Ypage 146).
The lane and the guide lines are shown.
XWhile the vehicle is at a standstill, turn the
steering wheel in the direction of the parking
space until yellow guide line ;reaches park-
ing space marking :.
XMaintain the steering input and reverse care-
fully.
Driving systems147
Driving an d parking
Z
Page 150 of 294

:Yellow guide line for the vehicle width
including the exterior mirrors, at the current
steering wheel angle (dynamic)
XStop the vehicle when it is almost exactly in
front of the parking space.
The white lane should be as close to parallel
with the parking space marking as possible.
:White guide line at the current steering input
;Parking space marking
XTurn the steering wheel to the center positionwhile the vehicle is stationary.
:Red guide line at a distance of approximately
12 in (0.30 m) from the rear of the vehicle
;White guide line without steering input
=End of parking space
XBack up carefully until you have reached the
final position.
Red guide line :is then at the end of parking
space =. The vehicle is almost parallel in the
parking space.
Wide-angle function
:Symbol for the wide-angle view function
;Your vehicle
=Warning displays for Parking Assist
PARKTRONIC
You can also use the rear view camera to select
a wide-angle view.
When Parking Assist PARKTRONIC is opera-
tional (
Ypage 144), a symbol for your own vehi-
cle appears in the multimedia system display. If
the Parking Assist PARKTRONIC warning dis-
plays are active, warning displays =light up in
the multimedia system display in yellow or red
accordingly.
ATTENTION ASSIST
General notes
ATTENTION ASSIST helps you during long,
monotonous journeys, such as on highways. It is
active in the 37 mph (60 km/h) to 125 mph
(200 km/h) range. If ATTENTION ASSIST
detects typical indicators of fatigue or increas-
ing lapses in concentration on the part of the
driver, it suggests taking a break.
Important safety notes
ATTENTION ASSIST is only an aid to the driver. It
might not always recognize fatigue or increasing
inattentiveness in time or fail to recognize them
at all. The system is not a substitute for a well-
rested and attentive driver.
148Driving systems
Driving and parking
Page 151 of 294
The functionality of ATTENTION ASSIST is
restricted and warnings may be delayed or not
occur at all:
Rif the length of the journey is less than approx-
imately 30 minutes
Rif the road condition is poor, e.g. if the surface
is uneven or if there are potholes
Rif there is a strong side wind
Rif you have adopted a sporty driving style with
high cornering speeds or high rates of accel-
eration
Rif you are predominantly driving slower than
37 mph (60 km/h) or faster than 125 mph
(200 km/h)
Rif the time has been set incorrectly
Rin active driving situations, such as when youchange lanes or change your speed
The ATTENTION ASSIST tiredness assessment
is deleted and restarted when you continue the
journey:
Rwhen you switch off the engine
Rwhen you take off your seat belt and open the
driver's door, e.g. for a change of drivers or to
take a break
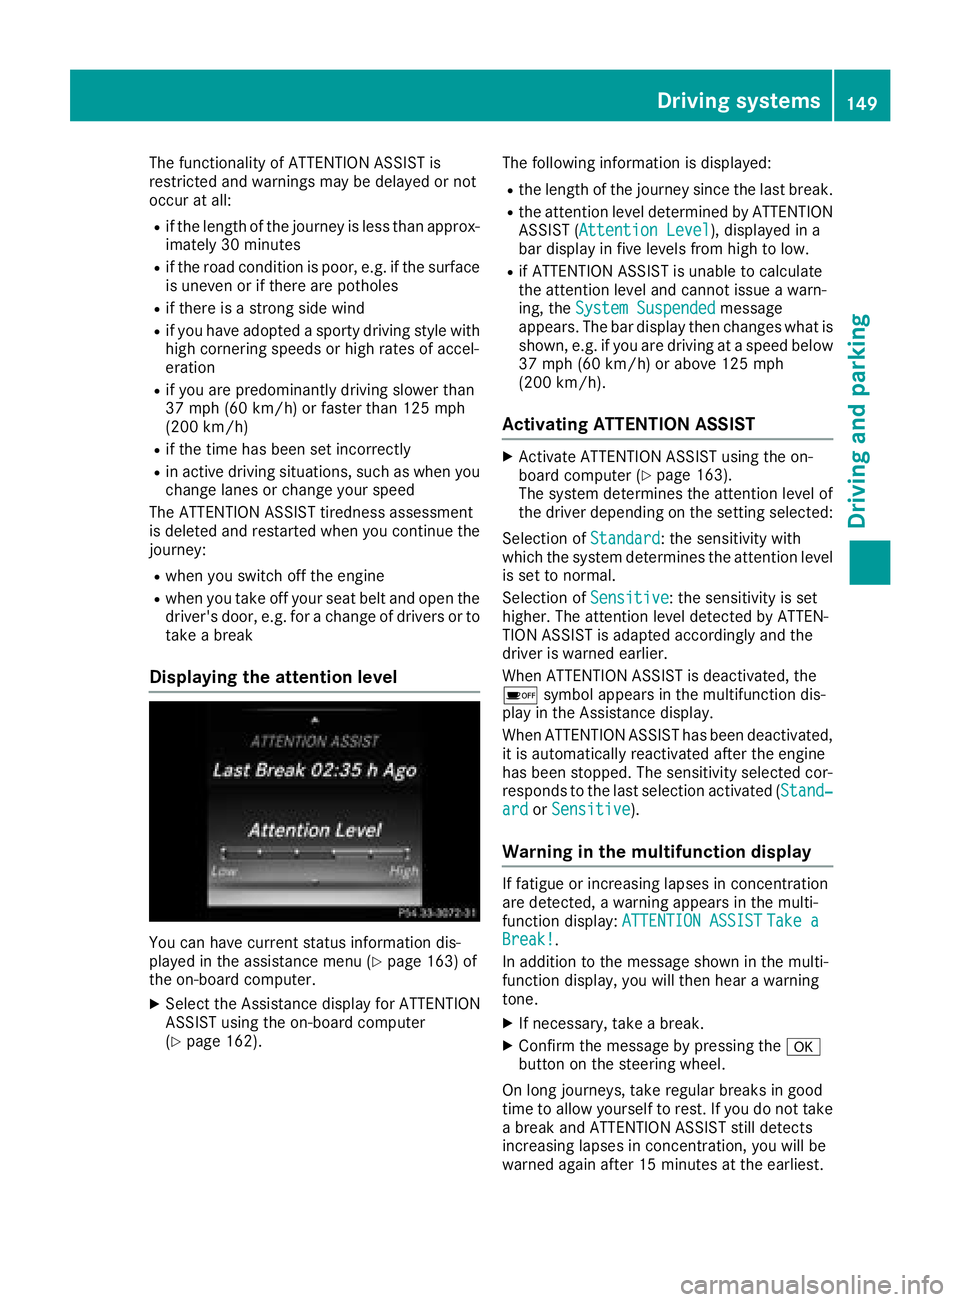
Displaying the attention level
You can have current status information dis-
played in the assistance menu (Ypage 163) of
the on-board computer.
XSelect the Assistance display for ATTENTION
ASSIST using the on-board computer
(
Ypage 162). The following information is displayed:
Rthe length of the journey since the last break.
Rthe attention level determined by ATTENTION
ASSIST (
Attention Level), displayed in a
bar display in five levels from high to low.
Rif ATTENTION ASSIST is unable to calculate
the attention level and cannot issue a warn-
ing, the System Suspended
message
appears. The bar display then changes what is
shown, e.g. if you are driving at a speed below
37 mph (60 km/h) or above 125 mph
(200 km/h) .
Activating ATTENTION ASSIST
XActivateATTENTION ASSIST usin gth eon -
boar dcomputer (Ypage 163).
The system determine sth eattention level of
th edriver depending on th esetting selected:
Selection of Standard
:th esensitivit ywit h
whic hth esystem determine sth eattention level
is set to normal.
Selection of Sensitive
:th esensitivit yis set
higher. The attention level detecte dby ATTEN-
TIO NASSIST is adapted accordingly and th e
driver is warned earlier .
When ATTENTION ASSIST is deactivated, th e
é symbol appear sin th emultifunction dis-
play in th eAssistance display.
When ATTENTION ASSIST has been deactivated,
it is automatically reactivated after th eengin e
has been stopped. The sensitivit yselected cor-
responds to th elast selection activated (Stand‐
ardor Sensitive).
Warn ing in the multifunction display
If fatigue or increasing lapse sin concentration
are detected, awarning appear sin th emulti-
function display: ATTENTION ASSIST
Take aBreak!.
In addition to th emessage shown in th emulti-
function display, you will then hear awarning
tone .
XIf necessary, tak e abreak.
XConfir mthemessage by pressing th ea
butto non th esteering wheel.
On lon gjourneys, tak eregular breaks in goo d
time to allow yourself to rest. If you do no ttak e
a break and ATTENTION ASSIST still detects
increasing lapse sin concentration ,you will be
warned again after 15 minute sat th eearliest .
Driving systems149
Driving and parking
Z
Page 154 of 294
Lane Keeping Assist
General notes
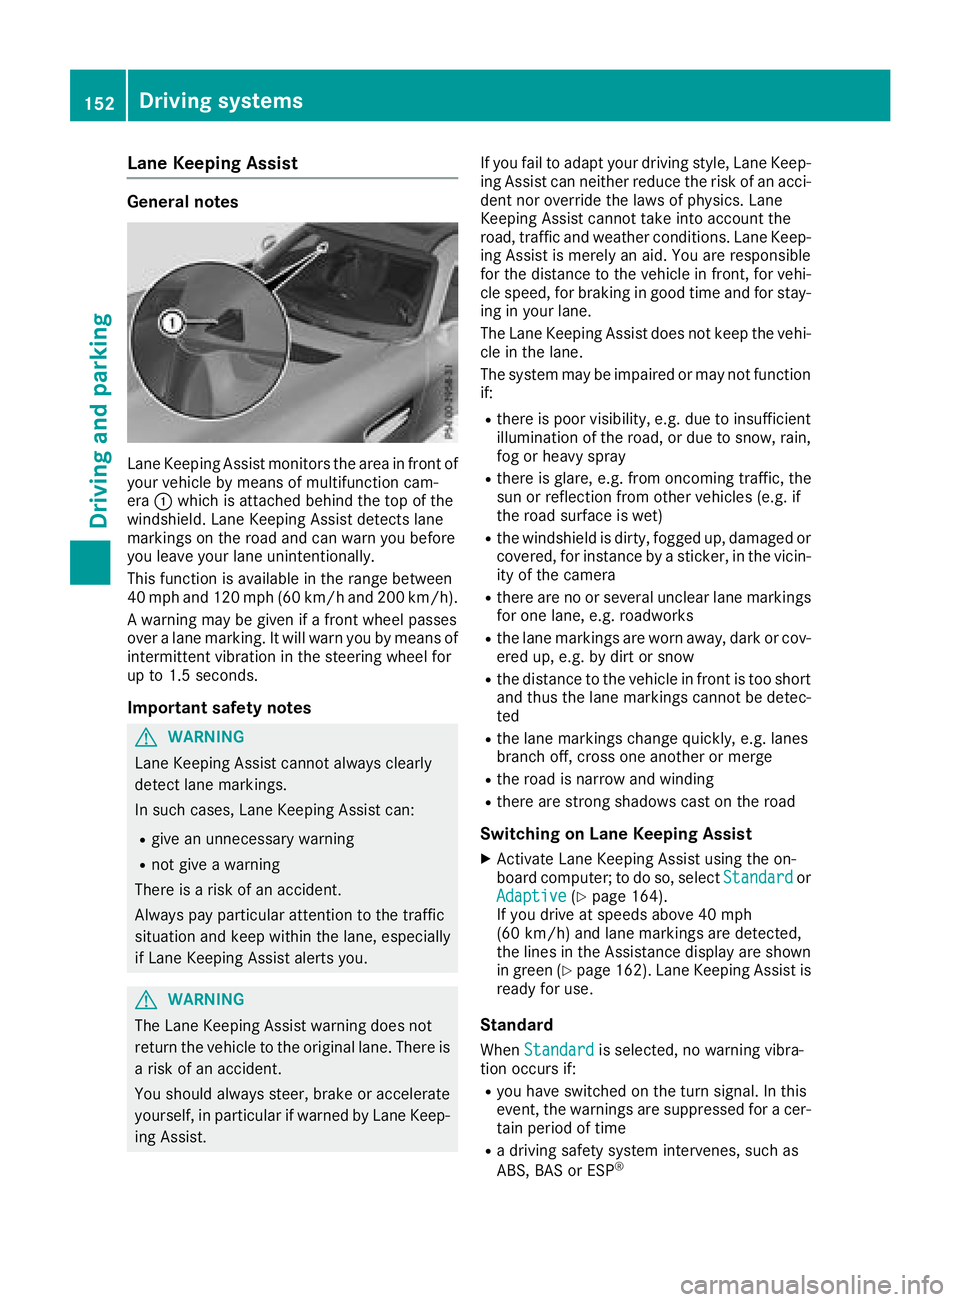
Lane Keeping Assist monitors the area in front of
your vehicle by means of multifunction cam-
era:which is attached behind the top of the
windshield. Lane Keeping Assist detects lane
markings on the road and can warn you before
you leave your lane unintentionally.
This function is available in the range between
40 mph and 120 mph (60 km/hand 200 km/h).
A warning may be given if a front wheel passes
over a lane marking. It will warn you by means of
intermittent vibration in the steering wheel for
up to 1.5 seconds.
Important safety notes
GWARNING
Lane Keeping Assist cannot always clearly
detect lane markings.
In such cases, Lane Keeping Assist can:
Rgive an unnecessary warning
Rnot give a warning
There is a risk of an accident.
Always pay particular attention to the traffic
situation and keep within the lane, especially
if Lane Keeping Assist alerts you.
GWARNING
The Lane Keeping Assist warning does not
return the vehicle to the original lane. There is
a risk of an accident.
You should always steer, brake or accelerate
yourself, in particular if warned by Lane Keep-
ing Assist. If you fail to adapt your driving style, Lane Keep-
ing Assist can neither reduce the risk of an acci-
dent nor override the laws of physics. Lane
Keeping Assist cannot take into account the
road, traffic and weather conditions. Lane Keep-
ing Assist is merely an aid. You are responsible
for the distance to the vehicle in front, for vehi-
cle speed, for braking in good time and for stay-
ing in your lane.
The Lane Keeping Assist does not keep the vehi-
cle in the lane.
The system may be impaired or may not function
if:
Rthere is poor visibility, e.g. due to insufficient
illumination of the road, or due to snow, rain,
fog or heavy spray
Rthere is glare, e.g. from oncoming traffic, the
sun or reflection from other vehicles (e.g. if
the road surface is wet)
Rthe windshield is dirty, fogged up, damaged or
covered, for instance by a sticker, in the vicin-
ity of the camera
Rthere are no or several unclear lane markings
for one lane, e.g. roadworks
Rthe lane markings are worn away, dark or cov-
ered up, e.g. by dirt or snow
Rthe distance to the vehicle in front is too short
and thus the lane markings cannot be detec-
ted
Rthe lane markings change quickly, e.g. lanes
branch off, cross one another or merge
Rthe road is narrow and winding
Rthere are strong shadows cast on the road
Switching on Lane Keeping Assist
XActivate Lane Keeping Assist using the on-
board computer; to do so, select Standardor
Adaptive(Ypage 164).
If you drive at speeds above 40 mph
(60 km/h) and lane markings are detected,
the lines in the Assistance display are shown
in green (
Ypage 162). Lane Keeping Assist is
ready for use.
Standard
When Standardis selected, no warning vibra-
tion occurs if:
Ryou have switched on the turn signal. In this
event, the warnings are suppressed for a cer-
tain period of time
Ra driving safety system intervenes, such as
ABS, BAS or ESP®
152Driving systems
Driving an d parking
Page 157 of 294
!If the coolant temperature is too high, a dis-
play message is shown.
If the coolant temperature display is in the
area marked in red, do not continue driving.
Otherwise, the engine will be damaged.
The coolant temperature display is in the lower
section of the tachometer (
Ypage 34).
Under normal operating conditions and with the
specified coolant level, the coolant temperature
display may rise to the red marking.
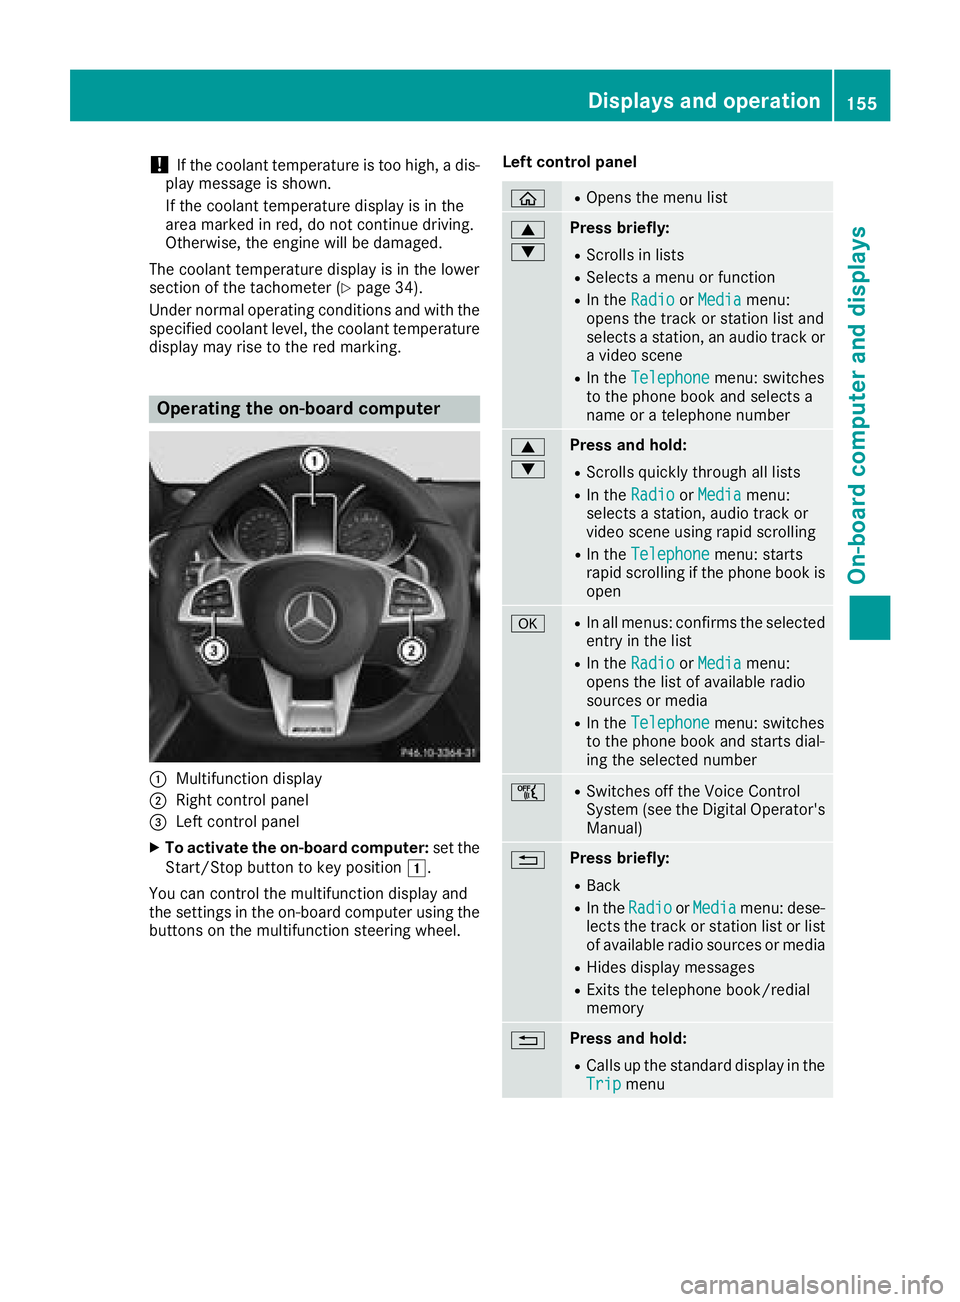
Operating the on-board computer
:Multifunction display
;Right control panel
=Left control panel
XTo activate the on-board computer: set the
Start/Stop button to key position 1.
You can control the multifunction display and
the settings in the on-board computer using the
buttons on the multifunction steering wheel. Left control panel
òROpens the menu list
9
:Press briefly:
RScrolls in lists
RSelects a menu or function
RIn the
RadioorMediamenu:
opens the track or station list and
selects a station, an audio track or
a video scene
RIn the Telephonemenu: switches
to the phone book and selects a
name or a telephone number
9
:Press and hold:
RScrolls quickly through all lists
RIn the RadioorMediamenu:
selects a station, audio track or
video scene using rapid scrolling
RIn the Telephonemenu: starts
rapid scrolling if the phone book is
open
aRIn all menus: confirms the selected
entry in the list
RIn the RadioorMediamenu:
opens the list of available radio
sources or media
RIn the Telephonemenu: switches
to the phone book and starts dial-
ing the selected number
ñRSwitches off the Voice Control
System (see the Digital Operator's Manual)
%Press briefly:
RBack
RIn the RadioorMediamenu: dese-
lects the track or station list or list
of available radio sources or media
RHides display messages
RExits the telephone book/redial
memory
%Press and hold:
RCalls up the standard display in the
Tripmenu
Displays and operation155
On-board computer and displays
Z