2018 MERCEDES-BENZ AMG GT COUPE light
[x] Cancel search: lightPage 147 of 174

Once the copying procedure is complete, you
will hear the first track of the copied album.
You can now copy more files to the Media
Register.
XTo cancel copying:selectCancel.
Files are stored in the Media Register up until the point of cancellation.
iIt is possible to change to a different func-
tion (e.g. radio) during the copying procedure.
The copying procedure continues in the back-
ground. While the copying procedure is taking
place, this is shown by a symbol in the status bar.
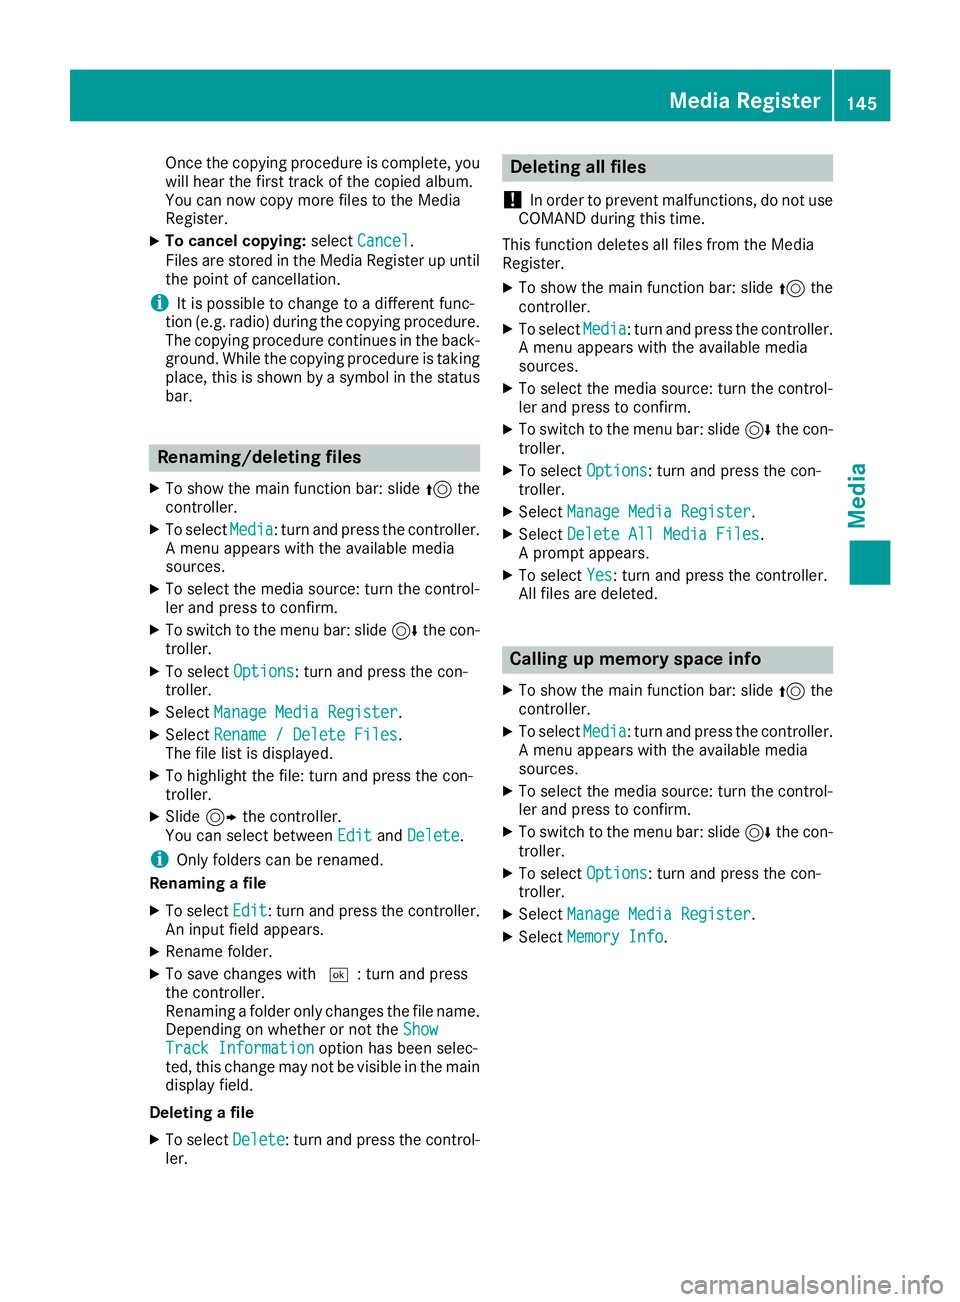
Renaming/deleting files
XTo show the main function bar: slide 5the
controller.
XTo select Media: turn and press the controller.
A menu appears with the available media
sources.
XTo select the media source: turn the control-
ler and press to confirm.
XTo switch to the menu bar: slide 6the con-
troller.
XTo select Options: turn and press the con-
troller.
XSelect Manage Media Register.
XSelectRename / Delete Files.
The file list is displayed.
XTo highlight the file: turn and press the con-
troller.
XSlide 9the controller.
You can select between EditandDelete.
iOnly folders can be renamed.
Renaming a file
XTo select Edit: turn and press the controller.
An input field appears.
XRename folder.
XTo save changes with ¬: turn and press
the controller.
Renaming a folder only changes the file name.
Depending on whether or not the Show
Track Informationoption has been selec-
ted, this change may not be visible in the main
display field.
Deleting a file
XTo select Delete: turn and press the control-
ler.
Deleting all files
!
In order to prevent malfunctions, do not use
COMAND during this time.
This function deletes all files from the Media
Register.
XTo show the main function bar: slide 5the
controller.
XTo select Media: turn and press the controller.
A menu appears with the available media
sources.
XTo select the media source: turn the control-
ler and press to confirm.
XTo switch to the menu bar: slide 6the con-
troller.
XTo select Options: turn and press the con-
troller.
XSelect Manage Media Register.
XSelectDelete All Media Files.
A prompt appears.
XTo select Yes: turn and press the controller.
All files are deleted.
Calling up memory space info
XTo show the main function bar: slide 5the
controller.
XTo select Media: turn and press the controller.
A menu appears with the available media
sources.
XTo select the media source: turn the control-
ler and press to confirm.
XTo switch to the menu bar: slide 6the con-
troller.
XTo select Options: turn and press the con-
troller.
XSelect Manage Media Register.
XSelectMemory Info.
Media Register145
Media
Z
Page 156 of 174

Switching on video DVD mode
XInsert and eject a disc from the single DVD
drive (Ypage 139)
Further options for switching on:
RUsing the main function bar (Ypage 136)
RUsing the device list (Ypage 136)
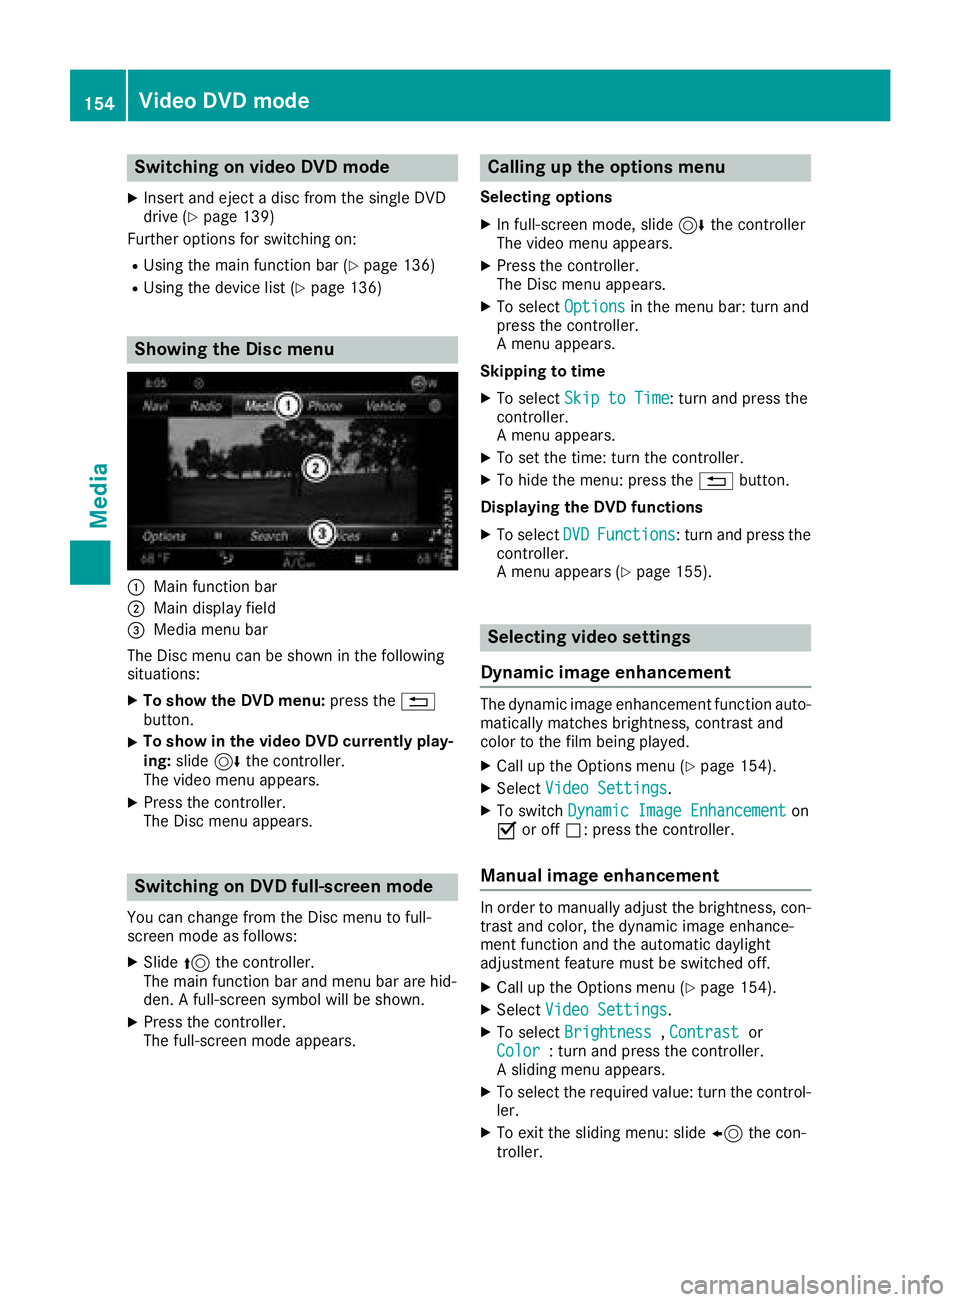
Showing the Disc menu
:Main function bar
;Main display field
=Media menu bar
The Disc menu can be shown in the following
situations:
XTo show the DVD menu: press the%
button.
XTo show in the video DVD currently play-
ing: slide 6the controller.
The video menu appears.
XPress the controller.
The Disc menu appears.
Switching on DVD full-screen mode
You can change from the Disc menu to full-
screen mode as follows:
XSlide 5the controller.
The main function bar and menu bar are hid-
den. A full-screen symbol will be shown.
XPress the controller.
The full-screen mode appears.
Calling up the options menu
Selecting options
XIn full-screen mode, slide 6the controller
The video menu appears.
XPress the controller.
The Disc menu appears.
XTo select Optionsin the menu bar: turn and
press the controller.
A menu appears.
Skipping to time
XTo select Skip to Time: turn and press the
controller.
A menu appears.
XTo set the time: turn the controller.
XTo hide the menu: press the %button.
Displaying the DVD functions
XTo select DVDFunctions: turn and press the
controller.
A menu appears (
Ypage 155).
Selecting video settings
Dynamic image enhancement
The dynamic image enhancement function auto-
matically matches brightness, contrast and
color to the film being played.
XCall up the Options menu (Ypage 154).
XSelect Video Settings.
XTo switch Dynamic Image Enhancementon
O or off ª: press the controller.
Manual image enhancement
In order to manually adjust the brightness, con-
trast and color, the dynamic image enhance-
ment function and the automatic daylight
adjustment feature must be switched off.
XCall up the Options menu (Ypage 154).
XSelect Video Settings.
XTo select Brightness,Contrastor
Color: turn and press the controller.
A sliding menu appears.
XTo select the required value: turn the control-
ler.
XTo exit the sliding menu: slide 8the con-
troller.
154Video DVD mode
Media
Page 158 of 174

FStops playback
GPauses playback
Using the DVD functions
XIn full-screen mode, press the controller
The DVD functions menu is shown.
It is possible to navigate in the DVD's control
menu when the arrows in the upper menu bar
are activated.
XTo select theXZ¬Yarrow to navigate in the
menu: turn the controller.
The active arrow is highlighted.
XTo select a menu entry: press the controller.
The next menu entry in the direction of the
arrow is highlighted.
XTo call up a highlighted menu entry: turn the
controller until ¬is highlighted.
XPress the controller.
The selected DVD scene is played.
XTo hide DVD functions: select &using the
controller.
XPress the controller.
The DVD functions menu is hidden.
Continuing/stopping playback
Interrupting playback
XShow the DVD functions (Ypage 155).
XTo select Éfrom the DVD functions menu:
turn and press the controller.
The Ë display changes to Ì. Playback
is stopped.
Continuing playback
XSelect Ì.
Playback continues from the point where it
was interrupted.
Stopping playback
XWhile playback is interrupted select É
again.
Restarting playback
XSelect Ì.
Playback restarts from the beginning.
Pausing/continuing playback
Pausing playback
XShow the DVD functions (Ypage 155).
XSelect Ë: turn and press the controller.
The Ë display changes to Ì.
Continuing playback
XSelect Ì.
Selecting a scene/chapter
If the film is divided into scenes and chapters,
you can select these directly while the film is
running or you can skip progressively through
them. This is not possible at certain points for
some DVDs (e.g. during the opening credits).
It may also be possible to select the scene and
chapter from the functions stored on the DVD.
XTo skip forward or back: in the video menu,
turn the controller.
The next or previous scene in the film is skip-
ped to.
iThe DVD functions can also be used to make
selections (Ypage 155).
Picture viewer
General notes
If there are pictures on the active data medium,
you can view them on the multimedia system.
The following data media and picture formats
are supported:
RData media: Media Register, CD, DVD, USB
devices, SD cards
RPicture formats: jpeg, jpg, bmp, png
The maximum image resolution is
20 megapixels.
It is not possible to view a picture from the driv-
er's side while the vehicle is in motion.
Displaying pictures
XIn media mode, slide 6the controller.
XTo select Search: turn and press the control-
ler.
The category list appears.
156Picture viewer
Media
Page 166 of 174

Option 1: selecting the area in the infor-
mation chart
XTo selectTownin the information chart: turn
and press the controller.
XTo select the current vehicle position:
select Current Position
from the menu.
The weather data for the current vehicle posi-
tion is received from the nearest weather sta-
tion and automatically displayed.
Requirement for "Near destination": a route to a
destination has been calculated (
Ypage 54).
The menu item is otherwise grayed out.
XTo select the vicinity of the destination:
select Near Destination
from the menu:
turn the controller and press to confirm.
XTo select a winter sports area: selectAt
Ski Areafrom the menu: turn the controller
and press to confirm.
XSelect a state, e.g. Colorado.
XSelect a winter sports area from the menu.
The weather data and other information is
displayed for the winter sports area that has
been selected. The data is supplied by the
nearest weather station.
The information chart shows the following infor-
mation (if available):
Rski slopes/ski lifts
Rsnowboarding and nighttime opening
Rsnow conditions (e.g. snow depth)
Rtemperature
The status of a facility is indicated as follows:
Rgreen check mark - open
Rred cross - closed
Rquestion mark - not known
Example: city list with character bar
Entry limitation: searching for a location using
the character bar is not possible while driving.
XTo search for a location: selectSearch
Areas: turn and press the controller.
XSelect Other StatesorCurrent State(ABC).
Depending on the selection, the list of states
or cities will appear with the character bar.
You can limit the search using the character
bar.
XTo select state/province or city: enter the
first few letters by turning and pressing the
controller.
XTo switch to the list without the character bar:
slide 5the controller or select ¬.
XTo cancel an entry: highlightin the
character bar and press the controller.
Pressing briefly deletes the last letter
entered.
Pressing and holding longer deletes the entire
entry.
XTo select the state/province or city from the
list: turn and press the controller.
After selecting a state (or province) the list of
locations appears.
After selecting a location, the information
chart displays the weather forecast for the
164Weather forecasts
SIRIUS Weather
Page 167 of 174

selected location. The data is supplied by the
nearest weather station.
Option 2: selecting the area in the
weather map
XCall up the weather map (Ypage 165).
XMove the weather map so that the crosshair is
over the desired area (Ypage 165).
XPress the controller.
The information chart shows the weather
forecast for the selected area. The data is
supplied by the nearest weather station.
Memory functions
Storing the area in the weather memory
You can save locations that are called up fre-
quently in ten preset positions (0, 1-9) in the
weather memory.
XIn the weather memory: select the area for
the weather forecast (Ypage 163).
The selected location appears at the top in the status bar.
XTo select Townin the information chart: turn
and press the controller.
XSelect Presets.
XSelect a preset using the controller.
XPress and hold the controller until you hear a
tone.
The area is entered on the selected preset.
Selecting an area from the weather
memory
XDirectly from the weather memory: select
Town
from the information chart: turn and
press the controller.
XSelect Presets.
XSelect the memory position which contains
the location you require.
The weather data for the selected area is dis-
played.
Weather map
Calling up the weather map
XTo select Mapin the information chart: turn
and press the controller.
The weather map is shown on a 500-mi (500-
km) scale. The crosshair highlights the
weather station that supplies the current
weather data.
Moving the weather map
XSlide 4 or1 the controller.
The weather map moves in the corresponding
direction under the crosshair.
Changing the scale
XTurn the controller.
The scale bar appears.
XTurn until the desired scale is set.
Showing/hiding the menu in the
weather map
XTo show: press the controller.
XTo hide:slide5the controller.
Selecting a weather station in the map
XMove the weather map and crosshair to the
desired position (Ypage 165).
XTo show the menu: press the controller.
XTo select Weather Table: press the control-
ler.
The weather data for the selected position is
received from the nearest weather station
and automatically displayed as a current-day
forecast.
Weather forecasts165
SIRIUS Weather
Page 170 of 174

Region of origincategory
Atlantic, North
and South Pacific
OceansName of tropical storm
(Hurricane Category
3)
Displays hurricane cate-
gories 1 through 5
Northwestern
Pacific OceanName of tropical storm
(Tropical Low
Press. Sys.)
Northwestern
Pacific OceanName of tropical storm
(Tropical Cyclone)
Northwestern
Pacific OceanName of tropical storm
(Typhoon)
Northwestern
Pacific OceanName of tropical storm
(Super-Typhoon)
If you have selected a map scale of 50 mi
(50 km) or smaller you will also see the time
stamp for the current weather data.
The weather map shows wind directions and
wind speeds.
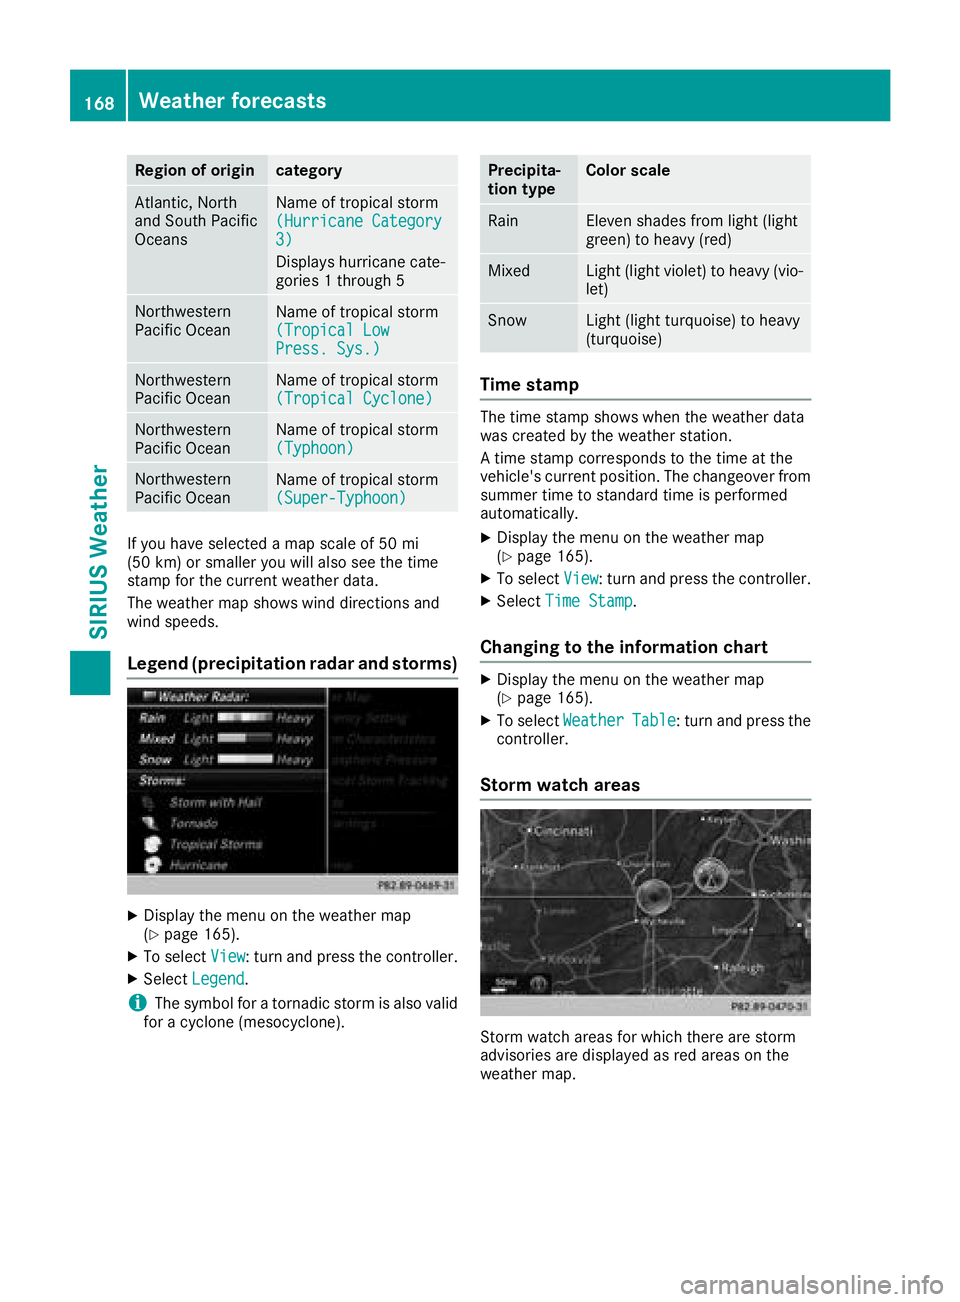
Legend (precipitation radar and storms)
XDisplay the menu on the weather map
(Ypage 165).
XTo selectView: turn and press the controller.
XSelectLegend.
iThe symbol for a tornadic storm is also valid
for a cyclone (mesocyclone).
Precipita-
tion typeColor scale
RainEleven shades from light (light
green) to heavy (red)
MixedLight (light violet) to heavy (vio-
let)
SnowLight (light turquoise) to heavy
(turquoise)
Time stamp
The time stamp shows when the weather data
was created by the weather station.
A time stamp corresponds to the time at the
vehicle's current position. The changeover from
summer time to standard time is performed
automatically.
XDisplay the menu on the weather map
(Ypage 165).
XTo select View: turn and press the controller.
XSelectTime Stamp.
Changing to the information chart
XDisplay the menu on the weather map
(Ypage 165).
XTo select WeatherTable: turn and press the
controller.
Storm watch areas
Storm watch areas for which there are storm
advisories are displayed as red areas on the
weather map.
168Weather forecasts
SIRIUS Weather
Page 171 of 174

Activating/deactivating the display of areas in
red:
XDisplay the menu on the weather map
(Ypage 165).
XTo selectView: turn and press the controller.
The list of display levels appears.
XSelect Storm Watch.
XSelectShow Symbols for Storm AreasOn Map.
Depending on the previous setting, activate
O or deactivate ªthe display of areas in
red.
Activating/deactivating the automatic display
of warning popups:
XSelect Display Storm Watch Automati‐cally.
Depending on the previous setting, activate
O or deactivate ªthe automatic display of
warning popups.
Setting the radius for the popups:
XSelect 5 Miles(5 km), 50 Miles(50 km) or
200 Miles( 200 km).
Storm overview
Displaying the Storm Guide:
XDisplay the menu on the weather map
(Ypage 165).
XTo select Guide: turn and press the controller.
A menu appears. The current storm is high-
lighted. There is information about the storm
in the status bar.
XTo select Next: turn and press the controller.
The next storm is marked.
XSelect Previous.
The previous storm is highlighted. Showing storm details:
XSelect
Details.
You see detailed information about the selec-
ted storm.
Showing detailed information (if available):
Rname of the tropical storm and category
Rtime stamp
Rdirectional movement speed and path
Propagation speed: the speed at which the
storm cell of a tropical cyclone is advanc-
ing.
Rmaximum wind speed
Weather forecasts169
SIRIUS Weather