2018 MERCEDES-BENZ AMG GT COUPE ECO mode
[x] Cancel search: ECO modePage 68 of 174

The example shows a personal POI.
XInsert the SD memory card (Ypage 139).
XTo switch to navigation mode:slide5the
controller.
XTo select Navi: turn and press the controller.
The map displays the current vehicle position
or the navigation menu appears.
XIf the navigation menu appears, press the
controller.
The map shows the vehicle's current position.
XTo show the menu: slide6the controller.
XTo select Destination: turn and press the
controller.
XSelect From Memory Card.
The menu displays the categories available on
the SD card.
XTo select a category or Personal Routes,
turn and press the controller.
The available personal POIs or route entries
are displayed.
XSelect personal POI or personal route.
The address of the personal POI appears or
the personal route is displayed in the map.
If a large number of entries are stored, a register
for quick selection appears. Personal POIs and
routes can be saved and sorted with different
character sets (e.g. Latin, Cyrillic, Arabic).
XTo select a register: slide9 the control-
ler.
XTo select a character: turn and press the con-
troller.
XTo select a character set for sorting: slide
9 the controller to select B.
XPress the controller.
The available character sets are displayed.
The#dot indicates the current setting.
XTurn and press the controller.
Editing
The example shows a personal route.
XSelect personal POI or personal route
(Ypage 65).
XTo explore a personal POI or personal
route: turn and press the controller to select
Map
.
The map with the crosshair appears and
shows the destination.
XScroll the map (Ypage 49).
XSet the map scale (Ypage 79).
XTo switch to the menu: press the %button.
XTo call the personal POI: turn and press the
controller to select Call
.
If a mobile phone is connected to the multi-
media system and the telephone number is
available, the call is connected (
Ypage 96).
XTo save a personal POI: turn and press the
controller to select Save
.
XContinue saving (Ypage 77).
XTo edit the name and symbol: turn and
press the controller to select Edit
.
XSelectChange NameorEdit Icon.
XCharacter entry (Ypage 28).
XSelect a symbol.
XTo delete a personal POI or route: turn and
press the controller to select Delete
.
A prompt will appear.
XSelect YesorNo.
If you select Yes, the personal destination or
personal route is deleted.
XTo select the outward and return route:
select Swap
by turning and pressing the con-
troller.
The starting and destination positions of your
personal route, and thus the direction for
route guidance, are switched round. One-way
streets or restricted intersections are taken
into consideration. Therefore, the outward
and return routes may differ from each other.
XTo start route guidance: turn and press the
controller to select Start
.
Recording the route
General notes
Routes are recorded using the SD card.
Requirements: the SD card has the FAT data
system format (e.g. FAT32).
66Personal POIs and routes
Navigation
Page 69 of 174

When recording the route, bear in mind the fol-
lowing:
RIf the SD card is inserted, it must not be
removed during recording.
RIf route recording is started manually, it must
be finished manually before the multimedia
system is switched off (e. g. when the engine
is switched off).
RThe multimedia system minimizes the num-
ber of route points recorded. Therefore when
the recorded route is subsequently com-
menced, it may differ from the route that was
originally recorded.
Starting/finishing route recording
XInsert the SD memory card (Ypage 139).
XTo switch to navigation mode:slide5the
controller.
XTo select Navi: turn and press the controller.
The map displays the current vehicle position
or the navigation menu appears.
XIf the navigation menu appears, press the
controller.
The map shows the vehicle's current position.
XTo show the menu: slide6the controller.
XTo select Destination: turn and press the
controller.
XSelect From Memory Card.
XSelectStart Route Recording.
The route is recorded and REC appears at the
bottom edge of the screen.
XTo stop recording, select End RouteRecordingfrom the menu.
The route is stored under Personal Routes.
Displaying/editing the recorded route
XInsert the SD memory card (Ypage 139).
XTo switch to navigation mode: slide5the
controller.
XTo select Navi: turn and press the controller.
The map displays the current vehicle position
or the navigation menu appears.
XIf the navigation menu appears, press the
controller.
The map shows the vehicle's current position.
XTo show the menu: slide6the controller.
XTo select Destination: turn and press the
controller.
XSelect From Memory Card.
XSelectPersonal Routes.
Previously recorded routes are displayed.
XTo select a route, turn and press the control-
ler.
The map appears with a menu. The recorded
route is shown on the map in blue.
XTo calculate a route: selectStart.
XTo change the name and symbol: select
Edit
.
XSelect Change NameorEdit Icon.
XCharacter entry (Ypage 28).
XSelect a symbol.
Route guidance
General notes
The multimedia system calculates the route to
the destination without taking the following into
account, for example:
Rtraffic lights
Rstop and yield signs
Rparking or stopping restrictions
Rroad narrowing
Rtemporary traffic rules and regulations
The navigation system can give differing driving
recommendations if the actual street/traffic sit-
uation does not correspond with the digital
map's data. For example, if the road layout or
the direction of a one-way street has been
changed.
For this reason, you must always observe road
and traffic rules and regulations during your
journey. Road and traffic rules and regulations
always have priority over system driving recom-
mendations.
Route guidance begins once a route has been
calculated (
Ypage 54).
The multimedia system guides you to your des-
tination by means of navigation announcements
in the form of audible navigation announce-
ments and route guidance displays.
The route guidance displays can be seen if nav-
igation mode is switched on.
If you do not follow the navigation announce-
ments or if you leave the calculated route, the
multimedia system automatically calculates a
new route to the destination.
Route guidance67
Navigation
Z
Page 71 of 174

Lane recommendations
Display on multi-lane roads
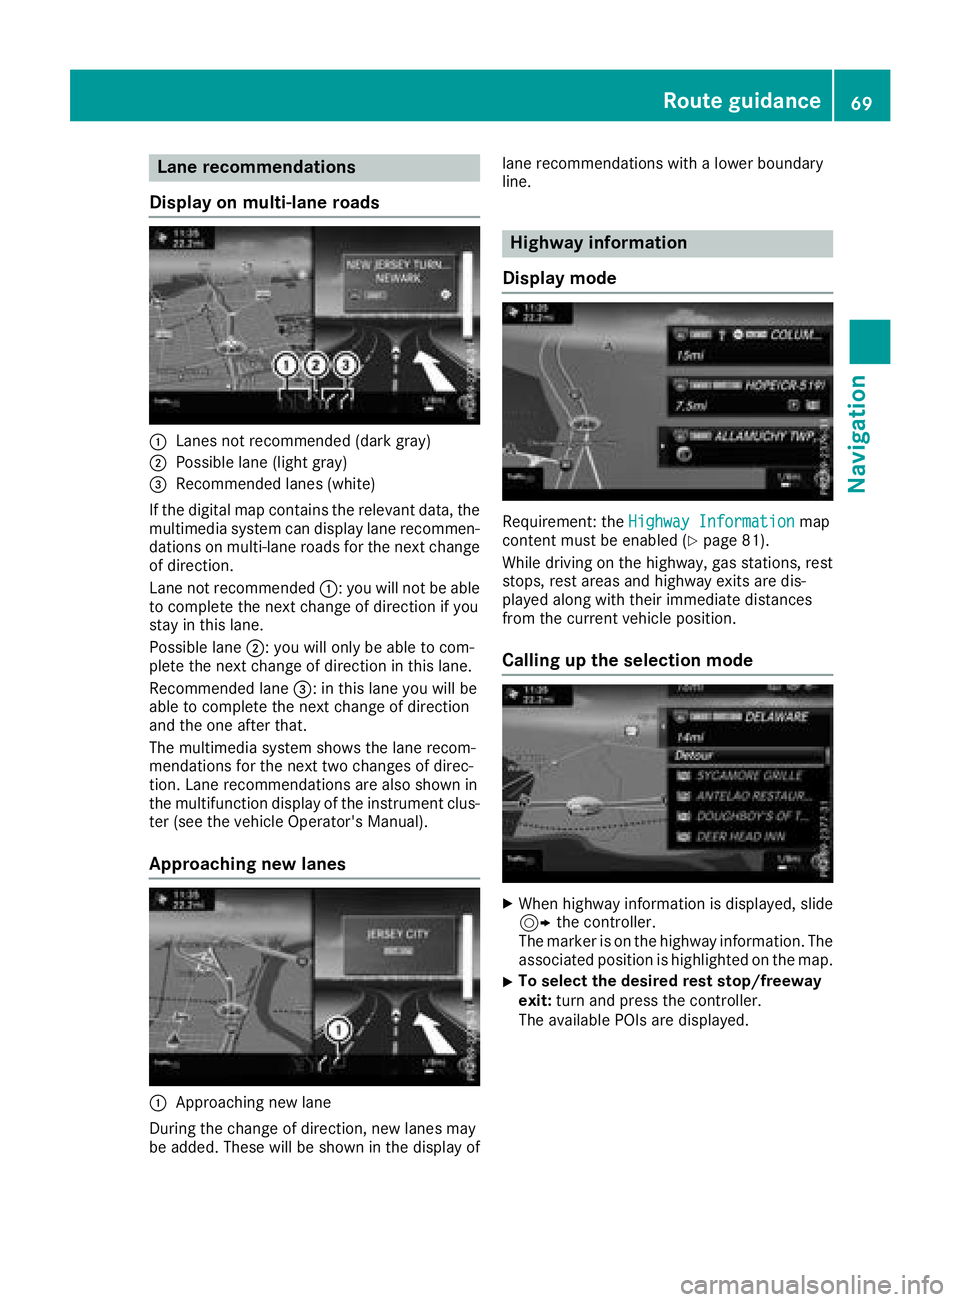
:Lanes not recommended (dark gray)
;Possible lane (light gray)
=Recommended lanes (white)
If the digital map contains the relevant data, the
multimedia system can display lane recommen-
dations on multi-lane roads for the next change
of direction.
Lane not recommended :: you will not be able
to complete the next change of direction if you
stay in this lane.
Possible lane ;: you will only be able to com-
plete the next change of direction in this lane.
Recommended lane =: in this lane you will be
able to complete the next change of direction
and the one after that.
The multimedia system shows the lane recom-
mendations for the next two changes of direc-
tion. Lane recommendations are also shown in
the multifunction display of the instrument clus-
ter (see the vehicle Operator's Manual).
Approaching new lanes
:Approaching new lane
During the change of direction, new lanes may
be added. These will be shown in the display of lane recommendations with a lower boundary
line.
Highway information
Display mode
Requirement: the Highway Informationmap
content must be enabled (Ypage 81).
While driving on the highway, gas stations, rest
stops, rest areas and highway exits are dis-
played along with their immediate distances
from the current vehicle position.
Calling up the selection mode
XWhen highway information is displayed, slide 9 the controller.
The marker is on the highway information. The
associated position is highlighted on the map.
XTo select the desired rest stop/freeway
exit: turn and press the controller.
The available POIs are displayed.
Route guidance69
Navigation
Z
Page 72 of 174

Starting route guidance to a POI
XTo select a POI:turn the controller and press
to confirm.
The POI details are displayed.
You can perform the following functions:
RStore in the address book (Ypage 77)
RView on the map (Ypage 82)
RCalled if a phone is connected and a phone
number is available (Ypage 96)
RSelect for route guidance and calculate a
route to it (Ypage 54)
Using the traffic jam function
Highway information enables the use of the traf-
fic jam function. The remaining route on the
highway in this case is blocked in the direction of
travel from the selected exit.
XTo select Detour: turn and press the control-
ler.
The traffic jam function appears
(
Ypage 73).
Destination reached
Once the destination is reached, you will see the
checkered flag. Route guidance is finished.
Navigation announcements
Repeating navigation announcements
If you missed the current navigation announce-
ment, you can call it up again.
XTo switch to navigation mode: slide5the
controller.
XTo select Navi: turn and press the controller.
The map displays the current vehicle position
or the navigation menu appears.
XIf the navigation menu appears, press the
controller.
The map shows the vehicle's current position.
XTo show the menu: slide6the controller.
XTo select +: turn and press the controller.
The navigation announcement is repeated.
iIf the Repeat Spoken Driving Recom‐mendationsfunction has previously been
added as a favorite, you can alternatively
select the function using the favorites button
(
Ypage 31).
Setting the volume manually
XDuring a navigation announcement, turn
Ä the control knob.
iWhen you start the engine, the volume is set
to the lowest setting.
70Route guidance
Navigation
Page 74 of 174

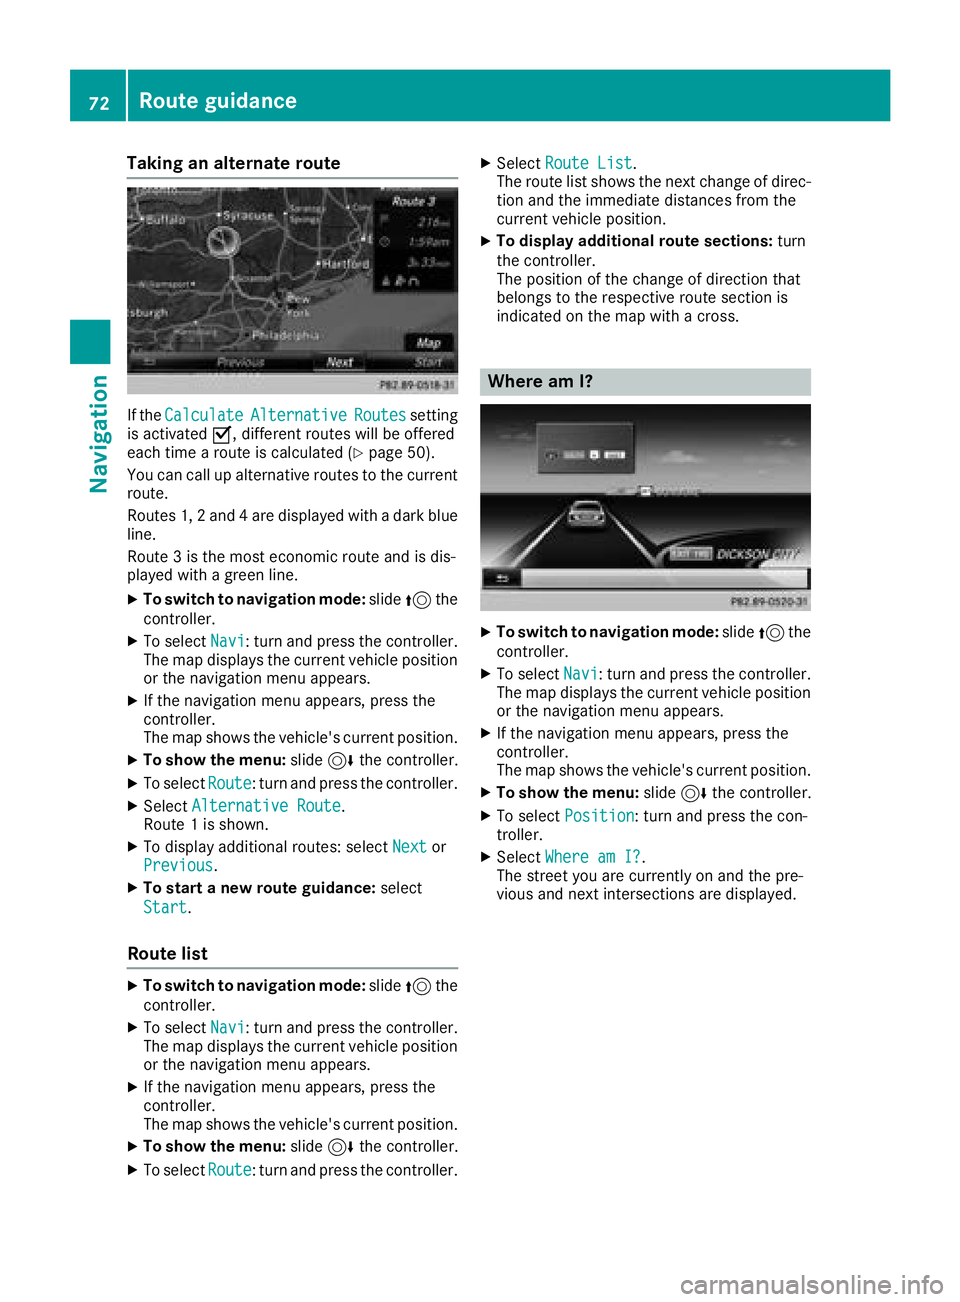
Taking an alternate route
If theCalculateAlternativeRoutessetting
is activated O, different routes will be offered
each time a route is calculated (
Ypage 50).
You can call up alternative routes to the current
route.
Routes 1, 2 and 4 are displayed with a dark blue line.
Route 3 is the most economic route and is dis-
played with a green line.
XTo switch to navigation mode: slide5the
controller.
XTo select Navi: turn and press the controller.
The map displays the current vehicle position
or the navigation menu appears.
XIf the navigation menu appears, press the
controller.
The map shows the vehicle's current position.
XTo show the menu: slide6the controller.
XTo select Route: turn and press the controller.
XSelectAlternative Route.
Route 1 is shown.
XTo display additional routes: select Nextor
Previous.
XTo start a new route guidance: select
Start
.
Route list
XTo switch to navigation mode: slide5the
controller.
XTo select Navi: turn and press the controller.
The map displays the current vehicle position
or the navigation menu appears.
XIf the navigation menu appears, press the
controller.
The map shows the vehicle's current position.
XTo show the menu: slide6the controller.
XTo select Route: turn and press the controller.
XSelectRoute List.
The route list shows the next change of direc-
tion and the immediate distances from the
current vehicle position.
XTo display additional route sections: turn
the controller.
The position of the change of direction that
belongs to the respective route section is
indicated on the map with a cross.
Where am I?
XTo switch to navigation mode: slide5the
controller.
XTo select Navi: turn and press the controller.
The map displays the current vehicle position
or the navigation menu appears.
XIf the navigation menu appears, press the
controller.
The map shows the vehicle's current position.
XTo show the menu: slide6the controller.
XTo select Position: turn and press the con-
troller.
XSelect Where am I?.
The street you are currently on and the pre-
vious and next intersections are displayed.
72Route guidance
Navigation
Page 85 of 174

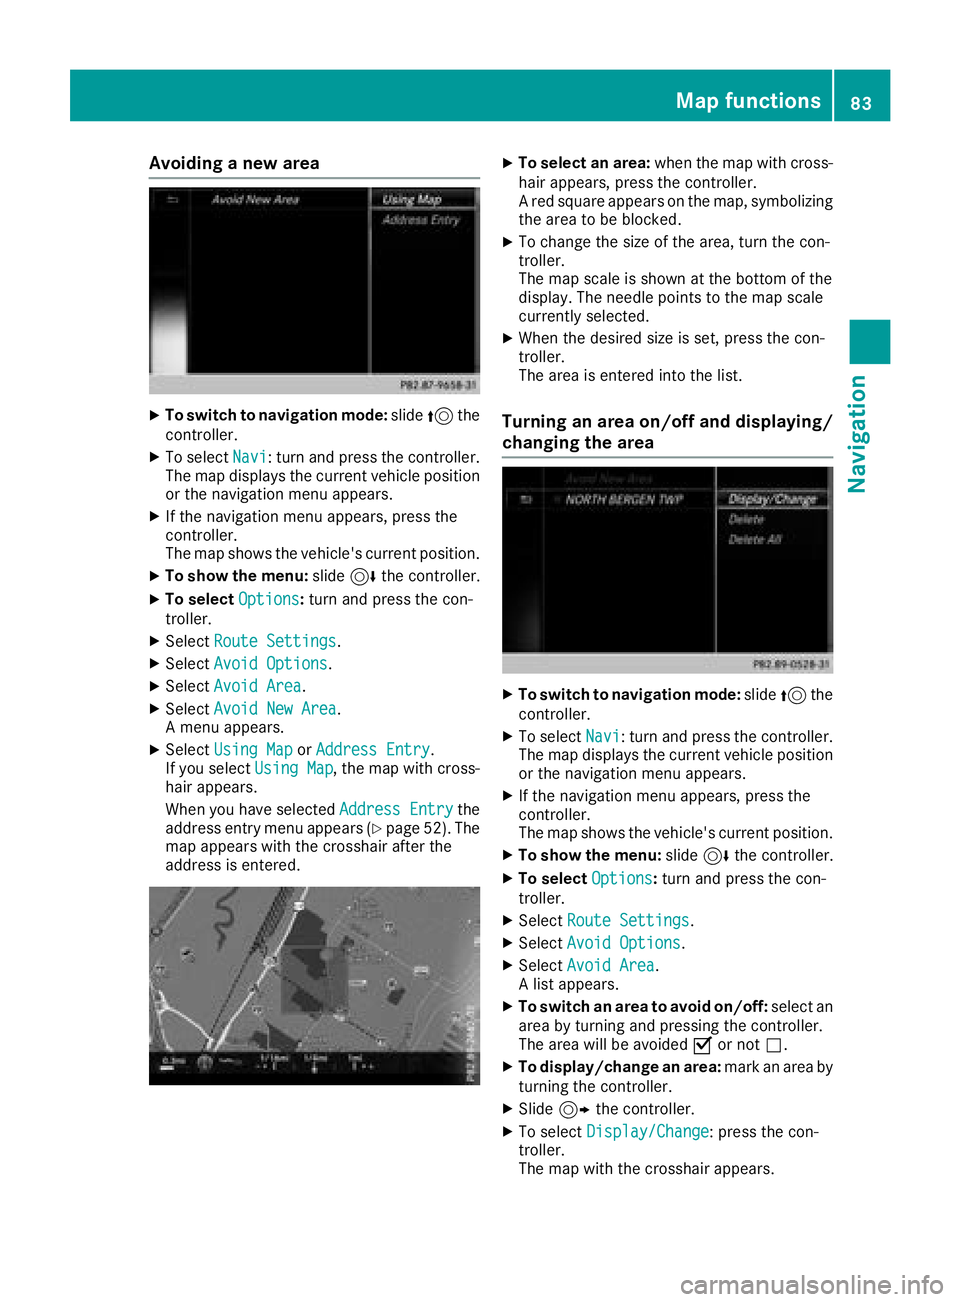
Avoiding a new area
XTo switch to navigation mode:slide5 the
controller .
XTo selectNavi:tur nand press th econtroller .
The map displays th ecurren tvehicl eposition
or th enavigation men uappears.
XIf th enavigation men uappears, press th e
controller .
The map shows th evehicle's curren tposition .
XTo showthemenu: slide6 thecontroller .
XTo select Options:tur nand press th econ-
troller .
XSelectRoute Settings.
XSelec tAvoid Option s.
XSelectAvoid Are a.
XSelectAvoid New Are a.
A men uappears.
XSelec tUsing Mapor Addres sEntry.
If you select Using Map,th emap wit hcross -
hair appears.
When you hav eselected AddressEntry
the
address entr ymen uappear s (Ypage 52) .The
map appear swit hth ecrosshair after th e
address is entered .
XTo select an area: when themap wit hcross -
hair appears, press th econtroller .
A red squar eappear son th emap, symbolizing
th earea to be blocked.
XTo chang eth esiz eof th earea, tur nth econ-
troller .
The map scale is shown at th ebotto mof th e
display. The needle points to th emap scale
currentl yselected.
XWhen th edesired siz eis set ,press th econ-
troller .
The area is entered int oth elist .
Turning an area on/off and displaying/
changing the area
XTo switch to navigation mode: slide5 the
controller .
XTo selectNavi:tur nand press th econtroller .
The map displays th ecurren tvehicl eposition
or th enavigation men uappears.
XIf th enavigation men uappears, press th e
controller .
The map shows th evehicle's curren tposition .
XTo showthemenu: slide6 thecontroller .
XTo select Options:tur nand press th econ-
troller .
XSelectRoute Settings.
XSelec tAvoid Option s.
XSelectAvoid Are a.
A list appears.
XTo switch an area to avoid on/off: select an
area by turnin gand pressing th econtroller .
The area will be avoided Oor no tª.
XTo display/chang ean area: markan area by
turnin gth econtroller .
XSlide9thecontroller .
XTo select Display/Change:press th econ-
troller .
The map wit hth ecrosshair appears.
Map functions83
Navigation
Z
Page 86 of 174

The area currently blocked is displayed as a
red square.
XTo move the area to a new location: slide
1,4,2the controller.
XTo change the size of the area: press the con-
troller.
XTurn the controller.
XTo accept changes: press the controller.
A message appears stating that the area has
been set.
Deleting one/all areas
XTo switch to navigation mode: slide5the
controller.
XTo select Navi: turn and press the controller.
The map displays the current vehicle position
or the navigation menu appears.
XIf the navigation menu appears, press the
controller.
The map shows the vehicle's current position.
XTo show the menu: slide6the controller.
XTo select Options:turn and press the con-
troller.
XSelect Route Settings.
XSelectAvoid Options.
XSelectAvoid Area.
A list appears.
XTo delete an area: mark an area by turning
the controller.
XSlide 9the controller.
XSelect DeleteorDelete All.
A prompt appears asking whether you wish to
delete the area.
XSelect YesorNo.
After selecting Yes, the area is deleted.
XTo delete all areas: when the list appears,
slide 9 the controller.
XSelect Delete All.
A prompt appears asking whether you wish to
delete all areas.
XSelect YesorNo.
After selecting Yes, all areas are deleted.
SIRIUS XM service
Displaying SIRIUS XM service informa-
tion
You can display the SIRIUS XM service informa-
tion.
XTo switch to navigation mode: slide5the
controller.
XTo select Navi: turn and press the controller.
The map displays the current vehicle position
or the navigation menu appears.
XIf the navigation menu appears, press the
controller.
The map shows the vehicle's current position.
XTo show the menu: slide6the controller.
XTo select Traffic: turn and press the con-
troller.
XSelect SIRIUS Service.
The provider's phone number (SIRIUS XM)
and the serial number of your service module
are displayed.
iAlternatively you can call up this function
using the touchpad (Ypage 22).
Registering for the SIRIUS XM traffic
report service
XCall the provider telephone number shown on
the multimedia system display.
iYou can also have the satellite service acti-
vated online. To do so, visit the SIRIUS XM
Radio website at http://www.sirius.com
(USA).
XThe connection is established: follow the
service employee's instructions.
The activation process may take up to ten
minutes.
iIf registration is not included when purchas-
ing the system, your credit card details will be
required to activate your account.
Updating the digital map
Introduction
The digital maps generated by the map software
become outdated in the same way as conven-
tional road maps. Optimal route guidance can
only be provided by the navigation system in
84Map functions
Navigation
Page 87 of 174

conjunction with the most up-to-date map soft-
ware.
Information about new versions of the digital
map can be obtained from an authorized
Mercedes-Benz Center. You can have the digital
map updated there using a data medium, or you
can update it yourself.
Carrying out a manual update
You can carry out the update yourself.
The update process may take some time (up to
45 minutes), depending on the size of the digital
map. The update will be completed more quickly
if the vehicle is stationary. If you begin the
update while the vehicle is stationary and the
starter battery has insufficient power, the mul-
timedia system may switch off automatically.
This protects the battery. In order to prevent
this, a suitable power supply to the vehicle must
be maintained.
Navigation functions
Calling up the navigation system
menu
XTo switch to navigation mode:slide5the
controller.
XTo select Navi: turn and press the controller.
The navigation menu appears or the map dis-
plays the current vehicle position.
XIf the map appears, slide 5the controller.
XPress the controller.
The navigation menu appears.
XTo return to the map: turn the controller
until Navigation
appears and then press the
controller.
Calling up the online map display
Requirement for online map display (USA):
mbrace must be activated for Internet access
(
Ypage 118).
Requirement for the online map display (Can-
ada): a mobile phone is connected to the multi-
media system via Bluetooth
®(Ypage 90) or
USB (Ypage 151).
XCall up the navigation menu (Ypage 85).
XTurn the controller until Online Map Dis‐playis brought to the front.
XPress the controller.
The online connection is established. Once
the connection is established, the Google
Maps™ map shows the vicinity of the current
vehicle position.
iAlternatively you can call up this function
using the touchpad (Ypage 22).
XTo exit the online map display: press the %
button.
Calling up the compass display
XCall up the navigation menu (Ypage 85).
XTurn the controller until Compassis brought to
the front.
XPress the controller.
The compass display provides the following
information:
RThe current direction of travel with bearing
(360 degree format) and compass direction
RLongitude and latitude coordinates in
degrees, minutes and seconds
RHeight (rounded off) above sea level
RNumber of GPS satellites from which a sig- nal can be received
iAlternatively you can call up this function
using the touchpad (Ypage 22).
XTo exit the compass display: press the %
button.
Navigation functions85
Navigation
Z