2018 LINCOLN CONTINENTAL maintenance
[x] Cancel search: maintenancePage 326 of 615

Your vehicle has limited engine power whenin the fail-safe mode, drive your vehicle withcaution. Your vehicle does not maintainhigh-speed operation and the engine mayoperate poorly.
Remember that the engine is capable ofautomatically shutting down to preventengine damage. In this situation:
1. Pull off the road as soon as safelypossible and switch the engine off.
2. If you are a member of a roadsideassistance program, we recommend thatyou contact your roadside assistanceservice provider.
3.If this is not possible, wait a short periodfor the engine to cool.
4. Check the coolant level. If the coolantlevel is at or below the minimum mark,add prediluted coolant immediately.
5.When the engine temperature cools, youcan re-start the engine. Have your vehiclechecked as soon as possible to minimizeengine damage.
Note:Driving your vehicle without repairincreases the chance of engine damage.
Engine Coolant TemperatureManagement (If Equipped)
WARNING: To reduce the risk of crashand injury, be prepared that the vehiclespeed may reduce and the vehicle may notbe able to accelerate with full power until thecoolant temperature reduces.
If you tow a trailer with your vehicle, theengine may temporarily reach a highertemperature during severe operatingconditions, for example ascending a long orsteep grade in high ambient temperatures.
At this time, you may notice the coolanttemperature gauge moves toward the redzone and a message may appear in theinformation display.
You may notice a reduction in vehicle speedcaused by reduced engine power in orderto manage the engine coolant temperature. Your vehicle may enter this mode if certainhigh-temperature and high-load conditionstake place. The amount of speed reductiondepends on vehicle loading, grade andambient temperature. If this occurs, there isno need to stop your vehicle. You cancontinue to drive.
The air conditioning may automatically turnon and off during severe operatingconditions to protect the engine fromoverheating. When the coolant temperaturedecreases to the normal operatingtemperature, the air conditioning turns on.
If the coolant temperature gauge moves fullyinto the red zone, or if the coolanttemperature warning or service engine soonmessages appear in your information display,do the following:
1.Stop your vehicle as soon as it is safe todo so. Fully apply the parking brake, shiftinto park (P) or neutral (N).
323
Continental (CPL) Canada/United States of America, enUSA, Edition date: 201706, Second-Printing
Maintenance
Page 327 of 615

2. Leave the engine running until thecoolant temperature gauge needlereturns to the normal position. Afterseveral minutes, if the temperature doesnot drop, follow the remaining steps.
3. Switch the engine off and wait for it tocool. Check the coolant level.
4. If the coolant level is at or below theminimum mark, add prediluted coolantimmediately.
5. If the coolant level is normal, restart theengine and continue.
AUTOMATIC TRANSMISSION
FLUID CHECK
Note:Transmission fluid should be checkedby an authorized dealer. If required, fluidshould be added by an authorized dealer.
Have an authorized dealer check and changethe transmission fluid at the correct serviceinterval. See Maintenance (page 312). Yourtransmission does not consume fluid.However, the fluid level should be checkedif the transmission is not working properly,(i.e., if the transmission slips or shifts slowly)or if you notice some sign of fluid leakage.
Do not use supplemental transmission fluidadditives, treatments or cleaning agents. Theuse of these materials may affecttransmission operation and result in damageto internal transmission components.
BRAKE FLUID CHECK
WARNING: Do not use any fluid otherthan the recommended brake fluid as thiswill reduce brake efficiency. Use of incorrectfluid could result in the loss of vehiclecontrol, serious personal injury or death.
WARNING: Only use brake fluid froma sealed container. Contamination with dirt,water, petroleum products or other materialsmay result in brake system damage or failure.Failure to adhere to this warning could resultin the loss of vehicle control, seriouspersonal injury or death.
WARNING: Do not allow the fluid totouch your skin or eyes. If this happens, rinsethe affected areas immediately with plentyof water and contact your physician.
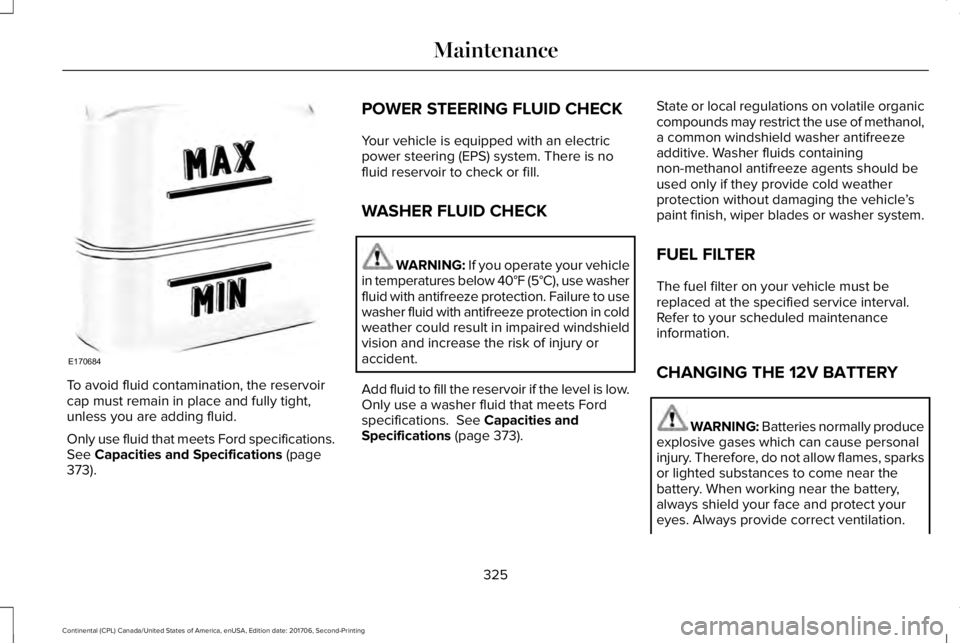
WARNING: A fluid level between theMAX and MIN lines is within the normaloperating range and there is no need to addfluid. A fluid level not in the normal operatingrange could compromise the performanceof the system. Have your vehicle checkedimmediately.
324
Continental (CPL) Canada/United States of America, enUSA, Edition date: 201706, Second-Printing
Maintenance
Page 328 of 615

To avoid fluid contamination, the reservoircap must remain in place and fully tight,unless you are adding fluid.
Only use fluid that meets Ford specifications.See Capacities and Specifications (page373).
POWER STEERING FLUID CHECK
Your vehicle is equipped with an electricpower steering (EPS) system. There is nofluid reservoir to check or fill.
WASHER FLUID CHECK
WARNING: If you operate your vehiclein temperatures below 40°F (5°C), use washerfluid with antifreeze protection. Failure to usewasher fluid with antifreeze protection in coldweather could result in impaired windshieldvision and increase the risk of injury oraccident.
Add fluid to fill the reservoir if the level is low.Only use a washer fluid that meets Fordspecifications. See Capacities andSpecifications (page 373).
State or local regulations on volatile organiccompounds may restrict the use of methanol,a common windshield washer antifreezeadditive. Washer fluids containingnon-methanol antifreeze agents should beused only if they provide cold weatherprotection without damaging the vehicle’spaint finish, wiper blades or washer system.
FUEL FILTER
The fuel filter on your vehicle must bereplaced at the specified service interval.Refer to your scheduled maintenanceinformation.
CHANGING THE 12V BATTERY
WARNING: Batteries normally produceexplosive gases which can cause personalinjury. Therefore, do not allow flames, sparksor lighted substances to come near thebattery. When working near the battery,always shield your face and protect youreyes. Always provide correct ventilation.
325
Continental (CPL) Canada/United States of America, enUSA, Edition date: 201706, Second-Printing
MaintenanceE170684
Page 329 of 615

WARNING: When lifting a plastic-casedbattery, excessive pressure on the end wallscould cause acid to flow through the ventcaps, resulting in personal injury and damageto the vehicle or battery. Lift the battery witha battery carrier or with your hands onopposite corners.
WARNING: Keep batteries out of reachof children. Batteries contain sulfuric acid.Avoid contact with skin, eyes or clothing.Shield your eyes when working near thebattery to protect against possible splashingof acid solution. In case of acid contact withskin or eyes, flush immediately with waterfor a minimum of 15 minutes and get promptmedical attention. If acid is swallowed, call aphysician immediately.
WARNING: Battery posts, terminalsand related accessories contain lead andlead compounds. Wash hands after handling.
WARNING: For vehicles withAuto-Start-Stop the battery requirement isdifferent. You must replace the battery withone of exactly the same specification.
Your vehicle is fitted with a Motorcraftmaintenance-free battery which normallydoes not require additional water.
When a battery replacement is required, youmust use a recommended replacementbattery that matches the electricalrequirements of the vehicle.
Note:If your vehicle has a battery cover,after cleaning or replacing the battery, makesure you reinstall it.
Note:See an authorized dealer for batteryaccess, testing, or replacement.
To make sure the battery managementsystem works correctly, do not connect anelectrical device ground connection directlyto the battery negative post. This can causeinaccurate measurements of the batterycondition and potential incorrect systemoperation.
Note:If you add electrical accessories orcomponents to the vehicle, it may adverselyaffect battery performance and durability.This may also affect the performance ofother electrical systems in the vehicle.
If you see any corrosion on the battery orterminals, remove the cables from theterminals and clean with a wire brush. Youcan neutralize the acid with a solution ofbaking soda and water.
Because your vehicle’s engine iselectronically-controlled by a computer,some engine control settings are maintainedby power from the battery. Some enginecomputer settings, like the idle trim and fueltrim strategy, optimize the driveability andperformance of the engine. The clock andradio station presets are also maintained inmemory by power from the low-voltagebattery. These settings are erased when atechnician disconnects and connects thelow-voltage battery.
To restore the settings, do the following:
326
Continental (CPL) Canada/United States of America, enUSA, Edition date: 201706, Second-Printing
Maintenance
Page 330 of 615

Note:Until you switch the ignition to the onposition, you will receive a message in yourinformation display stating that your vehicleis not in park.
1. Apply the parking brake.
2. Shift into park (P) or neutral (N).
3. Switch off all accessories.
4. Press the brake pedal and start yourvehicle.
5. Run the engine until it reaches normaloperating temperature. While the engineis warming up, complete the following:Reset the clock. See Audio Unit (page405). Reset the power windowsbounce-back feature. See PowerWindows (page 101). Reset the radiostation presets. See Audio Unit (page405).
6. Allow the engine to idle for at least oneminute.
7.Drive the vehicle at least 10 mi (16 km) tocompletely relearn the idle trim and fueltrim strategy.
Note:If you do not allow the engine torelearn the idle and fuel trim strategy, theidle quality of your vehicle may be adverselyaffected until the engine computereventually relearns the idle trim and fuel trimstrategy.
Note:Certain features may not operate ifthe battery monitor system is not reset witha scan tool following a jump start or batteryreplacement. Normal electrical accessoryoperation should resume after your vehicleis left undisturbed for 8 hours.
Make sure that you dispose of old batteriesin an environmentally friendly way. Seekadvice from your local authority aboutrecycling old batteries.
If storing your vehicle for more than 30 dayswithout recharging the battery, werecommend that you disconnect the batterycables to maintain battery charge for quickstarting.
CHECKING THE WIPER BLADES
Run the tip of your fingers over the edge ofthe blade to check for roughness.
Clean the wiper blades with washer fluid orwater applied with a soft sponge or cloth.
CHANGING THE WIPER BLADES
Replace the wiper blades at least annuallyfor optimum performance.
You can improve poor wiper quality bycleaning the wiper blades and thewindshield. See Cleaning the Windows andWiper Blades (page 337).
327
Continental (CPL) Canada/United States of America, enUSA, Edition date: 201706, Second-Printing
MaintenanceE142463
Page 331 of 615

Changing the Windshield Wiper Blades
Note:Do not hold the wiper blade whenlifting the wiper arm.
Note:Make sure that the wiper arm doesnot spring back against the glass when thewiper blade is not attached.
1. Lift the wiper arm and then press thewiper blade locking buttons together.
2. Slightly rotate the wiper blade.
3. Remove the wiper blade.
4. Install in the reverse order.
Note:Make sure that the wiper blade locksinto place.
ADJUSTING THE HEADLAMPS
Vertical Aim Adjustment
The headlamps on your vehicle are properlyaimed at the assembly plant. If your vehiclehas been in an accident, have the alignmentof your headlamps checked by yourauthorized dealer.
Headlamp Aiming Target
8 feet (2.4 meters)A
Center height of lamp to groundB
25 feet (7.6 meters)C
Horizontal reference lineD
Vertical Aim Adjustment
1.Park the vehicle directly in front of a wallor screen on a level surface,approximately 25 ft (7.6 m) away.
2. Measure the height from the center ofyour headlamp indicated by a 3.0millimeter circle on the lens to the groundand mark an 8 ft (2.4 m) horizontalreference line on the vertical wall orscreen at this height (a piece of maskingtape works well).
Note:To see a clearer light pattern foradjusting, you may want to block the lightfrom one headlamp while adjusting theother.
3. Turn on the low beam headlamps toilluminate the wall or screen and openthe hood. Cover one of the headlampsso no light hits the wall.
328
Continental (CPL) Canada/United States of America, enUSA, Edition date: 201706, Second-Printing
MaintenanceE129990
1
1 2 E142592
Page 332 of 615

4. There is a distinct cut-off (change fromlight to dark) in the left portion of thebeam pattern. Position the top edge ofthis cut-off 2 in (5 cm) below thehorizontal reference line.
5. Locate the vertical adjuster on eachheadlamp. Use a Phillips #2 screwdriverto turn the adjuster either clockwise orcounterclockwise to adjust the verticalaim of the headlamp. The horizontaledge of the brighter light should touchthe horizontal reference line.
6. Repeat Steps 3 through 7 to adjust theother headlamp.
7. Close the hood and turn off the lamps.
Horizontal Aim Adjustment
Horizontal aim is not required for this vehicleand is not adjustable.
CHANGING A BULB
WARNING: Bulbs can become hot. Letthe bulb cool down before removing it.Failure to do so could result in personalinjury.
WARNING: Switch the lamps and theignition off. Failure to follow this warningcould result in serious personal injury.
Use the correct specification bulb. See BulbSpecification Chart (page 330).
Install in the reverse order unless otherwisestated.
High-Intensity Discharge Headlamps
These lamps operate at a high voltage. Seean authorized dealer if they fail.
329
Continental (CPL) Canada/United States of America, enUSA, Edition date: 201706, Second-Printing
MaintenanceE142465 E277389
Page 333 of 615

Front Direction Indicator
1. Switch all of the lamps and the ignitionoff.
2. Disconnect the electrical connector.
3. Turn the bulb holder counterclockwiseand remove it.
4.Remove the bulb by pulling it straight out.
LED Lamps
LED lamps are not serviceable items. See anauthorized dealer if they fail.
The following lamps are LED:
•Front parking lamps.
•Front side marker lamps.
•Side direction indicators.
•Rear side marker lamps.
•Brake and rear lamps.
•Central high mounted brake lamp.
•Rear direction indicators.
•Reversing lamps.
•License plate lamps.
BULB SPECIFICATION CHART
The specified replacement bulbs are in thechart below. Headlamp bulbs must bemarked with an authorized D.O.T.(Department of Transportation) for NorthAmerica to affirm lamp performance, lightbrightness and pattern and safe visibility. Thecorrect bulbs will not damage the lampassembly or void the lamp assembly warrantyand will provide quality bulb burn time.
Trade numberFunction
D3S* Headlamp (high intensity discharge) Low and High
LED* Sidemarker - front
LED* Park lamp - front
7444NA* Turn lamp - front
LED*Signal indicator mirror lamp
330
Continental (CPL) Canada/United States of America, enUSA, Edition date: 201706, Second-Printing
MaintenanceE163826