2018 LINCOLN CONTINENTAL buttons
[x] Cancel search: buttonsPage 175 of 615
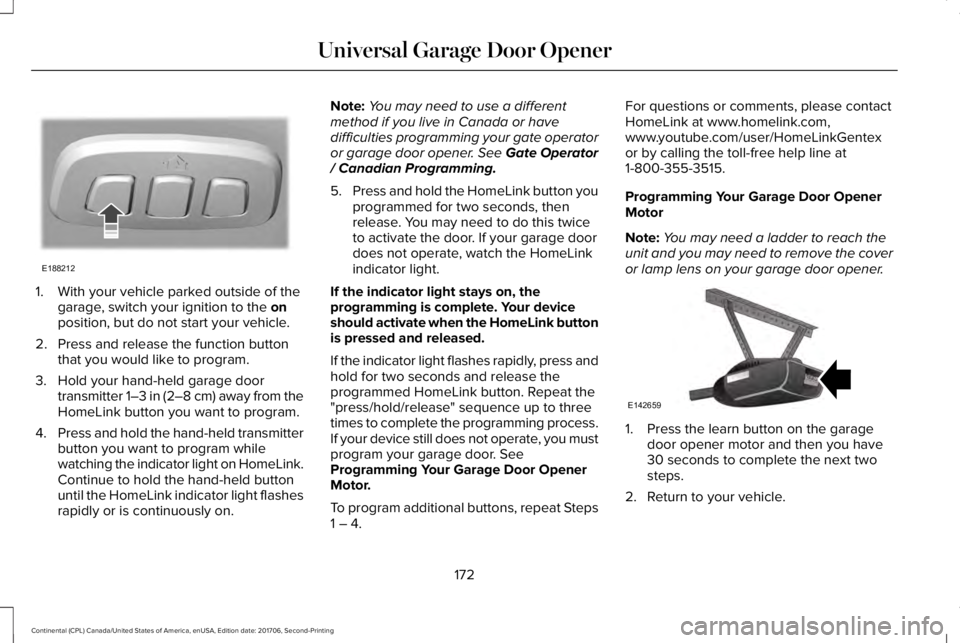
1. With your vehicle parked outside of thegarage, switch your ignition to the onposition, but do not start your vehicle.
2. Press and release the function buttonthat you would like to program.
3. Hold your hand-held garage doortransmitter 1–3 in (2–8 cm) away from theHomeLink button you want to program.
4.Press and hold the hand-held transmitterbutton you want to program whilewatching the indicator light on HomeLink.Continue to hold the hand-held buttonuntil the HomeLink indicator light flashesrapidly or is continuously on.
Note:You may need to use a differentmethod if you live in Canada or havedifficulties programming your gate operatoror garage door opener. See Gate Operator/ Canadian Programming.
5.Press and hold the HomeLink button youprogrammed for two seconds, thenrelease. You may need to do this twiceto activate the door. If your garage doordoes not operate, watch the HomeLinkindicator light.
If the indicator light stays on, theprogramming is complete. Your deviceshould activate when the HomeLink buttonis pressed and released.
If the indicator light flashes rapidly, press andhold for two seconds and release theprogrammed HomeLink button. Repeat the"press/hold/release" sequence up to threetimes to complete the programming process.If your device still does not operate, you mustprogram your garage door. SeeProgramming Your Garage Door OpenerMotor.
To program additional buttons, repeat Steps1 – 4.
For questions or comments, please contactHomeLink at www.homelink.com,www.youtube.com/user/HomeLinkGentexor by calling the toll-free help line at1-800-355-3515.
Programming Your Garage Door OpenerMotor
Note:You may need a ladder to reach theunit and you may need to remove the coveror lamp lens on your garage door opener.
1. Press the learn button on the garagedoor opener motor and then you have30 seconds to complete the next twosteps.
2. Return to your vehicle.
172
Continental (CPL) Canada/United States of America, enUSA, Edition date: 201706, Second-Printing
Universal Garage Door OpenerE188212 E142659
Page 176 of 615
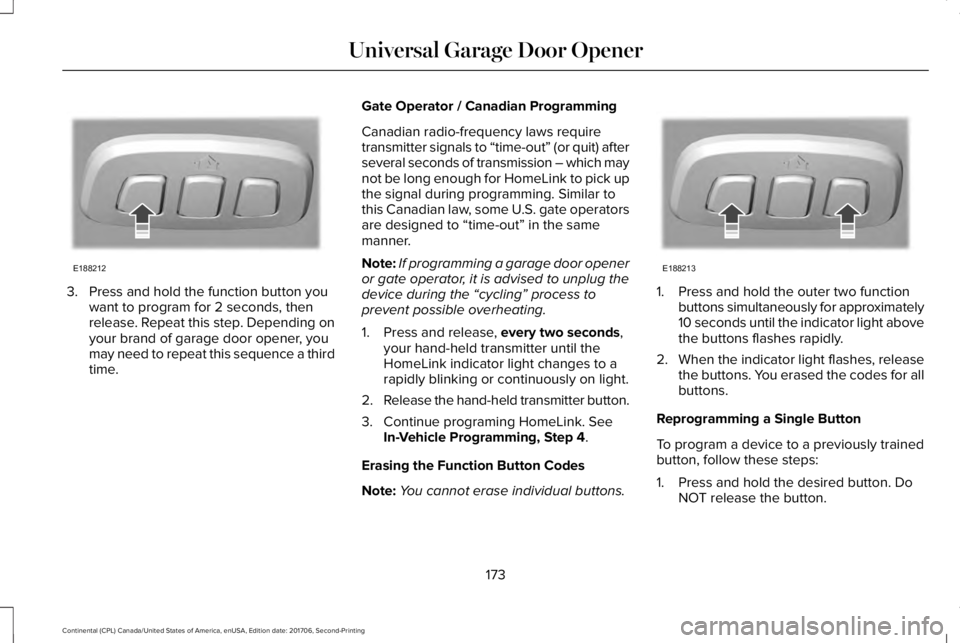
3. Press and hold the function button youwant to program for 2 seconds, thenrelease. Repeat this step. Depending onyour brand of garage door opener, youmay need to repeat this sequence a thirdtime.
Gate Operator / Canadian Programming
Canadian radio-frequency laws requiretransmitter signals to “time-out” (or quit) afterseveral seconds of transmission – which maynot be long enough for HomeLink to pick upthe signal during programming. Similar tothis Canadian law, some U.S. gate operatorsare designed to “time-out” in the samemanner.
Note:If programming a garage door openeror gate operator, it is advised to unplug thedevice during the “cycling” process toprevent possible overheating.
1. Press and release, every two seconds,your hand-held transmitter until theHomeLink indicator light changes to arapidly blinking or continuously on light.
2.Release the hand-held transmitter button.
3. Continue programing HomeLink. SeeIn-Vehicle Programming, Step 4.
Erasing the Function Button Codes
Note:You cannot erase individual buttons.
1. Press and hold the outer two functionbuttons simultaneously for approximately10 seconds until the indicator light abovethe buttons flashes rapidly.
2.When the indicator light flashes, releasethe buttons. You erased the codes for allbuttons.
Reprogramming a Single Button
To program a device to a previously trainedbutton, follow these steps:
1. Press and hold the desired button. DoNOT release the button.
173
Continental (CPL) Canada/United States of America, enUSA, Edition date: 201706, Second-Printing
Universal Garage Door OpenerE188212 E188213
Page 197 of 615
AUTOMATIC TRANSMISSION
WARNING: Always fully apply theparking brake and make sure you shift intopark (P). Failure to follow this instructioncould result in personal injury or death.
WARNING: Do not apply the brakepedal and accelerator pedal simultaneously.Applying both pedals simultaneously formore than a few seconds will limit engineperformance, which may result in difficultymaintaining speed in traffic and could leadto serious injury.
Note:You may not be able to shift out ofpark (P) unless the intelligent access key isinside your vehicle.
Push Button Shift Transmission
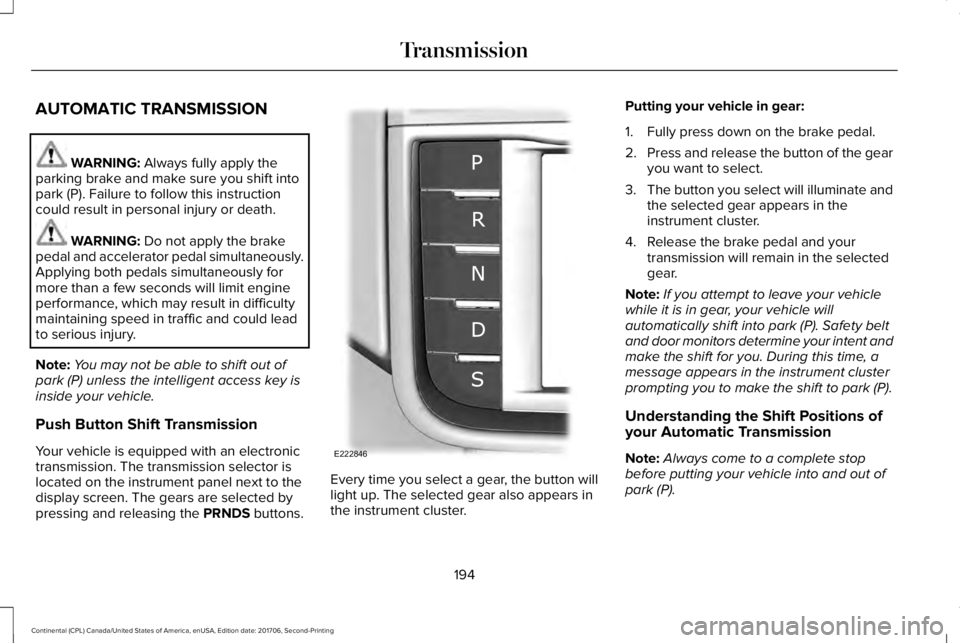
Your vehicle is equipped with an electronictransmission. The transmission selector islocated on the instrument panel next to thedisplay screen. The gears are selected bypressing and releasing the PRNDS buttons.
Every time you select a gear, the button willlight up. The selected gear also appears inthe instrument cluster.
Putting your vehicle in gear:
1. Fully press down on the brake pedal.
2.Press and release the button of the gearyou want to select.
3.The button you select will illuminate andthe selected gear appears in theinstrument cluster.
4. Release the brake pedal and yourtransmission will remain in the selectedgear.
Note:If you attempt to leave your vehiclewhile it is in gear, your vehicle willautomatically shift into park (P). Safety beltand door monitors determine your intent andmake the shift for you. During this time, amessage appears in the instrument clusterprompting you to make the shift to park (P).
Understanding the Shift Positions ofyour Automatic Transmission
Note:Always come to a complete stopbefore putting your vehicle into and out ofpark (P).
194
Continental (CPL) Canada/United States of America, enUSA, Edition date: 201706, Second-Printing
TransmissionE222846
Page 202 of 615

3. Using a tool, press and hold the brakeshift interlock switch. The shift buttonson the instrument panel will flash whenyour vehicle is in override mode.
4. With the override switch still held, pressthe neutral (N) button to shift from park.
5. Release the override button.
6. Your vehicle will remain in neutral forwrecker towing purposes or can beshifted to the desired gear and driven (ifpossible).
7. Release the parking brake.
Automatic Transmission AdaptiveLearning
This feature increases durability and providesconsistent shift feel over the life of yourvehicle. A new vehicle or transmission mayhave firm or soft shifts. This operation willnot affect function or durability of yourtransmission and is normal. Over time, theadaptive learning process will fully updatetransmission operation. Additionally, thestrategy must be relearned whenever thebattery is disconnected or a new battery isinstalled.
If Your Vehicle Gets Stuck In Mud orSnow
Note:Do not rock your vehicle if your engineis not at normal operating temperature ordamage to your transmission may occur.
Note:Do not rock your vehicle for more thana minute or damage to your transmissionand tires may occur, or your engine mayoverheat.
If your vehicle gets stuck in mud or snow,you can help rock your vehicle out by shiftingbetween forward and reverse gears,stopping between shifts in a steady pattern.Press lightly on the accelerator in each gear.
199
Continental (CPL) Canada/United States of America, enUSA, Edition date: 201706, Second-Printing
Transmission
Page 228 of 615
To toggle through the modes, use thebuttons on the information display to selectthe following:
•Parallel parking.
•Perpendicular parking.
•Parallel park out assist.
•Switch the system off.
Note:There is no time limit for togglingthrough the modes.
Parallel Parking
The system detects available parallel parkingspaces and steers your vehicle into thespace. You control the accelerator, gearshiftand brakes. The system visually and audiblyguides you into a parallel parking space.
Press the button once to searchfor a parking space.
Note:You can also switch the system onafter you have already driven partially orcompletely past a parking space. Press theactive park assist button and the systeminforms you if you have recently passed asuitable parking space.
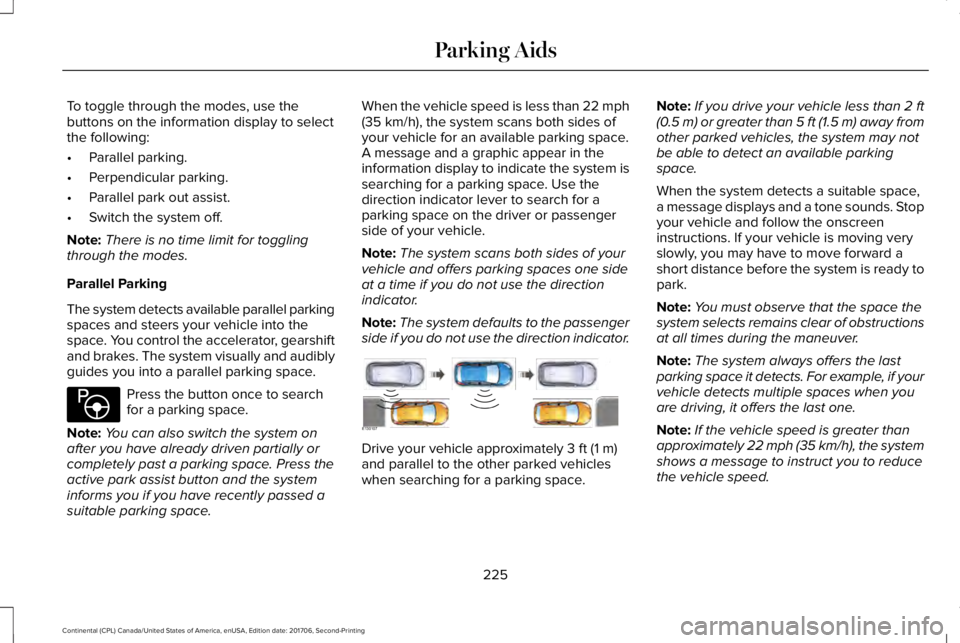
When the vehicle speed is less than 22 mph(35 km/h), the system scans both sides ofyour vehicle for an available parking space.A message and a graphic appear in theinformation display to indicate the system issearching for a parking space. Use thedirection indicator lever to search for aparking space on the driver or passengerside of your vehicle.
Note:The system scans both sides of yourvehicle and offers parking spaces one sideat a time if you do not use the directionindicator.
Note:The system defaults to the passengerside if you do not use the direction indicator.
Drive your vehicle approximately 3 ft (1 m)and parallel to the other parked vehicleswhen searching for a parking space.
Note:If you drive your vehicle less than 2 ft(0.5 m) or greater than 5 ft (1.5 m) away fromother parked vehicles, the system may notbe able to detect an available parkingspace.
When the system detects a suitable space,a message displays and a tone sounds. Stopyour vehicle and follow the onscreeninstructions. If your vehicle is moving veryslowly, you may have to move forward ashort distance before the system is ready topark.
Note:You must observe that the space thesystem selects remains clear of obstructionsat all times during the maneuver.
Note:The system always offers the lastparking space it detects. For example, if yourvehicle detects multiple spaces when youare driving, it offers the last one.
Note:If the vehicle speed is greater thanapproximately 22 mph (35 km/h), the systemshows a message to instruct you to reducethe vehicle speed.
225
Continental (CPL) Canada/United States of America, enUSA, Edition date: 201706, Second-Printing
Parking AidsE146186 E130107
Page 331 of 615

Changing the Windshield Wiper Blades
Note:Do not hold the wiper blade whenlifting the wiper arm.
Note:Make sure that the wiper arm doesnot spring back against the glass when thewiper blade is not attached.
1. Lift the wiper arm and then press thewiper blade locking buttons together.
2. Slightly rotate the wiper blade.
3. Remove the wiper blade.
4. Install in the reverse order.
Note:Make sure that the wiper blade locksinto place.
ADJUSTING THE HEADLAMPS
Vertical Aim Adjustment
The headlamps on your vehicle are properlyaimed at the assembly plant. If your vehiclehas been in an accident, have the alignmentof your headlamps checked by yourauthorized dealer.
Headlamp Aiming Target
8 feet (2.4 meters)A
Center height of lamp to groundB
25 feet (7.6 meters)C
Horizontal reference lineD
Vertical Aim Adjustment
1.Park the vehicle directly in front of a wallor screen on a level surface,approximately 25 ft (7.6 m) away.
2. Measure the height from the center ofyour headlamp indicated by a 3.0millimeter circle on the lens to the groundand mark an 8 ft (2.4 m) horizontalreference line on the vertical wall orscreen at this height (a piece of maskingtape works well).
Note:To see a clearer light pattern foradjusting, you may want to block the lightfrom one headlamp while adjusting theother.
3. Turn on the low beam headlamps toilluminate the wall or screen and openthe hood. Cover one of the headlampsso no light hits the wall.
328
Continental (CPL) Canada/United States of America, enUSA, Edition date: 201706, Second-Printing
MaintenanceE129990
1
1 2 E142592
Page 418 of 615

Action and DescriptionMenu ItemItem
This bar displays icons and messages pertaining to current system activities including climatesettings, voice commands and phone functions such as text messages.Status BarA
This button is available on the main screens. Pressing it takes you to the home screen view.HomeB
This shows the current time. You can set the clock manually or have it controlled by the vehicle'sGPS location. See Settings (page 480).ClockC
This displays the current outside temperature.Outside TemperatureD
You can touch any of the buttons on this bar to select a feature.Feature BarE
The touchscreen allows you quick access toall of your comfort, navigation,communication and entertainment options.Using the status and feature bar you canquickly select the feature you want to use.
Note:Your system is equipped with a featurethat allows you to access and control audiofeatures for 10 minutes after you switch theignition off (and no doors open).
The Status Bar
Additional icons also display in the status bardepending on market, vehicle options andcurrent operation. If a feature is not active,the icon does not display. Certain icons maymove to the left or right depending on whatoptions are active.
415
Continental (CPL) Canada/United States of America, enUSA, Edition date: 201706, Second-Printing
SYNC™ 3
Page 423 of 615
InformationOption
If you are on a call, the call information is displayed on the information display.
If you are receiving a call, you can accept it by selecting OK on the right-hand steering wheel controls.
* Depending on your vehicle options, all of these choices may not display.
Use the OK and arrow buttons on the rightside of your steering wheel to scroll throughthe available modes. The available optionsdepend on the cluster screen.
The selection menu expands and differentoptions appear.
•Press the up and down arrows to scrollthrough the modes.
•Press the right arrow to enter the mode,use the left arrow to exit the mode.
•Press the up and down arrows to makeadjustments within the chosen mode.
•Press OK to confirm your selection.
Note:If your vehicle is not equipped withnavigation, compass appears in the displayinstead of navigation. If you press the rightarrow to go into the compass menu, you cansee the compass graphic. The compassdisplays the direction in which the vehicle istraveling, not true direction (for example, ifthe vehicle is traveling west, the middle ofthe compass graphic displays west; northdisplays to the left of west though its truedirection is to the right of west).
Using the Steering Wheel Controls
Depending on your vehicle and optionpackage, you can use different controls onyour steering wheel to interact with thetouchscreen system in different ways.
VOL: Control the volume of audio output.
Mute: Mute the audio output.
Voice: Press to start a voice session. Pressagain to stop the voice prompt andimmediately begin speaking. Press and holdto end a voice session.
SEEK NEXT:
•While in radio mode, press to seekbetween memory presets.
•While in USB, Bluetooth Audio or CDmode, press to seek between songs orpress and hold to fast seek.
SEEK PREVIOUS:
•While in radio mode, press to seekbetween memory presets.
•While in USB, Bluetooth Audio or CDmode, press to seek between songs orpress and hold to fast seek.
PHONE ACCEPT: Press to answer a call orswitch between calls.
420
Continental (CPL) Canada/United States of America, enUSA, Edition date: 201706, Second-Printing
SYNC™ 3