Page 246 of 605
Features of your vehicle
160
4
To cancel or reset the Auto Defogging
System
Press the front windshield defroster
button for 3 seconds when the igni-
tion switch is in the ON position.
When the Auto Defogging System is
canceled, ADS OFF symbol will blink
3 times and the ADS OFF will be dis-
played on the climate control infor-
mation screen.
When the Auto Defogging System is
reset, ADS OFF symbol will blink 6
times without a signal.
Do not remove the sensor cover
located on the upper end of the pas-
senger side windshield glass.
Damage to the system parts could
occur and may not be covered by
your vehicle warranty. When the ignition switch is in the ON
position, the clean air function turns
on automatically.
Also, the clean air function turns off
automatically, when the ignition
switch turns to the OFF position.
OQLA045328
CLEAN AIR (IF EQUIPPED)
Page 265 of 605

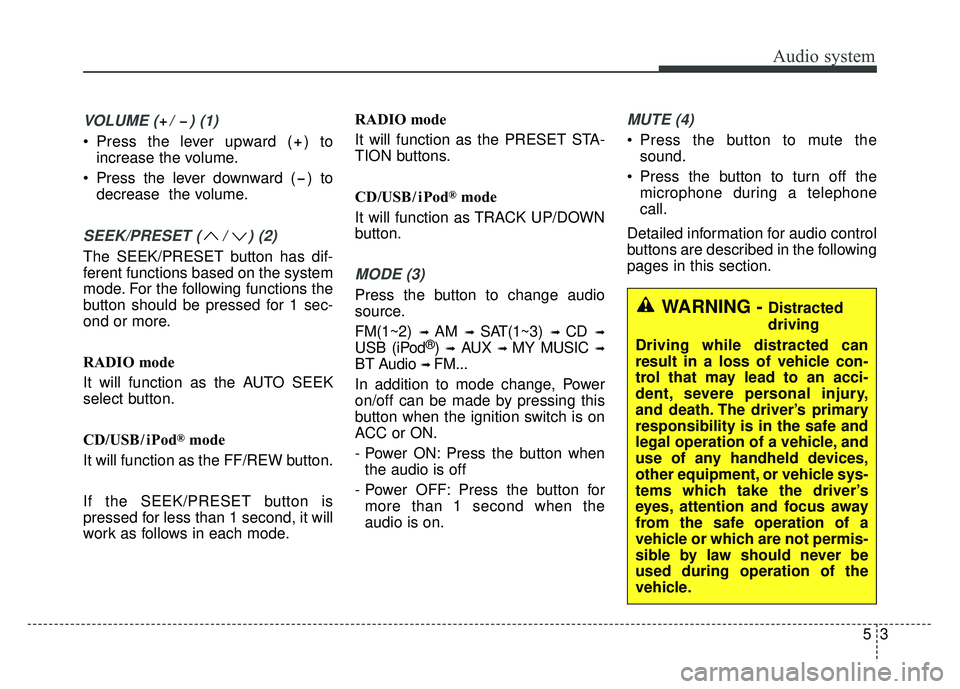
VOLUME ( / ) (1)
• Press the lever upward ( ) toincrease the volume.
Press the lever downward ( ) to decrease the volume.
SEEK/PRESET ( / ) (2)
The SEEK/PRESET button has dif-
ferent functions based on the system
mode. For the following functions the
button should be pressed for 1 sec-
ond or more.
RADIO mode
It will function as the AUTO SEEK
select button.
CD/USB/ iPod
®mode
It will function as the FF/REW button.
If the SEEK/PRESET button is
pressed for less than 1 second, it will
work as follows in each mode. RADIO mode
It will function as the PRESET STA-
TION buttons.
CD/USB/ iPod
®mode
It will function as TRACK UP/DOWN
button.
MODE (3)
Press the button to change audio
source.
FM(1~2)
➟ AM ➟ SAT(1~3) ➟ CD ➟
USB (iPod®) ➟AUX ➟ MY MUSIC ➟
BT Audio ➟ FM...
In addition to mode change, Power
on/off can be made by pressing this
button when the ignition switch is on
ACC or ON.
- Power ON: Press the button when the audio is off
- Power OFF: Press the button for more than 1 second when the
audio is on.
MUTE (4)
Press the button to mute the sound.
Press the button to turn off the microphone during a telephone
call.
Detailed information for audio control
buttons are described in the following
pages in this section.
Audio system
53
WARNING - Distracted
driving
Driving while distracted can
result in a loss of vehicle con-
trol that may lead to an acci-
dent, severe personal injury,
and death. The driver’s primary
responsibility is in the safe and
legal operation of a vehicle, and
use of any handheld devices,
other equipment, or vehicle sys-
tems which take the driver’s
eyes, attention and focus away
from the safe operation of a
vehicle or which are not permis-
sible by law should never be
used during operation of the
vehicle.
Page 270 of 605

Audio system
85
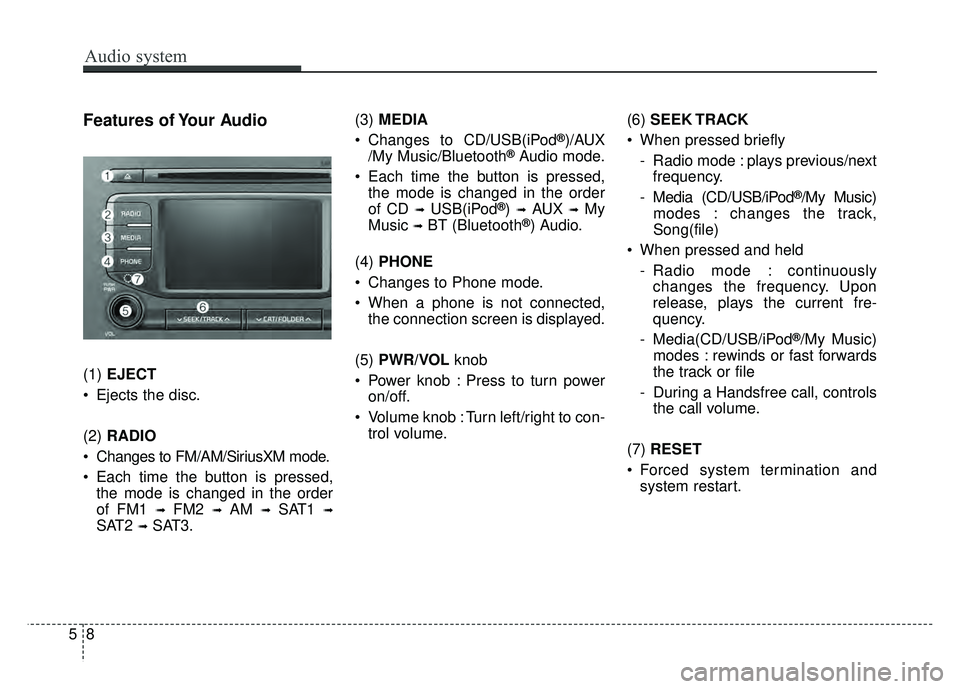
Features of Your Audio
(1) EJECT
Ejects the disc.
(2) RADIO
Changes to FM/AM/SiriusXM mode.
Each time the button is pressed, the mode is changed in the order
of FM1
➟FM2 ➟AM ➟SAT1 ➟
SAT2 ➟SAT3. (3)
MEDIA
Changes to CD/USB(iPod
®)/AUX
/My Music/Bluetooth®Audio mode.
Each time the button is pressed, the mode is changed in the order
of CD
➟USB(iPod®) ➟AUX ➟My
Music
➟BT (Bluetooth®) Audio.
(4) PHONE
Changes to Phone mode.
When a phone is not connected, the connection screen is displayed.
(5) PWR/VOL knob
Power knob : Press to turn power on/off.
Volume knob : Turn left/right to con- trol volume. (6)
SEEK TRACK
When pressed briefly - Radio mode : plays previous/nextfrequency.
- Media (CD/USB/iPod
®/My Music)
modes : changes the track,
Song(file)
When pressed and held - Radio mode : continuouslychanges the frequency. Upon
release, plays the current fre-
quency.
- Media(CD/USB/iPod
®/My Music)
modes : rewinds or fast forwards
the track or file
- During a Handsfree call, controls the call volume.
(7) RESET
Forced system termination and system restart.
Page 275 of 605

Audio system
513
✽
✽NOTICE - Using an iPod®
• iPod®is a registered trademark of
Apple Inc.
• In order to use the iPod
®with
your vehicle's audio system, you
must use a dedicated iPod
®cable.
(the cable that is supplied when
purchasing iPod
®/iPhone®prod-
ucts)
• If the iPod
®is connected to the
vehicle while it is playing, a high
pitch sound could occur for
approximately 1-2 seconds imme-
diately after connecting. If possi-
ble, connect the iPod
®to the vehi-
cle with the iPod®stopped/paused.
• When the vehicle ignition is set to ACC or ON, connecting the iPod
®
through the iPod®cable will
charge the iPod®through the car
audio system.
• When connecting with the iPod
®
cable, make sure to fully insert the
jack to prevent communication
interference. (Continued)(Continued)
• When the EQ features of an exter-
nal device, such as the iPod
®, and
the audio system are both active,
EQ effects could overlap and
cause sound deterioration and dis-
tortion. Whenever possible, turn
off the EQ feature within the
external device when it is connect-
ed to the audio system.
• Noise may occur when an iPod
®or
AUX device is connected. When
such devices are not being used,
disconnect the device for storage.
• When the iPod
®or AUX device
power is connected to the power
jack, playing the external device
may result in noise. In such cases,
disconnect the power connection
before use.
• Skipping or improper operation may occur depending on the char-
acteristics of your iPod
®/iPhone®
device. (Continued)(Continued)
• If your iPhone
®is connected to
both the Bluetooth®Wireless
Technology and USB, the sound
may not be properly played. In
your iPhone
®, select the Dock con-
nector or Bluetooth®Wireless
Technology to change the sound
output (source).
• iPod
®mode cannot be operated
when the iPod®cannot be recog-
nized due to versions that do not
support communication protocols.
• For fifth generation iPod
®Nano
devices, the iPod®may not be rec-
ognized when the battery level is
low. Please charge the iPod
®for
use.
• The search/play orders shown within the iPod
®device may differ
from the orders shown within the
audio system.
• If the iPod
®malfunctions due to
an iPod®device defect, reset the
iPod®and try again. (To learn
more, refer to your iPod®manual)
(Continued)
Page 281 of 605
Audio system
519
Radio Mode
Radio Mode Display Controls
(1) Mode Display
Displays current operating mode.
(2) Frequency
Displays the current frequency.
(3) Preset
Displays current preset number [1] ~
[6].
(4) Preset Display
Displays preset buttons.
(5) A.Store
Automatically saves frequencies with
superior reception to Preset buttons.With the Radio Mode Button
Pressing the [RADIO]button will
change the operating mode in the
order of FM1
➟ FM2 ➟ AM ➟ SAT1 ➟
SAT2 ➟ SAT3
If [Mode Pop up] is turned on within
[SETUP] �[Display], then pressing
the [RADIO] button will display the
Radio Mode Pop up screen.
Turn the TUNE knob to move the
focus. Press the knob to select.
Page 282 of 605
Audio system
20
5 Seek
Press the [SEEK TRACK]
button to
play the previous/next frequency.
Tu n e
Turn the TUNE knob to select the
desired frequency.
Selecting Presets/Saving Presets
Press the [Preset] button to display
the broadcast information for the fre-
quency saved to each button.
Press the [1] ~ [6] buttons to play the
desired preset.
While listening to a frequency you
want to save as a preset, press and
hold one of the [1] ~ [6] preset but-
tons to save the current frequency to
the selected preset.A.Store(Auto Store)
Press the [A.Store] button to auto-
matically save receivable frequen-
cies to Preset buttons.
Scan
Press the [SCAN]
button to preview
frequencies with superior reception
for 5 seconds each.
Press and hold the [SCAN] button to
preview presets for 5 seconds each.
Once scan is complete, the previous
frequency will be restored. While
Scan is operating, pressing the
[SCAN] button will cancel the scan-
ning.
Page 284 of 605

Audio system
22
5
SiriusXM Radio Mode
Radio Mode Display Controls
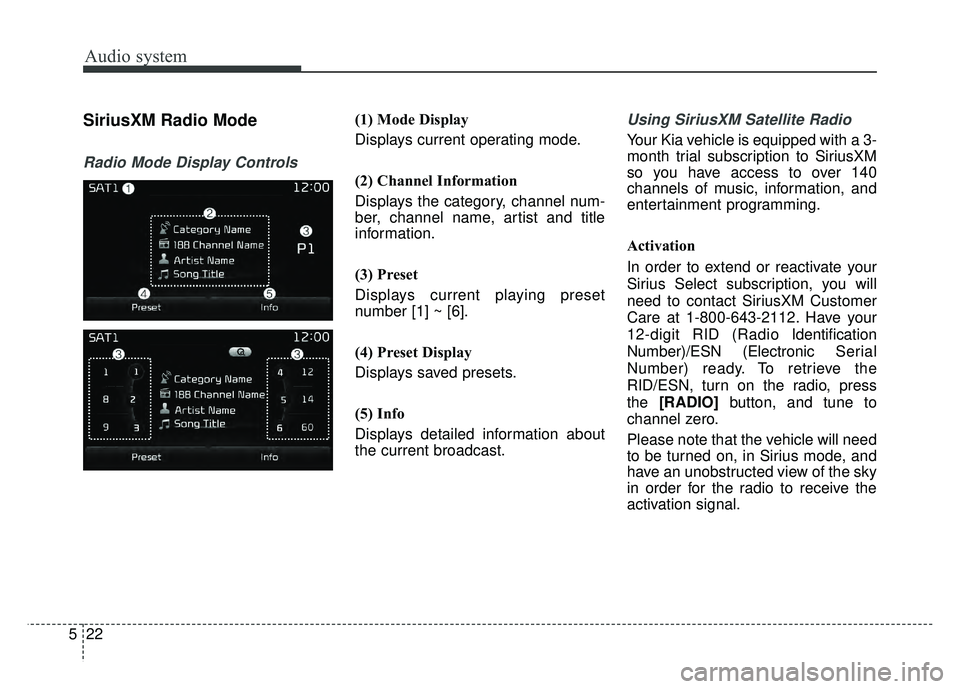
(1) Mode Display
Displays current operating mode.
(2) Channel Information
Displays the category, channel num-
ber, channel name, artist and title
information.
(3) Preset
Displays current playing preset
number [1] ~ [6].
(4) Preset Display
Displays saved presets.
(5) Info
Displays detailed information about
the current broadcast.Using SiriusXM Satellite Radio
Your Kia vehicle is equipped with a 3-
month trial subscription to SiriusXM
so you have access to over 140
channels of music, information, and
entertainment programming.
Activation
In order to extend or reactivate your
Sirius Select subscription, you will
need to contact SiriusXM Customer
Care at 1-800-643-2112. Have your
12-digit RID (Radio Identification
Number)/ESN (Electronic Serial
Number) ready. To retrieve the
RID/ESN, turn on the radio, press
the [RADIO] button, and tune to
channel zero.
Please note that the vehicle will need
to be turned on, in Sirius mode, and
have an unobstructed view of the sky
in order for the radio to receive the
activation signal.
Page 285 of 605
![KIA SPORTAGE 2018 Owners Manual Audio system
523
Seek
Press the [SEEK TRACK]button to
play the previous/next channel.
❈ If the “Category” icon is displayed,
channels are changed within the
current category.
Tu n e
Turn the TUN KIA SPORTAGE 2018 Owners Manual Audio system
523
Seek
Press the [SEEK TRACK]button to
play the previous/next channel.
❈ If the “Category” icon is displayed,
channels are changed within the
current category.
Tu n e
Turn the TUN](/manual-img/2/54576/w960_54576-284.png)
Audio system
523
Seek
Press the [SEEK TRACK]button to
play the previous/next channel.
❈ If the “Category” icon is displayed,
channels are changed within the
current category.
Tu n e
Turn the TUNE knob to select the
desired channel.
Scan
Press the [SCAN] button to scan all
channels with superior reception for
5 seconds each.
Once scan is complete, the previous-
ly played channel will be restored.
During Scan, pressing the [SCAN]
button again will cancel the scan
operation and restore the previously
played channel.
If the “Category” icon is displayed,
channels are changed within the cur-
rent category. Searching Categories
Select the category by using the
[CAT/FOLDER]
button and press the
TUNE knob to select.
Channels for the selected category
are played.
✽ ✽ Troubleshooting
1. Antenna Error
If this message is displayed, the
antenna or antenna cable is bro-
ken or unplugged. Please consult
with your Kia dealership.
2. No Signal If this message is displayed, it
means that the antenna is covered
and that the SiriusXM Satellite
Radio signal is not available.
Ensure the antenna is uncovered
and has a clear view of the sky.
Selecting Presets/Saving Presets
Press the [Preset] button to display
the broadcast information for the
channel saved to each button.
Press the [1] ~ [6] buttons to play the
desired preset.
While listening to a channel you want
to save as a preset, press and hold
one of the [1] ~ [6] preset buttons to
save the current channel to the
selected preset.