Page 114 of 620

Features of your vehicle
28
4
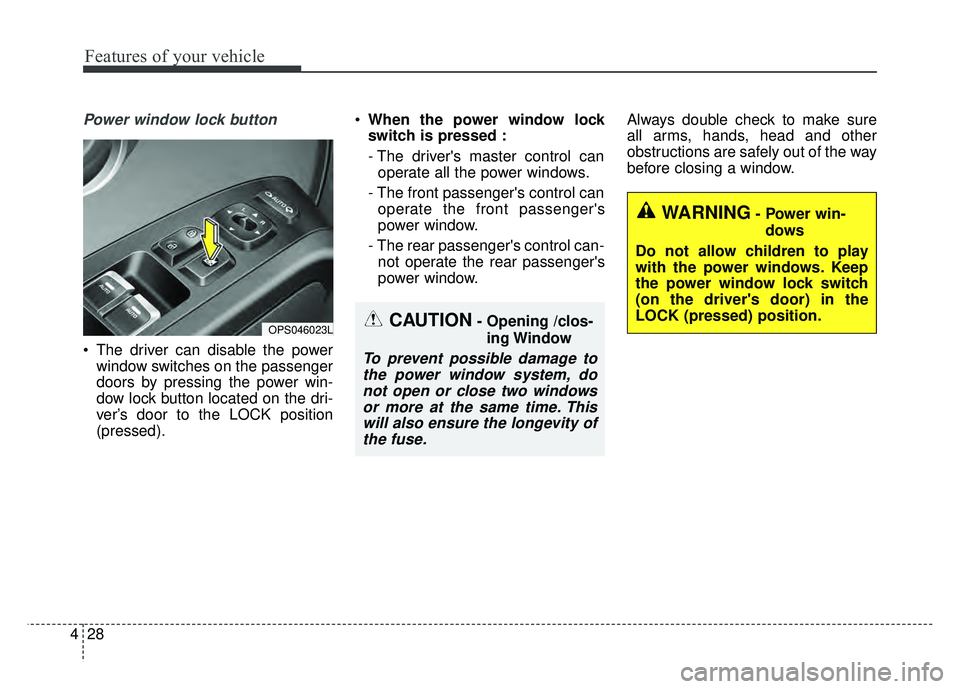
Power window lock button
The driver can disable the power
window switches on the passenger
doors by pressing the power win-
dow lock button located on the dri-
ver’s door to the LOCK position
(pressed).
When the power window lock
switch is pressed :
- The driver's master control can
operate all the power windows.
- The front passenger's control can operate the front passenger's
power window.
- The rear passenger's control can- not operate the rear passenger's
power window. Always double check to make sure
all arms, hands, head and other
obstructions are safely out of the way
before closing a window.
OPS046023LCAUTION- Opening /clos-
ing Window
To prevent possible damage tothe power window system, donot open or close two windowsor more at the same time. Thiswill also ensure the longevity ofthe fuse.
WARNING- Power win-
dows
Do not allow children to play
with the power windows. Keep
the power window lock switch
(on the driver's door) in the
LOCK (pressed) position.
Page 122 of 620

Features of your vehicle
36
4
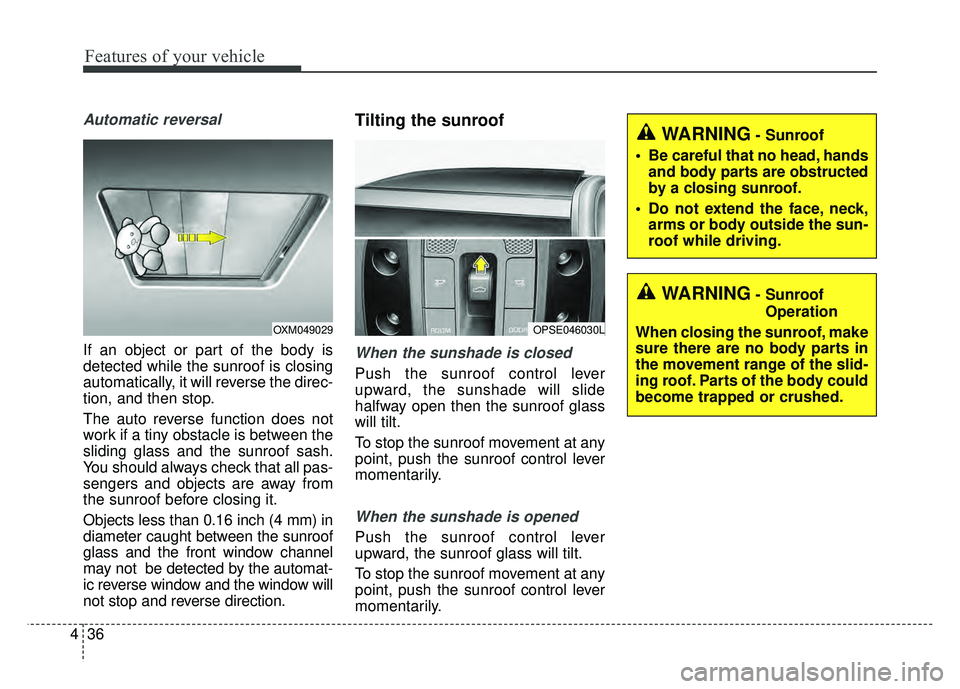
Automatic reversal
If an object or part of the body is
detected while the sunroof is closing
automatically, it will reverse the direc-
tion, and then stop.
The auto reverse function does not
work if a tiny obstacle is between the
sliding glass and the sunroof sash.
You should always check that all pas-
sengers and objects are away from
the sunroof before closing it.
Objects less than 0.16 inch (4 mm) in
diameter caught between the sunroof
glass and the front window channel
may not be detected by the automat-
ic reverse window and the window will
not stop and reverse direction.
Tilting the sunroof
When the sunshade is closed
Push the sunroof control lever
upward, the sunshade will slide
halfway open then the sunroof glass
will tilt.
To stop the sunroof movement at any
point, push the sunroof control lever
momentarily.
When the sunshade is opened
Push the sunroof control lever
upward, the sunroof glass will tilt.
To stop the sunroof movement at any
point, push the sunroof control lever
momentarily.
OPSE046030LOXM049029
WARNING- Sunroof
Operation
When closing the sunroof, make
sure there are no body parts in
the movement range of the slid-
ing roof. Parts of the body could
become trapped or crushed.
WARNING- Sunroof
Be careful that no head, hands and body parts are obstructed
by a closing sunroof.
Do not extend the face, neck, arms or body outside the sun-
roof while driving.
Page 129 of 620
443
Features of your vehicle
MIRRORS
Inside rearview mirror
Adjust the rearview mirror so that the
center view through the rear window
is seen. Make this adjustment before
you start driving.
Do not place objects in the rear seat
or cargo area which would interfere
with your vision through the rear win-
dow.
Day/night rearview mirror (if equipped)
Make this adjustment before you
start driving and while the day/night
lever is in the day position.
Pull the day/night lever toward you to
reduce the glare from the headlights
of the vehicles behind you during
night driving.
Remember that you lose somerearview clarity in the night position.
WARNING- Mirror adjust-
ment
Do not adjust the rearview mir-
ror while the vehicle is moving.
This could result in loss of con-
trol.
WARNING
Do not modify the inside mirror
and don’t install a wide mirror. It
could result in injury, during an
accident or deployment of the
air bag.
OAM049023
Day
Night
Page 176 of 620

Features of your vehicle
90
4
Auto light position (if equipped)
When the light switch is in the AUTO
light position, the taillights and head-
lights will be turned ON or OFF auto-
matically depending on the amount
of light outside the vehicle.
Never place anything over sensor
(1) located on the instrument
panel. This will ensure better auto-
light system control.
Don’t clean the sensor using a win- dow cleaner. The cleaner may
leave a light film which could inter-
fere with sensor operation. If your vehicle has window tint or
other types of metallic coating on
the front windshield, the Auto light
system may not work properly.
High beam operation
To turn on the high beam headlights,
push the lever away from you. The
lever will return to its original posi-
tion.
The high beam indicator will light
when the headlight high beams are
switched on.
To prevent the battery from being
discharged, do not leave the lights
on for a prolonged time while the
engine is not running.
OPS046443LOAM049044
Page 179 of 620
493
Features of your vehicle
A : Wiper speed control· MIST – Single wipe
· OFF – Off
· INT – Intermittent wipe
· LO – Low wiper speed
· HI – High wiper speed
B : Intermittent wipe time adjust- ment
C : Wash with brief wipes (front) D : Rear wiper/washer control
· ON – Continuous wipe
· INT – Intermittent wipe (if equipped)
· OFF – Off
E : Wash with brief wipes (rear)
Windshield wipers
Operates as follows when the igni-
tion switch is turned ON.
MIST : For a single wiping cycle,
push the lever upward and
release it with the lever in the
OFF position. The wipers will
operate continuously if the
lever is pushed upward and
held.
OFF : Wiper is not in operation
INT : Wiper operates intermittently at the same wiping intervals. Use
this mode in light rain or mist.
To vary the speed setting, turn
the speed control knob (1).
WIPERS AND WASHERS
Windshield wiper/washer Rear window wiper/washer (if equipped)
OAM049100N/OAM049048N
OAM049101N
Page 181 of 620
495
Features of your vehicle
Rear window wiper and washer
switch (if equipped)
The rear window wiper switch is
located at the end of the wiper and
washer switch lever. Turn the switch
to the desired position to operate the
rear wiper and washer.
ON - Normal wiper operation
INT - Intermittent wiper operation(if equipped)
OFF - Wiper is not in operation Push the lever away from you to
spray rear washer fluid and to run the
rear wipers 1~3 cycles. The spray
and wiper operation will continue
until you release the lever.
OAM049103N
CAUTION- Wipers& wind-
shields
To prevent possible damage to the wipers or windshield,do not operate the wiperswhen the windshield is dry.
To prevent damage to the wiper blades, do not use gaso-line, kerosene, paint thinner,or other solvents on or nearthem.
To prevent damage to the wiper arms and other compo-nents, do not attempt to movethe wipers manually.
OXM049125
Page 187 of 620

4101
Features of your vehicle
✽
✽NOTICE
If you want to defrost and defog the
front windshield, refer to
“Windshield defrosting and defog-
ging” in this section.
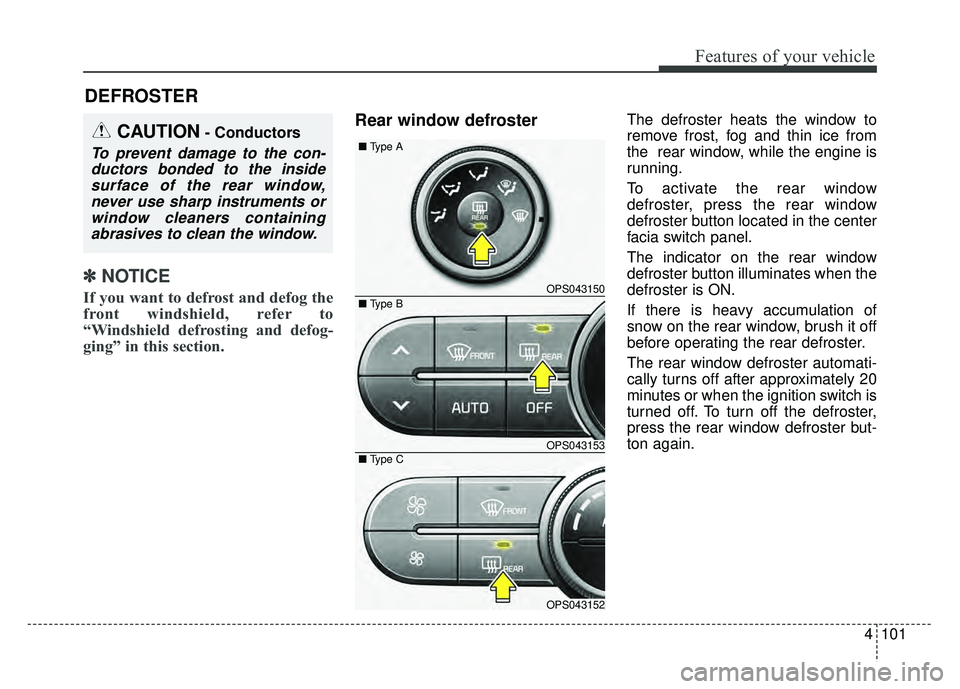
Rear window defrosterThe defroster heats the window to
remove frost, fog and thin ice from
the rear window, while the engine is
running.
To activate the rear window
defroster, press the rear window
defroster button located in the center
facia switch panel.
The indicator on the rear window
defroster button illuminates when the
defroster is ON.
If there is heavy accumulation of
snow on the rear window, brush it off
before operating the rear defroster.
The rear window defroster automati-
cally turns off after approximately 20
minutes or when the ignition switch is
turned off. To turn off the defroster,
press the rear window defroster but-
ton again.
DEFROSTER
CAUTION- Conductors
To prevent damage to the con-
ductors bonded to the insidesurface of the rear window,never use sharp instruments orwindow cleaners containingabrasives to clean the window.
OPS043150
OPS043153
OPS043152
■
Type A
■ Type C
■ Type B
Page 188 of 620
Features of your vehicle
102
4
Outside rearview mirror defroster
(if equipped)
If your vehicle is equipped with the
outside rearview mirror defrosters,
they will operate at the same time you
turn on the rear window defroster.
Front wiper deicer (if equipped)
The front wiper deicer will operate at
the same time you turn on the front
windshield defroster.
To turn off the wiper deicer, press the front windshield defroster but-
ton again.
The front wiper deicer automatical- ly turns off after approximately 20
minutes or when the ignition switch
is turned off.