2018 KIA SOUL heating
[x] Cancel search: heatingPage 224 of 620
Features of your vehicle
138
4
During mild weather or under condi-
tions where the operation of the seat
warmer is not needed, keep the
switches in the “OFF” position.
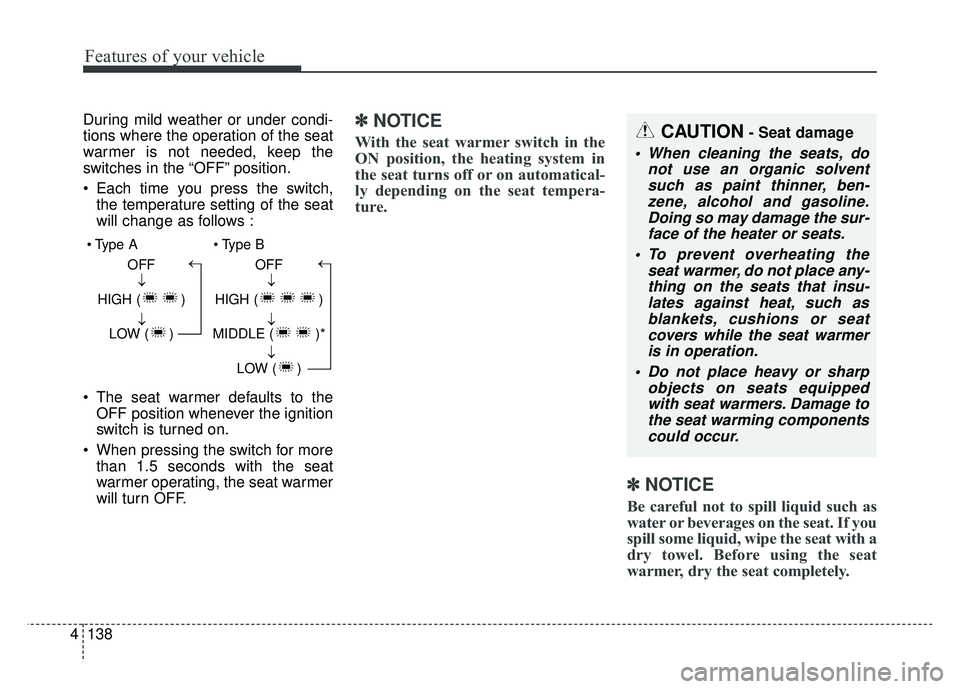
Each time you press the switch,
the temperature setting of the seat
will change as follows :
The seat warmer defaults to the OFF position whenever the ignition
switch is turned on.
When pressing the switch for more than 1.5 seconds with the seat
warmer operating, the seat warmer
will turn OFF.✽ ✽ NOTICE
With the seat warmer switch in the
ON position, the heating system in
the seat turns off or on automatical-
ly depending on the seat tempera-
ture.
✽ ✽NOTICE
Be careful not to spill liquid such as
water or beverages on the seat. If you
spill some liquid, wipe the seat with a
dry towel. Before using the seat
warmer, dry the seat completely.
CAUTION- Seat damage
When cleaning the seats, do
not use an organic solventsuch as paint thinner, ben-zene, alcohol and gasoline.Doing so may damage the sur-face of the heater or seats.
To prevent overheating the seat warmer, do not place any-thing on the seats that insu-lates against heat, such asblankets, cushions or seatcovers while the seat warmeris in operation.
Do not place heavy or sharp objects on seats equippedwith seat warmers. Damage tothe seat warming componentscould occur.
OFF
HIGH ( ) LOW ( )→→→ OFF
HIGH ( )
MIDDLE ( )* LOW ( )
→→→→
Page 226 of 620
Features of your vehicle
140
4
Rear seat warmer (if equipped)
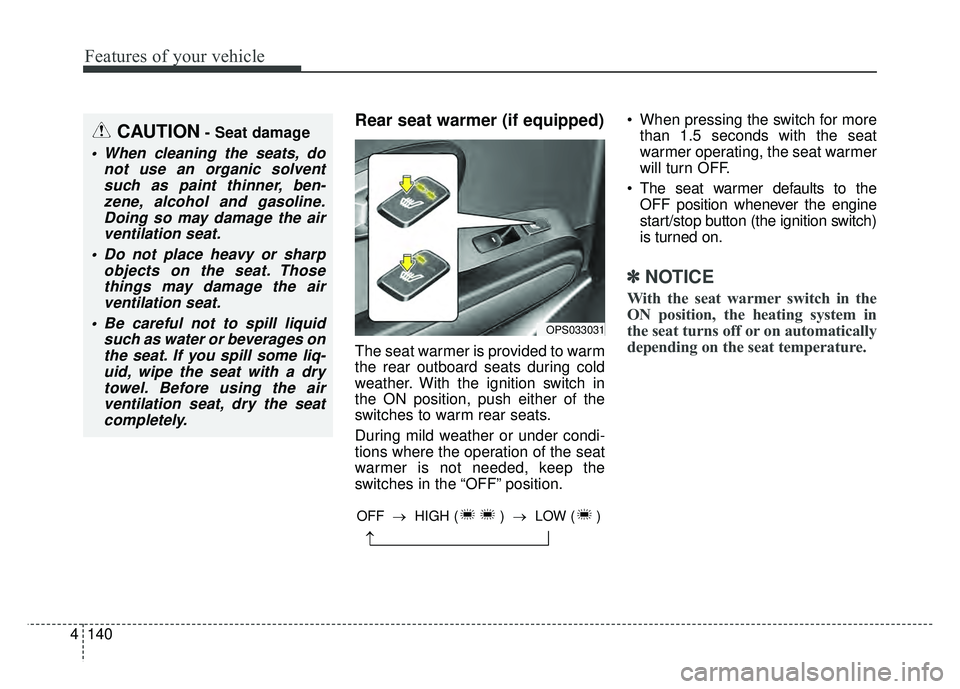
The seat warmer is provided to warm
the rear outboard seats during cold
weather. With the ignition switch in
the ON position, push either of the
switches to warm rear seats.
During mild weather or under condi-
tions where the operation of the seat
warmer is not needed, keep the
switches in the “OFF” position. When pressing the switch for more
than 1.5 seconds with the seat
warmer operating, the seat warmer
will turn OFF.
The seat warmer defaults to the OFF position whenever the engine
start/stop button (the ignition switch)
is turned on.
✽ ✽ NOTICE
With the seat warmer switch in the
ON position, the heating system in
the seat turns off or on automatically
depending on the seat temperature.
CAUTION- Seat damage
When cleaning the seats, do
not use an organic solventsuch as paint thinner, ben-zene, alcohol and gasoline.Doing so may damage the airventilation seat.
Do not place heavy or sharp objects on the seat. Thosethings may damage the airventilation seat.
Be careful not to spill liquid such as water or beverages onthe seat. If you spill some liq-uid, wipe the seat with a drytowel. Before using the airventilation seat, dry the seatcompletely.
OPS033031
→
OFF → HIGH ( ) →LOW ( )
Page 227 of 620
4141
Features of your vehicle
✽
✽NOTICE
Be careful not to spill liquid such as
water or beverages on the seat. If you
spill some liquid, wipe the seat with a
dry towel. Before using the seat
warmer, dry the seat completely.
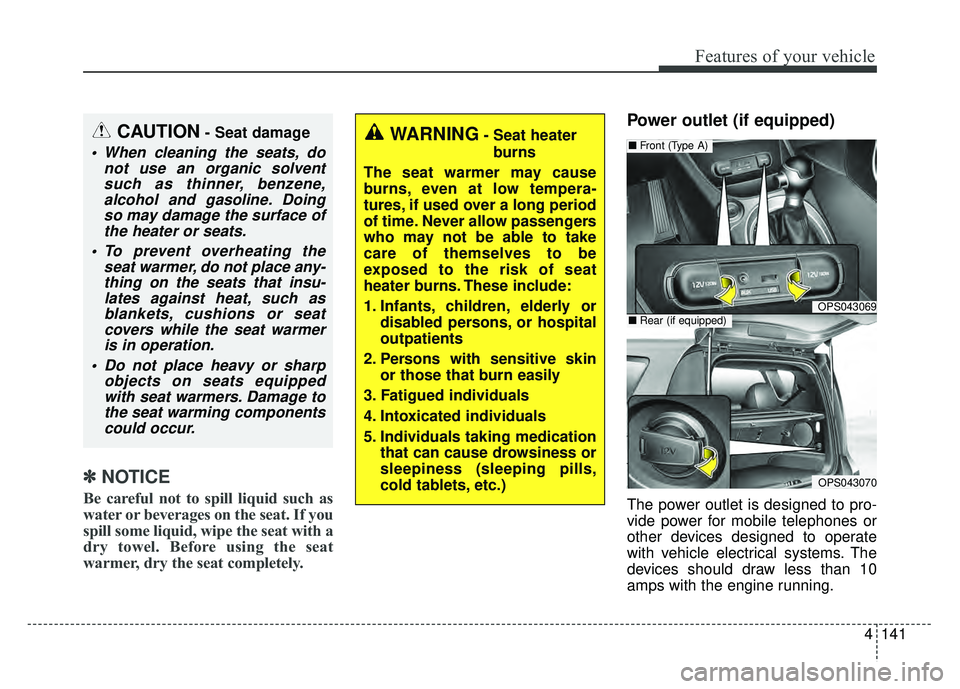
Power outlet (if equipped)
The power outlet is designed to pro-
vide power for mobile telephones or
other devices designed to operate
with vehicle electrical systems. The
devices should draw less than 10
amps with the engine running.
OPS043069
■ Front (Type A)
OPS043070
■Rear (if equipped)
CAUTION- Seat damage
When cleaning the seats, do
not use an organic solventsuch as thinner, benzene,alcohol and gasoline. Doingso may damage the surface ofthe heater or seats.
To prevent overheating the seat warmer, do not place any-thing on the seats that insu-lates against heat, such asblankets, cushions or seatcovers while the seat warmeris in operation.
Do not place heavy or sharp objects on seats equippedwith seat warmers. Damage tothe seat warming componentscould occur.
WARNING- Seat heater
burns
The seat warmer may cause
burns, even at low tempera-
tures, if used over a long period
of time. Never allow passengers
who may not be able to take
care of themselves to be
exposed to the risk of seat
heater burns. These include:
1. Infants, children, elderly or disabled persons, or hospital
outpatients
2. Persons with sensitive skin or those that burn easily
3. Fatigued individuals
4. Intoxicated individuals
5. Individuals taking medication that can cause drowsiness or
sleepiness (sleeping pills,
cold tablets, etc.)
Page 348 of 620
629
Driving your vehicle
Repetitive kick downs may lead tooverheating of the transmission.
This will lead to change in the vehi-
cle speed shift pattern, and illumi-
nate some warning message.
To return the normal driving condi-
tion, refrain from kick down speed
changes. When the warning mes-
sage illuminates, park the vehicle
at a safe location.
During the first 1,500 km (1,000 miles), you may feel that the vehi-
cle may not be smooth when accel-
erating at low speed. During this
break-in period, the shift quality
and performance of your new vehi-
cle is continuously optimized.
Always come to a complete stop before shifting into D (Drive) or R
(Reverse).
Do not put the shift lever in N (Neutral) while driving. Transmission ranges
The indicator in the instrument clus-
ter displays the shift lever position
when the ignition switch is in the ON
position.
P (Park)
Always come to a complete stop
before shifting into P (Park).
To shift from P (Park), you must
depress firmly on the brake pedal
and make sure your foot is off the
accelerator pedal.
The shift lever must be in P (Park)
before turning the engine off. R (Reverse)
Use this position to drive the vehicle
backward.
WARNING
Shifting into P (Park) while the
vehicle is in motion may
cause you to lose control of
the vehicle.
After the vehicle has stopped, always make sure the shift
lever is in P (Park), apply the
parking brake, and turn the
engine off.
Do not use the P (Park) posi- tion in place of the parking
brake.
CAUTION
Always come to a complete stopbefore shifting into or out of R(Reverse); you may damage thetransmission if you shift into R(Reverse) while the vehicle is inmotion.
CAUTION - Holding the
Vehicle Using Accelerator
Pedal
Do not attempt to hold your vehicle on a hill by applying theaccelerator pedal. This cancause your clutch and transmis-sion to be damaged as a resultof overheating.
Page 425 of 620
Driving your vehicle
106
6
If at all possible, avoid sharp turns or
abrupt maneuvers, do not load your
roof rack with heavy cargo, and
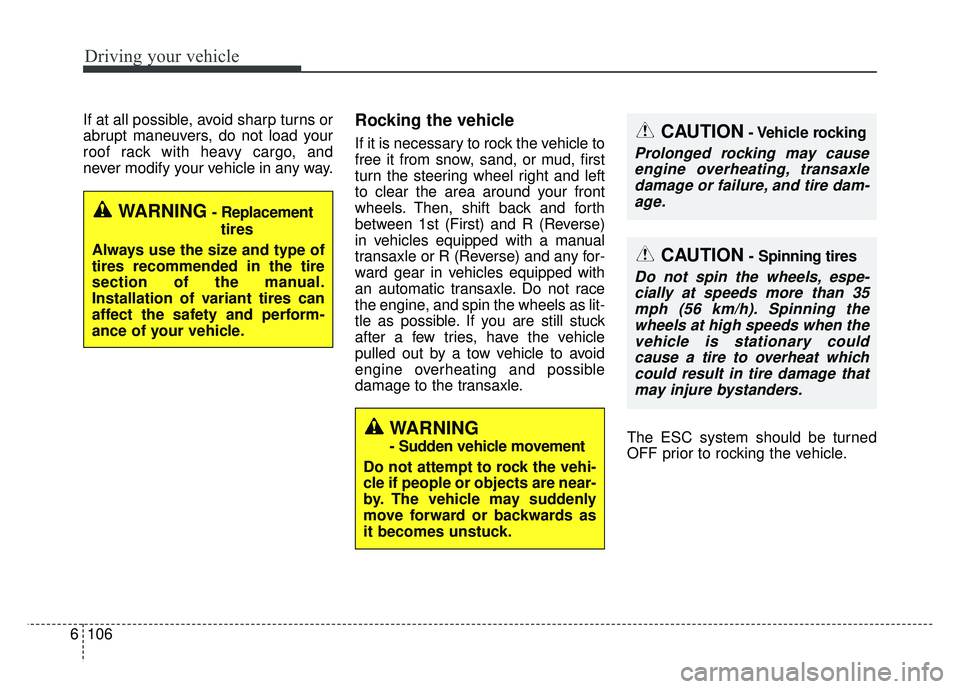
never modify your vehicle in any way.Rocking the vehicle
If it is necessary to rock the vehicle to
free it from snow, sand, or mud, first
turn the steering wheel right and left
to clear the area around your front
wheels. Then, shift back and forth
between 1st (First) and R (Reverse)
in vehicles equipped with a manual
transaxle or R (Reverse) and any for-
ward gear in vehicles equipped with
an automatic transaxle. Do not race
the engine, and spin the wheels as lit-
tle as possible. If you are still stuck
after a few tries, have the vehicle
pulled out by a tow vehicle to avoid
engine overheating and possible
damage to the transaxle.
The ESC system should be turned
OFF prior to rocking the vehicle.CAUTION- Vehicle rocking
Prolonged rocking may causeengine overheating, transaxledamage or failure, and tire dam-age.
WARNING- Replacement
tires
Always use the size and type of
tires recommended in the tire
section of the manual.
Installation of variant tires can
affect the safety and perform-
ance of your vehicle.
CAUTION- Spinning tires
Do not spin the wheels, espe- cially at speeds more than 35mph (56 km/h). Spinning thewheels at high speeds when thevehicle is stationary couldcause a tire to overheat whichcould result in tire damage thatmay injure bystanders.
WARNING
- Sudden vehicle movement
Do not attempt to rock the vehi-
cle if people or objects are near-
by. The vehicle may suddenly
move forward or backwards as
it becomes unstuck.
Page 428 of 620

6109
Driving your vehicle
Driving off-road
Drive carefully off-road because your
vehicle may be damaged by rocks or
roots of trees. Become familiar with
the off-road conditions where you
are going to drive before you begin
driving.
Highway driving
Tires
Adjust the tire inflation pressures to
specification. Low tire inflation pres-
sures will result in overheating and
possible failure of the tires.
Avoid using worn or damaged tires
which may result in reduced traction
or tire failure.
Never exceed the maximum tire
inflation pressure shown on the tires.
Fuel, engine coolant and engineoil
High speed travel consumes more
fuel than urban motoring. Do not for-
get to check both the engine coolant
and engine oil.
Drive belt
A loose or damaged drive belt may
result in overheating of the engine.
WARNING- Under/over inflated tires
Always check the tires for proper
inflation before driving.
Underinflated or overinflated
tires can cause poor handling,
loss of vehicle control, and sud-
den tire failure leading to acci-
dents, injuries, and even death.
For proper tire pressures, refer to
“Tires and wheels” in section 9.
WARNING- Tire tread
Always check the tire tread
before driving your vehicle.
Worn-out tires can result in loss
of vehicle control. Worn-out tires
should be replaced as soon as
possible. For further information
and tread limits, refer to "Tires
and wheels" in section 8.
Page 447 of 620
What to do in an emergency
87
IF THE ENGINE OVERHEATS
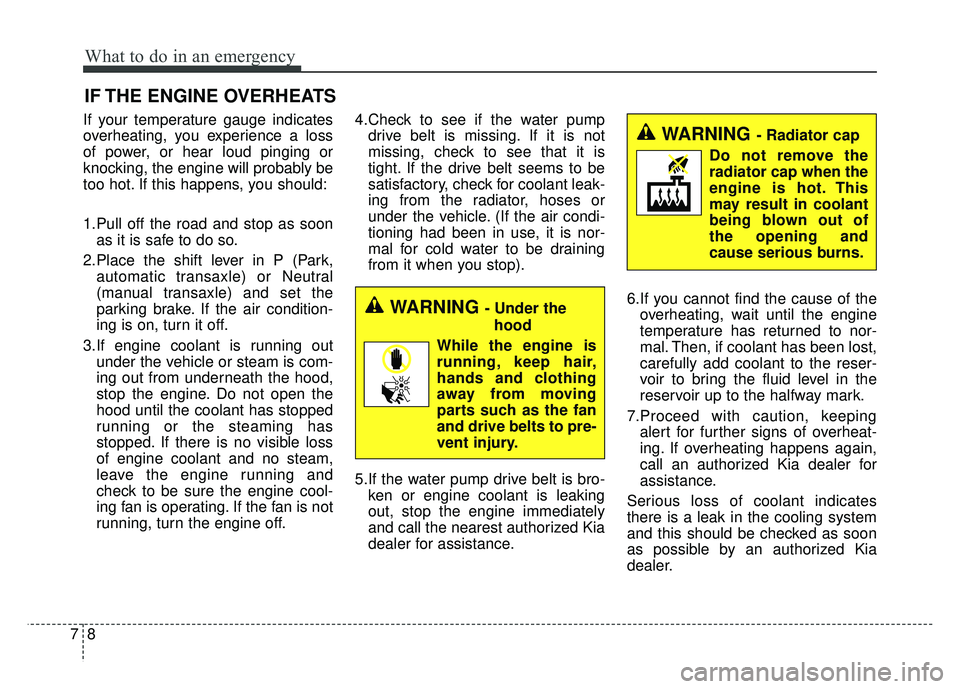
If your temperature gauge indicates
overheating, you experience a loss
of power, or hear loud pinging or
knocking, the engine will probably be
too hot. If this happens, you should:
1.Pull off the road and stop as soonas it is safe to do so.
2.Place the shift lever in P (Park, automatic transaxle) or Neutral
(manual transaxle) and set the
parking brake. If the air condition-
ing is on, turn it off.
3.If engine coolant is running out under the vehicle or steam is com-
ing out from underneath the hood,
stop the engine. Do not open the
hood until the coolant has stopped
running or the steaming has
stopped. If there is no visible loss
of engine coolant and no steam,
leave the engine running and
check to be sure the engine cool-
ing fan is operating. If the fan is not
running, turn the engine off. 4.Check to see if the water pump
drive belt is missing. If it is not
missing, check to see that it is
tight. If the drive belt seems to be
satisfactory, check for coolant leak-
ing from the radiator, hoses or
under the vehicle. (If the air condi-
tioning had been in use, it is nor-
mal for cold water to be draining
from it when you stop).
5.If the water pump drive belt is bro- ken or engine coolant is leaking
out, stop the engine immediately
and call the nearest authorized Kia
dealer for assistance. 6.If you cannot find the cause of the
overheating, wait until the engine
temperature has returned to nor-
mal. Then, if coolant has been lost,
carefully add coolant to the reser-
voir to bring the fluid level in the
reservoir up to the halfway mark.
7.Proceed with caution, keeping alert for further signs of overheat-
ing. If overheating happens again,
call an authorized Kia dealer for
assistance.
Serious loss of coolant indicates
there is a leak in the cooling system
and this should be checked as soon
as possible by an authorized Kia
dealer.
WARNING - Under the hood
While the engine is running, keep hair,
hands and clothing
away from moving
parts such as the fan
and drive belts to pre-
vent injury.
WARNING - Radiator cap
Do not remove the
radiator cap when the
engine is hot. This
may result in coolant
being blown out of
the opening and
cause serious burns.
Page 610 of 620
Index
2I
Air bag - advanced supplemental restraint system . . . . 3-42Adding equipment to or modifying your air bag-equipped vehicle . . . . . . . . . . . . . . . . . . . . 3-68
Air bag warning label. . . . . . . . . . . . . . . . . . . . . . . . 3-68
Air bag warning light . . . . . . . . . . . . . . . . . . . . . . . . 3-45
Curtain air bag . . . . . . . . . . . . . . . . . . . . . . . . . . . . . 3-61
Driver's and passenger's front air bag . . . . . . . . . . . 3-56
How does the air bag system operate. . . . . . . . . . . . 3-43
Occupant Detection System (ODS) . . . . . . . . . . . . . 3-49
Side air bag. . . . . . . . . . . . . . . . . . . . . . . . . . . . . . . . 3-59
SRS Care . . . . . . . . . . . . . . . . . . . . . . . . . . . . . . . . . 3-67
SRS components and functions . . . . . . . . . . . . . . . . 3-46
Air cleaner . . . . . . . . . . . . . . . . . . . . . . . . . . . . . . . . . . 8-48\
Filter replacement. . . . . . . . . . . . . . . . . . . . . . . . . . . 8-48
Air conditioning system . . . . . . . . . . . . . . . . . . . . . . . . . 9-6
Appearance care . . . . . . . . . . . . . . . . . . . . . . . . . . . . . 8-106 Exterior care . . . . . . . . . . . . . . . . . . . . . . . . . . . . . . 8-106
Interior care . . . . . . . . . . . . . . . . . . . . . . . . . . . . . . 8-111
Audio (With Touch Screen) . . . . . . . . . . . . . . . . . . . . . 5-46 Feature of Your Audio . . . . . . . . . . . . . . . . . . . . . . . 5-47
Media . . . . . . . . . . . . . . . . . . . . . . . . . . . . . . . . . . . . \
5-57
Phone . . . . . . . . . . . . . . . . . . . . . . . . . . . . . . . . . . . . \
5-73
Radio . . . . . . . . . . . . . . . . . . . . . . . . . . . . . . . . . . . . \
5-53
Setup . . . . . . . . . . . . . . . . . . . . . . . . . . . . . . . . . . . . \
. 5-82
Siri . . . . . . . . . . . . . . . . . . . . . . . . . . . . . . . . . . . . \
. . 5-81
SiriusXM . . . . . . . . . . . . . . . . . . . . . . . . . . . . . . . . . 5-55 Audio (Without Touch Screen) . . . . . . . . . . . . . . . . . . . 5-10
Feature of Your Audio . . . . . . . . . . . . . . . . . . . . . . . 5-11
Media . . . . . . . . . . . . . . . . . . . . . . . . . . . . . . . . . . . . \
5-20
Phone . . . . . . . . . . . . . . . . . . . . . . . . . . . . . . . . . . . . \
5-35
Radio . . . . . . . . . . . . . . . . . . . . . . . . . . . . . . . . . . . . \
5-16
Setup . . . . . . . . . . . . . . . . . . . . . . . . . . . . . . . . . . . . \
. 5-44
Siri . . . . . . . . . . . . . . . . . . . . . . . . . . . . . . . . . . . . \
. . 5-43
SiriusXM . . . . . . . . . . . . . . . . . . . . . . . . . . . . . . . . . 5-18
Audio System . . . . . . . . . . . . . . . . . . . . . . . . . . . . . . . . . 5-2 Antenna . . . . . . . . . . . . . . . . . . . . . . . . . . . . . . . . . . . 5-\
2
Audio remote control . . . . . . . . . . . . . . . . . . . . . . . . . 5-3
AUX and USB port . . . . . . . . . . . . . . . . . . . . . . . . . . 5-4
How vehicle audio works . . . . . . . . . . . . . . . . . . . . . . 5-6
Speaker lights . . . . . . . . . . . . . . . . . . . . . . . . . . . . . . . 5-4
Automatic climate control system . . . . . . . . . . . . . . . 4-114 Air Conditioning refrigerant label . . . . . . . . . . . . . 4-126
Automatic heating and air conditioning. . . . . . . . . 4-115
Checking the amount of air conditioner refrigerant and compressor lubricant . . . . . . . . . . . . . . . . . . . . . . 4-127
Climate control air filter. . . . . . . . . . . . . . . . . . . . . 4-125
Manual heating and air conditioning . . . . . . . . . . . 4-116
System operation . . . . . . . . . . . . . . . . . . . . . . . . . . 4-123
Automatic transaxle . . . . . . . . . . . . . . . . . . . . . . . . . . . 6-19 Automatic transaxle operation . . . . . . . . . . . . . . . . . 6-19
Good driving practices . . . . . . . . . . . . . . . . . . . . . . . 6-24
Autonomous emergency braking (AEB) . . . . . . . . . . . 6-48 AEB warning message and system control . . . . . . . 6-50
Brake operation . . . . . . . . . . . . . . . . . . . . . . . . . . . . 6-52
A