Page 18 of 586
Safety features of your vehicle
23
Front seat
(1) Forward and backward
(2) Seatback angle
(3) Seat cushion height
(4) Lumbar support (Driver’s seat)
(5) Driver position memory
(6) Headrest
(7) Walk-in switch
2nd / 3rd row seat
(8) Forward and backward
(9) Seatback angle and folding
(10) Walk-in
(11) Headrest
(12) Armrest
(13) Seatback angle and folding
(14) Seat sinking
(15) Headrest
SEATS
OYP037322N
Manual seat
Power seat
Page 40 of 586
Safety features of your vehicle
24
3
4. Make sure the green mark on the
rear seat cushion frame is visible
and the catches are locked in posi-
tion by moving the seat forward
and backward or lifting the front
portion of the seat. If the green
mark is invisible and the seat
moves, it is not locked properly.
5. Pull up the seatback recline strap.
6. Lift and push the seatback back- ward firmly until it clicks into place.
Make sure the seatback is locked
in place.
7. Return the seat belt to the proper position. If the rear catches of the seat are
locked into the rear anchors (2) while
the front catches are not locked into
the front anchors (1), do the follow-
ings to release the rear catches from
the rear anchors.
OYP034232N
WARNING - Installing or
removing the tumble seat
Do not install or remove the
tumble (2nd row center) seat, if
there are occupants in the 3rd
row seats, as this may injure
occupants.
OYP034233N
OYP034235N
Page 44 of 586

Safety features of your vehicle
28
3
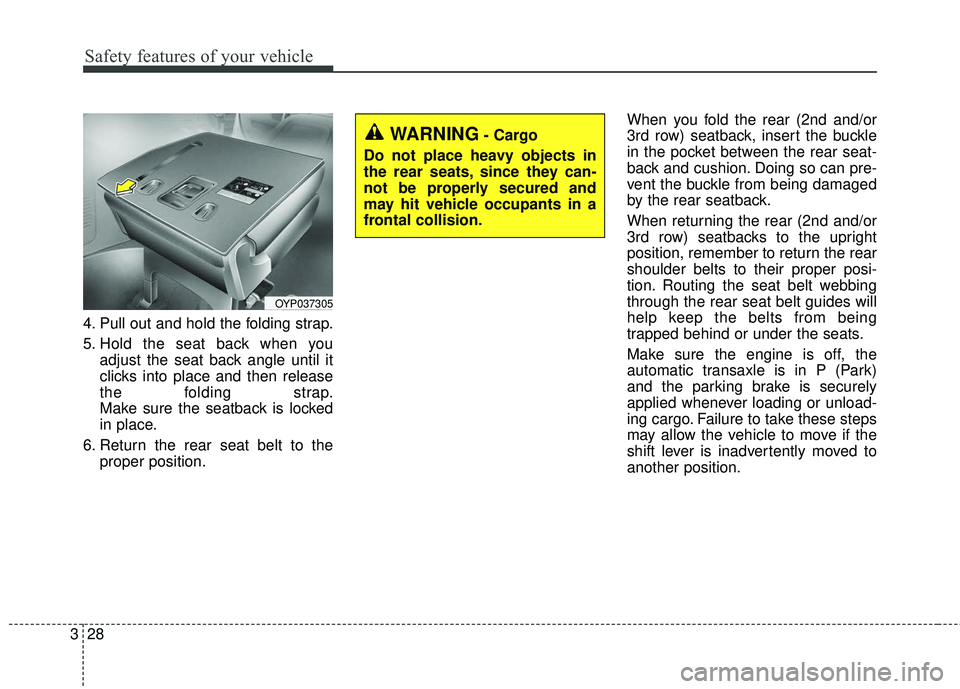
4. Pull out and hold the folding strap.
5. Hold the seat back when you
adjust the seat back angle until it
clicks into place and then release
the folding strap.
Make sure the seatback is locked
in place.
6. Return the rear seat belt to the proper position. When you fold the rear (2nd and/or
3rd row) seatback, insert the buckle
in the pocket between the rear seat-
back and cushion. Doing so can pre-
vent the buckle from being damaged
by the rear seatback.
When returning the rear (2nd and/or
3rd row) seatbacks to the upright
position, remember to return the rear
shoulder belts to their proper posi-
tion. Routing the seat belt webbing
through the rear seat belt guides will
help keep the belts from being
trapped behind or under the seats.
Make sure the engine is off, the
automatic transaxle is in P (Park)
and the parking brake is securely
applied whenever loading or unload-
ing cargo. Failure to take these steps
may allow the vehicle to move if the
shift lever is inadvertently moved to
another position.
WARNING- Cargo
Do not place heavy objects in
the rear seats, since they can-
not be properly secured and
may hit vehicle occupants in a
frontal collision.
OYP037305
Page 45 of 586
329
Safety features of your vehicle
Armrest (2nd row seat)
The 2nd row seats have the armrest
located on the side of seatback.Type A
To use the armrest, swing down the
armrest to the lowest position.
Type B
To use the armrest, press the
release button
(1) on the armrest and adjust the
angle to the desired position. And
then release the button (1).
OUN026140
WARNING - 3rd row seat
3rd row occupants should always
remain in the center of the seat
cushion so the occupants head
is protected by the headrest.
If not, the tailgate may hit the
occupant's head, which could
cause injury.
OYP034254N
OYP034300N/Q
■ Type A
■ Type B (for SXL package)
Page 60 of 586
Safety features of your vehicle
44
3
Stowing the rear seat belt
The rear seat belt buckles can be
stowed in the pocket between the
rear seatback and cushion when not
in use.
Routing the seat belt webbing
through the rear seat belt guides will
help keep the belts from being
trapped behind or under the seats.
After inserting the seat belt, tighten
the belt webbing by pulling it up.
CAUTION
Remove the seat belt from the
guides before using. If you pullon the seat belt when it is storedin the guides, it may damage theguides and/or belt webbing.
OYP034214N
OYP034267N
OYP034212N
■ 2nd row seat (for 2nd row center seat, if equipped)
■ 3rd row
Page 72 of 586

Safety features of your vehicle
56
3
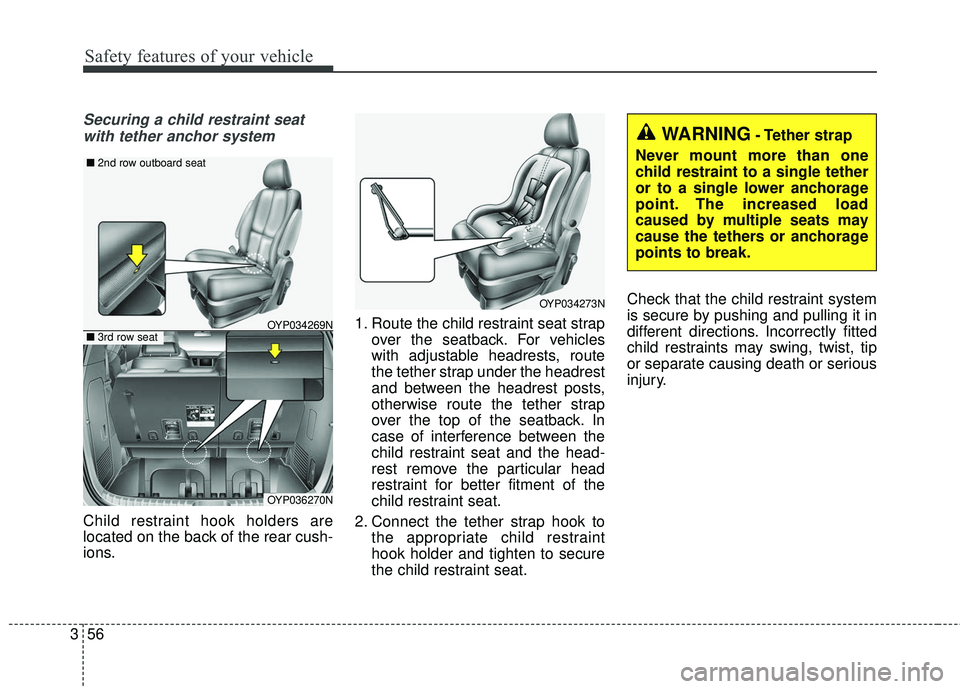
Securing a child restraint seat
with tether anchor system
Child restraint hook holders are
located on the back of the rear cush-
ions. 1. Route the child restraint seat strap
over the seatback. For vehicles
with adjustable headrests, route
the tether strap under the headrest
and between the headrest posts,
otherwise route the tether strap
over the top of the seatback. In
case of interference between the
child restraint seat and the head-
rest remove the particular head
restraint for better fitment of the
child restraint seat.
2. Connect the tether strap hook to the appropriate child restraint
hook holder and tighten to secure
the child restraint seat. Check that the child restraint system
is secure by pushing and pulling it in
different directions. Incorrectly fitted
child restraints may swing, twist, tip
or separate causing death or serious
injury.
OYP034273N
WARNING- Tether strap
Never mount more than one
child restraint to a single tether
or to a single lower anchorage
point. The increased load
caused by multiple seats may
cause the tethers or anchorage
points to break.
OYP036270N
OYP034269N
■ 2nd row outboard seat
■3rd row seat
Page 73 of 586

357
Safety features of your vehicle
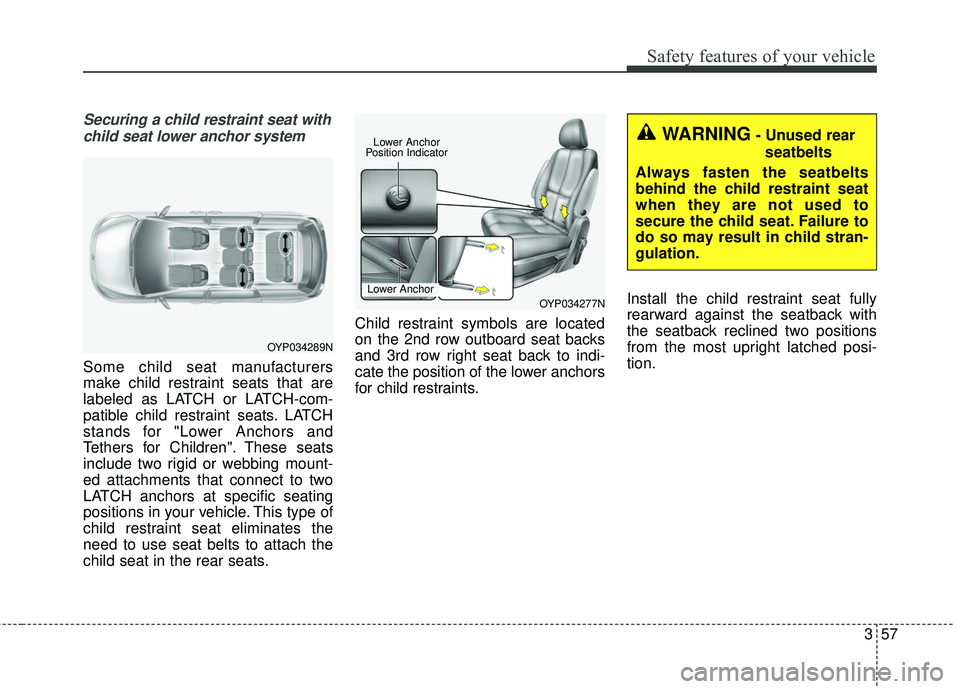
Securing a child restraint seat withchild seat lower anchor system
Some child seat manufacturers
make child restraint seats that are
labeled as LATCH or LATCH-com-
patible child restraint seats. LATCH
stands for "Lower Anchors and
Tethers for Children". These seats
include two rigid or webbing mount-
ed attachments that connect to two
LATCH anchors at specific seating
positions in your vehicle. This type of
child restraint seat eliminates the
need to use seat belts to attach the
child seat in the rear seats. Child restraint symbols are located
on the 2nd row outboard seat backs
and 3rd row right seat back to indi-
cate the position of the lower anchors
for child restraints.
Install the child restraint seat fully
rearward against the seatback with
the seatback reclined two positions
from the most upright latched posi-
tion.
OYP034277NLower Anchor
WARNING- Unused rear
seatbelts
Always fasten the seatbelts
behind the child restraint seat
when they are not used to
secure the child seat. Failure to
do so may result in child stran-
gulation.
OYP034289N
Lower Anchor
Position Indicator
Page 74 of 586

Safety features of your vehicle
58
3
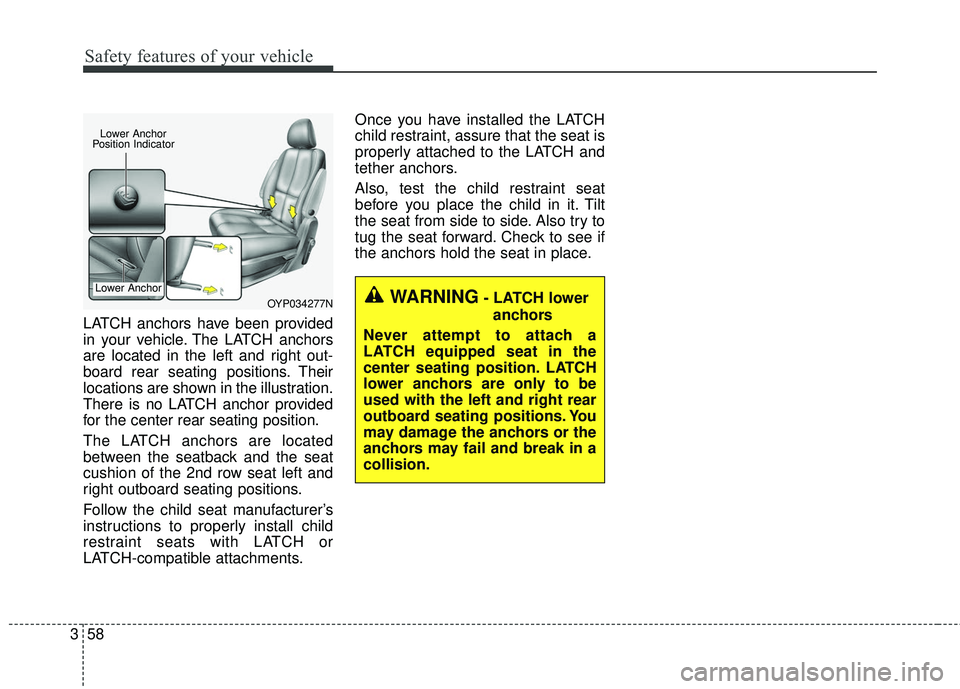
LATCH anchors have been provided
in your vehicle. The LATCH anchors
are located in the left and right out-
board rear seating positions. Their
locations are shown in the illustration.
There is no LATCH anchor provided
for the center rear seating position.
The LATCH anchors are located
between the seatback and the seat
cushion of the 2nd row seat left and
right outboard seating positions.
Follow the child seat manufacturer’s
instructions to properly install child
restraint seats with LATCH or
LATCH-compatible attachments. Once you have installed the LATCH
child restraint, assure that the seat is
properly attached to the LATCH and
tether anchors.
Also, test the child restraint seat
before you place the child in it. Tilt
the seat from side to side. Also try to
tug the seat forward. Check to see if
the anchors hold the seat in place.
WARNING- LATCH lower
anchors
Never attempt to attach a
LATCH equipped seat in the
center seating position. LATCH
lower anchors are only to be
used with the left and right rear
outboard seating positions. You
may damage the anchors or the
anchors may fail and break in a
collision.OYP034277N
Lower Anchor
Lower Anchor
Position Indicator