Page 208 of 586

Features of your vehicle
106
4
Average Fuel Economy (2)
The average fuel economy is calcu-
lated by the total driving distance
and fuel consumption since the last
average fuel economy reset.
- Fuel economy range : 0.0 ~ 99.9MPG or L/100km
The average fuel economy can be reset both manually and automati-
cally.
Manual reset
To reset average fuel economy manu-
ally,
- Type A cluster Press the RESET button
- Type B and C cluster Press the SELECT scroll switch (OK)
on the steering wheel for more
than 1 second when the average
fuel economy is displayed. Automatic reset
To make the average fuel economy
be reset automatically whenever refu-
eling, select the “Auto Reset” mode in
User Setting menu of the LCD display
(Refer to “LCD Display”).
Under “Auto Reset” mode, the aver-
age fuel economy will be cleared to
zero (---) when the vehicle speed
exceeds 1 km/h after refueling more
than 6 liters (1.6 gallons).
✽ ✽
NOTICE
The average fuel economy is not dis-
played for more accurate calculation
if the vehicle does not drive more
than 10 seconds or 50 meters (0.03
miles) since the ignition switch or
Engine Start/Stop button is turned
to ON.
Instant Fuel Economy (3)
This mode displays the instant fuel
economy during the last few sec-
onds when the vehicle speed is
more than 10 km/h (6.2 MPH).
- Fuel economy range : 0 ~ 30L/100km or 0 ~ 50 MPG
Page 269 of 586

4167
Features of your vehicle
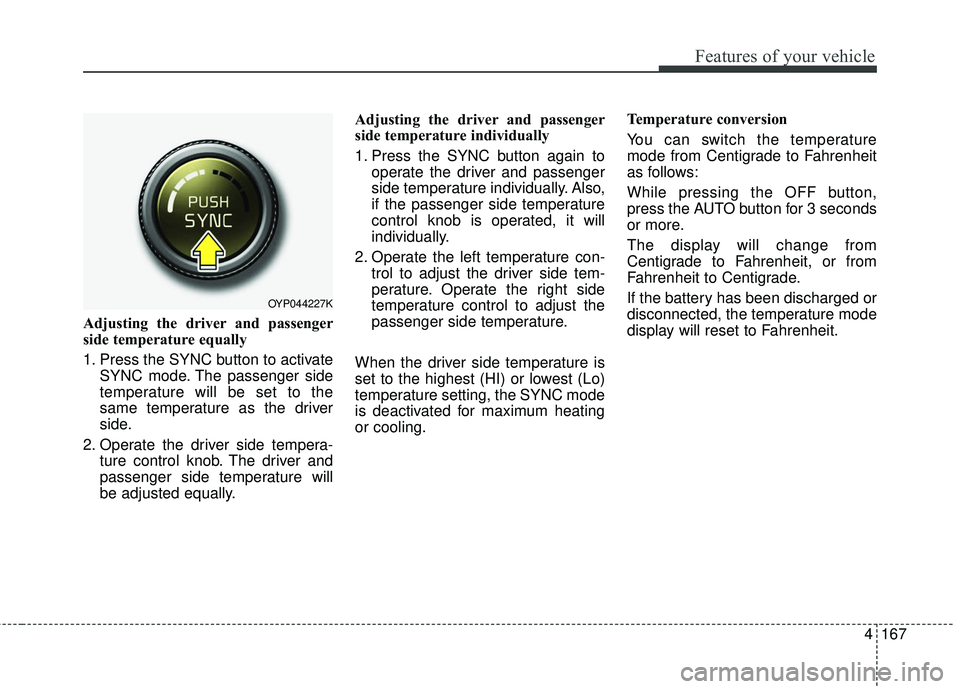
Adjusting the driver and passenger
side temperature equally
1. Press the SYNC button to activateSYNC mode. The passenger side
temperature will be set to the
same temperature as the driver
side.
2. Operate the driver side tempera- ture control knob. The driver and
passenger side temperature will
be adjusted equally. Adjusting the driver and passenger
side temperature individually
1. Press the SYNC button again to
operate the driver and passenger
side temperature individually. Also,
if the passenger side temperature
control knob is operated, it will
individually.
2. Operate the left temperature con- trol to adjust the driver side tem-
perature. Operate the right side
temperature control to adjust the
passenger side temperature.
When the driver side temperature is
set to the highest (HI) or lowest (Lo)
temperature setting, the SYNC mode
is deactivated for maximum heating
or cooling. Temperature conversion
You can switch the temperature
mode from Centigrade to Fahrenheit
as follows:
While pressing the OFF button,
press the AUTO button for 3 seconds
or more.
The display will change from
Centigrade to Fahrenheit, or from
Fahrenheit to Centigrade.
If the battery has been discharged or
disconnected, the temperature mode
display will reset to Fahrenheit.
OYP044227K
Page 284 of 586

Features of your vehicle
182
4
To defrost outside windshield
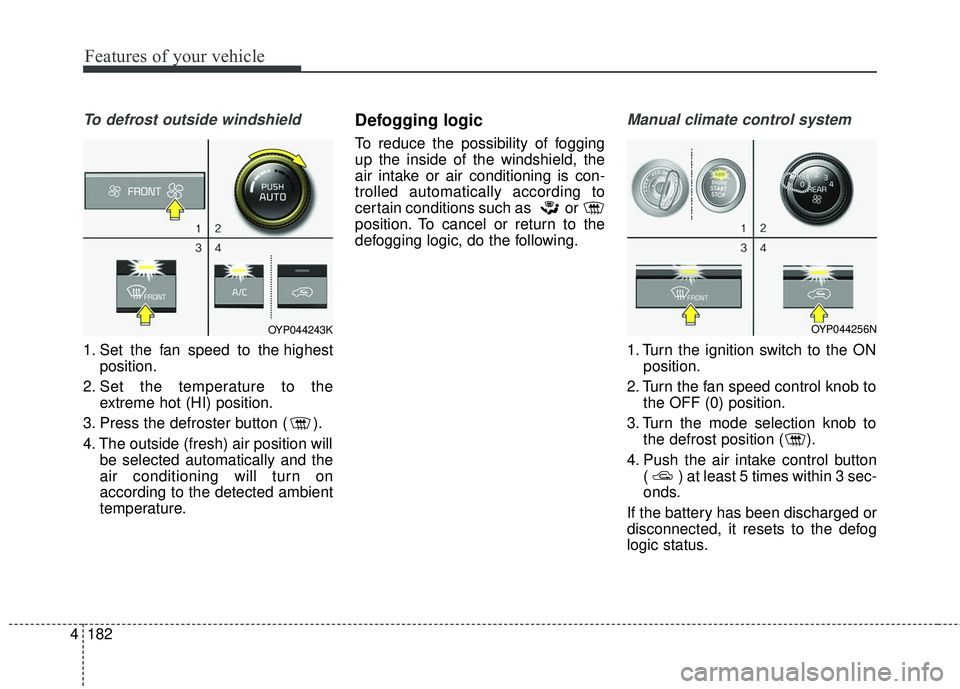
1. Set the fan speed to the highest
position.
2. Set the temperature to the extreme hot (HI) position.
3. Press the defroster button ( ).
4. The outside (fresh) air position will be selected automatically and the
air conditioning will turn on
according to the detected ambient
temperature.
Defogging logic
To reduce the possibility of fogging
up the inside of the windshield, the
air intake or air conditioning is con-
trolled automatically according to
certain conditions such as or
position. To cancel or return to the
defogging logic, do the following.
Manual climate control system
1. Turn the ignition switch to the ONposition.
2. Turn the fan speed control knob to the OFF (0) position.
3. Turn the mode selection knob to the defrost position ( ).
4. Push the air intake control button ( ) at least 5 times within 3 sec-
onds.
If the battery has been discharged or
disconnected, it resets to the defog
logic status.
OYP044243KOYP044256N
Page 285 of 586
4183
Features of your vehicle
Automatic climate control system
1. Turn the ignition switch to the ONposition.
2. Select the defroster position press- ing the defroster button ( ).
3. While pressing the air conditioning button (A/C), press the air intake
control button at least 5 times with-
in 3 seconds.
The recirculation indicator blinks 3
times with 0.5 second of interval. It
indicates that the defogging logic is
canceled or returned to the pro-
grammed status. If the battery has been discharged or
disconnected, it resets to the defog
logic status.
Auto defogging system
(if equipped)
Auto defogging reduces the probabil-
ity of fogging up the inside of the
windshield by automatically sensing
the moisture of inside the windshield.
The auto defogging system operates
when the heater or air conditioning is
on.
OYP044258N
OYP057021
Page 286 of 586

Features of your vehicle
184
4
This indicator illuminates
when the auto defogging
system senses the mois-
ture of inside the wind-
shield and operates.
If more moisture is in the vehicle,
higher steps operate as follow. For
example if auto defogging does not
defog inside the windshield at step 1
Outside air position, it tries to defog
again at step 2 Blowing air toward
the windshield.
Step 1 : Outside air position
Step 2 :Blowing air toward the wind-
shield
Step 3 : Increasing air flow toward the windshield
Step 4 : Operating the air conditioning
Step 5 : M aximizing the air condi-
tioning To cancel or reset the Auto Defogging
System
Press the front windshield defroster
button for 3 seconds when the igni-
tion switch is in the ON position.
When the ADS system is canceled,
[ADS OFF] symbol will blink 3 times
per 1 sec and the position [ADS
OFF] will be displayed on the climate
control information screen. (A TYPE)
When the ADS system is canceled,
Indicator on the button will blink 3
times per 0.5 sec. (B TYPE)
When the ADS system is reset, [ADS
OFF] symbol will blink 6 times per
0.5sec and the position [ADS OFF]
will be disappeared on the climate
control information screen. (A TYPE)
When the ADS system is reset,
Indicator on the button will blink 6
times per 0.25 sec. (B TYPE)
✽ ✽
NOTICE
If the A/C off or recirculated air
position is manually selected while
the auto defogging system is on, the
auto defogging indicator will blink 3
times to give notice that manual
operation is canceled.
Do not remove the sensor cover
located on the upper end of the pas-
senger side windshield glass.
Damage to the system parts could
occur and may not be covered by
your vehicle warranty.
Page 310 of 586
4 208
Features of your vehicle
(7) RESET
Shutdown and restart the system.
(8) DISP
Turn the display on or off.
(9) MUTE
When the button is pressed, stops sound and icon is displayed on
LCD.
(10) SETUP
Display, Sound, Bluetooth, System and Display Off settings.
(11) TUNE knob
Turn to navigate through the sta- tions/songs list.
Press to select an item.
Page 311 of 586

209
4
Features of your vehicle
Steering wheel remote control
❈
The actual image in the vehicle
may differ from the illustration.
(1) VOICE
Pressing the button - If Siri is not active: Starts Siri.
- If Siri is active: Re-starts Siri.
Pressing and holding the button: Siri is deactivated.
(2) MODE
Press the button to change the mode in the following order: Radio
➟ Media. (3)
VOLUME
Press to adjust the volume.
(4) UP/DOWN
Press the button in radio mode to search Presets.
Press and hold the button in radio mode to search frequencies.
Press the button in media mode to change the current song.
Press and hold the button in media mode to quick search through
songs.
(5) CALL
Pressing the button - If not in
Bluetooth®Wireless
Technology Handsfree mode or
receiving a phone call.
First press: Display Dial Number
screen.
Second press: Automatically dis-
play the most recently Dialed call
number.
Third press: Dial the phone num-
ber entered. - Press in the Incoming Call notifi-
cation screen to accept the
phone call.
- Press in
Bluetooth®Wireless
Technology Handsfree mode to
switch to the waiting call.
Pressing and holding the button (over 1.0 seconds)
- If not in
Bluetooth®Wireless
Technology Handsfree mode or
receiving a phone call, the most
recently Dialed Call number is
dialed.
- Press in
Bluetooth®Wireless
Technology Handsfree mode to
transfer the call to your cell
phone.
- Press in cell phone mode to switch to
Bluetooth®Wireless
Technology Handsfree mode.
(6) END
Press in
Bluetooth®Wireless
Technology Handsfree mode to
end the phone call.
Press in the incoming call screen to reject the call.
Page 315 of 586

213
4
Features of your vehicle
Radio
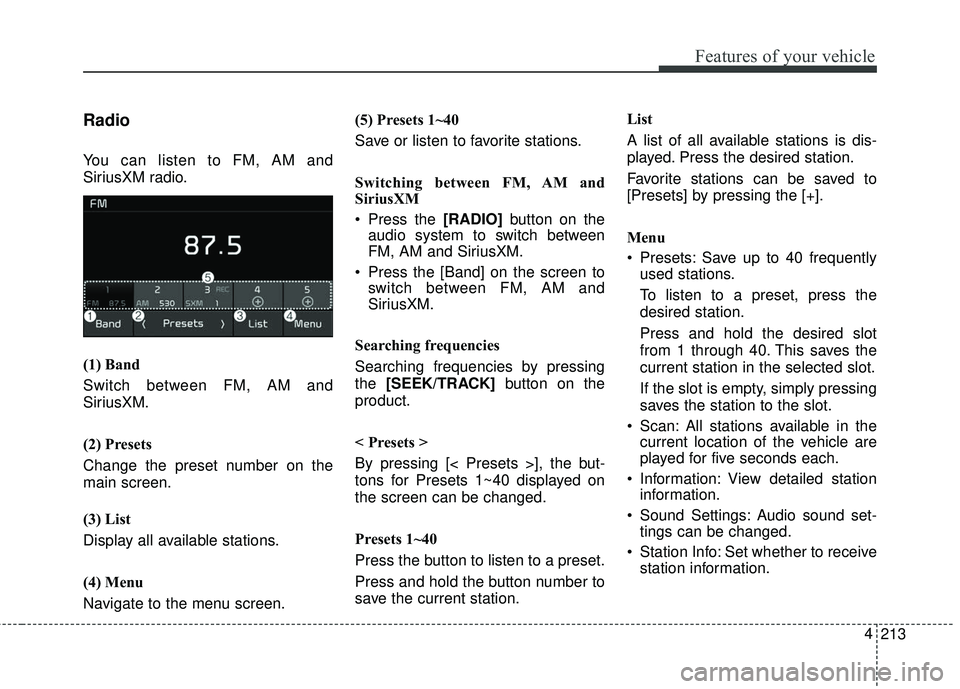
You can listen to FM, AM and
SiriusXM radio.
(1) Band
Switch between FM, AM and
SiriusXM.
(2) Presets
Change the preset number on the
main screen.
(3) List
Display all available stations.
(4) Menu
Navigate to the menu screen. (5) Presets 1~40
Save or listen to favorite stations.
Switching between FM, AM and
SiriusXM
Press the [RADIO]
button on the
audio system to switch between
FM, AM and SiriusXM.
Press the [Band] on the screen to switch between FM, AM and
SiriusXM.
Searching frequencies
Searching frequencies by pressing
the [SEEK/TRACK] button on the
product.
< Presets >
By pressing [< Presets >], the but-
tons for Presets 1~40 displayed on
the screen can be changed.
Presets 1~40
Press the button to listen to a preset.
Press and hold the button number to
save the current station. List
A list of all available stations is dis-
played. Press the desired station.
Favorite stations can be saved to
[Presets] by pressing the [+].
Menu
Presets: Save up to 40 frequently
used stations.
To listen to a preset, press the
desired station.
Press and hold the desired slot
from 1 through 40. This saves the
current station in the selected slot.
If the slot is empty, simply pressing
saves the station to the slot.
Scan: All stations available in the current location of the vehicle are
played for five seconds each.
Information: View detailed station information.
Sound Settings: Audio sound set- tings can be changed.
Station Info: Set whether to receive station information.