2018 KIA RIO trailer
[x] Cancel search: trailerPage 9 of 490

Introduction
61
No special break-in period is need-
ed. By following a few simple precau-
tions for the first 1,000 km (600
miles) you may add to the perform-
ance, economy and life of your vehi-
cle.
Do not race the engine.
While driving, keep your enginespeed (rpm, or revolutions per
minute) between 2,000 rpm and
4,000 rpm.
Do not maintain a single speed for long periods of time, either fast or
slow. Varying engine speed is
needed to properly break-in the
engine.
Avoid hard stops, except in emer- gencies, to allow the brakes to seat
properly.
Don't tow a trailer during the first 2,000 km (1,200 miles) of opera-
tion.
VEHICLE BREAK-IN
PROCESS
Page 291 of 490
643
Driving your vehicle
The AEB may unnecessarily pro-duce warning messages and warn-
ing alarms. Due to the sensing lim-
itation, the AEB may not produce
warning messages or warning
alarm at all.
When there is a malfunction with the AEB, the braking control does
not operate upon detecting a colli-
sion risk even with other braking
systems normally operating.
The AEB operates only for the vehicle in front, while driving for-
ward. It does not operate for any
animals or vehicles in the opposite
direction.
The AEB can not recognize cross- traffic or parked vehicles present-
ing a side-profile.
If the vehicle ahead suddenly stops, there is a risk of collision.
The driver must always pay caution
in case of dangerous situations.
In case of sudden braking when the AEB Is activated, objects inside
the vehicle may move and injure
the occupants. When the driver depresses the
brake in a risk of collision, the AEB
system may not operate.
The AEB may not operate due to driving or traffic condition, weather,
and road condition.
The AEB may not operate in all vehicles.Limitation of the system
The AEB is an assistant system for a
driver in a certain risky driving condi-
tion and it does not take every
responsibility for all risks from driving
condition.
The AEB monitors the driving situa-
tions through the radar. For any vehi-
cle activity occurring outside the sen-
sor range, the AEB may not function.
The driver should exercise caution in
the following situations, as the AEB
operation may be limited:
- In situations when there is severeradar reflection, the AEB may not
operate normally. (parking lot, iron
bridge, etc.)
- Special vehicles (bus, truck, con- structive vehicle, trailer, etc.) in
which radars are difficult to detect,
the AEB may not operate normally.
Page 292 of 490
Driving your vehicle
44
6
Recognizing vehicles
- Sensor or sensor cover is contam-
inated with foreign substances.
- It heavily rains or snows.
- There is electromagnetic interfer- ence.
- Something in the path of travel deflects the radar waves.
- The vehicle in front has a narrow body. (i.e. motorcycles)
- The vehicle in front is a special vehicle, such as a heavily-loaded
truck or a trailer.
- The vehicle driving is unstable.
- The radar sensor recognition is limited.
- Driving on unpaved and uneven road surfaces, or through sudden
gradient changes.
- In construction zones or on railroad tracks, or there are metallic objects
on the road.
- Driving indoors such as in an underground parking lot. - Driving in an underground parking
lot.
- Entering a tunnel or tollgate.
- There are materials which easily reflect radar signals. (guardrails,
approaching vehicles, etc.)
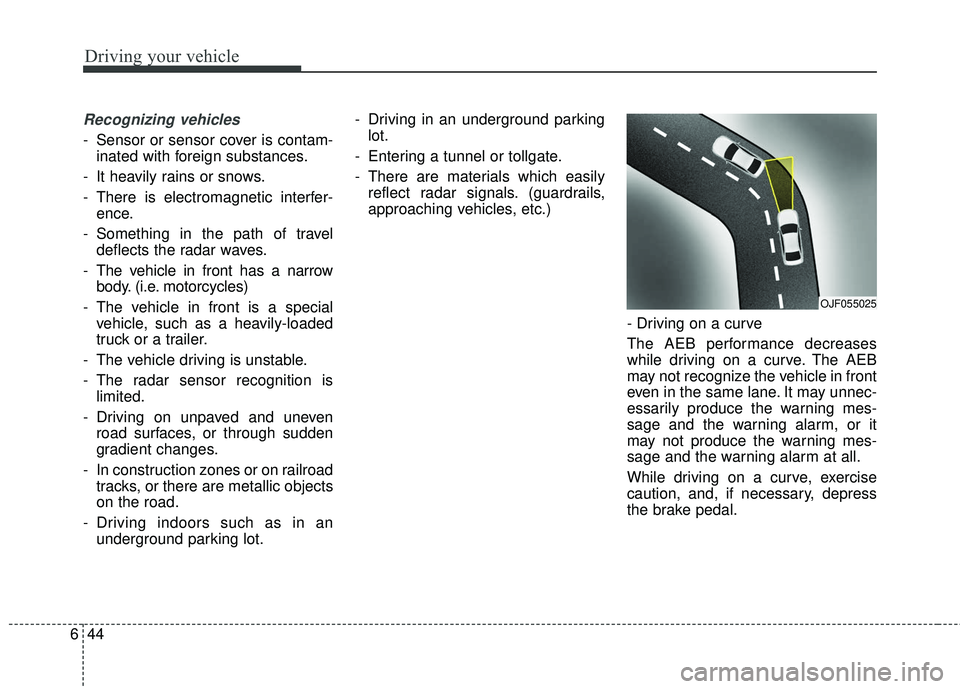
- Driving on a curve
The AEB performance decreases
while driving on a curve. The AEB
may not recognize the vehicle in front
even in the same lane. It may unnec-
essarily produce the warning mes-
sage and the warning alarm, or it
may not produce the warning mes-
sage and the warning alarm at all.
While driving on a curve, exercise
caution, and, if necessary, depress
the brake pedal.
OJF055025
Page 312 of 490
Driving your vehicle
64
6
Don't let your parking brake
freeze
Under some conditions your parking
brake can freeze in the engaged
position. This is most likely to hap-
pen when there is an accumulation
of snow or ice around or near the
rear brakes or if the brakes are wet.
If there is a risk the parking brake
may freeze, apply it only temporarily
while you put the shift lever in P
(automatic transaxle) or in first or
reverse gear (manual transaxle) and
block the rear wheels so the vehicle
cannot roll. Then release the parking
brake.
Don't let ice and snow accu-
mulate underneath
Under some conditions, snow and
ice can build up under the fenders
and interfere with the steering. When
driving in severe winter conditions
where this may happen, you should
periodically check underneath the
car to be sure the movement of the
front wheels and the steering com-
ponents is not obstructed.
Carry emergency equipment
Depending on the severity of the
weather you should carry appropri-
ate emergency equipment. Some of
the items you may want to carry
include tow straps or chains, emer-
gency flares, sand, a shovel, jumper
cables, a window scraper, gloves,
ground cloth, coveralls, a blanket,
etc.
TRAILER TOWING
We do not recommend using this
vehicle for trailer towing.
Page 313 of 490
665
Driving your vehicle
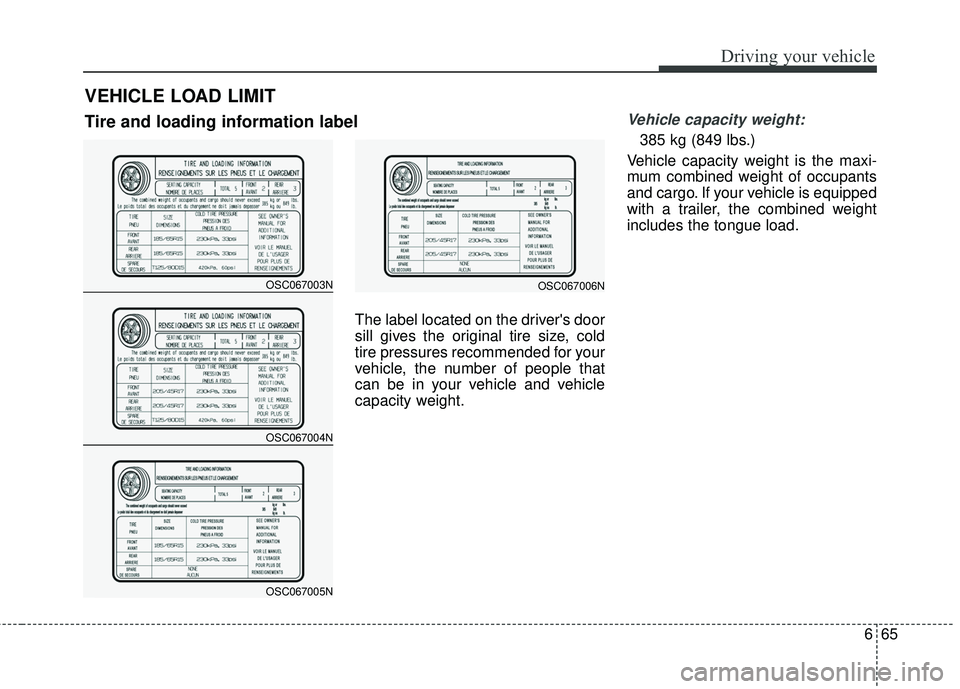
The label located on the driver's door
sill gives the original tire size, cold
tire pressures recommended for your
vehicle, the number of people that
can be in your vehicle and vehicle
capacity weight.
Vehicle capacity weight:
385 kg (849 lbs.)
Vehicle capacity weight is the maxi-
mum combined weight of occupants
and cargo. If your vehicle is equipped
with a trailer, the combined weight
includes the tongue load.
VEHICLE LOAD LIMIT
OSC067003N
OSC067004N
OSC067005N
OSC067006N
Tire and loading information label
Page 314 of 490
Driving your vehicle
66
6
Seating capacity:
Total : 5 persons
(Front seat : 2 persons, Rear seat : 3 persons)
Seating capacity is the maximum
number of occupants including a
driver, your vehicle may carry.
However, the seating capacity may
be reduced based upon the weight of
all of the occupants, and the weight
of the cargo being carried or towed.
Do not overload the vehicle as there
is a limit to the total weight, or load
limit including occupants and cargo,
the vehicle can carry.
Towing capacity:
We do not recommend using this
vehicle for trailer towing.
Cargo capacity:
The cargo capacity of your vehicle
will increase or decrease depending
on the weight and the number of
occupants and the tongue load, if
your vehicle is equipped with a trailer.
Steps For Determining Correct Load Limit -
1.Locate the statement "The com- bined weight of occupants and
cargo should never exceed XXX kg
or XXX lbs.'' on your vehicle's plac-
ard.
2.Determine the combined weight of the driver and passengers that will
be riding in your vehicle.
3.Subtract the combined weight of the driver and passengers from
XXX kg or XXX lbs. 4.The resulting figure equals the
available amount of cargo and lug-
gage load capacity. For example, if
the “XXX” amount equals 635 kg
(1400 lbs.) and there will be five 68
kg (150 lbs.) passengers in your
vehicle, the amount of available
cargo and luggage load capacity is
295 kg (650 lbs).
(635-340 (5 x 68) = 295 kg or
1400-750 (5 x 150) = 650 lbs.)
5.Determine the combined weight of luggage and cargo being loaded
on the vehicle. That weight may not
safely exceed the available cargo
and luggage load capacity calcu-
lated in Step 4.
6.If your vehicle will be towing a trail- er, load from your trailer will be
transferred to your vehicle. Consult
this manual to determine how this
reduces the available cargo and
luggage load capacity of your vehi-
cle.
Page 318 of 490
Driving your vehicle
70
6
This section will guide you in the
proper loading of your vehicle and/or
trailer, to keep your loaded vehicle
weight within its design rating capa-
bility, with or without a trailer.
Properly loading your vehicle will
provide maximum return of the vehi-
cle design performance. Before load-
ing your vehicle, familiarize yourself
with the following terms for determin-
ing your vehicle's weight ratings, with
or without a trailer, from the vehicle's
specifications and the compliance
label:
Base curb weight
This is the weight of the vehicle
including a full tank of fuel and all
standard equipment. It does not
include passengers, cargo, or option-
al equipment.
Vehicle curb weight
This is the weight of your new vehicle
when you picked it up from your deal-
er plus any aftermarket equipment.
Cargo weight
This figure includes all weight added
to the Base Curb Weight, including
cargo and optional equipment.
GAW (Gross axle weight)
This is the total weight placed on
each axle (front and rear) - including
vehicle curb weight and all payload.
GAWR
(Gross axle weight rating)
This is the maximum allowable
weight that can be carried by a single
axle (front or rear). These numbers
are shown on the compliance label.
The total load on each axle must
never exceed its GAWR.
GVW (Gross vehicle weight)
This is the Base Curb Weight plus
actual Cargo Weight plus passen-
gers.
GVWR
(Gross vehicle weight rating)
This is the maximum allowable
weight of the fully loaded vehicle
(including all options, equipment,
passengers and cargo). The GVWR
is shown on the certification label
located on the driver’s door sill.
VEHICLE WEIGHT
Page 337 of 490
719
What to do in an emergency
It is possible that some tires, espe-
cially with larger punctures or dam-
age to the sidewall, cannot be sealed
completely.
Air pressure loss in the tire may
adversely affect tire performance.
For this reason, you should avoid
abrupt steering or other driving
maneuvers, especially if the vehicle
is heavily loaded or if a trailer is in
use.
The Tire Mobility Kit is not designed
or intended as a permanent tire
repair method and is to be used for
one tire only.
This instruction shows you step by
step procedure to temporarily seal
the puncture.
Read the section "Notes on the safe
use of the Tire Mobility Kit".Notes on the safe use of the
Tire Mobility Kit
Park your car at the side of theroad so that you can work with the
Tire Mobility Kit away from moving
traffic.
To be sure your vehicle will not move, even when you're on fairly
level ground, always set your park-
ing brake.
Only use the Tire Mobility Kit for sealing/inflation passenger car
tires. Only punctured areas located
within the tread region of the tire
can be sealed using the tire mobil-
ity kit.
Do not use on motorcycles, bicy- cles or any other type of tires.
When the tire and wheel are dam- aged, do not use Tire Mobility Kit
for your safety.
Use of the Tire Mobility Kit may not be effective for tire damage larger
than approximately 6 mm (0.24 in).
Please contact the nearest Kia
dealership if the tire cannot be
made roadworthy with the Tire
Mobility Kit. Do not use the Tire Mobility Kit if a
tire is severely damaged by driving
run flat or with insufficient air pres-
sure.
Do not remove any foreign objects such as nails or screws that have
penetrated the tire.
Provided the car is outdoors, leave the engine running. Otherwise
operating the compressor may
eventually drain the car battery.
Never leave the Tire Mobility Kit unattended while it is being used.
Do not leave the compressor run- ning for more than 10 min. at a time
or it may overheat.
Do not use the Tire Mobility Kit if the ambient temperature is below -
-30°C (22°F).