2018 KIA RIO auto stop
[x] Cancel search: auto stopPage 31 of 490
Safety features of your vehicle
14
3
The seat belt automatically adjusts to
the proper length only after the lap
belt portion is adjusted manually so
that it fits snugly around your hips. If
you lean forward in a slow, easy
motion, the belt will extend and let
you move around. If there is a sud-
den stop or impact, however, the belt
will lock into position. It will also lock
if you try to lean forward too quickly.
If you are unable to pull out the seat
belt from the retractor, firmly pull the
belt out and release it. Then you will
be able to pull the belt out smoothly. Height adjustment
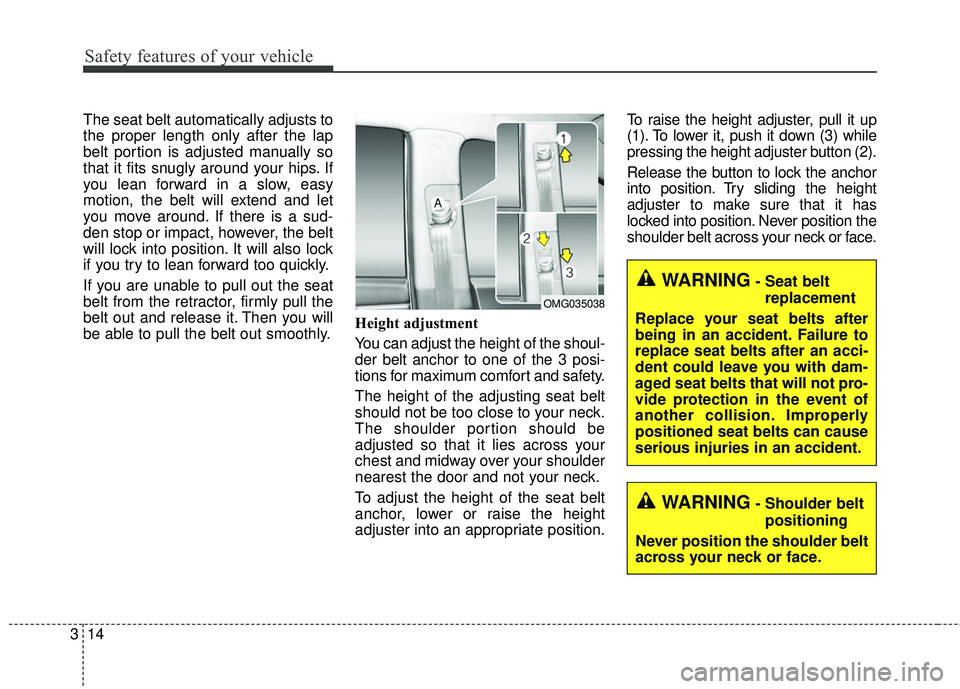
You can adjust the height of the shoul-
der belt anchor to one of the 3 posi-
tions for maximum comfort and safety.
The height of the adjusting seat belt
should not be too close to your neck.
The shoulder portion should be
adjusted so that it lies across your
chest and midway over your shoulder
nearest the door and not your neck.
To adjust the height of the seat belt
anchor, lower or raise the height
adjuster into an appropriate position.To raise the height adjuster, pull it up
(1). To lower it, push it down (3) while
pressing the height adjuster button (2).
Release the button to lock the anchor
into position. Try sliding the height
adjuster to make sure that it has
locked into position. Never position the
shoulder belt across your neck or face.
WARNING- Seat belt
replacement
Replace your seat belts after
being in an accident. Failure to
replace seat belts after an acci-
dent could leave you with dam-
aged seat belts that will not pro-
vide protection in the event of
another collision. Improperly
positioned seat belts can cause
serious injuries in an accident.
WARNING- Shoulder belt positioning
Never position the shoulder belt
across your neck or face.
OMG035038
Page 42 of 490
325
Safety features of your vehicle
✽ ✽NOTICE
If the vehicle headrest prevents
proper installation of a child seat (as
described in the child seat system
manual), the headrest of the respec-
tive seating position shall be read-
justed or entirely removed.
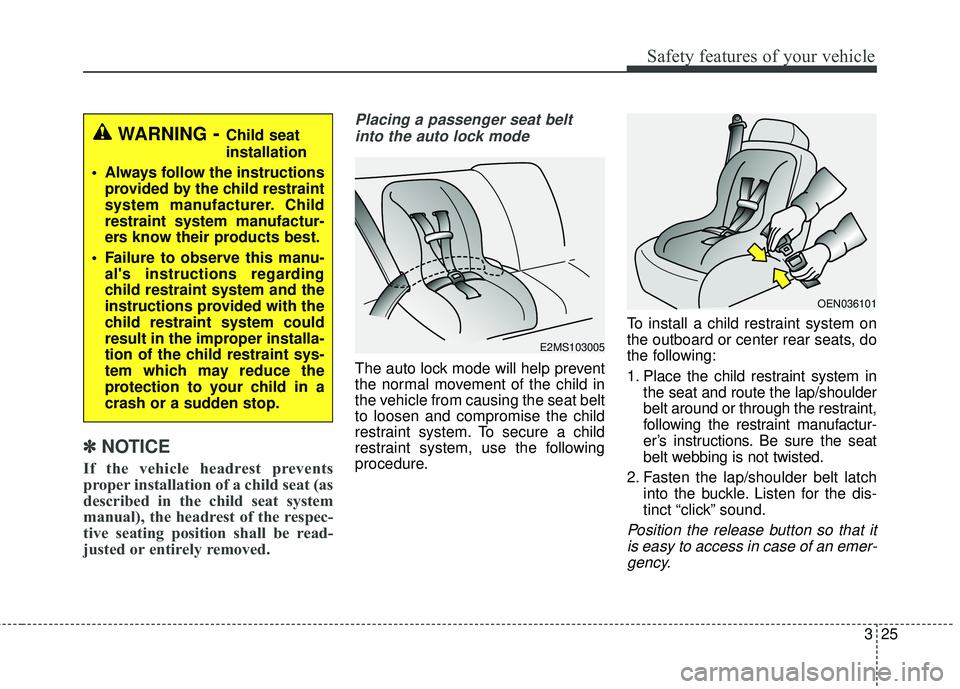
Placing a passenger seat belt
into the auto lock mode
The auto lock mode will help prevent
the normal movement of the child in
the vehicle from causing the seat belt
to loosen and compromise the child
restraint system. To secure a child
restraint system, use the following
procedure. To install a child restraint system on
the outboard or center rear seats, do
the following:
1. Place the child restraint system in
the seat and route the lap/shoulder
belt around or through the restraint,
following the restraint manufactur-
er’s instructions. Be sure the seat
belt webbing is not twisted.
2. Fasten the lap/shoulder belt latch into the buckle. Listen for the dis-
tinct “click” sound.
Position the release button so that itis easy to access in case of an emer-gency.
WARNING- Child seat
installation
Always follow the instructions provided by the child restraint
system manufacturer. Child
restraint system manufactur-
ers know their products best.
Failure to observe this manu- al's instructions regarding
child restraint system and the
instructions provided with the
child restraint system could
result in the improper installa-
tion of the child restraint sys-
tem which may reduce the
protection to your child in a
crash or a sudden stop.
E2MS103005
OEN036101
Page 44 of 490
327
Safety features of your vehicle
The lap/shoulder belt automatically
returns to the “emergency lock
mode” whenever the belt is allowed
to retract fully.
Therefore, the preceding seven
steps must be followed each time a
child restraint is installed.
To remove the child restraint, press
the release button on the buckle and
then pull the lap/shoulder belt out of
the restraint and allow the seat belt
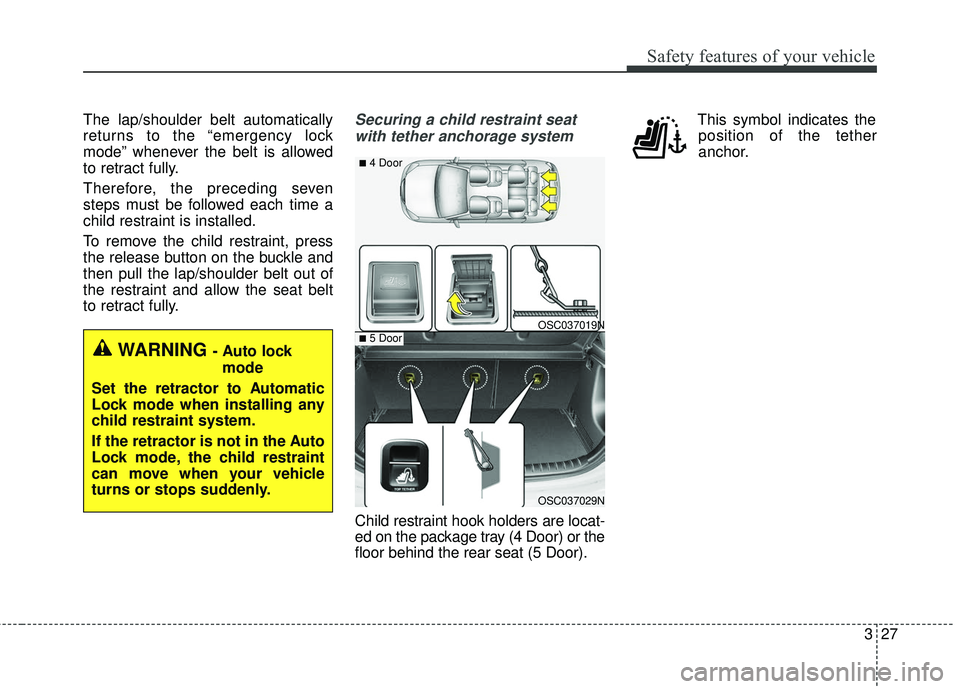
to retract fully.Securing a child restraint seatwith tether anchorage system
Child restraint hook holders are locat-
ed on the package tray (4 Door) or the
floor behind the rear seat (5 Door). This symbol indicates the
position of the tether
anchor.
WARNING - Auto lock
mode
Set the retractor to Automatic
Lock mode when installing any
child restraint system.
If the retractor is not in the Auto
Lock mode, the child restraint
can move when your vehicle
turns or stops suddenly.
OSC037019N
OSC037029N
■4 Door
■5 Door
Page 82 of 490
Features of your vehicle
10
4
✽ ✽
NOTICE
If the keyless entry system is inoper-
ative due to exposure to water or liq-
uids, it will not be covered by your
manufacturer's vehicle warranty.
Trunk/tailgate open (3)
(if equipped)
The trunk/tailgate is opened if the
button is pressed for more than 1
second.
Once the trunk/tailgate is opened and
then closed, the trunk/tailgate will lock
automatically.
Alarm (4)
The horn sounds and the hazard
warning lights blink for about 30 sec-
onds if this button is pressed for
more than 0.5 seconds. To stop the
horn and lights, press any button on
the transmitter.
Transmitter precautions
The transmitter (or smart key) will not
work if any of following occurs:
The ignition key is in the ignition switch.
You exceed the operating distance limit (about 30 m [90 feet]).
The battery in the transmitter (or smart key) is weak.
Other vehicles or objects may be blocking the signal.
The weather is extremely cold.
The transmitter (or smart key) is close to a radio transmitter such as
a radio station or an airport which
can interfere with normal operation
of the transmitter.
When the transmitter (or smart key)
does not work properly, open and
close the door with the ignition key. If
you have a problem with the trans-
mitter (or smart key), contact an
authorized Kia dealer.
Page 90 of 490
Features of your vehicle
18
4
DOOR LOCKS
Operating door locks from
outside the vehicle
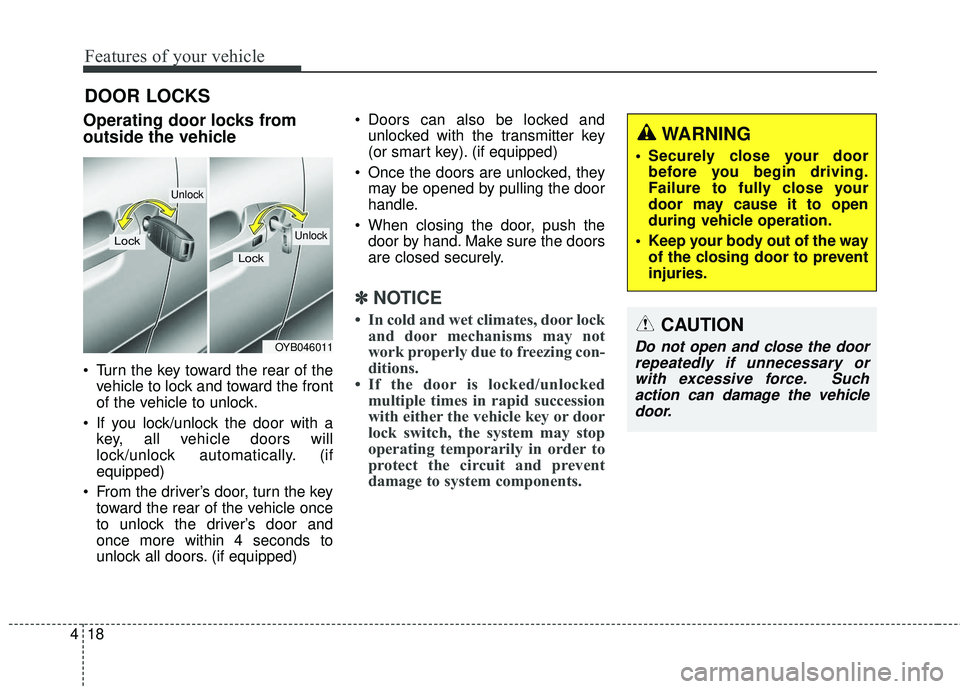
Turn the key toward the rear of the
vehicle to lock and toward the front
of the vehicle to unlock.
If you lock/unlock the door with a key, all vehicle doors will
lock/unlock automatically. (if
equipped)
From the driver’s door, turn the key toward the rear of the vehicle once
to unlock the driver’s door and
once more within 4 seconds to
unlock all doors. (if equipped) Doors can also be locked and
unlocked with the transmitter key
(or smart key). (if equipped)
Once the doors are unlocked, they may be opened by pulling the door
handle.
When closing the door, push the door by hand. Make sure the doors
are closed securely.
✽ ✽ NOTICE
• In cold and wet climates, door lock
and door mechanisms may not
work properly due to freezing con-
ditions.
• If the door is locked/unlocked multiple times in rapid succession
with either the vehicle key or door
lock switch, the system may stop
operating temporarily in order to
protect the circuit and prevent
damage to system components.
OYB046011
Lock
Unlock
Lock
Unlock
WARNING
Securely close your door
before you begin driving.
Failure to fully close your
door may cause it to open
during vehicle operation.
Keep your body out of the way of the closing door to prevent
injuries.
CAUTION
Do not open and close the doorrepeatedly if unnecessary orwith excessive force. Suchaction can damage the vehicledoor.
Page 93 of 490
421
Features of your vehicle
Speed sensing door lock sys-
tem (if equipped)
All doors will be automatically locked
after the vehicle speed exceeds 9
mph. And all doors will be automati-
cally unlocked when you turn the
engine off or when you remove the
ignition key. (if equipped)
An authorized Kia dealer can acti-
vate or deactivate some auto door
lock/ unlock features as follows;
Auto door unlock by using the dri-ver's door lock button
Auto door lock/unlock by shifting the transaxle shift lever out of P
(Park) or into P (Park)
Auto door unlock when the ignition key is removed from the ignition
switch (for smart key, when the
ENGINE START/STOP button is
turned to the OFF position)
If you want to activate or deactivate
some door lock/unlock feature, con-
sult an authorized Kia dealer.
Child-protector rear door lock
The child safety lock is provided to
help prevent children from acciden-
tally opening the rear doors from
inside the vehicle. The rear door
safety locks should be used whenev-
er children are in the vehicle.
1. Open the rear door.
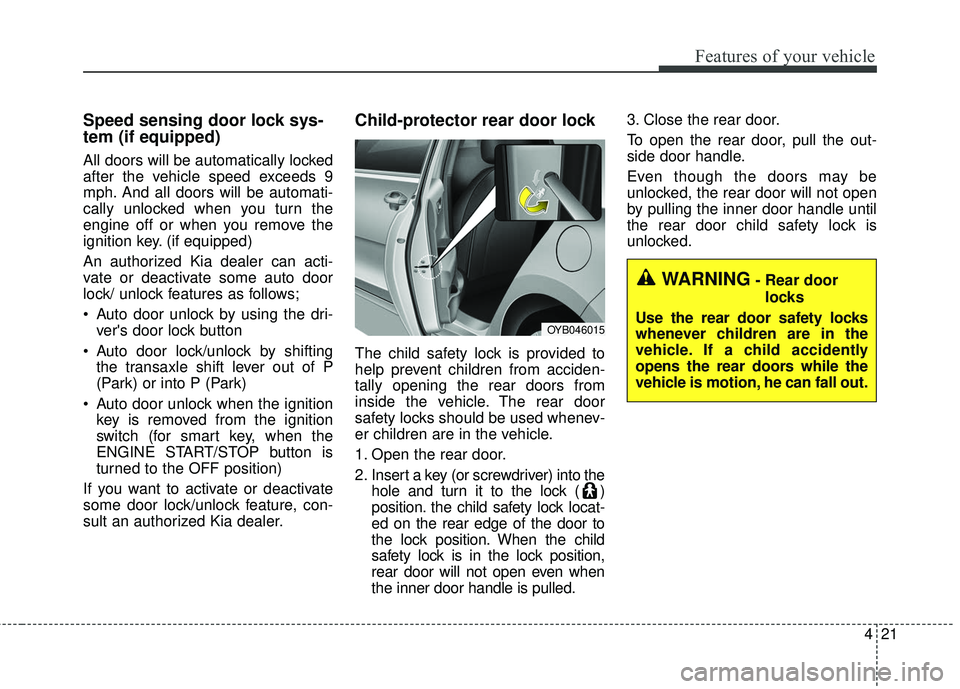
2. Insert a key (or screwdriver) into the hole and turn it to the lock ( )
position. the child safety lock locat-
ed on the rear edge of the door to
the lock position. When the child
safety lock is in the lock position,
rear door will not open even when
the inner door handle is pulled. 3. Close the rear door.
To open the rear door, pull the out-
side door handle.
Even though the doors may be
unlocked, the rear door will not open
by pulling the inner door handle until
the rear door child safety lock is
unlocked.
OYB046015
WARNING- Rear door
locks
Use the rear door safety locks
whenever children are in the
vehicle. If a child accidently
opens the rear doors while the
vehicle is motion, he can fall out.
Page 105 of 490
433
Features of your vehicle
Auto down window (if equipped) (Driver’s window)
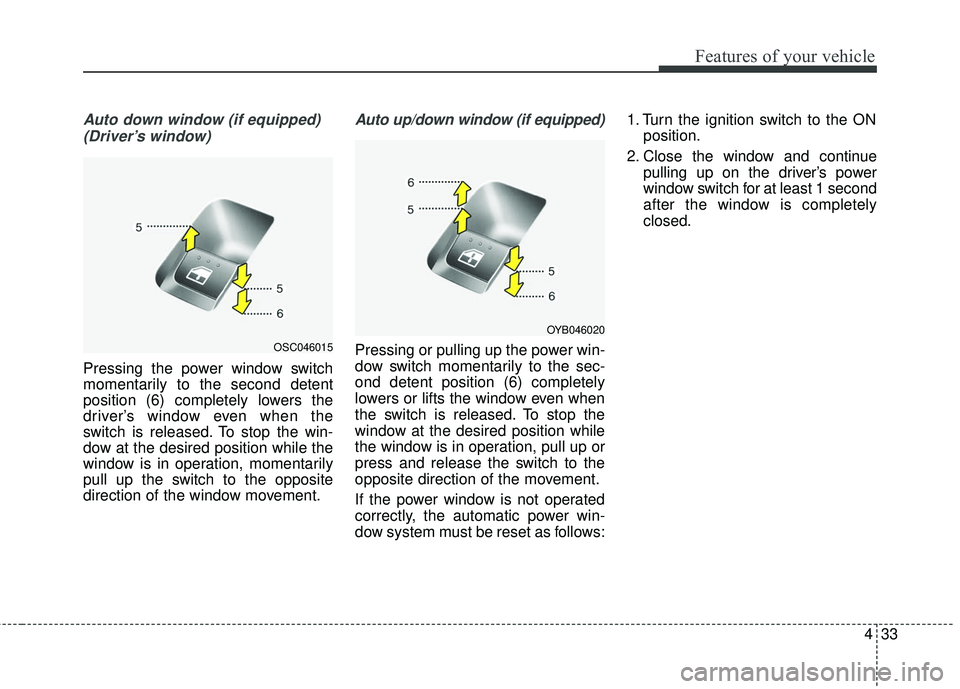
Pressing the power window switch
momentarily to the second detent
position (6) completely lowers the
driver’s window even when the
switch is released. To stop the win-
dow at the desired position while the
window is in operation, momentarily
pull up the switch to the opposite
direction of the window movement.
Auto up/down window (if equipped)
Pressing or pulling up the power win-
dow switch momentarily to the sec-
ond detent position (6) completely
lowers or lifts the window even when
the switch is released. To stop the
window at the desired position while
the window is in operation, pull up or
press and release the switch to the
opposite direction of the movement.
If the power window is not operated
correctly, the automatic power win-
dow system must be reset as follows: 1. Turn the ignition switch to the ON
position.
2. Close the window and continue pulling up on the driver’s power
window switch for at least 1 second
after the window is completely
closed.OSC046015
OYB046020
Page 106 of 490
Features of your vehicle
34
4
Automatic reversal (if equipped)
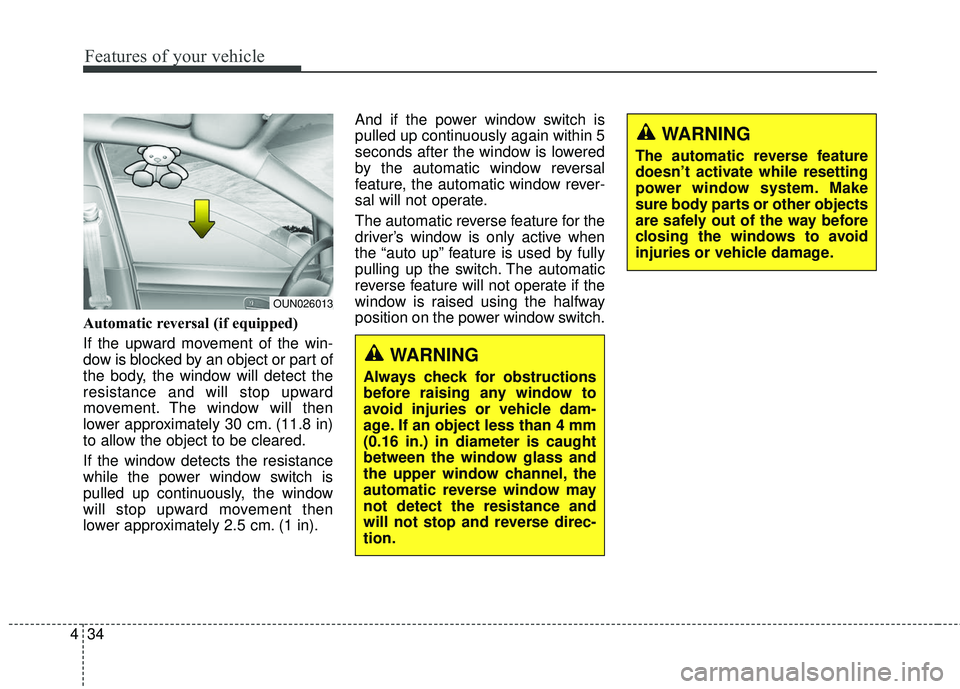
If the upward movement of the win-
dow is blocked by an object or part of
the body, the window will detect the
resistance and will stop upward
movement. The window will then
lower approximately 30 cm. (11.8 in)
to allow the object to be cleared.
If the window detects the resistance
while the power window switch is
pulled up continuously, the window
will stop upward movement then
lower approximately 2.5 cm. (1 in). And if the power window switch is
pulled up continuously again within 5
seconds after the window is lowered
by the automatic window reversal
feature, the automatic window rever-
sal will not operate.
The automatic reverse feature for the
driver’s window is only active when
the “auto up” feature is used by fully
pulling up the switch. The automatic
reverse feature will not operate if the
window is raised using the halfway
position on the power window switch.
WARNING
The automatic reverse feature
doesn’t activate while resetting
power window system. Make
sure body parts or other objects
are safely out of the way before
closing the windows to avoid
injuries or vehicle damage.
WARNING
Always check for obstructions
before raising any window to
avoid injuries or vehicle dam-
age. If an object less than 4 mm
(0.16 in.) in diameter is caught
between the window glass and
the upper window channel, the
automatic reverse window may
not detect the resistance and
will not stop and reverse direc-
tion.
OUN026013