Page 142 of 490
Features of your vehicle
70
4
Door, hood, trunk (tailgate) open
This warning is displayed indicat-
ing which door, or the hood, or the
trunk (tailgate) is open. Sunroof Open (if equipped)
This warning is displayed if you
turn off the engine when the sun-
roof is open. Engine has overheated
This warning message illuminates
when the engine coolant tempera-
ture is above 120°C (248°F). This
means that the engine is overheated
and may be damaged.
❈
If your vehicle is overheated, refer
to “Overheating” in chapter 7.
Shift to P (for smart key system and
automatic transaxle)
This warning message illuminates if you try to turn off the engine without
the shift lever in P (Park) position.
At this time, the Engine Start/Stop Button turns to the ACC position (If
you press the Engine Start/Stop
Button once more, it will turn to the
ON position).
OYB046134OYB046133
Page 153 of 490

481
Features of your vehicle
This warning light remains on after
blinking for approximately 60 seconds
or repeats blinking and off at the
intervals of approximately 3 seconds:
When there is a malfunction withthe TPMS.
In this case, have your vehicle
inspected by an authorized Kia
dealer as soon as possible.
❈ For more details, refer to “Tire
Pressure Monitoring System
(TPMS)” in chapter 7.
The TPMS cannot alert you to severe
and sudden tire damage caused by
external factors.
If you notice any vehicle instability,
immediately take your foot off the
accelerator pedal, apply the brakes
gradually with light force, and slowly
move to a safe position off the road.Door Ajar WarningLight (if equipped)
This warning light illuminates:
When a door is not closed securely.
Trunk (tailgate) OpenWarning Light(if equipped)
This warning light illuminates:
When the trunk (tailgate) is not
closed securely.
WARNING
- Low tire pressure
Significantly low tire pressure makes the vehicle unstable
and can contribute to loss of
vehicle control and increased
braking distances.
Continued driving or low pres- sure tires will cause the tires to
overheat and fail.
Page 173 of 490
4101
Features of your vehicle
Luggage room lamp
The luggage room lamp comes on
when the trunk (tailgate) is opened.The luggage lamp comes on as long
as the trunk lid (tailgate) is open. To
prevent unnecessary charging sys-
tem drain, close the trunk lid (tail-
gate) securely after using the lug-
gage room.
Glove box lamp
The glove box lamp comes on when
the glove box is opened. To prevent
unnecessary charging system drain,
close the glove box securely after
use.
OYB046407
OSC047412N
OYB046405
Page 251 of 490

63
Driving your vehicle
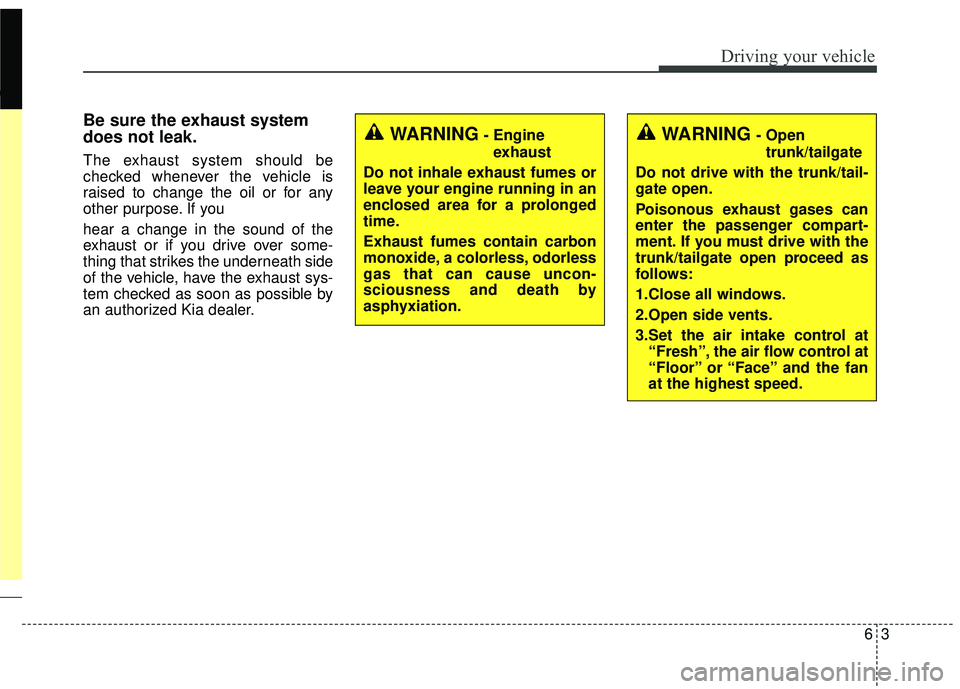
Be sure the exhaust system
does not leak.
The exhaust system should be
checked whenever the vehicle is
raised to change the oil or for any
other purpose. If you
hear a change in the sound of the
exhaust or if you drive over some-
thing that strikes the underneath side
of the vehicle, have the exhaust sys-
tem checked as soon as possible by
an authorized Kia dealer.
WARNING- Engineexhaust
Do not inhale exhaust fumes or
leave your engine running in an
enclosed area for a prolonged
time.
Exhaust fumes contain carbon
monoxide, a colorless, odorless
gas that can cause uncon-
sciousness and death by
asphyxiation.WARNING- Open trunk/tailgate
Do not drive with the trunk/tail-
gate open.
Poisonous exhaust gases can
enter the passenger compart-
ment. If you must drive with the
trunk/tailgate open proceed as
follows:
1.Close all windows.
2.Open side vents.
3.Set the air intake control at “Fresh”, the air flow control at
“Floor” or “Face” and the fan
at the highest speed.
Page 359 of 490

• Radial-ply tires . . . . . . . . . . . . . . . . . . . . . . . . . . . . . . 8-58
• Low aspect ratio tire . . . . . . . . . . . . . . . . . . . . . . . . . . 8-58
Fuses . . . . . . . . . . . . . . . . . . . . . . . . . . . . . . . . . . . . \
8-60
• Inner panel fuse replacement . . . . . . . . . . . . . . . . . . . 8-62
• Memory fuse . . . . . . . . . . . . . . . . . . . . . . . . . . . . . . . . 8-63
• Engine compartment fuse replacement. . . . . . . . . . . 8-64
• Fuse/relay panel description. . . . . . . . . . . . . . . . . . . . 8-66
Light bulbs . . . . . . . . . . . . . . . . . . . . . . . . . . . . . . . 8-75
• Bulb replacement precaution . . . . . . . . . . . . . . . . . . . 8-75
• Light bulb position (Front). . . . . . . . . . . . . . . . . . . . . 8-77
• Light bulb position (Rear) (5 door) . . . . . . . . . . . . . . 8-78
• Light bulb position (Rear) (4 door) . . . . . . . . . . . . . . 8-79
• Light bulb position (Side) . . . . . . . . . . . . . . . . . . . . . . 8-80
• Headlamp (Low/High beam) bulbreplacement(Headlamp Type A) . . . . . . . . . . . . . . . . 8-80
• Front turn signal lamp bulb replacement (Headlamp Type A) . . . . . . . . . . . . . . . . . . . . . . . . . . 8-81
• Headlamp (Low/High beam) bulb replacement (Headlamp Type B) . . . . . . . . . . . . . . . . . . . . . . . . . . 8-82
• Front turn signal lamp bulb replacement (Headlamp Type B) . . . . . . . . . . . . . . . . . . . . . . . . . . 8-83
• Front fog lamp bulb replacement . . . . . . . . . . . . . . . 8-84
• Position lamp + DRL (LED type) bulb replacement . . 8-84 • DRL (Bulb type) bulb replacement . . . . . . . . . . . . . . 8-85
• Side repeater lamp (LED type)
bulb Replacement. . 8-85
• Side repeater lamp (Bulb type) bulb Replacement . . 8-86
• Stop and tail lamp bulb replacement (5 door) . . . . . 8-86
• Rear turn signal lamp bulb replacement (5 door) . . 8-88
• Stop and tail lamp (LED type) bulb replacement (5 Door) . . . . . . . . . . . . . . . . . . . . . . . . . . . . . . . . . . . 8-\
89
• Back-up lamp bulb replacement (5 door) . . . . . . . . . 8-89
• Tail lamp (Inside) bulb replacement (5 door). . . . . . 8-90
• High mounted stop lamp bulb replacement (5 Door) . . . . . . . . . . . . . . . . . . . . . . . . . . . . . . . . . . . 8-\
91
• License plate lamp bulb replacement (5, 4 door) . . . 8-91
• Rear turn signal lamp bulb replacement (4 door) . . 8-92
• Stop and tail lamp/Side marker (Bulb type) replacement (4 door) . . . . . . . . . . . . . . . . . . . . . . . . . 8-93
• Back-up lamp bulb replacement (4 door) . . . . . . . . . 8-94
• Tail lamp (Bulb type) bulb replacement (4 door) . . 8-95
• Stop and tail lamp (LED type) bulb replacement (4 door) . . . . . . . . . . . . . . . . . . . . . . . . . . . . . . . . . . . . \
8-96
• High mounted stop lamp bulb replacement (4 door) . . 8-96
• Trunk lamp bulb replacement (4 door) . . . . . . . . . . 8-97
• Map lamp bulb replacement . . . . . . . . . . . . . . . . . . . 8-97
• Vanity mirror lamp bulb replacement . . . . . . . . . . . 8-98
• Room lamp bulb replacement . . . . . . . . . . . . . . . . . . 8-99
8
Page 427 of 490
Maintenance
70
8
Fuse NameFuse ratingCircuit Protected
SPARE320ASpare
A/BAG IND7.5AInstrument Cluster
CLUSTER7.5AInstrument Cluster
MDPS7.5AMDPS (Motor Driven Power Steering) Unit
AUDIO20AAudio, Audio/Video & Navigation Head Unit
ROOM LP10ARoom Lamp Relay, Glove Box Lamp, Air Conditioner Control Module, SLM (Seat Belt & Lighting Module),
BCM (Body Control Module), Auto Light & Photo Sensor, TPMS (Tire Pressure Monitoring System) Unit,
Instrument Cluster, Data Link Connector, Room Lamp, Trunk Room Lamp
Page 443 of 490
Maintenance
86
8
Side repeater lamp (bulb type)
bulb Replacement
1. Remove the lamp assembly from
the vehicle by prying the lens and
pulling the assembly out.
2. Disconnect the bulb electrical con- nector.
3. Separate the socket and the lens parts by turning the socket coun-
terclockwise until the tabs on the
socket align with the slots on the
lens part. 4. Remove the bulb by pulling it
straight out.
5. Insert a new bulb in the socket.
6. Reassemble the socket and the lens part.
7. Connect the bulb electrical con- nector.
8. Reinstall the lamp assembly to the body of the vehicle.
Stop and tail lamp bulb
replacement (5 Door)
1. Open the trunk lid.
2. Loosen the light assembly retain-ing screws with a cross-tip screw-
driver.
OYB076059OYB076060
Page 445 of 490
Maintenance
88
8
Rear turn signal lamp bulb
replacement (5 Door)
1. Open the trunk lid.
2. Loosen the light assembly retain-
ing screws with a cross-tip screw-
driver. 3. Remove the rear combination
lamp assembly from the body of
the vehicle.
4. Disconnect the rear combination lamp connector. 5. Remove the socket from the
assembly by turning the socket
counterclockwise until the tabs on
the socket align with the slots on
the assembly.
6. Remove the bulb from the socket by pressing it in and rotating it counter-
clockwise until the tabs on the bulb
align with the slots in the socket.
Pull the bulb out of the socket.
7. Insert a new bulb by inserting it into the socket and rotating it until
it locks into place.
OYB076060
OYB076061OYB076063