2018 KIA RIO mirror
[x] Cancel search: mirrorPage 175 of 490
4103
Features of your vehicle
If you want to defrost and defog the
front windshield, refer to “Windshield
Defrosting and Defogging” in this
section.
Rear window defroster
The defroster heats the window to
remove frost, fog and thin ice from
the interior and exterior of the rear
window, while the engine is running.
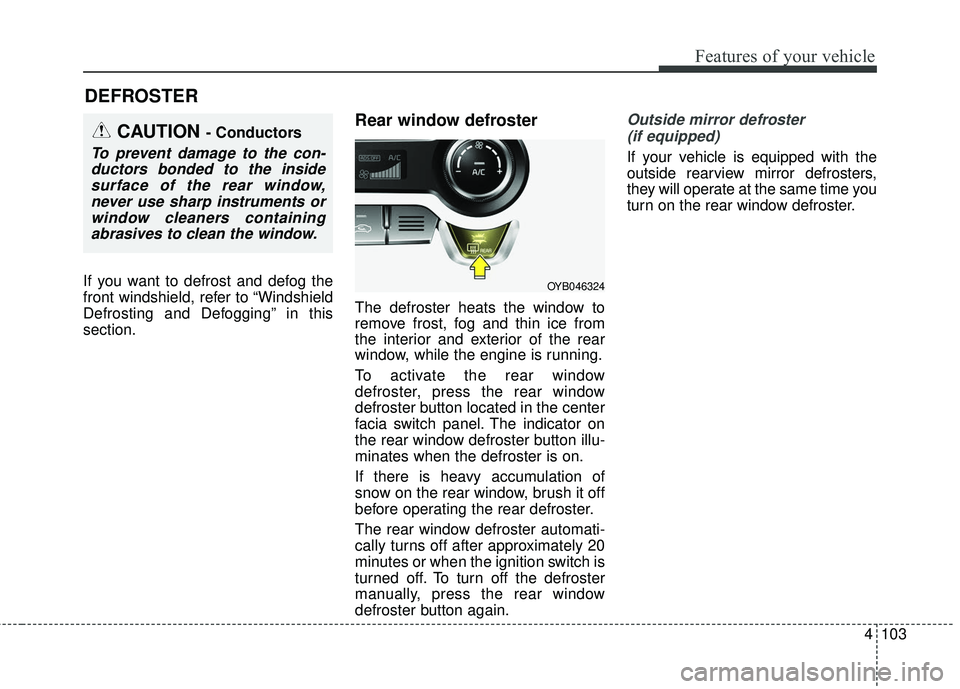
To activate the rear window
defroster, press the rear window
defroster button located in the center
facia switch panel. The indicator on
the rear window defroster button illu-
minates when the defroster is on.
If there is heavy accumulation of
snow on the rear window, brush it off
before operating the rear defroster.
The rear window defroster automati-
cally turns off after approximately 20
minutes or when the ignition switch is
turned off. To turn off the defroster
manually, press the rear window
defroster button again.
Outside mirror defroster (if equipped)
If your vehicle is equipped with the
outside rearview mirror defrosters,
they will operate at the same time you
turn on the rear window defroster.
DEFROSTER
OYB046324
CAUTION - Conductors
To prevent damage to the con-ductors bonded to the insidesurface of the rear window,never use sharp instruments orwindow cleaners containingabrasives to clean the window.
Page 195 of 490
4123
Features of your vehicle
WINDSHIELD DEFROSTING AND DEFOGGING
For maximum defrosting, set thetemperature control to the extreme
right/hot position and the fan speed
control to the highest speed.
If warm air to the floor is desired while defrosting or defogging, set the
mode to the floor-defrost position.
Before driving, clear all snow and ice from the windshield, rear win-
dow, outside rear view mirrors, and
all side windows.
Clear all snow and ice from the hood and air inlet in the cowl grill to
improve heater and defroster effi-
ciency and to reduce the probabili-
ty of fogging up the inside of the
windshield.Manual climate control system
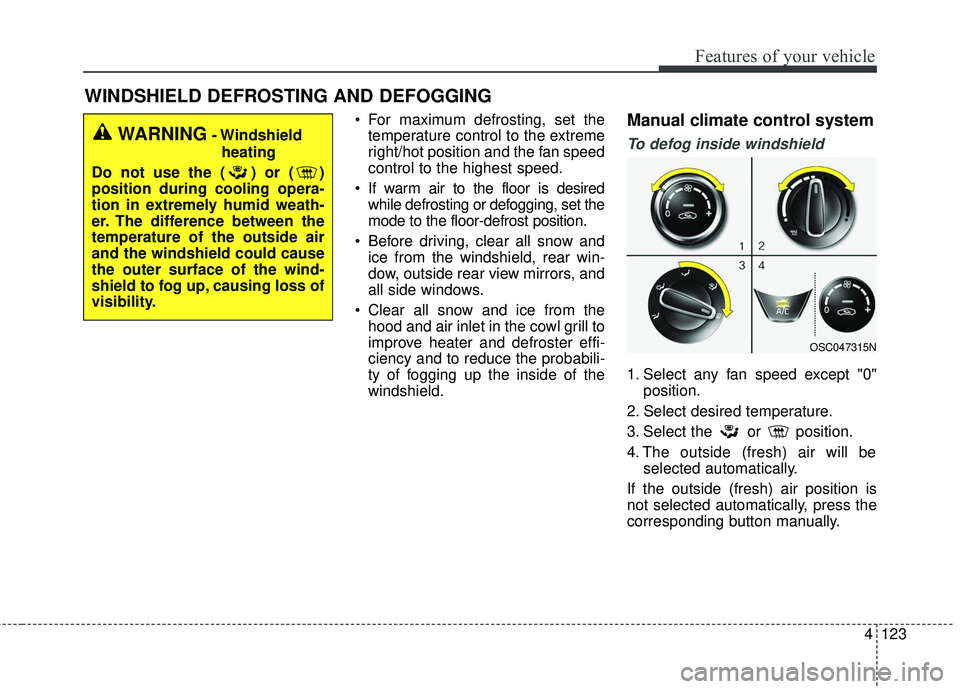
To defog inside windshield
1. Select any fan speed except "0" position.
2. Select desired temperature.
3. Select the or position.
4. The outside (fresh) air will be selected automatically.
If the outside (fresh) air position is
not selected automatically, press the
corresponding button manually.
WARNING- Windshield heating
Do not use the ( ) or ( )
position during cooling opera-
tion in extremely humid weath-
er. The difference between the
temperature of the outside air
and the windshield could cause
the outer surface of the wind-
shield to fog up, causing loss of
visibility.
OSC047315N
Page 201 of 490
4129
Features of your vehicle
Sunglass holder (if equipped)
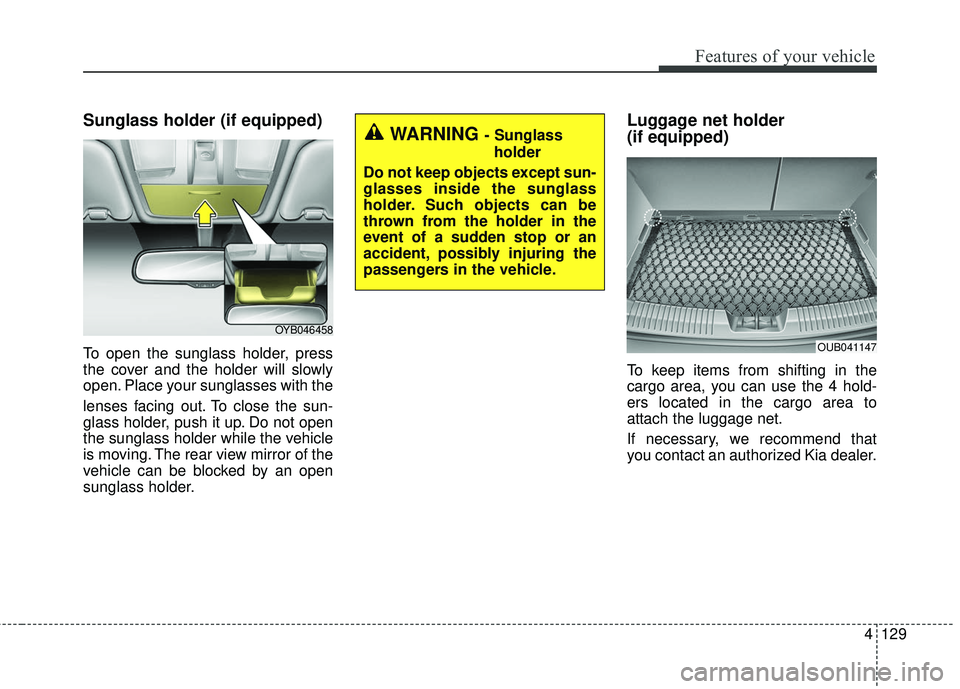
To open the sunglass holder, press
the cover and the holder will slowly
open. Place your sunglasses with the
lenses facing out. To close the sun-
glass holder, push it up. Do not open
the sunglass holder while the vehicle
is moving. The rear view mirror of the
vehicle can be blocked by an open
sunglass holder.
Luggage net holder
(if equipped)
To keep items from shifting in the
cargo area, you can use the 4 hold-
ers located in the cargo area to
attach the luggage net.
If necessary, we recommend that
you contact an authorized Kia dealer.
OYB046458
WARNING - Sunglassholder
Do not keep objects except sun-
glasses inside the sunglass
holder. Such objects can be
thrown from the holder in the
event of a sudden stop or an
accident, possibly injuring the
passengers in the vehicle.
OUB041147
Page 203 of 490
4131
Features of your vehicle
Cup holder
✽ ✽NOTICE
When cleaning spilled liquids, do
not dry the cup holder at high tem-
perature. This may damage the cup
holder.
Cups or small beverage cans may be
placed in the cup holders.
Sunvisor
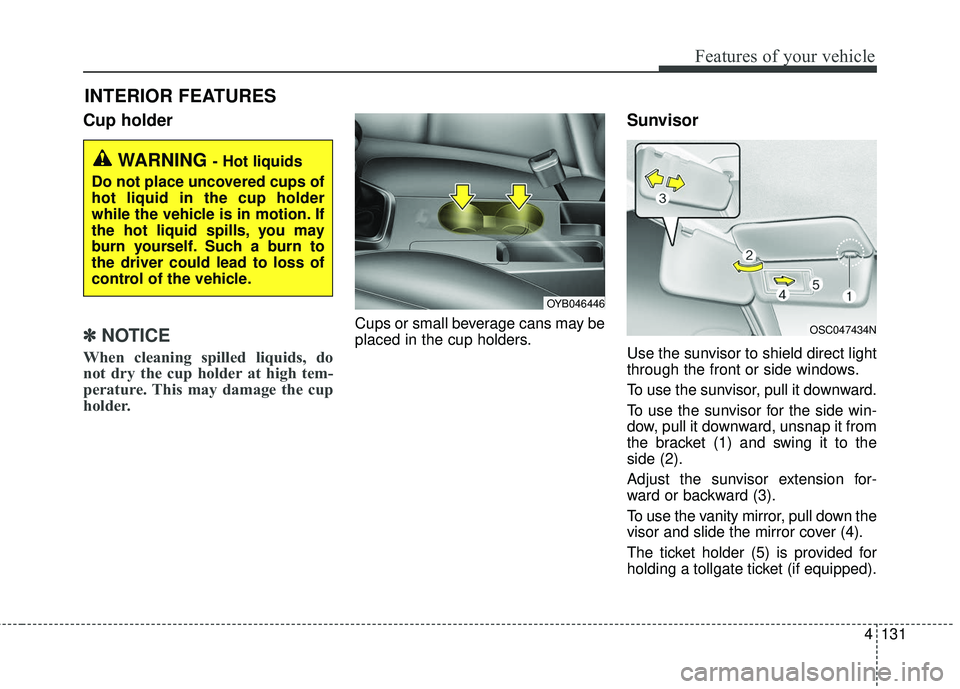
Use the sunvisor to shield direct light
through the front or side windows.
To use the sunvisor, pull it downward.
To use the sunvisor for the side win-
dow, pull it downward, unsnap it from
the bracket (1) and swing it to the
side (2).
Adjust the sunvisor extension for-
ward or backward (3).
To use the vanity mirror, pull down the
visor and slide the mirror cover (4).
The ticket holder (5) is provided for
holding a tollgate ticket (if equipped).
INTERIOR FEATURES
WARNING - Hot liquids
Do not place uncovered cups of
hot liquid in the cup holder
while the vehicle is in motion. If
the hot liquid spills, you may
burn yourself. Such a burn to
the driver could lead to loss of
control of the vehicle.
OYB046446
OSC047434N
Page 204 of 490
Features of your vehicle
132
4
Seat warmer (if equipped)
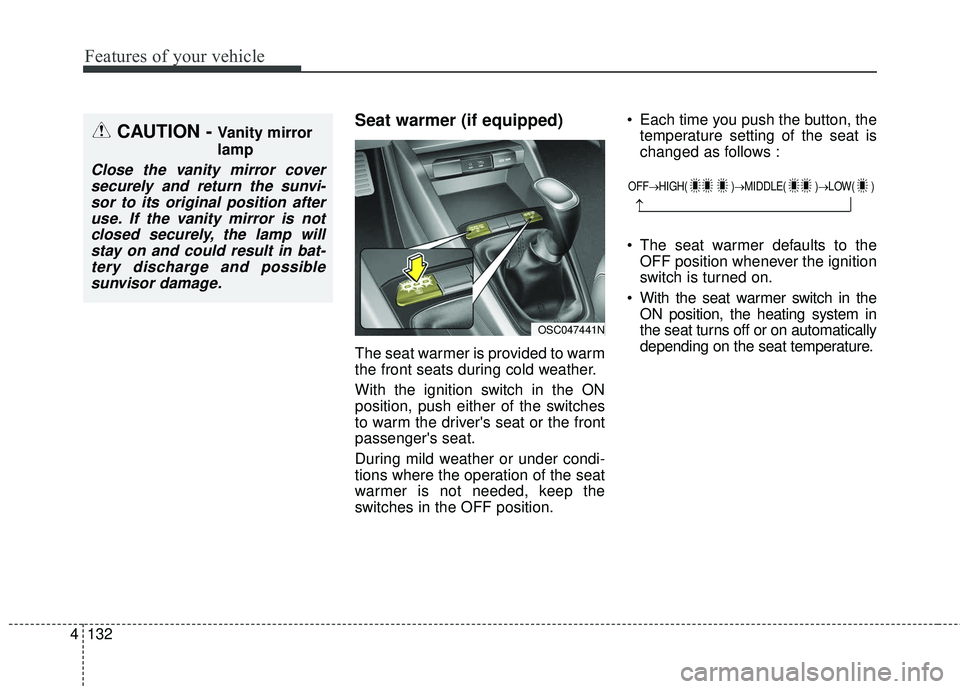
The seat warmer is provided to warm
the front seats during cold weather.
With the ignition switch in the ON
position, push either of the switches
to warm the driver's seat or the front
passenger's seat.
During mild weather or under condi-
tions where the operation of the seat
warmer is not needed, keep the
switches in the OFF position. Each time you push the button, the
temperature setting of the seat is
changed as follows :
The seat warmer defaults to the OFF position whenever the ignition
switch is turned on.
With the seat warmer switch in the ON position, the heating system in
the seat turns off or on automatically
depending on the seat temperature.
CAUTION - Vanity mirror
lamp
Close the vanity mirror coversecurely and return the sunvi-sor to its original position afteruse. If the vanity mirror is notclosed securely, the lamp willstay on and could result in bat-tery discharge and possiblesunvisor damage.
OFF→ HIGH( )→ MIDDLE( )→LOW( )
→
OSC047441N
Page 252 of 490
Driving your vehicle
46
Before entering vehicle
• Be sure that all windows, outsidemirror(s), and outside lights are
clean.
Check the condition of the tires.
Check under the vehicle for any sign of leaks.
Be sure there are no obstacles behind you if you intend to back up.
Necessary inspections
Fluid levels, such as engine oil,
engine coolant, brake fluid, and
washer fluid should be checked on a
regular basis, with the exact interval
depending on the fluid. Further
details are provided in Chapter 8,
“Maintenance”.
Before starting
Close and lock all doors.
Position the seat so that all con-trols are easily reached.
Buckle your seat belt.
Adjust the inside and outside rearview mirrors.
Be sure that all lights work.
Check all gauges.
Check the operation of warning lights when the ignition switch is
turned to the ON position.
Release the parking brake and make sure the brake warning light
goes off.
For safe operation, be sure you are
familiar with your vehicle and its
equipment.
BEFORE DRIVING
WARNING- Distracted driving
Focus on the road while driving.
The driver's primary responsi-
bility is in the safe and legal
operation of the vehicle. Use of
any hand held devices, other
equipment or vehicle systems
that distract the driver should
not be used during vehicle
operation.
Page 307 of 490
659
Driving your vehicle
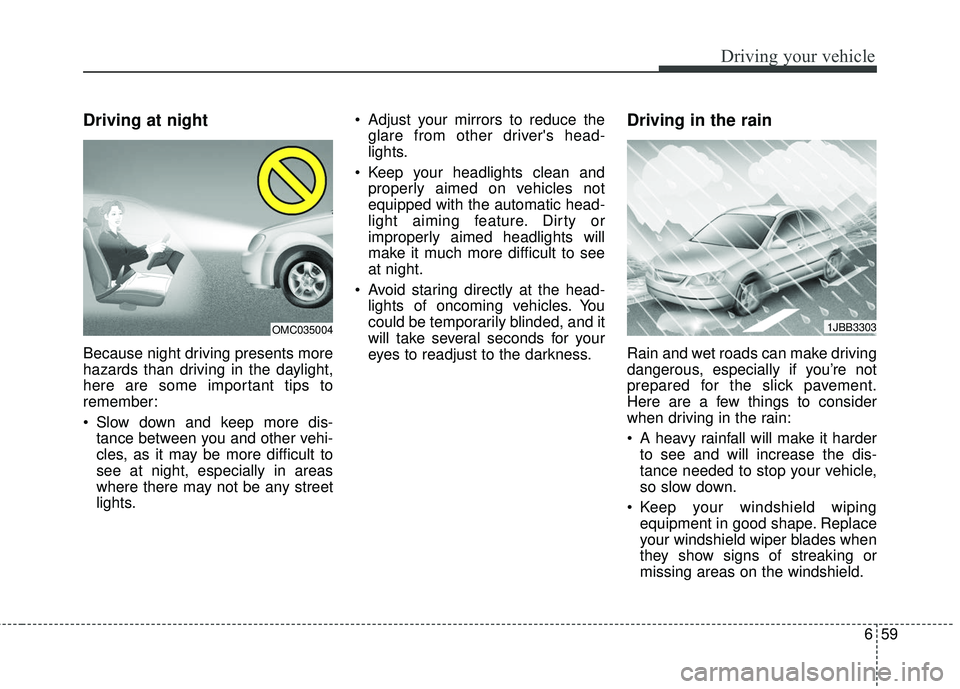
Driving at night
Because night driving presents more
hazards than driving in the daylight,
here are some important tips to
remember:
Slow down and keep more dis-tance between you and other vehi-
cles, as it may be more difficult to
see at night, especially in areas
where there may not be any street
lights. Adjust your mirrors to reduce the
glare from other driver's head-
lights.
Keep your headlights clean and properly aimed on vehicles not
equipped with the automatic head-
light aiming feature. Dirty or
improperly aimed headlights will
make it much more difficult to see
at night.
Avoid staring directly at the head- lights of oncoming vehicles. You
could be temporarily blinded, and it
will take several seconds for your
eyes to readjust to the darkness.
Driving in the rain
Rain and wet roads can make driving
dangerous, especially if you’re not
prepared for the slick pavement.
Here are a few things to consider
when driving in the rain:
A heavy rainfall will make it harderto see and will increase the dis-
tance needed to stop your vehicle,
so slow down.
Keep your windshield wiping equipment in good shape. Replace
your windshield wiper blades when
they show signs of streaking or
missing areas on the windshield.
1JBB3303OMC035004
Page 359 of 490
• Radial-ply tires . . . . . . . . . . . . . . . . . . . . . . . . . . . . . . 8-58
• Low aspect ratio tire . . . . . . . . . . . . . . . . . . . . . . . . . . 8-58
Fuses . . . . . . . . . . . . . . . . . . . . . . . . . . . . . . . . . . . . \
8-60
• Inner panel fuse replacement . . . . . . . . . . . . . . . . . . . 8-62
• Memory fuse . . . . . . . . . . . . . . . . . . . . . . . . . . . . . . . . 8-63
• Engine compartment fuse replacement. . . . . . . . . . . 8-64
• Fuse/relay panel description. . . . . . . . . . . . . . . . . . . . 8-66
Light bulbs . . . . . . . . . . . . . . . . . . . . . . . . . . . . . . . 8-75
• Bulb replacement precaution . . . . . . . . . . . . . . . . . . . 8-75
• Light bulb position (Front). . . . . . . . . . . . . . . . . . . . . 8-77
• Light bulb position (Rear) (5 door) . . . . . . . . . . . . . . 8-78
• Light bulb position (Rear) (4 door) . . . . . . . . . . . . . . 8-79
• Light bulb position (Side) . . . . . . . . . . . . . . . . . . . . . . 8-80
• Headlamp (Low/High beam) bulbreplacement(Headlamp Type A) . . . . . . . . . . . . . . . . 8-80
• Front turn signal lamp bulb replacement (Headlamp Type A) . . . . . . . . . . . . . . . . . . . . . . . . . . 8-81
• Headlamp (Low/High beam) bulb replacement (Headlamp Type B) . . . . . . . . . . . . . . . . . . . . . . . . . . 8-82
• Front turn signal lamp bulb replacement (Headlamp Type B) . . . . . . . . . . . . . . . . . . . . . . . . . . 8-83
• Front fog lamp bulb replacement . . . . . . . . . . . . . . . 8-84
• Position lamp + DRL (LED type) bulb replacement . . 8-84 • DRL (Bulb type) bulb replacement . . . . . . . . . . . . . . 8-85
• Side repeater lamp (LED type)
bulb Replacement. . 8-85
• Side repeater lamp (Bulb type) bulb Replacement . . 8-86
• Stop and tail lamp bulb replacement (5 door) . . . . . 8-86
• Rear turn signal lamp bulb replacement (5 door) . . 8-88
• Stop and tail lamp (LED type) bulb replacement (5 Door) . . . . . . . . . . . . . . . . . . . . . . . . . . . . . . . . . . . 8-\
89
• Back-up lamp bulb replacement (5 door) . . . . . . . . . 8-89
• Tail lamp (Inside) bulb replacement (5 door). . . . . . 8-90
• High mounted stop lamp bulb replacement (5 Door) . . . . . . . . . . . . . . . . . . . . . . . . . . . . . . . . . . . 8-\
91
• License plate lamp bulb replacement (5, 4 door) . . . 8-91
• Rear turn signal lamp bulb replacement (4 door) . . 8-92
• Stop and tail lamp/Side marker (Bulb type) replacement (4 door) . . . . . . . . . . . . . . . . . . . . . . . . . 8-93
• Back-up lamp bulb replacement (4 door) . . . . . . . . . 8-94
• Tail lamp (Bulb type) bulb replacement (4 door) . . 8-95
• Stop and tail lamp (LED type) bulb replacement (4 door) . . . . . . . . . . . . . . . . . . . . . . . . . . . . . . . . . . . . \
8-96
• High mounted stop lamp bulb replacement (4 door) . . 8-96
• Trunk lamp bulb replacement (4 door) . . . . . . . . . . 8-97
• Map lamp bulb replacement . . . . . . . . . . . . . . . . . . . 8-97
• Vanity mirror lamp bulb replacement . . . . . . . . . . . 8-98
• Room lamp bulb replacement . . . . . . . . . . . . . . . . . . 8-99
8