2018 KIA RIO HATCHBACK steering wheel
[x] Cancel search: steering wheelPage 297 of 492
649
Driving your vehicle
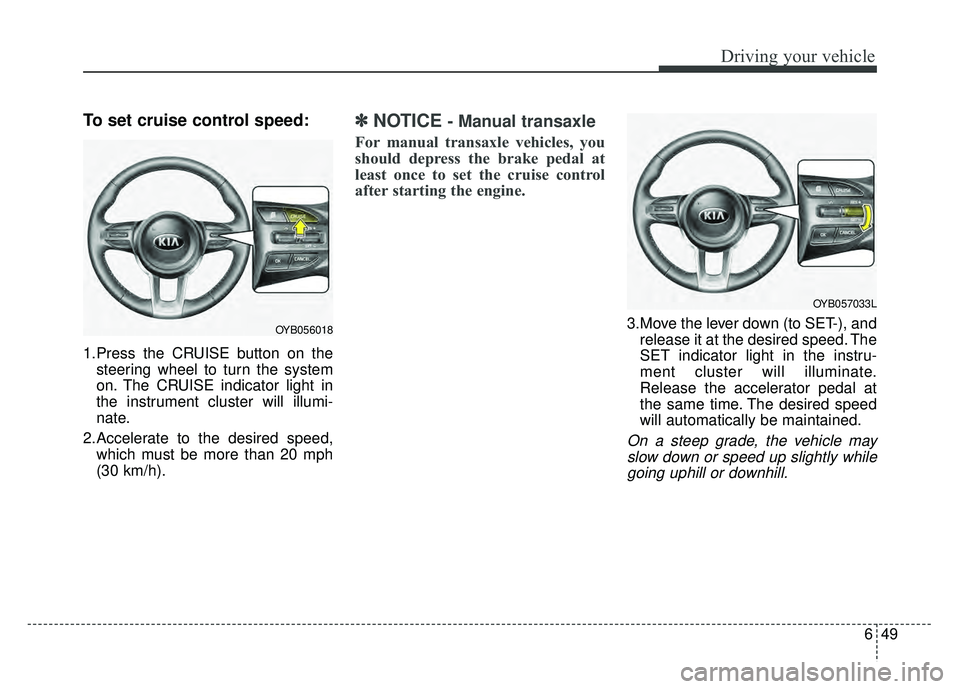
To set cruise control speed:
1.Press the CRUISE button on thesteering wheel to turn the system
on. The CRUISE indicator light in
the instrument cluster will illumi-
nate.
2.Accelerate to the desired speed, which must be more than 20 mph
(30 km/h).
✽ ✽ NOTICE- Manual transaxle
For manual transaxle vehicles, you
should depress the brake pedal at
least once to set the cruise control
after starting the engine.
3.Move the lever down (to SET-), and
release it at the desired speed. The
SET indicator light in the instru-
ment cluster will illuminate.
Release the accelerator pedal at
the same time. The desired speed
will automatically be maintained.
On a steep grade, the vehicle mayslow down or speed up slightly whilegoing uphill or downhill.
OYB056018
OYB057033L
Page 299 of 492
651
Driving your vehicle
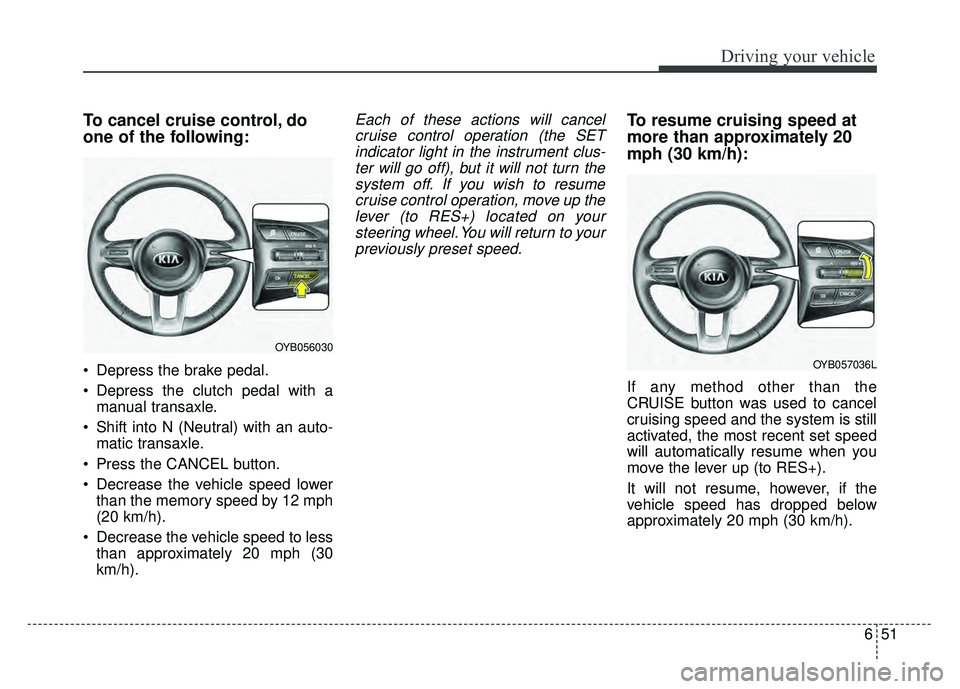
To cancel cruise control, do
one of the following:
Depress the brake pedal.
Depress the clutch pedal with amanual transaxle.
Shift into N (Neutral) with an auto- matic transaxle.
Press the CANCEL button.
Decrease the vehicle speed lower than the memory speed by 12 mph
(20 km/h).
Decrease the vehicle speed to less than approximately 20 mph (30
km/h).
Each of these actions will cancelcruise control operation (the SETindicator light in the instrument clus-ter will go off), but it will not turn thesystem off. If you wish to resumecruise control operation, move up thelever (to RES+) located on yoursteering wheel. You will return to yourpreviously preset speed.To resume cruising speed at
more than approximately 20
mph (30 km/h):
If any method other than the
CRUISE button was used to cancel
cruising speed and the system is still
activated, the most recent set speed
will automatically resume when you
move the lever up (to RES+).
It will not resume, however, if the
vehicle speed has dropped below
approximately 20 mph (30 km/h).
OYB056030
OYB057036L
Page 301 of 492

653
Driving your vehicle
SPORT mode
The sport mode may be selected
according to the driver’s preference
or road condition.The mode changes whenever the
SPORT MODE button is pressed.
❈
When normal mode is selected, it
is not displayed on the cluster.
SPORT mode
SPORT mode focuses on
dynamic driving by auto-
matically adjusting the
steering wheel, engine
and transaxle system.
MODE button is pressed
and the SPORT mode is
selected, the SPORT
indicator (yellow or white)
will illuminate.
is activated, and the
engine start/stop button
is turned off and on it will
change to NORMAL
mode. To turn on the
SPORT mode press
SPORT MODE button
again.
SPORT MODE INTEGRATED CONTROL SYSTEM
OSC057012N
NORMAL SPORTSPORT
Page 304 of 492
Driving your vehicle
56
6
Remember, your vehicle does not
require extended warm-up. After
the engine has started, allow the
engine to run for 10 to 20 seconds
prior to placing the vehicle in gear.
In very cold weather, however, give
your engine a slightly longer warm-
up period.
Don't “lug” or “over-rev” the engine. Lugging is driving too slowly in a
very high gear resulting in engine
bucking. If this happens, shift to a
lower gear. Over-revving is racing
the engine beyond its safe limit.
This can be avoided by shifting at
the recommended speed. Use your air conditioning sparingly.
The air conditioning system is
operated by engine power so your
fuel economy is reduced when you
use it.
Open windows at high speeds can reduce fuel economy.
Fuel economy is reduced by cross- winds and headwinds. To help off-
set some of this loss, slow down
when driving in these conditions.
Keeping a vehicle in good operating
condition is important both for econ-
omy and safety. Therefore, have an
authorized Kia dealer perform
scheduled inspections and mainte-
nance.
WARNING- Engine off during
motion
Never turn the engine off to
coast down hills or anytime the
vehicle is in motion. The power
steering and power brakes will
not function properly without
the engine running. In addition,
turning off the ignition while
driving could engage the steer-
ing wheel lock resulting in loss
of vehicle steering. Keep the
engine on and downshift to an
appropriate gear for engine
braking effect.
Page 305 of 492
657
Driving your vehicle
Hazardous driving conditions
When hazardous driving conditions
are encountered such as water,
snow, ice, mud, sand, or similar haz-
ards, follow these suggestions:
Drive cautiously and allow extradistance for braking.
Avoid sudden braking or steering.
When braking with non-ABS brakes pump the brake pedal with
a light up-and-down motion until
the vehicle is stopped. Do not pump the brake pedal on a
vehicle equipped with ABS.
If stalled in snow, mud, or sand,
use second gear. Accelerate slow-
ly to avoid spinning the drive
wheels.
Use sand, rock salt, tire chains, or other non-slip material under the
drive wheels to provide traction
when stalled in ice, snow, or mud.
Rocking the vehicle
If it is necessary to rock the vehicle
to free it from snow, sand, or mud,
first turn the steering wheel right and
left to clear the area around your
front wheels. Then, shift back and
forth between 1st (First) and R
(Reverse) in vehicles equipped with
a manual transaxle or R (Reverse)
and any forward gear in vehicles
equipped with an automatic
transaxle. Do not race the engine,
and spin the wheels as little as pos-
sible. If you are still stuck after a few
tries, have the vehicle pulled out by a
tow vehicle to avoid engine overheat-
ing and possible damage to the
transaxle.
The ESC system should be turned
OFF prior to rocking the vehicle.
SPECIAL DRIVING CONDITIONS
WARNING- Downshifting
Do not downshift with an auto-
matic transaxle while driving on
slippery surfaces. The sudden
change in tire speed could
cause the tires to skid and
result in an accident.
CAUTION- Vehicle rocking
Prolonged rocking may causeengine overheating, transaxledamage or failure, and tire dam-age.
Page 310 of 492
Driving your vehicle
62
6
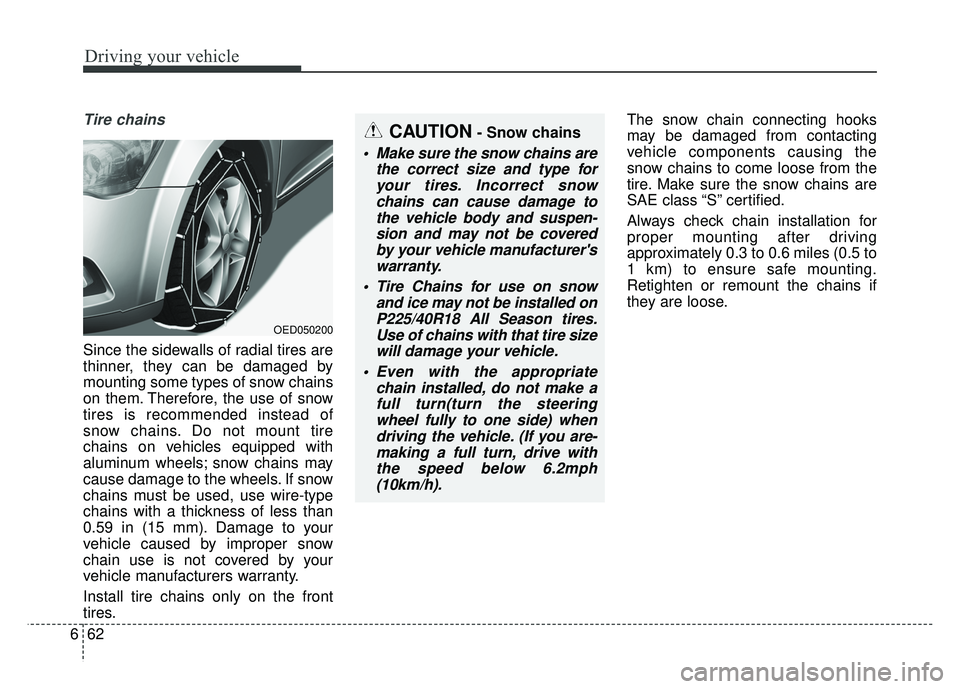
Tire chains
Since the sidewalls of radial tires are
thinner, they can be damaged by
mounting some types of snow chains
on them. Therefore, the use of snow
tires is recommended instead of
snow chains. Do not mount tire
chains on vehicles equipped with
aluminum wheels; snow chains may
cause damage to the wheels. If snow
chains must be used, use wire-type
chains with a thickness of less than
0.59 in (15 mm). Damage to your
vehicle caused by improper snow
chain use is not covered by your
vehicle manufacturers warranty.
Install tire chains only on the front
tires. The snow chain connecting hooks
may be damaged from contacting
vehicle components causing the
snow chains to come loose from the
tire. Make sure the snow chains are
SAE class “S” certified.
Always check chain installation for
proper mounting after driving
approximately 0.3 to 0.6 miles (0.5 to
1 km) to ensure safe mounting.
Retighten or remount the chains if
they are loose.
CAUTION- Snow chains
Make sure the snow chains are
the correct size and type foryour tires. Incorrect snowchains can cause damage tothe vehicle body and suspen-sion and may not be coveredby your vehicle manufacturer'swarranty.
Tire Chains for use on snow and ice may not be installed onP225/40R18 All Season tires.Use of chains with that tire sizewill damage your vehicle.
Even with the appropriate chain installed, do not make afull turn(turn the steeringwheel fully to one side) whendriving the vehicle. (If you are-making a full turn, drive withthe speed below 6.2mph(10km/h).
OED050200
Page 312 of 492

Driving your vehicle
64
6
Change to "winter weight" oil
if necessary
In some climates it is recommended
that a lower viscosity "winter weight"
oil be used during cold weather. See
section 9 for recommendations. If
you aren't sure what weight oil you
should use, consult an authorized
Kia dealer.
Check spark plugs and igni-
tion system
Inspect your spark plugs as
described in section 8 and replace
them if necessary. Also check all
ignition wiring and components to be
sure they are not cracked, worn or
damaged in any way.
To keep locks from freezing
To keep the locks from freezing,
squirt an approved de-icer fluid or
glycerine into the key opening. If a
lock is covered with ice, squirt it with
an approved de-icing fluid to remove
the ice. If the lock is frozen internally,
you may be able to thaw it out by
using a heated key. Handle the heat-
ed key with care to avoid injury.
Use approved window washer
anti-freeze in system
To keep the water in the window
washer system from freezing, add an
approved window washer anti-freeze
solution in accordance with instruc-
tions on the container. Window wash-
er anti-freeze is available from an
authorized Kia dealer and most auto
parts outlets. Do not use engine
coolant or other types of anti-freeze
as these may damage the paint fin-
ish.
Don't let your parking brake
freeze
Under some conditions your parking
brake can freeze in the engaged
position. This is most likely to hap-
pen when there is an accumulation
of snow or ice around or near the
rear brakes or if the brakes are wet.
If there is a risk the parking brake
may freeze, apply it only temporarily
while you put the shift lever in P
(automatic transaxle) or in first or
reverse gear (manual transaxle) and
block the rear wheels so the vehicle
cannot roll. Then release the parking
brake.
Don't let ice and snow accu-
mulate underneath
Under some conditions, snow and
ice can build up under the fenders
and interfere with the steering. When
driving in severe winter conditions
where this may happen, you should
periodically check underneath the
car to be sure the movement of the
front wheels and the steering com-
ponents is not obstructed.
Page 349 of 492
What to do in an emergency
30
7
If towing is necessary, we recom-
mend you have it done by an
authorized Kia dealer or a com-
mercial tow truck service.
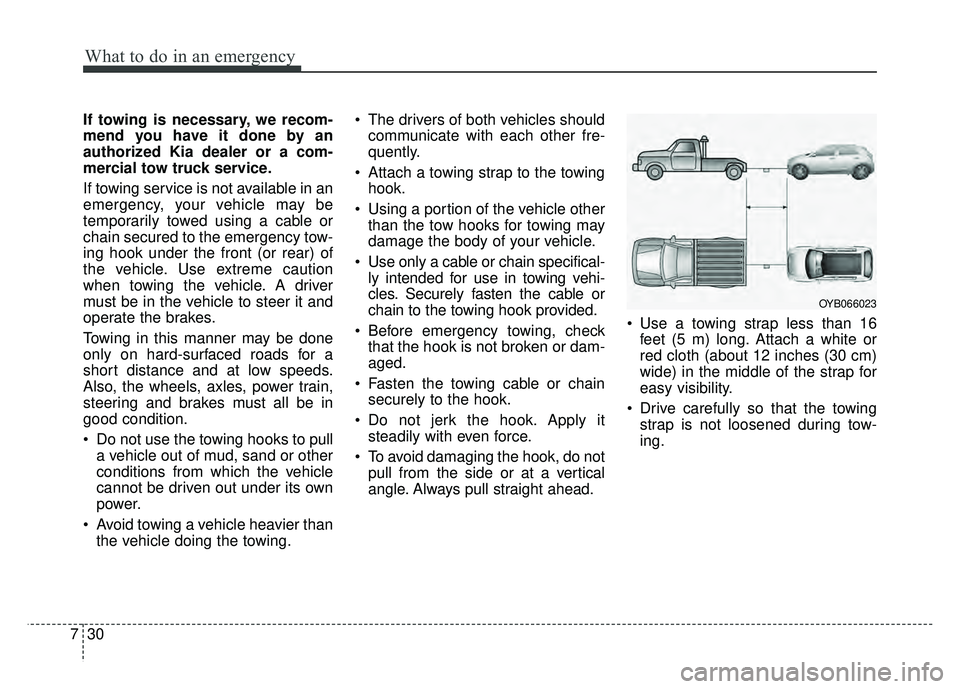
If towing service is not available in an
emergency, your vehicle may be
temporarily towed using a cable or
chain secured to the emergency tow-
ing hook under the front (or rear) of
the vehicle. Use extreme caution
when towing the vehicle. A driver
must be in the vehicle to steer it and
operate the brakes.
Towing in this manner may be done
only on hard-surfaced roads for a
short distance and at low speeds.
Also, the wheels, axles, power train,
steering and brakes must all be in
good condition.
Do not use the towing hooks to pull
a vehicle out of mud, sand or other
conditions from which the vehicle
cannot be driven out under its own
power.
Avoid towing a vehicle heavier than the vehicle doing the towing. The drivers of both vehicles should
communicate with each other fre-
quently.
Attach a towing strap to the towing hook.
Using a portion of the vehicle other than the tow hooks for towing may
damage the body of your vehicle.
Use only a cable or chain specifical- ly intended for use in towing vehi-
cles. Securely fasten the cable or
chain to the towing hook provided.
Before emergency towing, check that the hook is not broken or dam-
aged.
Fasten the towing cable or chain securely to the hook.
Do not jerk the hook. Apply it steadily with even force.
To avoid damaging the hook, do not pull from the side or at a vertical
angle. Always pull straight ahead. Use a towing strap less than 16
feet (5 m) long. Attach a white or
red cloth (about 12 inches (30 cm)
wide) in the middle of the strap for
easy visibility.
Drive carefully so that the towing strap is not loosened during tow-
ing.
OYB066023