Page 158 of 492

Features of your vehicle
86
4
The rear view camera will activate
with the ignition switch on and the
shift lever in the R (Reverse) position.
Note- during initial start up, system
may not display instantly due to the
audio system booting up.
2 ~ 4 seconds may be required
before displaying during initial
reverse selection. This occurs when
starting and immediately shifting to
reverse.
This system is a supplemental sys-
tem that shows behind the vehicle
through the UVO audio or navigation
display backing-up.
Always keep the camera lens clean. If
lens is covered with foreign matter,
the camera may not operate normally.
The rearview camera is not a substi-
tute for proper and safe backing-up
procedures. Always drive safely and
use caution when backing up. The
rearview camera may not display
every object behind the vehicle.
REARVIEW CAMERA (IF EQUIPPED)
WARNING - Backing Up &
Using Camera
Never rely solely on the rear view
camera when backing up. Prior
to entering your vehicle always
do a visual check of the area
behind your vehicle, and before
backing up be aware of your sur-
roundings and supplement the
rear view camera by looking over
your shoulders and checking
your rear view mirrors. Due to the
difficulty of ensuring that the
area behind you remains clear,
always back up slowly and stop
immediately if you even suspect
that a person, and especially a
child, might be behind you.
■Type B
■Type A
OSC047438N
OYB046401
OYB046402
Page 195 of 492

4123
Features of your vehicle
WINDSHIELD DEFROSTING AND DEFOGGING
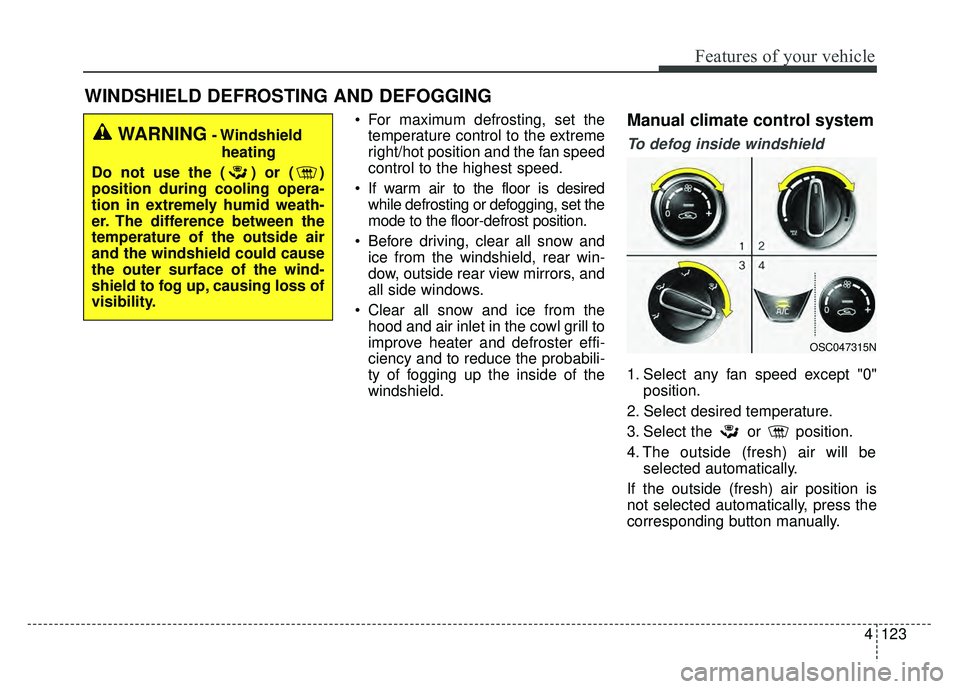
For maximum defrosting, set thetemperature control to the extreme
right/hot position and the fan speed
control to the highest speed.
If warm air to the floor is desired while defrosting or defogging, set the
mode to the floor-defrost position.
Before driving, clear all snow and ice from the windshield, rear win-
dow, outside rear view mirrors, and
all side windows.
Clear all snow and ice from the hood and air inlet in the cowl grill to
improve heater and defroster effi-
ciency and to reduce the probabili-
ty of fogging up the inside of the
windshield.Manual climate control system
To defog inside windshield
1. Select any fan speed except "0" position.
2. Select desired temperature.
3. Select the or position.
4. The outside (fresh) air will be selected automatically.
If the outside (fresh) air position is
not selected automatically, press the
corresponding button manually.
WARNING- Windshield heating
Do not use the ( ) or ( )
position during cooling opera-
tion in extremely humid weath-
er. The difference between the
temperature of the outside air
and the windshield could cause
the outer surface of the wind-
shield to fog up, causing loss of
visibility.
OSC047315N
Page 196 of 492

Features of your vehicle
124
4
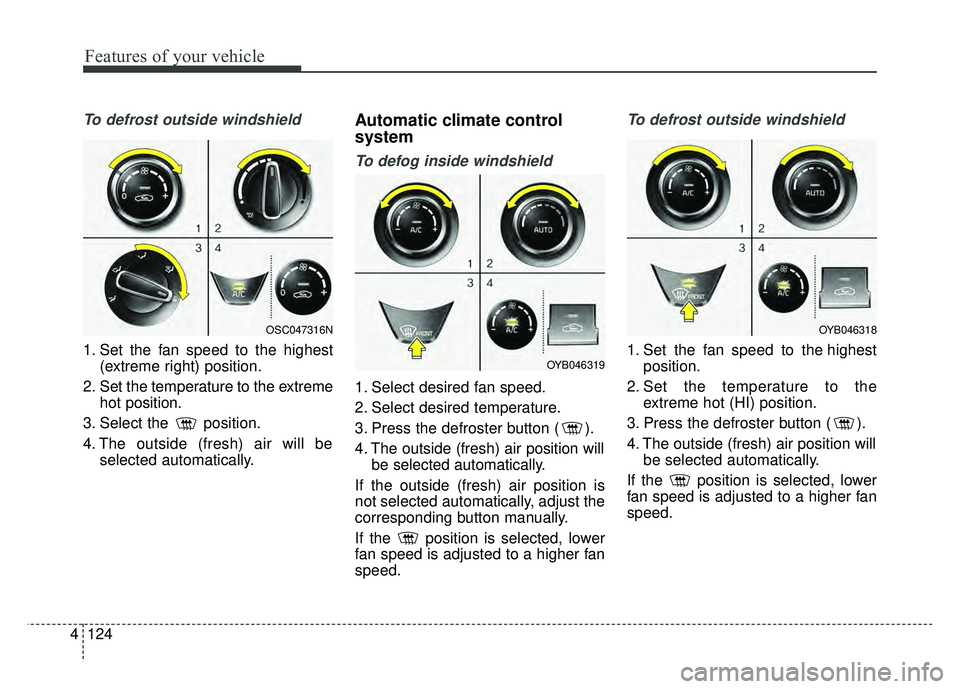
To defrost outside windshield
1. Set the fan speed to the highest
(extreme right) position.
2. Set the temperature to the extreme hot position.
3. Select the position.
4. The outside (fresh) air will be selected automatically.
Automatic climate control
system
To defog inside windshield
1. Select desired fan speed.
2. Select desired temperature.
3. Press the defroster button ( ).
4. The outside (fresh) air position willbe selected automatically.
If the outside (fresh) air position is
not selected automatically, adjust the
corresponding button manually.
If the position is selected, lower
fan speed is adjusted to a higher fan
speed.
To defrost outside windshield
1. Set the fan speed to the highest position.
2. Set the temperature to the extreme hot (HI) position.
3. Press the defroster button ( ).
4. The outside (fresh) air position will be selected automatically.
If the position is selected, lower
fan speed is adjusted to a higher fan
speed.
OSC047316N
OYB046319
OYB046318
Page 205 of 492

4133
Features of your vehicle
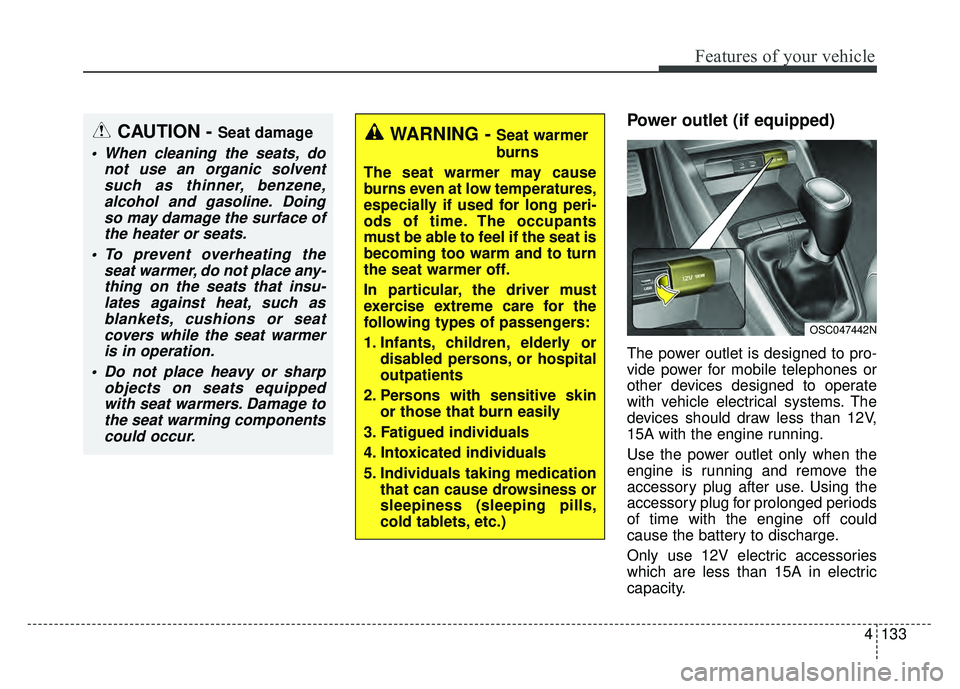
Power outlet (if equipped)
The power outlet is designed to pro-
vide power for mobile telephones or
other devices designed to operate
with vehicle electrical systems. The
devices should draw less than 12V,
15A with the engine running.
Use the power outlet only when the
engine is running and remove the
accessory plug after use. Using the
accessory plug for prolonged periods
of time with the engine off could
cause the battery to discharge.
Only use 12V electric accessories
which are less than 15A in electric
capacity.
CAUTION - Seat damage
When cleaning the seats, donot use an organic solventsuch as thinner, benzene,alcohol and gasoline. Doingso may damage the surface ofthe heater or seats.
To prevent overheating the seat warmer, do not place any-thing on the seats that insu-lates against heat, such asblankets, cushions or seatcovers while the seat warmeris in operation.
Do not place heavy or sharp objects on seats equippedwith seat warmers. Damage tothe seat warming componentscould occur.
WARNING - Seat warmer
burns
The seat warmer may cause
burns even at low temperatures,
especially if used for long peri-
ods of time. The occupants
must be able to feel if the seat is
becoming too warm and to turn
the seat warmer off.
In particular, the driver must
exercise extreme care for the
following types of passengers:
1. Infants, children, elderly or disabled persons, or hospital
outpatients
2. Persons with sensitive skin or those that burn easily
3. Fatigued individuals
4. Intoxicated individuals
5. Individuals taking medication that can cause drowsiness or
sleepiness (sleeping pills,
cold tablets, etc.)
OSC047442N
Page 215 of 492
Audio system
56
iPod®
iPod®is a trademark of Apple Inc.
Bluetooth®Wireless Technology
The Bluetooth®word mark and logos are registered
trademarks owned by Bluetooth SIG, Inc. and any use of
such marks by Kia is under license. Other trademarks
and trade names are those of their respective owners.
Page 221 of 492

Audio system
512 Driving while distracted can result
in a loss of vehicle control that may
lead to an accident, severe person-
al injury, and death. The driver’s
primary responsibility is in the safe
and legal operation of a vehicle,
and use of any handheld devices,
other equipment, or vehicle sys-
tems which take the driver’s eyes,
attention and focus away from the
safe operation of a vehicle or which
are not permissible by law should
never be used during operation of
the vehicle.
Adjust the volume to levels that allow the driver to hear sounds
from outside of the vehicle. Driving
in a state where external sounds
cannot be heard may lead to acci-
dents.
Pay attention to the volume setting when turning the device on. A sud-
den output of extreme volume
upon turning the device on could
lead to hearing impairment. (Adjust
the volume to a suitable levels
before turning off the device.) If you want to change the position
of device installation, please
inquire with your place of purchase
or service maintenance center.
Technical expertise is required to
install or disassemble the device.
Turn on the car ignition before using this device. Do not operate
the audio system for long periods
of time with the ignition turned off
as such operations may lead to
battery discharge.
In case of product malfunction, please contact your place of pur-
chase or After Service center.
Placing the audio system within an electromagnetic environment may
result in noise interference.
CAUTION
When cleaning the device, make sure to turn off theaudio system and use a dryand smooth cloth.
Do not place beverages close to the audio system. Spillingbeverages may lead to systemmalfunction.
Never use tough materials, chemical cloths, or solvents(alcohol, benzene, thinners,etc.) as such materials maydamage the device panel orcause color/quality deteriora-tion.
Prevent caustic solutions such as perfume and cosmeticoil from contacting the dash-board because they maycause damage or discol-oration.
CAUTION - LCD Monitor
Do not subject the device tosevere shock or impact. Directpressure onto the front side ofthe monitor may cause damageto the LCD or touch screen.
Page 241 of 492
![KIA RIO HATCHBACK 2018 Owners Manual Audio system
532
Connecting Bluetooth®Wireless
Technology devices
If there are no connected devices
Press the [PHONE] button on the
audio system or the [CALL] button in
the steering wheel remote cont KIA RIO HATCHBACK 2018 Owners Manual Audio system
532
Connecting Bluetooth®Wireless
Technology devices
If there are no connected devices
Press the [PHONE] button on the
audio system or the [CALL] button in
the steering wheel remote cont](/manual-img/2/57983/w960_57983-240.png)
Audio system
532
Connecting Bluetooth®Wireless
Technology devices
If there are no connected devices
Press the [PHONE] button on the
audio system or the [CALL] button in
the steering wheel remote control ➟
List of paired
Bluetooth®Wireless
Technology devices ➟Select the
desired
Bluetooth®Wireless Technology
device from the list ➟ Connect
Bluetooth®
Wireless Technology. If there are connected devices
Press the [PHONE]
button on the
audio system ➟ Select [Settings] ➟
Select [Connections] ➟ Select
Bluetooth®Wireless Technology device
to connect ➟ Select [Connect] ➟
Connect
Bluetooth®Wireless Technology.
✽ ✽ NOTICE
• Only one Bluetooth®Wireless
Technology device can be connected
at a time.
• When a Bluetooth
®Wireless
Technology device is connected,
other devices cannot be paired.
Accepting/rejecting phone calls
Receiving phone calls with
Bluetooth®Wireless Technology con-
nected.
(1) Caller name: If the caller number is in your contacts, the correspon-
ding name is displayed.
(2) Incoming phone number: Incoming phone number is displayed.
(3) Accept: Accept call.
(4) Reject: Reject call.
Page 242 of 492

Audio system
33
5
✽
✽
NOTICE
• When the incoming call screen is
displayed, audio mode and the set-
tings screen cannot be shown.
Only call volume control is sup-
ported.
• Some Bluetooth
®Wireless Technology
devices may not support the call
reject function.
• Some Bluetooth
®Wireless Technology
devices may not support the phone
number display function.
Operation during calls
Incoming call with Bluetooth®
Wireless Technology connected ➟
Select [Accept].
(1) Call duration: Call duration display.
(2) Caller name: If the caller number is in your contacts, the corresponding
name is displayed.
(3) Incoming phone number: Incoming phone number is displayed.
(4) Keypad: Number keypad for Automatic Response Service input
is displayed.
(5) Private: Call is transferred to a cell phone.
(6) Outgoing Volume: Adjust outgo- ing voice volume.
(7) End: End call.
✽ ✽ NOTICE
• Some Bluetooth®Wireless Technology
devices may not support the
Private function.
• The outgoing voice volume may vary depending on the type of
Bluetooth
®Wireless Technology
device. If the outgoing voice vol-
ume is too high or low, adjust the
Out Vol.
Favorites
Press the [PHONE] button on the
audio system ➟ Select [Favorites] ➟
Favorites list displayed.
(1) Favorites list: A list of paired favorites is displayed.
Connect a call when selected.