2018 KIA K900 change time
[x] Cancel search: change timePage 2 of 544
Kia, THE COMPANY
Thank you for becoming the owner of a new Kia vehicle.
As a global car manufacturer focused on building high-quality vehi-
cles with exceptional value, Kia Motors is dedicated to providing you
with a customer service experience that exceeds your expectations.
All information contained in this Owner’s Manual was accurate at the
time of publication. However, Kia reserves the right to make changes
at any time so that our policy of continual product improvement can
be carried out.
This manual applies to all models of this vehicle and includes descrip-
tions and explanations of optional as well as standard equipment. As a
result, you may encounter material in this manual that is not applica-
ble to your specific Kia vehicle.Drive safely and enjoy your Kia!
KH USA FOREWORD:2016 12/28/2016 3:34 PM Page 1
Page 3 of 544
i
Thank you for choosing a Kia vehicle.
When you require service, remember that your Kia dealer
knows your vehicle best. Your dealer has factory-trained tech-
nicians, recommended special tools and genuine Kia replace-
ment parts. It is dedicated to your complete customer satisfac-
tion.
Because subsequent owners require this important information
as well, this publication should remain with the vehicle if it is
sold.
This manual will familiarize you with operational, mainte-
nance and safety information about your new vehicle. It is sup-
plemented by a Warranty and Consumer Information manual
that provides important information on all warranties regarding
your vehicle.
We urge you to read these publications carefully and follow the
recommendations to help assure enjoyable and safe operation
of your new vehicle.
Kia offers a great variety of options, components and features
for its various models. Therefore, some of the equipment
described in this manual, along with the various illustrations,
may not be applicable to your particular vehicle.
The information and specifications provided in this manual
were accurate at the time of printing. Kia reserves the right to
discontinue or change specifications or design at any time
without notice and without incurring any obligation. If you
have questions, always check with your Kia dealer.
We assure you of our continuing interest in your motoring
pleasure and satisfaction in your Kia vehicle.
© 2017 Kia MOTORS AMERICA, Inc.
All rights reserved. May not be reproduced or translated in
whole or in part without the written consent of Kia MOTORS
AMERICA, Inc.
Printed in Korea
Foreword
KH USA FOREWORD:2016 12/28/2016 3:34 PM Page 2
Page 9 of 544

Fuel Additives
Kia recommends that you use good
quality gasolines treated with deter-
gent additives such as TOP TIER
Detergent Gasoline, which helps
prevent deposit formation in the
engine. These gasolines will help the
engine run cleaner and enhance per-
formance of the Emission Control
System. For more information on
TOP TIER Detergent Gasoline,
please go to the website (www.top
-
tiergas.com
).
For Customers who do not use TOP
TIER Detergent Gasoline regularly,
and have problems starting or the
engine does not run smoothly, addi-
tives that you can buy separately
may be added to the gasoline. If
TOP TIER Detergent Gasoline is not
available, one bottle of additive
added to the fuel tank at 7,500 miles
or every engine oil change is recom-
mended. Additives are available from
your authorized K900 Kia dealer
along with information on how to use
them. Do not mix other additives.
Operation in foreign countries
If you are going to drive your vehicle
in another country, be sure to:
Observe all regulations regarding registration and insurance.
Determine that acceptable fuel is available. No special break-in period is needed.
By following a few simple precautions
for the first 600 miles (1,000 km) you
may add to the performance, econo-
my and life of your vehicle.
Do not race the engine.
While driving, keep your engine
speed (rpm, or revolutions per
minute) between 2,000 rpm and
4,000 rpm.
Do not maintain a single speed for long periods of time, either fast or
slow. Varying engine speed is
needed to properly break-in the
engine.
Avoid hard stops, except in emer- gencies, to allow the brakes to seat
properly.
Introduction
1
1-5
VEHICLE BREAK-IN PROCESS
KH USA 1:2016 12/1/2016 9:43 PM Page 5
Page 52 of 544
3-34
Seat and safety features of your vehicle
Using a child restraint system
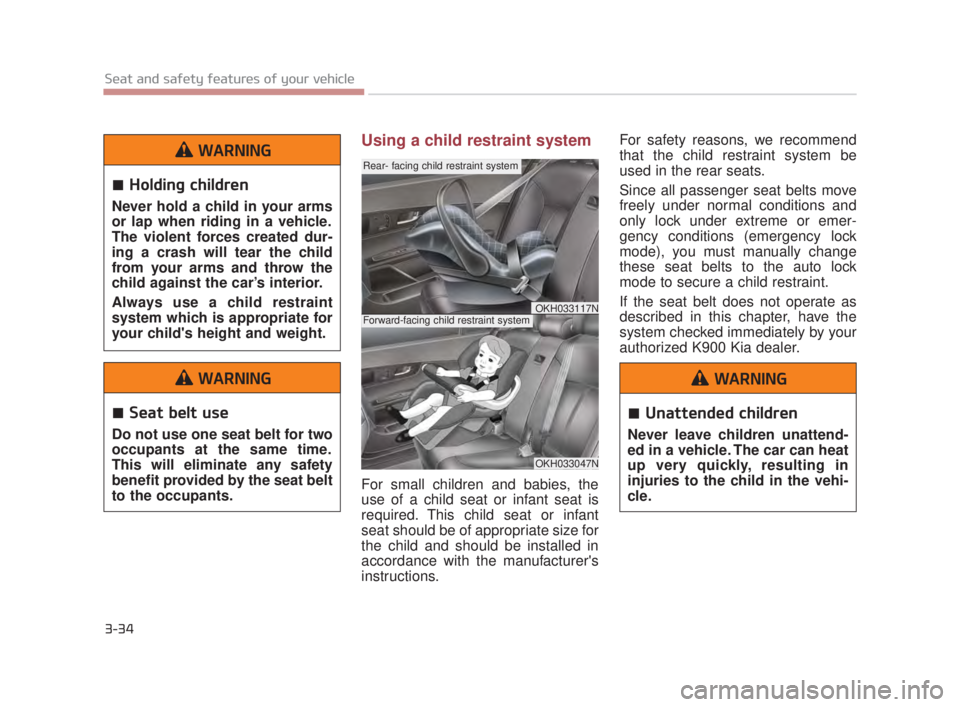
For small children and babies, the
use of a child seat or infant seat is
required. This child seat or infant
seat should be of appropriate size for
the child and should be installed in
accordance with the manufacturer's
instructions. For safety reasons, we recommend
that the child restraint system be
used in the rear seats.
Since all passenger seat belts move
freely under normal conditions and
only lock under extreme or emer-
gency conditions (emergency lock
mode), you must manually change
these seat belts to the auto lock
mode to secure a child restraint.
If the seat belt does not operate as
described in this chapter, have the
system checked immediately by your
authorized K900 Kia dealer.
OKH033047N
Rear- facing child restraint system
Forward-facing child restraint systemOKH033117N
Holding children
Never hold a child in your arms
or lap when riding in a vehicle.
The violent forces created dur-
ing a crash will tear the child
from your arms and throw the
child against the car’s interior.
Always use a child restraint
system which is appropriate for
your child's height and weight.
WARNING
Seat belt use
Do not use one seat belt for two
occupants at the same time.
This will eliminate any safety
benefit provided by the seat belt
to the occupants.
WARNING
Unattended children
Never leave children unattend-
ed in a vehicle. The car can heat
up very quickly, resulting in
injuries to the child in the vehi-
cle.
WARNING
KH USA 3:2018 4/18/2017 9:35 AM Page 34
Page 105 of 544
Features of your vehicle
4-24
Power Trunk Non-Opening orClosing Conditions:
The power trunk will not open or close automatically, when the vehi-
cle is moving more than 1.8 mph (3
km/h).
The power trunk can be operated when the engine is not running.
However, the power trunk operation
consumes large amounts of vehicle
electric power. To prevent the bat-
tery from draining, do not operate it
excessively (e.g., more than
approximately 10 times repeatedly).
Do not modify or repair any part of the power trunk by yourself. This
must be done by an authorized
K900 Kia dealer.
Before jacking up the vehicle to change a tire or repair the vehicle,
open the power trunk. Do not oper-
ate the power trunk when the vehi-
cle is raised or this could cause the
power trunk to operate improperly.
If there are obstacles such as snow on the power trunk, it may not open
automatically. After removing the
obstacle, try to open it again.
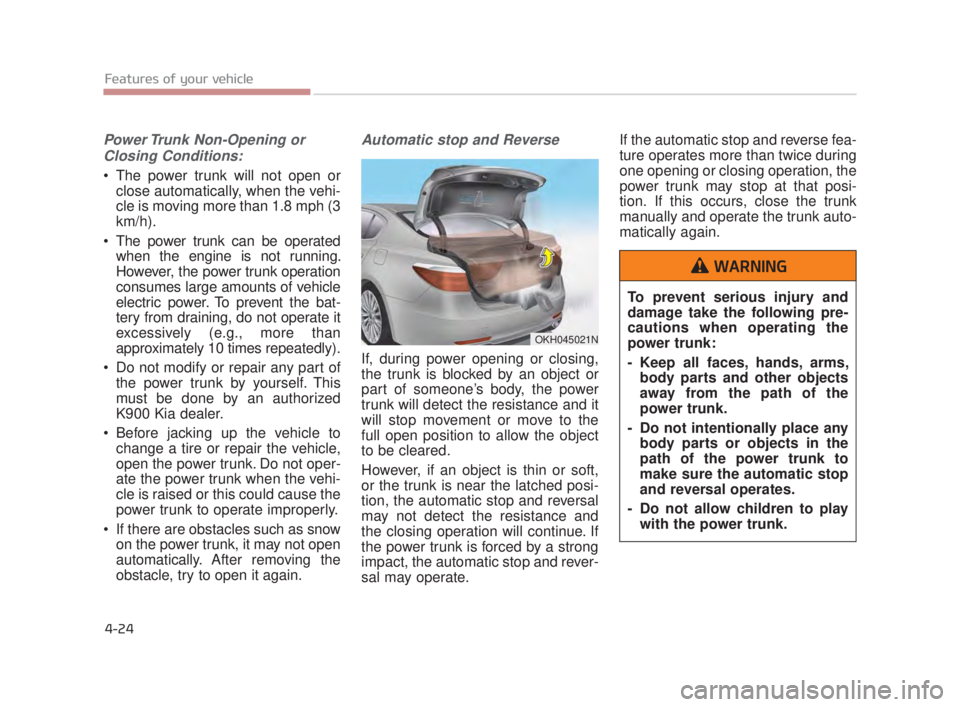
Automatic stop and Reverse
If, during power opening or closing,
the trunk is blocked by an object or
part of someone’s body, the power
trunk will detect the resistance and it
will stop movement or move to the
full open position to allow the object
to be cleared.
However, if an object is thin or soft,
or the trunk is near the latched posi-
tion, the automatic stop and reversal
may not detect the resistance and
the closing operation will continue. If
the power trunk is forced by a strong
impact, the automatic stop and rever-
sal may operate. If the automatic stop and reverse fea-
ture operates more than twice during
one opening or closing operation, the
power trunk may stop at that posi-
tion. If this occurs, close the trunk
manually and operate the trunk auto-
matically again.
OKH045021N
To prevent serious injury and
damage take the following pre-
cautions when operating the
power trunk:
- Keep all faces, hands, arms,
body parts and other objects
away from the path of the
power trunk.
- Do not intentionally place any body parts or objects in the
path of the power trunk to
make sure the automatic stop
and reversal operates.
- Do not allow children to play with the power trunk.
WARNING
KH USA 4:2018 4/18/2017 5:56 PM Page 24
Page 137 of 544

Features of your vehicle
4-56
The transceiver has been tested and
complies with FCC and Industry
Canada rules. Changes or modifica-
tions not expressly approved by the
party responsible for compliance
could void the user's authority to
operate the device.
NVS
®and Z-NAV™ are registered
trademarks. Nav®are of Gentex
Corporation, Zeeland, Michigan.
HomeLink
®is a registered trade-
mark owned by Johnson Controls
Technology Company, Holland,
Michigan.
Electric chromic mirror (ECM) with
HomeLink® system, compass andUVO (for U.S.A, if equipped)
Your vehicle may be equipped with a
Gentex Automatic-Dimming Mirror
with a Z-Nav™ Electronic Compass
Display and an Integrated HomeLink
®
Wireless Control System. During
nighttime driving, this feature will
automatically detect and reduce
rearview mirror glare while the com-
pass indicates the direction the vehi-
cle is pointed. The HomeLink
®
Universal Transceiver allows you to
activate your garage door(s), electric
gate, home lighting, etc. (1) (i)Information
(2) UVO Button
(Google Local Search)
(3) RSA(Roadside Assistance)
(4) Compass control button & Dimming ON/OFF button
(5) Status indicator LED
(6) Channel 1 button
(7) Channel 2 button
(8) Channel 3 button
(9) Compass display
(10) Rear light sensor
OKH045933N
KH USA 4:2018 4/18/2017 5:57 PM Page 56
Page 141 of 544
Features of your vehicle
4-60
Programming HomeLink®
Please note the following:
When programming a garage dooropener, it is advised to park the
vehicle outside of the garage.
It is recommended that a new bat- tery be placed in the hand-held
transmitter of the device being pro-
grammed to HomeLink
®for quicker
training and accurate transmission
of the radio-frequency signal.
Some vehicles may require the ignition switch to be placed in the
ACC (or "Accessories") position for
programming and/or operation of
HomeLink
®.
In the event that there are still pro- gramming difficulties or questions
after following the programming
steps listed below, contact
HomeLink
®at: www.homelink.com
or by calling 1-800-355-3515.
Programming
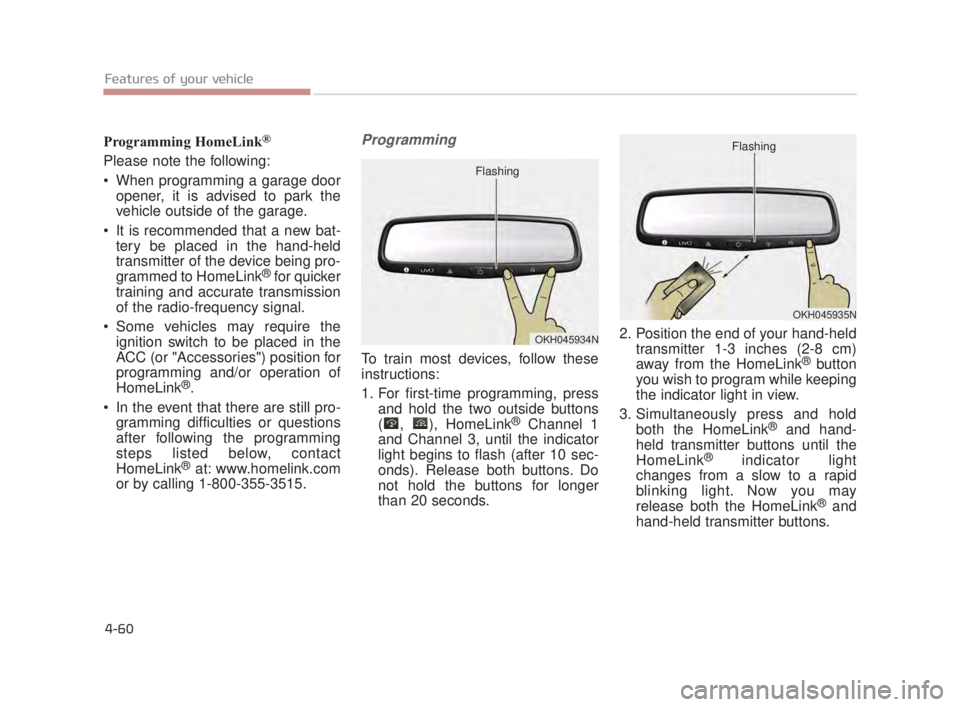
To train most devices, follow these
instructions:
1. For first-time programming, press and hold the two outside buttons
( , ), HomeLink
®Channel 1
and Channel 3, until the indicator
light begins to flash (after 10 sec-
onds). Release both buttons. Do
not hold the buttons for longer
than 20 seconds. 2. Position the end of your hand-held
transmitter 1-3 inches (2-8 cm)
away from the HomeLink
®button
you wish to program while keeping
the indicator light in view.
3. Simultaneously press and hold both the HomeLink
®and hand-
held transmitter buttons until the
HomeLink
®indicator light
changes from a slow to a rapid
blinking light. Now you may
release both the HomeLink
®and
hand-held transmitter buttons.
OKH045934N
Flashing
OKH045935N
Flashing
KH USA 4:2018 4/18/2017 5:58 PM Page 60
Page 142 of 544
Features of your vehicle
4
4-61
INFORMATION
Some devices may require you to
replace this Programming step 3
with procedures noted in the "Gate
Operator/Canadian Programming"
chapter. If the HomeLink
®indicator
light does not change to a rapidly
blinking light after performing these
steps, contact HomeLink
®at
www.homelink.com.
4. Firmly press, hold for 5 seconds
and release the programmed
HomeLink
®button up to two sepa-
rate times to activate the door. If
the door does not activate, press
and hold the just-trained
HomeLink
®button and observe the
indicator light.
If the indicator light stays on con- stantly, programming is complete
and your device should activate
when the HomeLink
®button is
pressed and released.
If the indicator light blinks rapidly for 2 seconds and then turns to a
constant light, continue with
"Programming" steps 5-7 to com-
plete the programming of a
rolling code equipped device
(most commonly a garage door
opener).
5. At the garage door opener receiv- er (motor-head unit) in the garage,
locate the "learn" or "smart" but-
ton. This can usually be found
where the hanging antenna wire is
attached to the motor-head unit. 6. Firmly press and release the
"learn" or "smart" button. (The
name and color of the button vary
by manufacturer). There are 30
seconds to initiate step 7.
7. Return to the vehicle and firmly press, hold for 2 seconds and
release the programmed
HomeLink
®button. Repeat the
"press/hold/release" sequence a
second time, and, depending on
the brand of the garage door
opener (or other rolling code
equipped device), repeat this
sequence a third time to com plete
the programming process.
HomeLink
®should now activate your
rolling code equipped device.
i
KH USA 4:2018 4/18/2017 5:58 PM Page 61