2018 JEEP GRAND CHEROKEE CD player
[x] Cancel search: CD playerPage 31 of 368

WARNING!
• All occupants, including the driver,
should not operate a vehicle or sit in a
vehicle’s seat until the head restraints
are placed in their proper positions in
order to minimize the risk of neck injury
in the event of a collision.
• Do not place items over the top of the
Active Head Restraint, such as coats,
seat covers or portable DVD players.
These items may interfere with the op-
eration of the Active Head Restraint in
the event of a collision and could result
in serious injury or death.
• Active Head Restraints may be deployed
if they are struck by an object such as a
hand, foot or loose cargo. To avoid acci-
dental deployment of the Active Head
Restraint ensure that all cargo is se-
cured, as loose cargo could contact the
Active Head Restraint during sudden
stops. Failure to follow this warning
could cause personal injury if the Active
Head Restraint is deployed.
Front Removal
WARNING!
ALL the head restraints MUST be rein-
stalled in the vehicle to properly protect
the occupants.
NOTE:
• The head restraints should only be removed
by qualified technicians, for service pur-
poses only. If either of the head restraints
require removal, see your authorized dealer.
• In the event of deployment of an Active
Head Restraint, refer to “Occupant Re-
straint Systems” in “Safety” in your Own-
er’s Manual for further information.
WARNING!
• All occupants, including the driver,
should not operate a vehicle or sit in a
vehicle’s seat until the head restraints
are placed in their proper positions in
order to minimize the risk of neck injury
in the event of a collision.
WARNING!
• Do not place items over the top of the
Active Head Restraint, such as coats,
seat covers or portable DVD players.
These items may interfere with the op-
eration of the Active Head Restraint in
the event of a collision and could result
in serious injury or death.
• Active Head Restraints may be deployed
if they are struck by an object such as a
hand, foot or loose cargo. To avoid acci-
dental deployment of the Active Head
Restraint ensure that all cargo is se-
cured, as loose cargo could contact the
Active Head Restraint during sudden
stops. Failure to follow this warning
could cause personal injury if the Active
Head Restraint is deployed.
29
Page 110 of 368

Active Head Restraint (AHR) Components:WARNING!
• All occupants, including the driver,
should not operate a vehicle or sit in a
vehicle’s seat until the head restraints
are placed in their proper positions in
order to minimize the risk of neck injury
in the event of a collision.
• Do not place items over the top of the
Active Head Restraint, such as coats,
seat covers or portable DVD players.
These items may interfere with the op-
eration of the Active Head Restraint in
the event of a collision and could result
in serious injury or death.
• Active Head Restraints may be deployed
if they are struck by an object such as a
hand, foot or loose cargo. To avoid acci-
dental deployment of the Active Head
Restraint, ensure that all cargo is se-
cured, as loose cargo could contact the
Active Head Restraint during sudden
stops. Failure to follow this warning
could cause personal injury if the Active
Head Restraint is deployed.NOTE:
For more information on properly adjusting
and positioning the head restraint, refer to
“Head Restraints” in “Getting To Know Your
Vehicle.”
Resetting Active Head Restraints (AHR)
If the Active Head Restraints are triggered
during a collision, the front half of the head
restraint will be extended forward and sepa-
rated from the rear half of the head restraint
(See Image). Do not drive your vehicle after
Active Head Restraint (AHR) Components
1 — Head Restraint Front Half (Soft
Foam And Trim)
2 — Head Restraint Back Half (Decora-
tive Plastic Rear Cover)
3 — Head Restraint Guide Tubes
4 — Seat Back
Active Head Restraint (AHR) Deployed
SAFETY
108
Page 287 of 368

MULTIMEDIA
CYBERSECURITY...........287
OFF ROAD PAGES — IF
EQUIPPED.................288
Off Road Pages Status Bar........288
Vehicle Dynamics..............289
Suspension..................289
Pitch And Roll — If Equipped......290
Accessory Gauges..............290
Selec-Terrain — If Equipped.......291
TIPS CONTROLS AND GENERAL
INFORMATION..............291
Steering Wheel Audio Controls......291
Reception Conditions............292
Care And Maintenance...........292
Anti-Theft Protection............292
UCONNECT 4 WITH 7-INCH DIS-
PLAY.....................292
Uconnect 4 At A Glance.........292
Drag & Drop Menu Bar...........294
Radio.....................295
Android Auto — If Equipped.......296Apple CarPlay Integration — If
Equipped...................297
Apps — If Equipped............298
UCONNECT 4C/4C NAV WITH
8.4-INCH DISPLAY...........299
Uconnect 4C/4C NAV At A Glance . . .299
Drag & Drop Menu Bar...........300
Radio.....................301
Android Auto — If Equipped.......302
Apple CarPlay Integration — If
Equipped...................306
Apps — If Equipped............308
UCONNECT SETTINGS.......308
IPOD/USB/MEDIA PLAYER CON-
TROL....................309
Audio Jack (AUX)..............309
USB Port...................310
Bluetooth Streaming Audio........310
UCONNECT REAR SEAT ENTER-
TAINMENT (RSE) SYSTEM — IF
EQUIPPED.................310
Getting Started...............311Dual Video Screen..............312
Blu-ray Disc Player.............312
Play Video Games..............315
NAVIGATION — IF EQUIPPED . . .316
Changing The Navigation Voice Prompt
Volume....................316
Finding Points Of Interest.........318
Finding A Place By Spelling The Name .318
One-Step Voice Destination Entry. . . .318
Setting Your Home Location........318
Home.....................318
Adding A Stop................320
Taking A Detour...............320
UCONNECT PHONE..........321
Uconnect Phone (Bluetooth Hands Free
Calling)....................321
Pairing (Wirelessly Connecting) Your Mobile
Phone To The Uconnect System.....323
Common Phone Commands
(Examples)..................326
Mute (Or Unmute) Microphone During
Call......................326
MULTIMEDIA
285
Page 311 of 368

• Clock • Audio
• Safety & Driving As-
sistance• Phone/Bluetooth
• Mirrors & Wipers • Accessibility
• Lights • Radio Setup
• Doors & Locks • Restore Settings
• Auto-On Comfort &
Remote Start• Clear Personal Data
• Compass – If
Equipped• System Information
NOTE:
Depending on the vehicles options, feature
settings may vary.
Refer to “Uconnect Settings” in “Multime-
dia” in the Owner’s Manual for further infor-
mation.
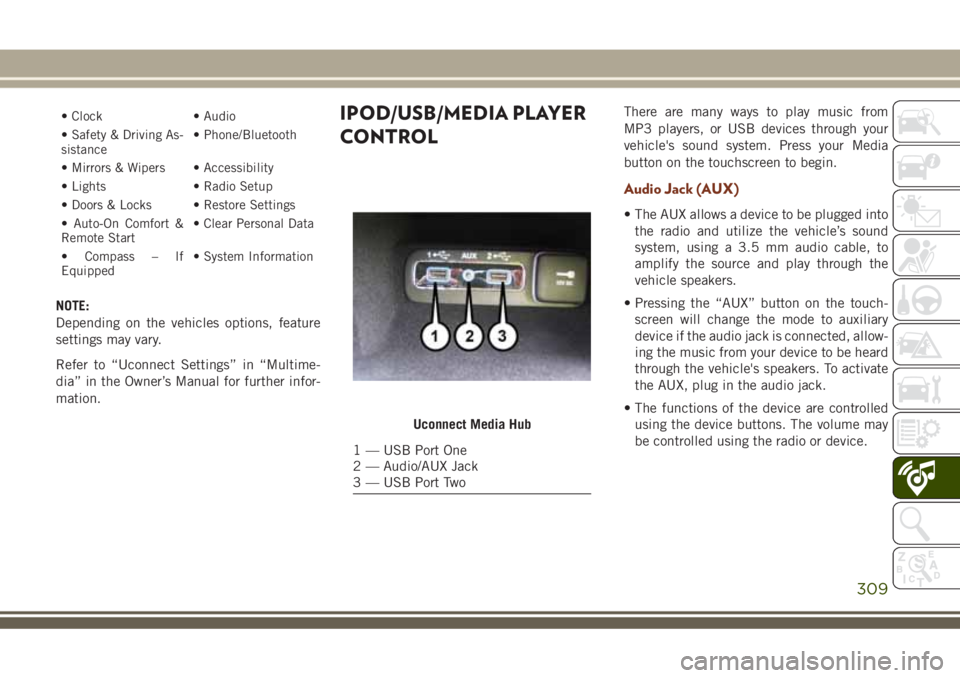
IPOD/USB/MEDIA PLAYER
CONTROLThere are many ways to play music from
MP3 players, or USB devices through your
vehicle's sound system. Press your Media
button on the touchscreen to begin.
Audio Jack (AUX)
• The AUX allows a device to be plugged into
the radio and utilize the vehicle’s sound
system, using a 3.5 mm audio cable, to
amplify the source and play through the
vehicle speakers.
• Pressing the “AUX” button on the touch-
screen will change the mode to auxiliary
device if the audio jack is connected, allow-
ing the music from your device to be heard
through the vehicle's speakers. To activate
the AUX, plug in the audio jack.
• The functions of the device are controlled
using the device buttons. The volume may
be controlled using the radio or device.
Uconnect Media Hub
1 — USB Port One
2 — Audio/AUX Jack
3 — USB Port Two
309
Page 313 of 368

Getting Started
•Screen(s) located in the rear of front seats:
Open the LCD screen cover by lifting up on
cover.
• Place the ignition in the ON or ACC posi-
tion.
• Your vehicle may be equipped with a Blu-
ray Disc Player. If equipped with a Blu-ray
disc player, the icon will be present on the
Player.• Turn on the Rear Seat Entertainment sys-
tem by pushing the power button on the
remote control.
• When the Video Screen(s) are open and a
DVD/Blu-ray disc is inserted into the disc
player, the screen(s) turn(s) on automati-
cally, the headphone transmitters turn on
and playback begins.• With the Dual Video Screen System, Chan-
nel 1 (Rear 1) on the remote control and
headphones, refers to Screen 1 (driver's
side) and Channel 2 (Rear 2) on the Re-
mote Control and Headphones refers to
Screen 2 (passenger side).
RSE System Screen
RSE System Channel 1 (Rear 1)
RSE System Remote Control Channel
Selectors
311
Page 314 of 368

• The system can be controlled either by the
front seat occupants utilizing the touch-
screen radio or by the rear seat occupants
using the remote control.
Dual Video Screen
NOTE:
Typically there are two different ways to op-
erate the features of the Rear Seat Entertain-
ment System.
• The Remote Control
• The Touchscreen Radio (If Equipped)
Blu-ray Disc Player
Play A Blu-ray Disc
The Blu-ray disc player is located in the
center console.
RSE System Headphone Channel
SelectorsBlu-ray Disc Player Location
MULTIMEDIA
312
Page 315 of 368

1. Insert a Blu-ray disc into the VES disc
player with the label facing as indicated
on the Blu-ray player. The radio automati-
cally selects the appropriate mode after
the disc is recognized and displays the
menu screen, the language screen, or
starts playing the first track.
2. To watch a Blu-ray disc on Rear 1 for
driver's side rear passengers, ensure the
Remote Control and Headphone switch is
on Rear 1.
3. To watch a Blu-ray disc on Rear 2 for
passenger side rear passengers, ensure
the Remote Control and Headphone
switch is on Rear 2.NOTE:
• To view a Blu-ray disc on the radio, press
the “Media” button on the touchscreen,
and then press the “Disc” button. Press the
“Play” button, and then the “full screen”
button.
• Viewing a Blu-ray disc on the radio screen is
not available in all states/provinces. The
vehicle must be stopped, and the gear se-
lector must be in the PARK position for
vehicles with automatic transmission.
313
Page 317 of 368

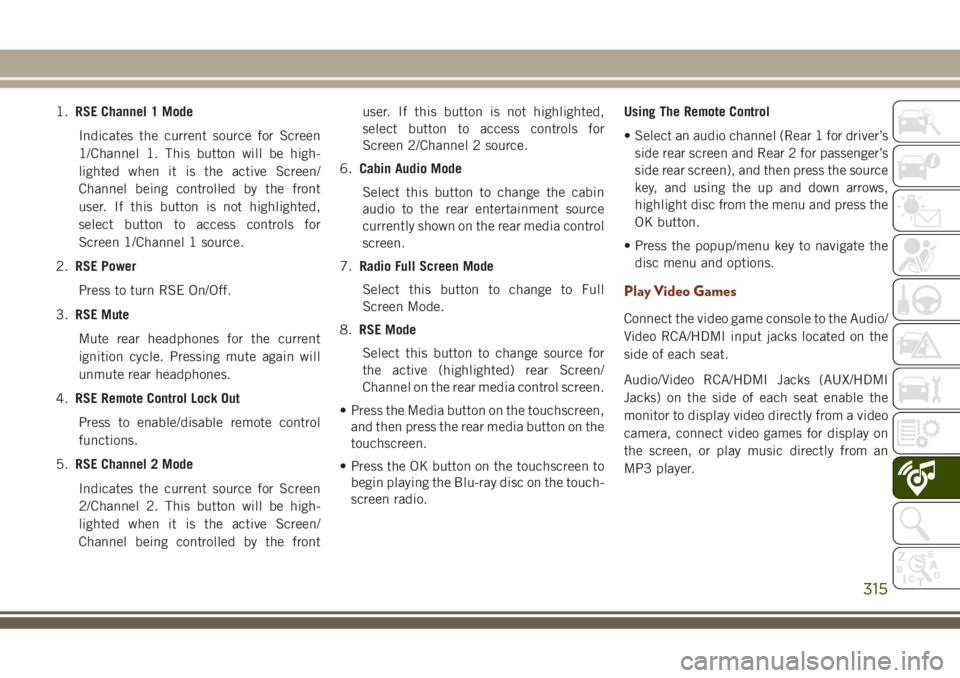
1.RSE Channel 1 Mode
Indicates the current source for Screen
1/Channel 1. This button will be high-
lighted when it is the active Screen/
Channel being controlled by the front
user. If this button is not highlighted,
select button to access controls for
Screen 1/Channel 1 source.
2.RSE Power
Press to turn RSE On/Off.
3.RSE Mute
Mute rear headphones for the current
ignition cycle. Pressing mute again will
unmute rear headphones.
4.RSE Remote Control Lock Out
Press to enable/disable remote control
functions.
5.RSE Channel 2 Mode
Indicates the current source for Screen
2/Channel 2. This button will be high-
lighted when it is the active Screen/
Channel being controlled by the frontuser. If this button is not highlighted,
select button to access controls for
Screen 2/Channel 2 source.
6.Cabin Audio Mode
Select this button to change the cabin
audio to the rear entertainment source
currently shown on the rear media control
screen.
7.Radio Full Screen Mode
Select this button to change to Full
Screen Mode.
8.RSE Mode
Select this button to change source for
the active (highlighted) rear Screen/
Channel on the rear media control screen.
• Press the Media button on the touchscreen,
and then press the rear media button on the
touchscreen.
• Press the OK button on the touchscreen to
begin playing the Blu-ray disc on the touch-
screen radio.Using The Remote Control
• Select an audio channel (Rear 1 for driver’s
side rear screen and Rear 2 for passenger’s
side rear screen), and then press the source
key, and using the up and down arrows,
highlight disc from the menu and press the
OK button.
• Press the popup/menu key to navigate the
disc menu and options.
Play Video Games
Connect the video game console to the Audio/
Video RCA/HDMI input jacks located on the
side of each seat.
Audio/Video RCA/HDMI Jacks (AUX/HDMI
Jacks) on the side of each seat enable the
monitor to display video directly from a video
camera, connect video games for display on
the screen, or play music directly from an
MP3 player.
315