Page 249 of 630
WARNING!(Continued)
•ALWAYS make sure objects cannot fall or slide into
the driver ’s side floor area when the vehicle is
moving. Objects can become trapped under accelera-
tor, brake, or clutch pedals and could cause a loss of
vehicle control.
• NEVER place any objects under the floor mat (e.g.,
towels, keys, etc.). These objects could change the
position of the floor mat and may cause interference
with the accelerator, brake, or clutch pedals.
• If the vehicle carpet has been removed and re-
installed, always properly attach carpet to the floor
and check the floor mat fasteners are secure to the
vehicle carpet. Fully depress each pedal to check for
interference with the accelerator, brake, or clutch
pedals then re-install the floor mats.
• It is recommended to only use mild soap and water
to clean your floor mats. After cleaning, always check
your floor mat has been properly installed and is
secured to your vehicle using the floor mat fasteners
by lightly pulling mat.
Periodic Safety Checks You Should Make Outside
The Vehicle
Tires
Examine tires for excessive tread wear and uneven wear
patterns. Check for stones, nails, glass, or other objects
lodged in the tread or sidewall. Inspect the tread for cuts
and cracks. Inspect sidewalls for cuts, cracks, and bulges.
Check the wheel nuts for tightness. Check the tires (includ-
ing spare) for proper cold inflation pressure.
Lights
Have someone observe the operation of brake lights and
exterior lights while you work the controls. Check turn
signal and high beam indicator lights on the instrument
panel.
Door Latches
Check for proper closing, latching, and locking.
Fluid Leaks
Check area under the vehicle after overnight parking for fuel,
coolant, oil, or other fluid leaks. Also, if gasoline fumes are
detected or if fuel, or brake fluid leaks are suspected. The
cause should be located and corrected immediately.
5
SAFETY 247
Page 280 of 630
The system requires that the engine be running for all
changes. When lowering the vehicle all of the doors,
including the liftgate, must be closed. If a door is opened at
any time while the vehicle is lowering the change will not
be completed until the open door(s) is/are closed.
The Quadra-Lift air suspension system uses a lifting and
lowering pattern which keeps the headlights from incor-
rectly shining into oncoming traffic. When raising the
vehicle, the rear of the vehicle will move up first and then
the front. When lowering the vehicle, the front will move
down first and then the rear.
After the engine is turned off, it may be noticed that the air
suspension system operates briefly, this is normal. The
system is correcting the position of the vehicle to ensure a
proper appearance.
To assist with changing a spare tire, the Quadra-Lift air
suspension system has a feature which allows the auto-
matic leveling to be disabled. Refer to “Uconnect Settings”
in “Multimedia” for further information.
For further information refer to “Driving Tips” in “Starting
And Operating” section.NOTE:
If equipped with a touch screen radio all enabling/
disabling of air suspension features must be done through
the radio. Refer to “Uconnect Settings” in “Multimedia” for
further information.
Page 361 of 630
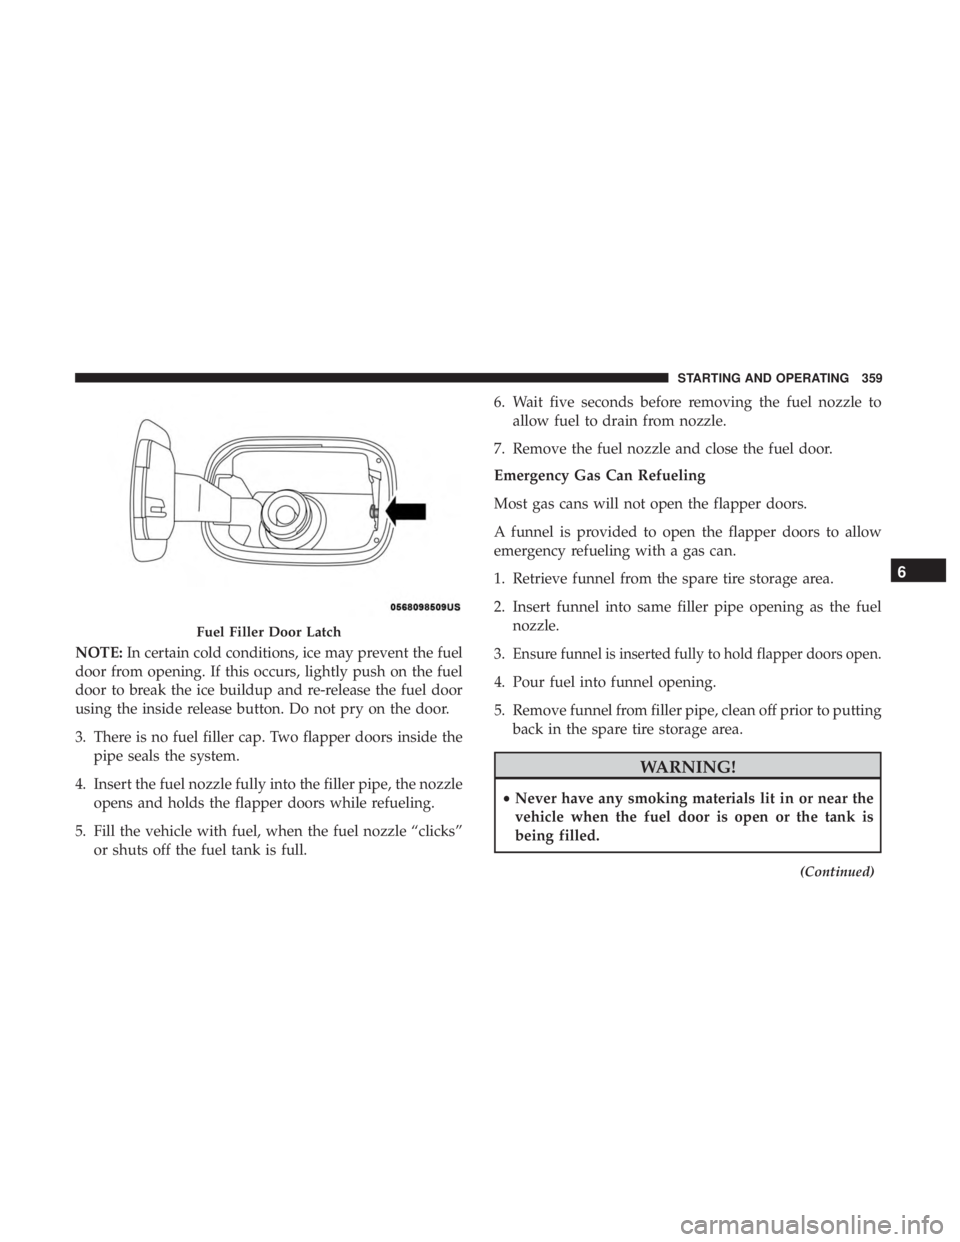
NOTE:In certain cold conditions, ice may prevent the fuel
door from opening. If this occurs, lightly push on the fuel
door to break the ice buildup and re-release the fuel door
using the inside release button. Do not pry on the door.
3. There is no fuel filler cap. Two flapper doors inside the pipe seals the system.
4. Insert the fuel nozzle fully into the filler pipe, the nozzle opens and holds the flapper doors while refueling.
5. Fill the vehicle with fuel, when the fuel nozzle “clicks” or shuts off the fuel tank is full. 6. Wait five seconds before removing the fuel nozzle to
allow fuel to drain from nozzle.
7. Remove the fuel nozzle and close the fuel door.
Emergency Gas Can Refueling
Most gas cans will not open the flapper doors.
A funnel is provided to open the flapper doors to allow
emergency refueling with a gas can.
1. Retrieve funnel from the spare tire storage area.
2. Insert funnel into same filler pipe opening as the fuel nozzle.
3.Ensure funnel is inserted fully to hold flapper doors open.
4. Pour fuel into funnel opening.
5. Remove funnel from filler pipe, clean off prior to putting back in the spare tire storage area.
Page 372 of 630
WARNING!(Continued)
•Safety chains must always be used between your
vehicle and trailer. Always connect the chains to the
hook retainers of the vehicle hitch. Cross the chains
under the trailer tongue and allow enough slack for
turning corners.
• Vehicles with trailers should not be parked on a
grade. When parking, apply the parking brake on the
tow vehicle. Put the tow vehicle transmission in
PARK. For four-wheel drive vehicles, make sure the
transfer case is not in NEUTRAL. Always, block or
�chock� the trailer wheels.
• GCWR must not be exceeded.
• Total weight must be distributed between the tow
vehicle and the trailer such that the following four
ratings are not exceeded:
1. GVWR
2. GTW
3. GAWR
4. Tongue weight rating for the trailer hitch utilized.
Towing Requirements — Tires
• Do not attempt to tow a trailer while using a compact
spare tire.
• Do not drive more than 50 mph (80 km/h) when towing
while using a full size spare tire.
• Proper tire inflation pressures are essential to the safe
and satisfactory operation of your vehicle. Refer to
“Tires” in “Servicing And Maintenance” for proper tire
inflation procedures.
• Check the trailer tires for proper tire inflation pressures
before trailer usage.
• Check for signs of tire wear or visible tire damage before
towing a trailer. Refer to “Tires” in “Servicing And
Maintenance” for the proper inspection procedure.
• When replacing tires, refer to “Tires” in “Servicing And
Maintenance” for the proper tire replacement proce-
dures. Replacing tires with a higher load carrying capac-
ity will not increase the vehicle’s GVWR and GAWR
limits.
370 STARTING AND OPERATING
Page 413 of 630
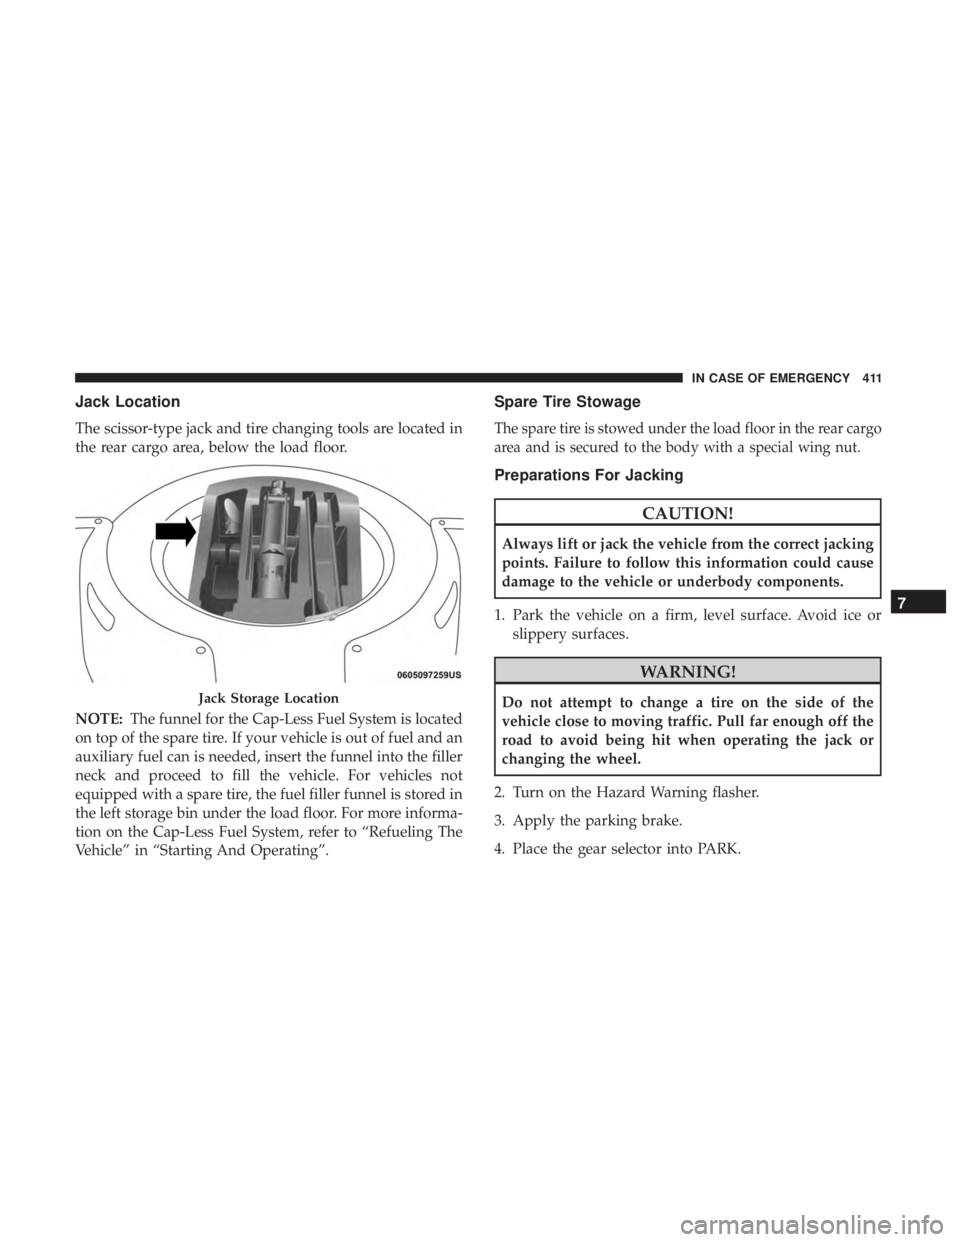
Jack Location
The scissor-type jack and tire changing tools are located in
the rear cargo area, below the load floor.
NOTE:The funnel for the Cap-Less Fuel System is located
on top of the spare tire. If your vehicle is out of fuel and an
auxiliary fuel can is needed, insert the funnel into the filler
neck and proceed to fill the vehicle. For vehicles not
equipped with a spare tire, the fuel filler funnel is stored in
the left storage bin under the load floor. For more informa-
tion on the Cap-Less Fuel System, refer to “Refueling The
Vehicle” in “Starting And Operating”.
Spare Tire Stowage
The spare tire is stowed under the load floor in the rear cargo
area and is secured to the body with a special wing nut.
Preparations For Jacking
Page 418 of 630
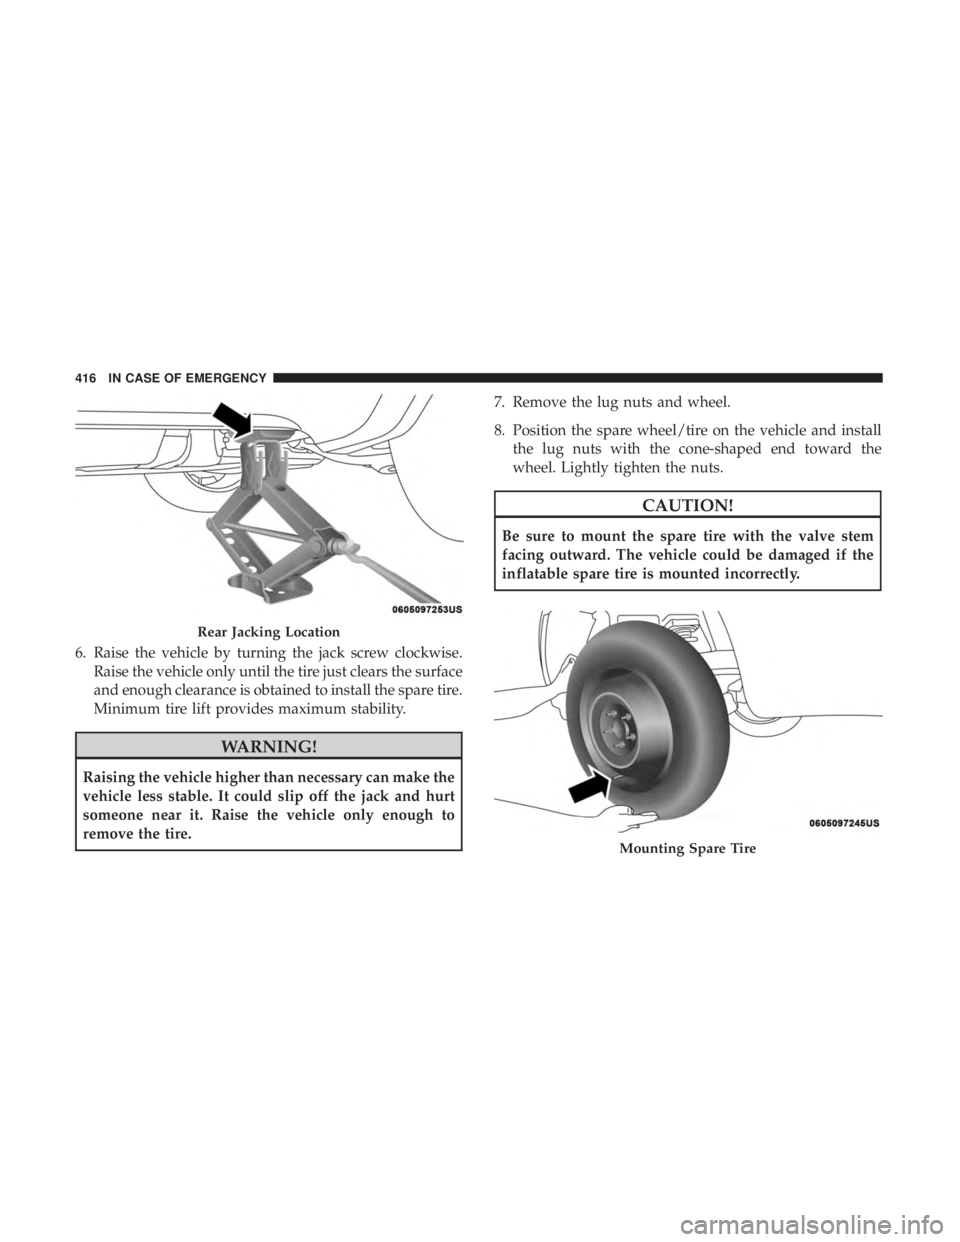
6. Raise the vehicle by turning the jack screw clockwise.Raise the vehicle only until the tire just clears the surface
and enough clearance is obtained to install the spare tire.
Minimum tire lift provides maximum stability.
Page 419 of 630
WARNING!
To avoid the risk of forcing the vehicle off the jack, do
not tighten the wheel nuts fully until the vehicle has
been lowered. Failure to follow this warning may
result in serious injury.
9. Lower the vehicle by turning the jack screw counter- clockwise, and remove the jack and wheel blocks.
10. Finish tightening the lug nuts. Push down on the wrench while at the end of the handle for increased
leverage. Tighten the lug nuts in a star pattern until
each nut has been tightened twice. For correct lug nut
torque, refer to “Torque Specifications” in “Technical
Specifications”. If in doubt about the correct tightness,
have them checked with a torque wrench by your
authorized dealer or at a service station.
11. Lower the jack to the fully closed position and return it and the tools to the proper positions in the foam tray.
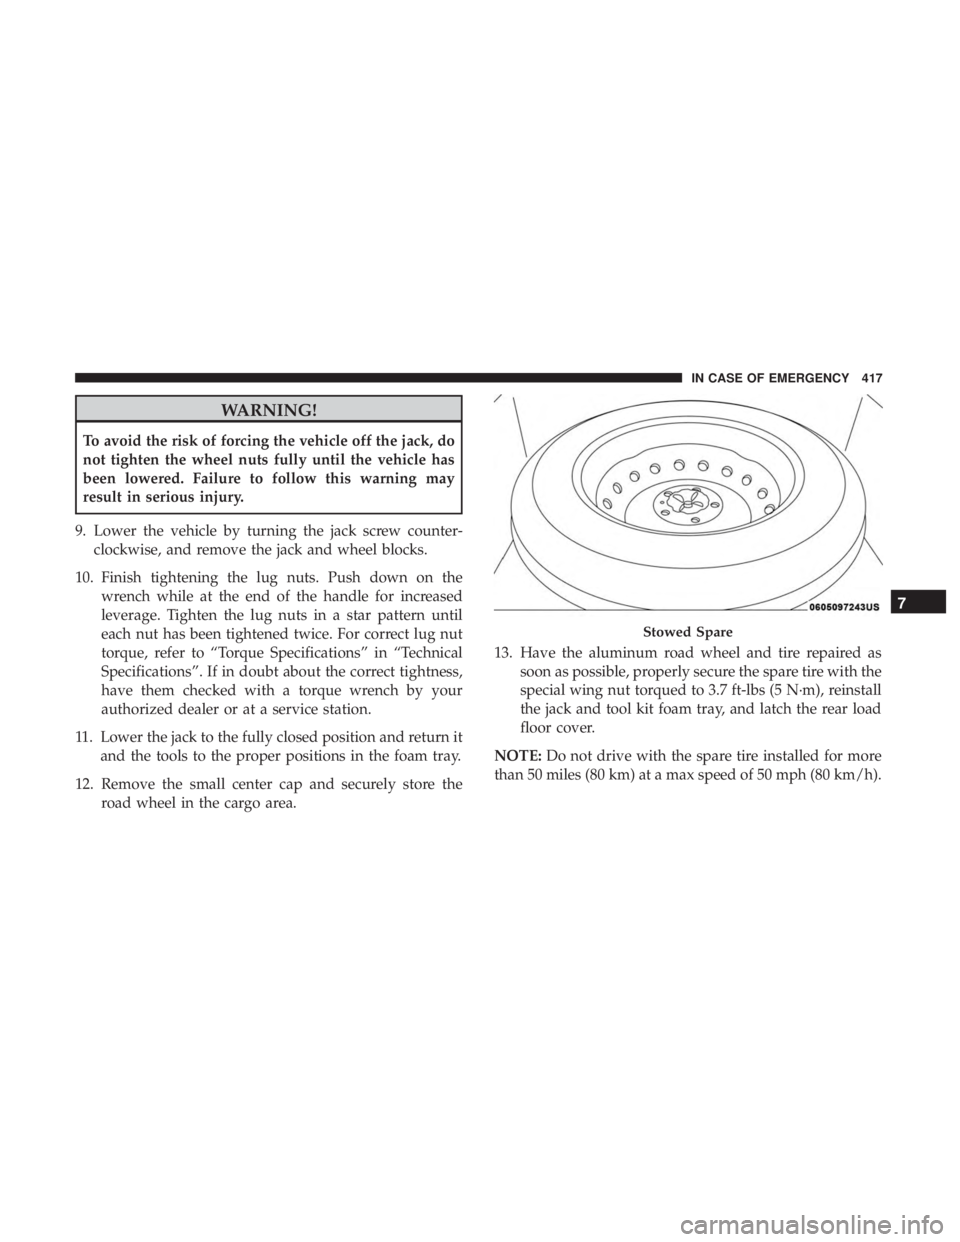
12. Remove the small center cap and securely store the road wheel in the cargo area. 13. Have the aluminum road wheel and tire repaired as
soon as possible, properly secure the spare tire with the
special wing nut torqued to 3.7 ft-lbs (5 N·m), reinstall
the jack and tool kit foam tray, and latch the rear load
floor cover.
NOTE: Do not drive with the spare tire installed for more
than 50 miles (80 km) at a max speed of 50 mph (80 km/h).
Page 420 of 630
WARNING!
A loose tire or jack thrown forward in a collision or
hard stop could endanger the occupants of the vehicle.
Always stow the jack parts and the spare tire in the
places provided. Have the deflated (flat) tire repaired
or replaced immediately.
Road Tire Installation
1. Mount the road tire on the axle.
2.
Install the remaining lug nuts with the cone shaped end of
the nut toward the wheel. Lightly tighten the lug nuts.