2018 Hyundai Sonata manual transmission
[x] Cancel search: manual transmissionPage 4 of 522

F4
INTRODUCTION
Congratulations, and thank you for choosing HYUNDAI. We are pleased to welcome you to the growing number of
discriminating people who drive HYUNDAIS. We are very proud of the advanced engineering and high-quality
construction of each HYUNDAI we build.
Your Owner's Manual will introduce you to the features and operation of your new HYUNDAI. To become familiar with
your new HYUNDAI, so that you can fully enjoy it, read this Owner's Manual carefully before driving your new vehicle.
This manual contains important safety information and instructions intended to familiarize you with your vehicle's
controls and safety features so you can safely operate your vehicle.
This manual also contains information on maintenance designed to enhance safe operation of the vehicle. It is
recommended that all service and maintenance on your car be performed by an authorized HYUNDAI dealer.
HYUNDAI dealers are prepared to provide high-quality service, maintenance and any other assistance that may be
required.
This Owner's Manual should be considered a permanent part of your vehicle, and should be kept in the vehicle so
you can refer to it at any time. The manual should stay with the vehicle if you sell it to provide the next owner with
important operating, safety and maintenance information.
HYUNDAI MOTOR AMERICA
Copyright 2017 HYUNDAI Motor America. All rights reserved. No part of this publication may be reproduced, stored
in any retrieval system or transmitted in any form or by any means without the prior written permission of HYUNDAI
Motor America.Severe engine and transmission damage may result from the use of poor quality fuels and lubricants that
do not meet HYUNDAI specifications. You must always use high quality fuels and lubricants that meet the
specifications listed on Page 8-6 in the Vehicle Specifications section of the Owner's Manual.
CAUTION
Page 122 of 522

3-37
Convenient features of your vehicle
3
Programming HomeLink®
Please note the following:
When programming a garage dooropener, it is advised to park the
vehicle outside of the garage.
It is recommended that a new bat- tery be placed in the hand-held
transmitter of the device being pro-
grammed to HomeLink
®for quicker
training and accurate transmission
of the radio-frequency signal.
Some vehicles may require the ignition switch to be placed in the
ACC (or "Accessories") position for
programming and/or operation of
HomeLink
®.
In the event that there are still pro- gramming difficulties or questions
after following the programming
steps listed below, contact
HomeLink
®at: www.homelink.com
or by calling 1-800-355-3515.
Rolling code programming
Rolling code devices which are
"code-protected" and manufactured
after 1996 may be determined by the
following:
Reference the device owner’s manual for verification.
The handheld transmitter appears to program the HomeLink
®
Universal Transceiver but does not
activate the device.
Press and hold the trained HomeLink button. The device has
the rolling code feature if the indi-
cator light flashes rapidly and then
turns solid after 2 seconds.
Before programming HomeLink
®
to a garage door opener or gate
operator, make sure people and
objects are out of the way of the
device to prevent potential harm
or damage. Do not use the
HomeLink
®with any garage door
opener that lacks the safety stop
and reverse features required by
U.S. federal safety standards (this
includes any garage door opener
model manufactured before April
1, 1982). A garage door that can-
not detect an object - signaling
the door to stop and reverse -
does not meet current U.S. feder-
al safety standards. Using a
garage door opener without
these features increases the risk
of serious injury or death.
WARNING
Page 156 of 522
3-71
Convenient features of your vehicle
Manual shift Mode- Auto Transmission :1~6 (6 speed automatic transmis-
sion)
1~8 (8 speed automatic transmis-
sion)
- Ecoshift Dual Clutch Transmission: 1, 2, 3, 4, 5, 6, 7Shift indicator pop-up (if equipped)
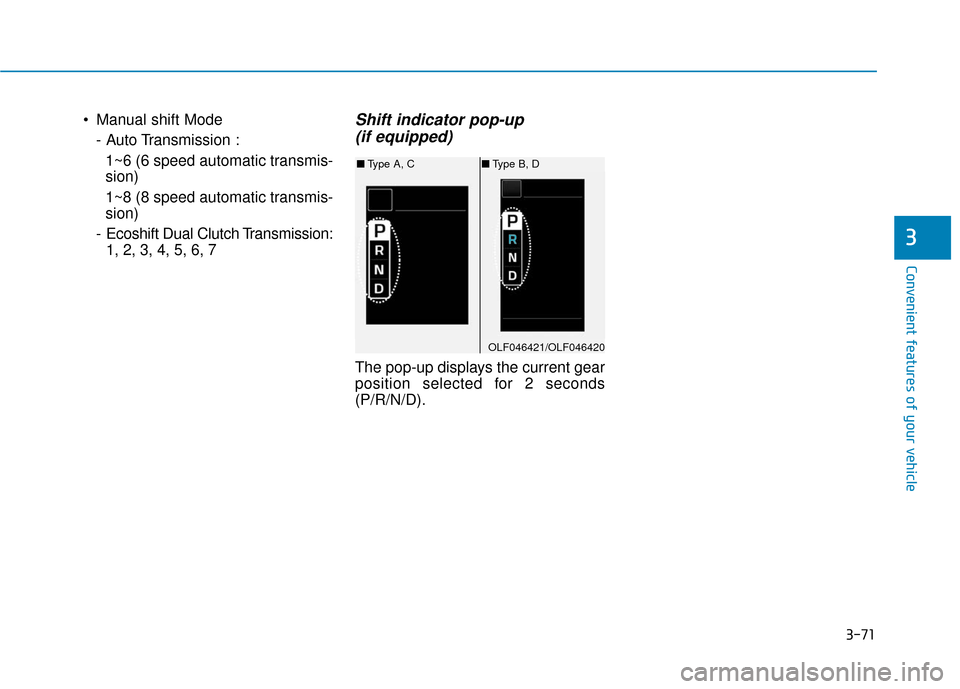
The pop-up displays the current gear
position selected for 2 seconds
(P/R/N/D).
3
OLF046421/OLF046420
■ Type A, C ■Type B, D
Page 267 of 522
5-17
Driving your vehicle
5
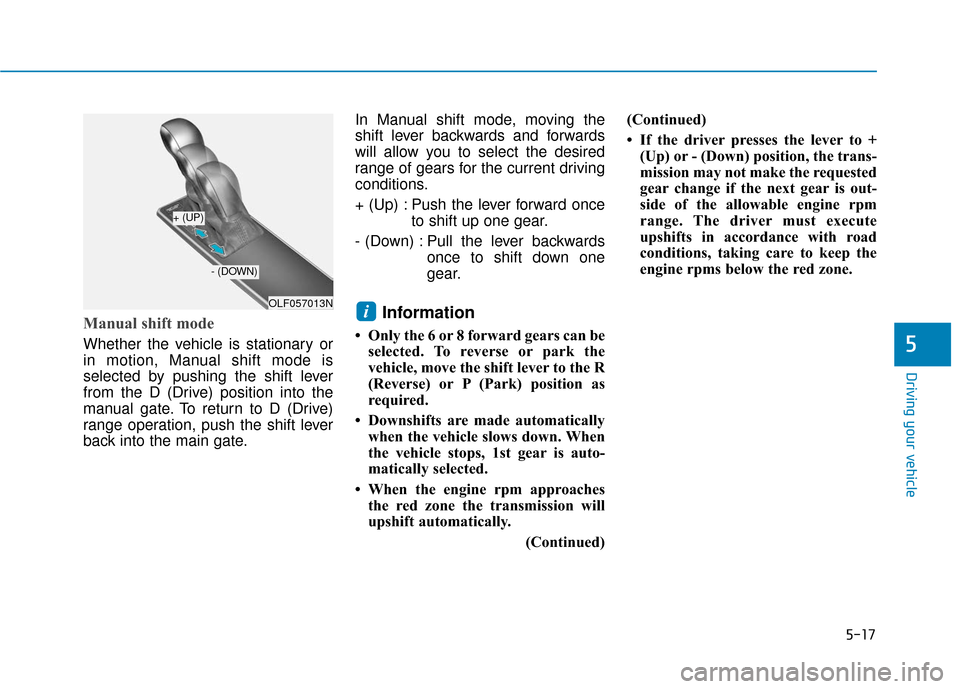
Manual shift mode
Whether the vehicle is stationary or
in motion, Manual shift mode is
selected by pushing the shift lever
from the D (Drive) position into the
manual gate. To return to D (Drive)
range operation, push the shift lever
back into the main gate.In Manual shift mode, moving the
shift lever backwards and forwards
will allow you to select the desired
range of gears for the current driving
conditions.
+ (Up) : Push the lever forward once
to shift up one gear.
- (Down) : Pull the lever backwards once to shift down one
gear.
Information
• Only the 6 or 8 forward gears can beselected. To reverse or park the
vehicle, move the shift lever to the R
(Reverse) or P (Park) position as
required.
• Downshifts are made automatically when the vehicle slows down. When
the vehicle stops, 1st gear is auto-
matically selected.
• When the engine rpm approaches the red zone the transmission will
upshift automatically.
(Continued)(Continued)
• If the driver presses the lever to +
(Up) or - (Down) position, the trans-
mission may not make the requested
gear change if the next gear is out-
side of the allowable engine rpm
range. The driver must execute
upshifts in accordance with road
conditions, taking care to keep the
engine rpms below the red zone.
iOLF057013N
+ (UP)
- (DOWN)
Page 269 of 522

5-19
Driving your vehicle The Ecoshift dual clutch transmis-sion gives the driving feel of a man-
ual transmission, yet provides the
ease of a fully automatic transmis-
sion. Unlike a traditional automatic
transmission, the gear shifting can
be felt (and heard) on the Ecoshift
dual clutch transmission.
- Think of it as an automaticallyshifting manual transmission.
- Shift into Drive range and get fully automatic shifting, similar to a
conventional automatic transmis-
sion. Ecoshift dual clutch transmission
adopts dry-type dual clutch, which
is different from torque converter of
automatic transmission, and shows
better acceleration performance
during driving. But, initial launch
might be little bit slower than
Automatic Transmission.
The dry-type clutch transfers torque and provides a direct drive
feeling which may feel different
from a conventional automatic
transmission with a torque convert-
er. This may be more noticeable
when starting from a stop or low
vehicle speed.
When rapidly accelerating at lower vehicle speeds, the engine could
rev up to higher engine RPM
depending on the driving condition.
For smooth uphill launches, press down the accelerator pedal
smoothly depending on the current
conditions.
If you release your foot from the accelerator pedal at low vehicle
speed, you may feel strong engine
brake, which is similar to manual
transmission.5
To reduce the risk of serious
injury or death:
ALWAYS check the surround-
ing areas near your vehicle for
people, especially children,
before shifting a vehicle into
D (Drive) or R (Reverse).
Before leaving the driver's
seat, always make sure the
shift lever is in the P (Park)
position, then set the parking
brake, and place the ignition
switch in the LOCK/OFF posi-
tion. Unexpected and sudden
vehicle movement can occur
if these precautions are not
followed.
Do not use engine braking
(shifting from a high gear to
lower gear) rapidly on slip-
pery roads. The vehicle may
slip causing an accident.
WARNING
To avoid damage to your
transaxle, do not try to accel-
erate in R (Reverse) or any for-
ward gear position with the
brakes on.
When stopped on slope, do
not hold the vehicle with
accelerator pedal. Use the
service brake or the parking
brake.
CAUTION
Page 270 of 522
5-20
When driving downhill, you mayuse Manual shift mode and press
the paddle shifters (except 1.6 T-
GDI engine) to downshift to a lower
gear in order to control your speed
without using the brake pedal
excessively.
When you turn the engine on and off, you may hear clicking sounds
as the system goes through a self
test. This is a normal sound for the
Ecoshift dual clutch transmission.
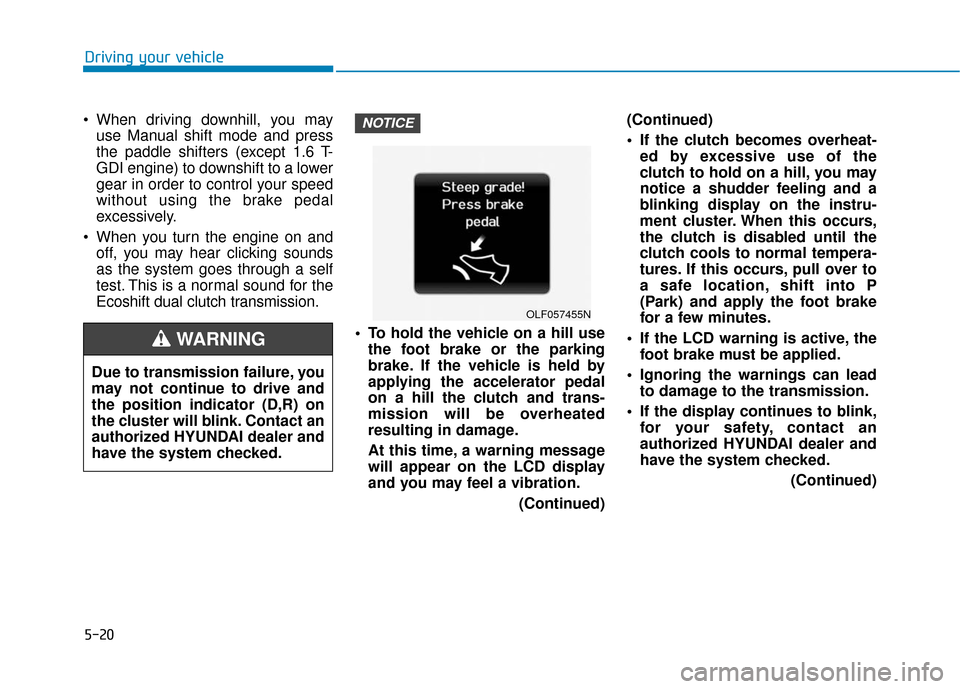
To hold the vehicle on a hill usethe foot brake or the parking
brake. If the vehicle is held by
applying the accelerator pedal
on a hill the clutch and trans-
mission will be overheated
resulting in damage.
At this time, a warning message
will appear on the LCD display
and you may feel a vibration.
(Continued)(Continued)
If the clutch becomes overheat-
ed by excessive use of the
clutch to hold on a hill, you may
notice a shudder feeling and a
blinking display on the instru-
ment cluster. When this occurs,
the clutch is disabled until the
clutch cools to normal tempera-
tures. If this occurs, pull over to
a safe location, shift into P
(Park) and apply the foot brake
for a few minutes.
If the LCD warning is active, the foot brake must be applied.
Ignoring the warnings can lead to damage to the transmission.
If the display continues to blink, for your safety, contact an
authorized HYUNDAI dealer and
have the system checked.
(Continued)NOTICE
Driving your vehicle
OLF057455N
Due to transmission failure, you
may not continue to drive and
the position indicator (D,R) on
the cluster will blink. Contact an
authorized HYUNDAI dealer and
have the system checked.
WARNING
Page 273 of 522
5-23
Driving your vehicle
D (Drive)
This is the normal driving position.
The transmission will automatically
shift through a seven-gear
sequence, providing the best fuel
economy and power.
For extra power when passing anoth-
er vehicle or driving uphill depress
the accelerator pedal further until
you feel the transmission downshift
to a lower gear.
The DRIVE MODE switch, located
on the shift lever console, allows the
driver to switch from NORMAL mode
to SPORT or ECO mode.
For more information, refer to
"Drive Mode Integrated Control
System" later in this chapter.
Always ensure vehicle is station-
ary, at a complete stop, before
selecting D (Drive).
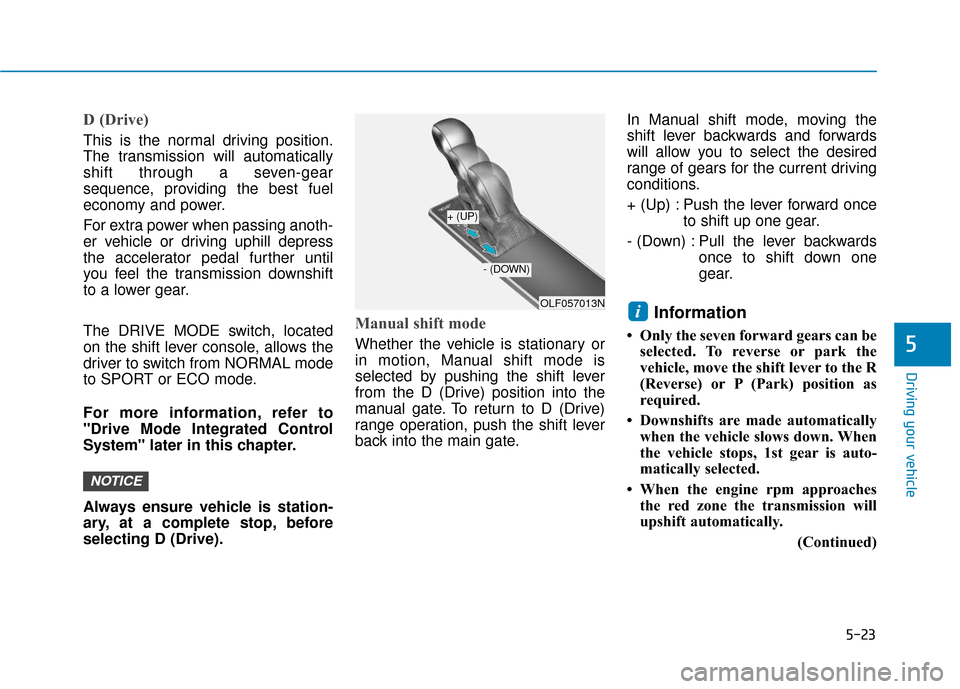
Manual shift mode
Whether the vehicle is stationary or
in motion, Manual shift mode is
selected by pushing the shift lever
from the D (Drive) position into the
manual gate. To return to D (Drive)
range operation, push the shift lever
back into the main gate.In Manual shift mode, moving the
shift lever backwards and forwards
will allow you to select the desired
range of gears for the current driving
conditions.
+ (Up) : Push the lever forward once
to shift up one gear.
- (Down) : Pull the lever backwards once to shift down one
gear.
Information
• Only the seven forward gears can beselected. To reverse or park the
vehicle, move the shift lever to the R
(Reverse) or P (Park) position as
required.
• Downshifts are made automatically when the vehicle slows down. When
the vehicle stops, 1st gear is auto-
matically selected.
• When the engine rpm approaches the red zone the transmission will
upshift automatically.
(Continued)
i
NOTICE
5
OLF057013N
+ (UP)
- (DOWN)
Page 274 of 522
5-24
Driving your vehicle
(Continued)
• If the driver presses the lever to + (Up) or - (Down) position, the
transmission may not make the
requested gear change if the next
gear is outside of the allowable
engine rpm range. The driver must
execute upshifts in accordance with
road conditions, taking care to keep
the engine rpms below the red zone.
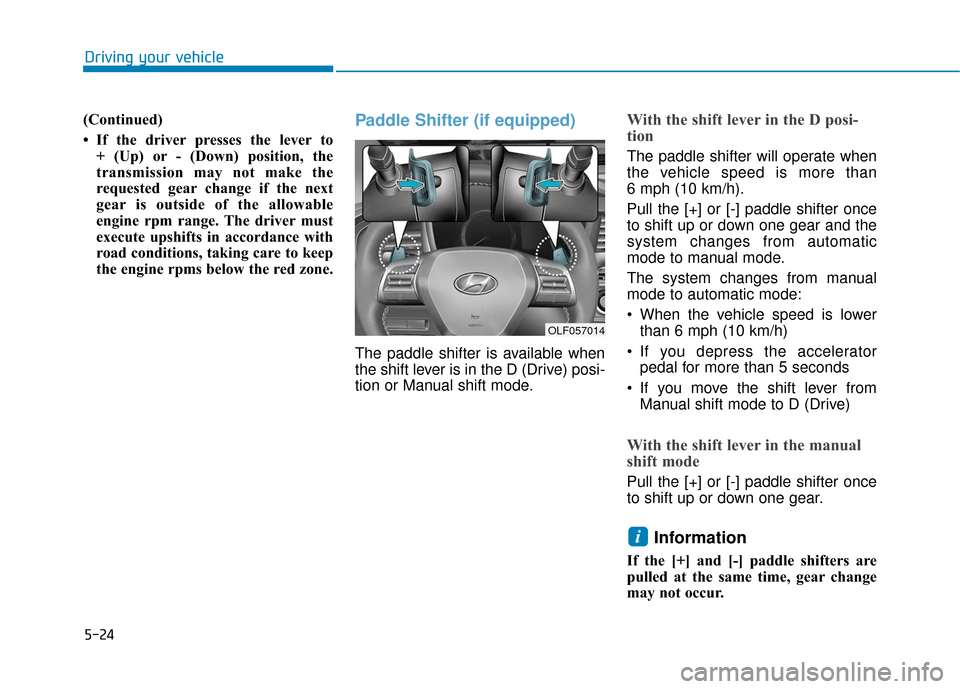
Paddle Shifter (if equipped)
The paddle shifter is available when
the shift lever is in the D (Drive) posi-
tion or Manual shift mode.
With the shift lever in the D posi-
tion
The paddle shifter will operate when
the vehicle speed is more than
6 mph (10 km/h).
Pull the [+] or [-] paddle shifter once
to shift up or down one gear and the
system changes from automatic
mode to manual mode.
The system changes from manual
mode to automatic mode:
When the vehicle speed is lowerthan 6 mph (10 km/h)
If you depress the accelerator pedal for more than 5 seconds
If you move the shift lever from Manual shift mode to D (Drive)
With the shift lever in the manual
shift mode
Pull the [+] or [-] paddle shifter once
to shift up or down one gear.
Information
If the [+] and [-] paddle shifters are
pulled at the same time, gear change
may not occur.
i
OLF057014