2018 Hyundai Sonata emergency towing
[x] Cancel search: emergency towingPage 252 of 522

5
Blind Spot Detection System (BSD) ..................5-89
BSD (Blind Spot Detection) /
LCA (Lane Change Assist) .............................................5-90
RCTA (Rear Cross Traffic Alert) ..................................5-93
Automatic emergency braking (AEB) ...............5-97
System setting and activation......................................5-97
AEB warning message and system control ..............5-99
Sensor to detect the distance from the vehicle
in front (front radar) ...................................................5-102
System malfunction......................................................5-103
Limitation of the system .............................................5-105
Special Driving Conditions ................................5-109
Hazardous Driving Conditions....................................5-109
Rocking the Vehicle ......................................................5-109
Smooth Cornering .........................................................5-110
Driving at Night .............................................................5-110
Driving in the Rain ........................................................5-111
Driving in Flooded Areas.............................................5-111
Winter Driving ....................................................5-112
Snow or Icy Conditions................................................5-112
Winter Precautions .......................................................5-114
Vehicle Load Limit..............................................5-116
Tire Loading Information Label .................................5-117
Trailer Towing .....................................................5-121
Page 358 of 522

5-108
Driving your vehicle
Detecting pedestrians
The sensor may be limited when:
- The pedestrian is not fully detectedby the camera recognition system,
for example, if the pedestrian is
leaning over or is not fully walking
upright
- The pedestrian is moving very quickly or appears abruptly in the
camera detection area
The pedestrian is wearing clothing
that easily blends into the back-
ground, making it difficult to be
detected by the camera recogni-
tion system
- The outside lighting is too bright (e.g. when driving in bright sunlight
or in sun glare) or too dark (e.g.
when driving on a dark rural road
at night)
- It is difficult to detect and distin- guish the pedestrian from other
objects in the surroundings, for
example, when there is a group of
pedestrians or a large crowdInformation
In some instances, the AEB system
may be cancelled when subjected to
electromagnetic interference.
Information
This device complies with Part 15 of
the FCC rules.
Operation is subject to the following
two conditions:
1. This device may not cause harmful interference, and
2. This device must accept any inter- ference received, including interfer-
ence that may cause undesired
operation.
i
i
Do not use the Automatic
Emergency Braking system
when towing a vehicle.
Application of the AEB system
while towing may adversely
affect the safety of your vehi-
cle or the towing vehicle
Use extreme caution when the
vehicle in front of you has
cargo that extends rearward
from the cab, or when the
vehicle in front of you has
higher ground clearance.
The AEB system is designed
to help detect and monitor the
vehicle ahead or detect a
pedestrian in the roadway
through radar signals and
camera recognition. It is not
designed to detect bicycles,
motorcycles, or smaller
wheeled objects such as lug-
gage bags, shopping carts, or
strollers.
Never try to test the operation
of the AEB system. Doing so
may cause severe injury or
death.
WARNING
Page 372 of 522

What to do in an emergency
6
Hazard Warning Flasher .......................................6-2
In Case of an Emergency While Driving.............6-2
If the Engine Stalls While Driving .................................6-2
If the Engine Stalls at a Crossroad or Crossing ........6-2
If you Have a Flat Tire While Driving ..........................6-3
If the Engine Will Not Start..................................6-3
If the Engine Doesn’t Turn Over or
Turns Over Slowly .............................................................6-3
If the Engine Turns Over Normally but
Doesn’t Start.......................................................................6\
-3
Jump Starting ..........................................................6-4
If the Engine Overheats........................................6-7
Tire Pressure Monitoring System (TPMS).........6-9
Check Tire Pressure .........................................................6-9
Tire Pressure Monitoring System ...............................6-10
Low Tire Pressure Telltale ............................................6-11
Low Tire Pressure Position and
Tire Pressure Telltale .....................................................6-11
TPMS (Tire Pressure Monitoring System)
Malfunction Indicator.....................................................6-12
Changing a Tire with TPMS..........................................6-13
If you Have a Flat Tire........................................6-15
With Spare Tire................................................................6-15
With Tire Mobility Kit (TMK) ........................................6-23
Towing ...................................................................6-30
Towing Service .................................................................6-30
Emergency Towing..........................................................6-31
Page 375 of 522

6-4
What to do in an emergency
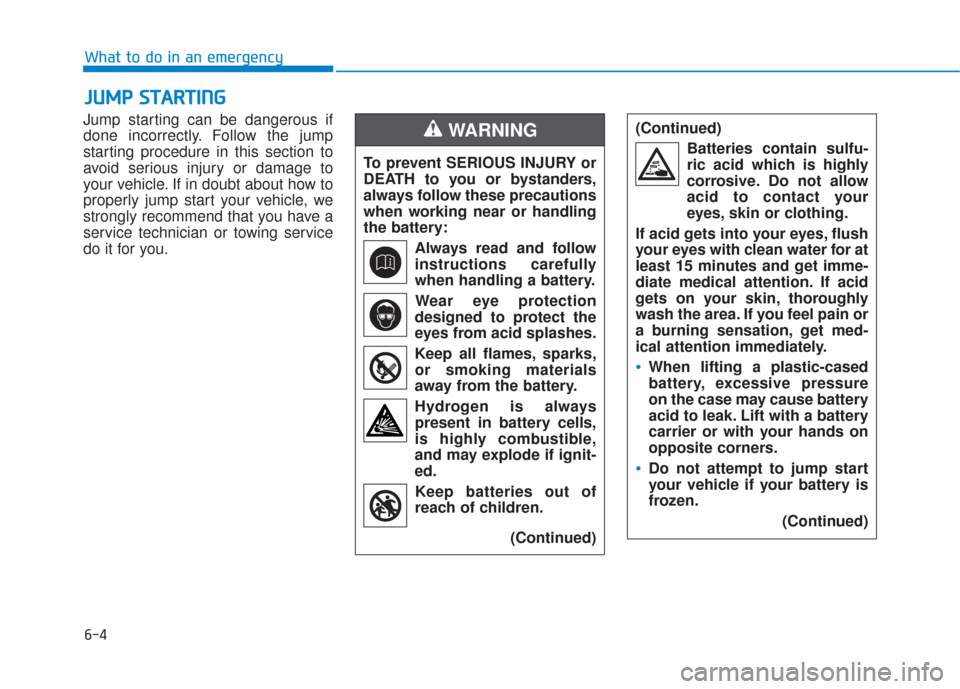
Jump starting can be dangerous if
done incorrectly. Follow the jump
starting procedure in this section to
avoid serious injury or damage to
your vehicle. If in doubt about how to
properly jump start your vehicle, we
strongly recommend that you have a
service technician or towing service
do it for you.
J J U
U M
M P
P
S
S T
T A
A R
RT
TI
IN
N G
G
To prevent SERIOUS INJURY or
DEATH to you or bystanders,
always follow these precautions
when working near or handling
the battery:
Always read and follow
instructions carefully
when handling a battery.Wear eye protection
designed to protect the
eyes from acid splashes.
Keep all flames, sparks,
or smoking materials
away from the battery.
Hydrogen is always present in battery cells,
is highly combustible,
and may explode if ignit-
ed.
Keep batteries out of
reach of children.
(Continued)
WARNING (Continued)Batteries contain sulfu-
ric acid which is highly
corrosive. Do not allow
acid to contact your
eyes, skin or clothing.
If acid gets into your eyes, flush
your eyes with clean water for at
least 15 minutes and get imme-
diate medical attention. If acid
gets on your skin, thoroughly
wash the area. If you feel pain or
a burning sensation, get med-
ical attention immediately.
When lifting a plastic-cased
battery, excessive pressure
on the case may cause battery
acid to leak. Lift with a battery
carrier or with your hands on
opposite corners.
Do not attempt to jump start
your vehicle if your battery is
frozen. (Continued)
Page 387 of 522

6-16
What to do in an emergency
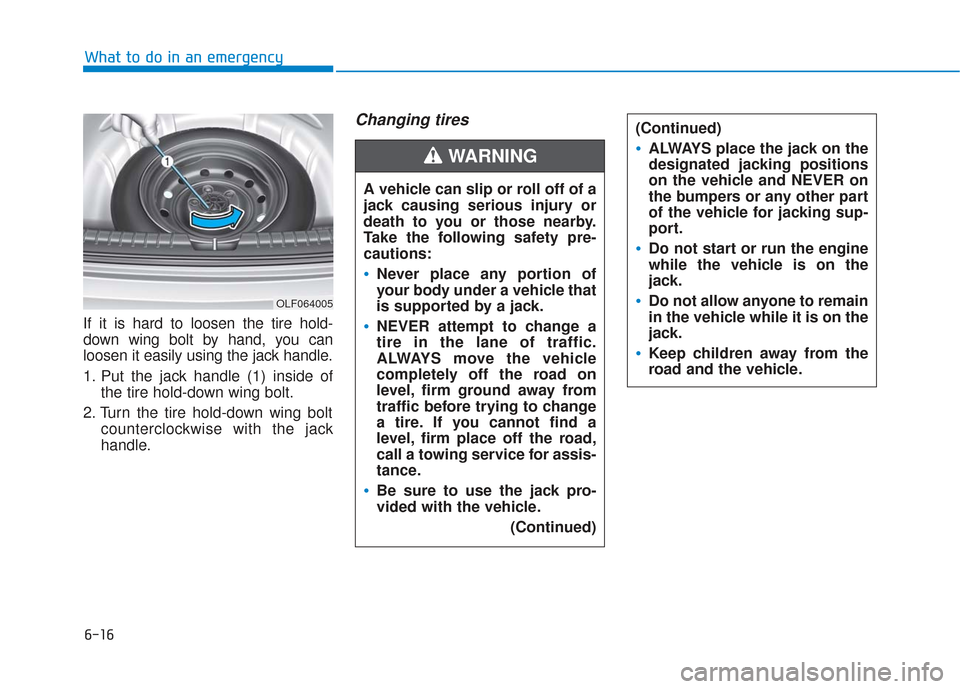
If it is hard to loosen the tire hold-
down wing bolt by hand, you can
loosen it easily using the jack handle.
1. Put the jack handle (1) inside of the tire hold-down wing bolt.
2. Turn the tire hold-down wing bolt counterclockwise with the jack
handle.
Changing tires
A vehicle can slip or roll off of a
jack causing serious injury or
death to you or those nearby.
Take the following safety pre-
cautions:
Never place any portion of
your body under a vehicle that
is supported by a jack.
NEVER attempt to change a
tire in the lane of traffic.
ALWAYS move the vehicle
completely off the road on
level, firm ground away from
traffic before trying to change
a tire. If you cannot find a
level, firm place off the road,
call a towing service for assis-
tance.
Be sure to use the jack pro-
vided with the vehicle.
(Continued)
(Continued)
ALWAYS place the jack on the
designated jacking positions
on the vehicle and NEVER on
the bumpers or any other part
of the vehicle for jacking sup-
port.
Do not start or run the engine
while the vehicle is on the
jack.
Do not allow anyone to remain
in the vehicle while it is on the
jack.
Keep children away from the
road and the vehicle.
WARNING
OLF064005
Page 399 of 522

6-28
9. Switch off the compressor.
10. Detach the hoses from thesealant bottle connector and
from the tire valve.
Return the Tire Mobility Kit to its stor-
age location in the vehicle.
Distributing the sealant
11. Immediately drive approximately 4~6 miles (7~10 km or about 10
minutes) to evenly distribute the
sealant in the tire.
Do not exceed a speed of 50 mph
(80 km/h). If possible, do not fall
below a speed of 12 mph (20 km/h).
While driving, if you experience any
unusual vibration, ride disturbance or
noise, reduce your speed and drive
with caution until you can safely pull
off of the side of the road.
Call for road side service or towing.
When you use the Tire Mobility Kit,
the tire pressure sensors and wheel
may be damaged by sealant, have it
inspected at an authorized dealer. Checking the tire inflation pres-
sure
1. After driving approximately
4~6 miles (7~10 km or about
10 minutes), stop at a safe loca-
tion.
2. Connect hose (9) of the compres- sor directly to the tire valve.
3. Plug the compressor power cord into the vehicle power outlet.
What to do in an emergency
OLF067020
Do not attempt to drive your
vehicle if the tire pressure is
below 29 psi (200 kpa). This
could result in an accident due
to sudden tire failure.
CAUTION
Do not leave your vehicle run-
ning in a poorly ventilated area
for extended periods of time.
Carbon monoxide poisoning
and suffocation can occur.
WARNING
Page 406 of 522

6-35
What to do in an emergency
Distributing the sealant
9. Immediately drive approximately7~10 km (4~6 miles or, about
10min) to evenly distribute the
sealant in the tire. Do not exceed a speed of 80 km/h
(50 mph). If possible, do not fall
below a speed of 20 km/h (12 mph).
While driving, if you experience any
unusual vibration, ride disturbance or
noise, reduce your speed and drive
with caution until you can safely pull
off of the side of the road.
Call for road side service or towing.
When you use the Tire Mobility Kit,
the tire pressure sensors and wheel
may be damaged by sealant, remove
the sealant stained with tire pressure
sensors and wheel and inspect in
authorized dealer.
Checking the tire inflation
pressure
1. After driving approximately 7~10
km (4~6 miles or about 10 min),
stop at a safety location.
2. Connect the filling hose (3) of the compressor directly to the tire
valve.
6
OLMF064106OIGH067043
OLF067035
Page 407 of 522

6-36
3. Plug the compressor power cordinto the vehicle power outlet.
4. Adjust the tire inflation pressure to the recomended tire inflation.
With the ignition swithched on, proceed as follows.
- To increase the inflation pres- sure : Switch on the compres-
sor. To check the current inflation
pressure setting, briefly switch
off the compressor.
- To reduce the inflation pres- sure: Press the button (8) on the
compressor.
Do not let the compressor run for
more than 10 minutes, otherwise
the device will overheat and may
be damaged.
Information
The pressure gauge may show higher
than actual reading when the com-
pressor is running. To get an accurate
tire reading, the compressor needs to
be turned off.
i
NOTICE
What to do in an emergency
The tire inflation pressure must
be at least 220 kPa (32 psi). If it
is not, do not continue driving.
Call for road side service or
towing.
WARNING
If the inflation pressure is not
maintained, drive the vehicle a
second time, refer to
Distributing the sealant. Then
repeat steps 1 to 4.
Use of the TMK may be ineffec-
tual for tire damage larger than
approximately 4 mm (0.16 in).
We recommend that you con-
tact an authorized HYUNDAI
dealer if the tire cannot be made
roadworthy with the Tire
Mobility Kit.
CAUTION
Tire pressure sensor
The sealant on the tire pressure
sensor and wheel should be
removed when you replace the
tire with a new one and inspect
the tire pressure sensors at an
authorized dealer.
When reinstalling the repaired
or replaced tire and wheel on
the vehicle, tighten the wheel
lug nut to 11~13 kgf·m (79~94
lbf·ft).
CAUTION