2018 Hyundai Sonata Gear
[x] Cancel search: GearPage 108 of 522

3-23
Convenient features of your vehicle
3
Tilt Steering / Telescope Steering
Adjust the steering wheel so it points
toward your chest, not toward your
face. Make sure you can see the
instrument panel warning lights and
gauges. After adjusting, push the
steering wheel both up and down to
be certain it is locked in position.
Always adjust the position of the
steering wheel before driving.To change the steering wheel angle
and height:
1. Pull down the lock-release lever (1).
2. Adjust the steering wheel to thedesired angle (2) and height (3).
3. Pull up the lock-release lever to lock the steering wheel in place.
Information
After adjustment, sometimes the lock
release lever may not lock the steering
wheel. It is not a malfunction. This
occurs when two gears are not
engaged correctly. In this case, adjust
the steering wheel again and then lock
the steering wheel.
Heated Steering Wheel
(if equipped)
When the ignition switch is in the ON
position or when the engine is run-
ning, press the heated steering
wheel button to warm the steering
wheel. The indicator on the button
will illuminate.
i
OLF047015
OLF047016NEVER adjust the steering
wheel while driving. This may
cause loss of vehicle control
resulting in an accident.
WARNING
Page 156 of 522

3-71
Convenient features of your vehicle
Manual shift Mode- Auto Transmission :1~6 (6 speed automatic transmis-
sion)
1~8 (8 speed automatic transmis-
sion)
- Ecoshift Dual Clutch Transmission: 1, 2, 3, 4, 5, 6, 7Shift indicator pop-up (if equipped)
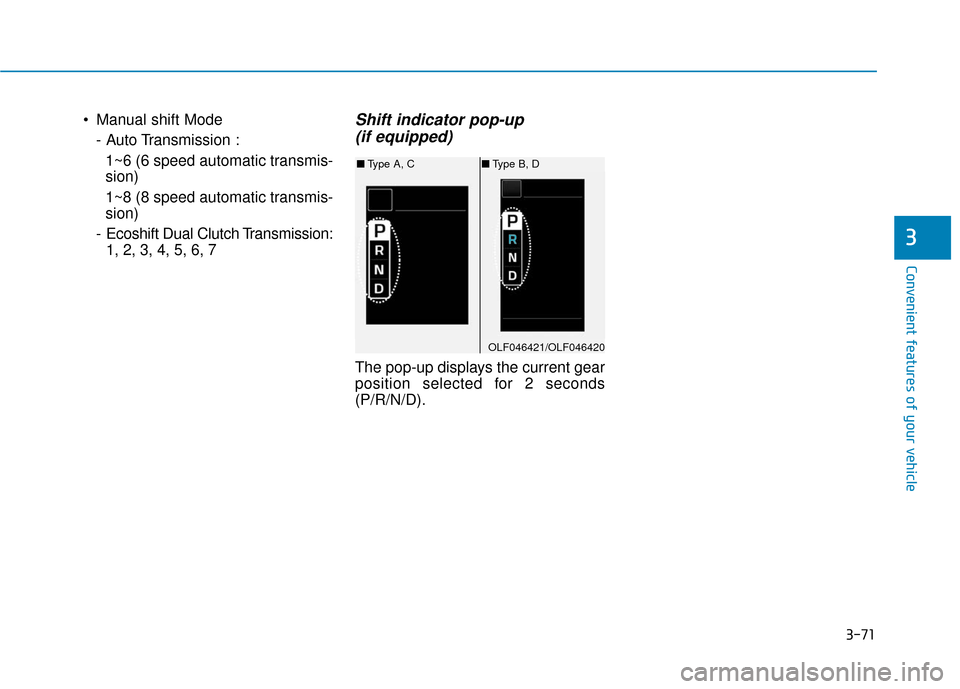
The pop-up displays the current gear
position selected for 2 seconds
(P/R/N/D).
3
OLF046421/OLF046420
■ Type A, C ■Type B, D
Page 163 of 522

3-78
5. Convenience
Seat Easy Access
- Off: The seat easy access functionis deactivated.
- Normal/Extended: When you turn off the engine, the driver's seat will
automatically move rearward short
(Normal) or long (Extended) for
you to enter or exit the vehicle
more comfortably.
For more information, refer to
"Driver Position Memory System"
in this chapter. Wireless Charging System
To activate or deactivate the wireless
charging system in the front seat.
For more information, refer to
"Wireless Charging System" in
this chapter.
Wiper/Lights Display
To activate or deactivate the Wiper/
Light mode.
When activated, the LCD display
shows the selected Wiper/Light
mode whenever you changed the
mode.
Gear Position Pop-up
To activate or deactivate the gear
position pop-up.
When activated, the gear position
will be displayed on the LCD display.6. Service Interval
Enabled service Interval
To activate or deactivate the service
interval function.
Adjust Interval
If the service interval menu is acti-
vated, you may adjust the time and
distance.
Information
To use the service interval menu, con-
sult an authorized HYUNDAI dealer.
i
Convenient features of your vehicle
Page 176 of 522

3-91
Convenient features of your vehicle
3
Parking Brake & BrakeFluid Warning Light
This warning light illuminates:
Once you set the ignition switch or
the Engine Start/Stop button to the
ON position.
- It illuminates for approximately 3seconds.
- It remains on if the parking brake is applied.
When the parking brake is applied.
When the brake fluid level in the reservoir is low.
- If the warning light illuminateswith the parking brake released, it
indicates the brake fluid level in
reservoir is low.
If the brake fluid level in the reser-
voir is low:
1. Drive carefully to the nearest safe location and stop your vehicle.
2. With the engine stopped, check the brake fluid level immediately and
add fluid as required (For more
information, refer to "Brake
Fluid" in chapter 7) . Then check all
brake components for fluid leaks. If
any leak on the brake system is still
found, the warning light remains on,
or the brakes do not operate prop-
erly, do not drive the vehicle. In this
case, have your vehicle inspected
by an authorized HYUNDAI dealer.
Dual-diagonal braking system
Your vehicle is equipped with dual-
diagonal braking systems. This
means you still have braking on two
wheels even if one of the dual sys-
tems should fail.
With only one of the dual systems
working, more than normal pedal
travel and greater pedal pressure are
required to stop the vehicle.
Also, the vehicle will not stop in as
short a distance with only a portion
of the brake system working.
If the brakes fail while you are driv-
ing, shift to a lower gear for addition-
al engine braking and stop the vehi-
cle as soon as it is safe to do so.
Page 265 of 522

5-15
Driving your vehicle
5
The indicator in the instrument clus-
ter displays the shift lever position
when the ignition switch is in the ON
position.
P (Park)
Always come to a complete stop
before shifting into P (Park).
To shift from P (Park), you must
depress firmly on the brake pedal
and make sure your foot is off the
accelerator pedal.
If you have done all of the above and
still cannot shift the lever out of P
(Park), see "Shift-Lock Release" on
page 5-25.
The shift lever must be in P (Park)
before turning the engine off.
To reduce the risk of serious
injury or death:
ALWAYS check the surround-
ing areas near your vehicle for
people, especially children,
before shifting a vehicle into
D (Drive) or R (Reverse).
Before leaving the driver's
seat, always make sure the
shift lever is in the P (Park)
position, then set the parking
brake, and place the ignition
switch in the LOCK/OFF posi-
tion. Unexpected and sudden
vehicle movement can occur
if these precautions are not
followed.
When using Manual shift
mode, do not use engine brak-
ing (shifting from a high gear
to lower gear) rapidly on slip-
pery roads. The vehicle may
slip causing an accident.
WARNING
Shifting into P (Park) while the
vehicle is in motion may
cause you to lose control of
the vehicle.
After the vehicle has stopped,
always make sure the shift
lever is in P (Park), apply the
parking brake, and turn the
engine off.
Do not use the P (Park) posi-
tion in place of the parking
brake.
WARNING
Page 266 of 522

5-16
Driving your vehicle
R (Reverse)
Use this position to drive the vehicle
backward.
N (Neutral)
The wheels and transmission are not
engaged.
Use N (Neutral) if you need to restart
a stalled engine, or if it is necessary
to stop with the engine ON. Shift into
P (Park) if you need to leave your
vehicle for any reason.
Always depress the brake pedal
when you are shifting from N
(Neutral) to another gear.
D (Drive)
This is the normal driving position.
The transmission will automatically
shift through a 6 or 8-gear sequence,
providing the best fuel economy and
power.
For extra power when passing anoth-
er vehicle or driving uphill depress
the accelerator pedal further until
you feel the transmission downshift
to a lower gear.
The DRIVE MODE switch, located
on the shift lever console, allows the
driver to switch from NORMAL mode
to SPORT or ECO mode.
For more information, refer to
"Drive Mode Integrated Control
System" later in this chapter.
Always come to a complete
stop before shifting into or out
of R (Reverse); you may dam-
age the transmission if you shift
into R (Reverse) while the vehi-
cle is in motion.
CAUTION
Do not shift into gear unless
your foot is firmly on the brake
pedal. Shifting into gear when
the engine is running at high
speed can cause the vehicle to
move very rapidly. You could
lose control of the vehicle and
hit people or objects.
WARNING
Page 267 of 522

5-17
Driving your vehicle
5
Manual shift mode
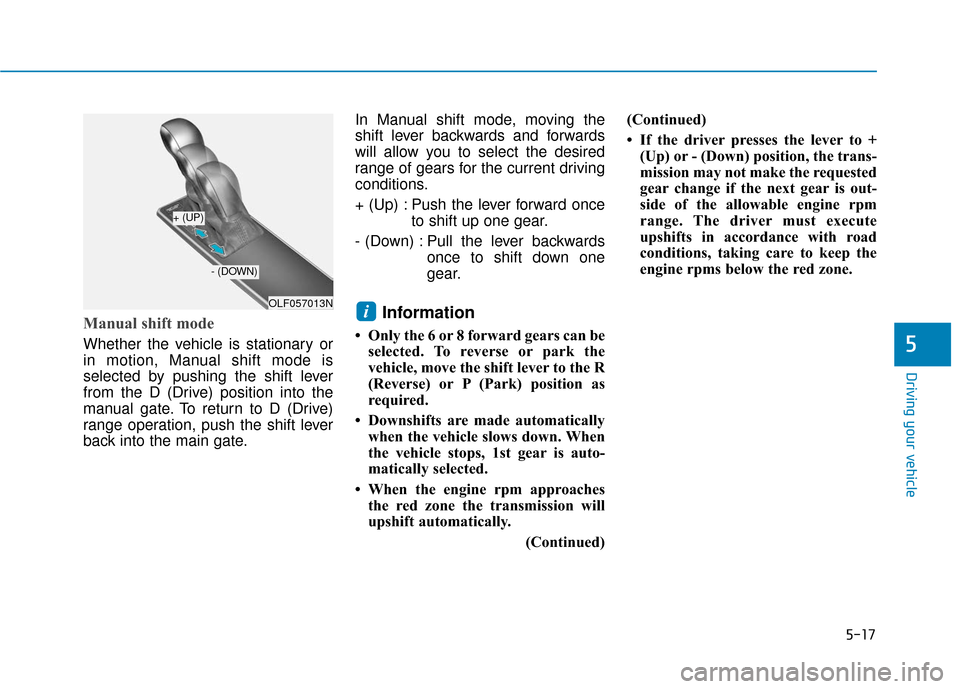
Whether the vehicle is stationary or
in motion, Manual shift mode is
selected by pushing the shift lever
from the D (Drive) position into the
manual gate. To return to D (Drive)
range operation, push the shift lever
back into the main gate.In Manual shift mode, moving the
shift lever backwards and forwards
will allow you to select the desired
range of gears for the current driving
conditions.
+ (Up) : Push the lever forward once
to shift up one gear.
- (Down) : Pull the lever backwards once to shift down one
gear.
Information
• Only the 6 or 8 forward gears can beselected. To reverse or park the
vehicle, move the shift lever to the R
(Reverse) or P (Park) position as
required.
• Downshifts are made automatically when the vehicle slows down. When
the vehicle stops, 1st gear is auto-
matically selected.
• When the engine rpm approaches the red zone the transmission will
upshift automatically.
(Continued)(Continued)
• If the driver presses the lever to +
(Up) or - (Down) position, the trans-
mission may not make the requested
gear change if the next gear is out-
side of the allowable engine rpm
range. The driver must execute
upshifts in accordance with road
conditions, taking care to keep the
engine rpms below the red zone.
iOLF057013N
+ (UP)
- (DOWN)
Page 269 of 522

5-19
Driving your vehicle The Ecoshift dual clutch transmis-sion gives the driving feel of a man-
ual transmission, yet provides the
ease of a fully automatic transmis-
sion. Unlike a traditional automatic
transmission, the gear shifting can
be felt (and heard) on the Ecoshift
dual clutch transmission.
- Think of it as an automaticallyshifting manual transmission.
- Shift into Drive range and get fully automatic shifting, similar to a
conventional automatic transmis-
sion. Ecoshift dual clutch transmission
adopts dry-type dual clutch, which
is different from torque converter of
automatic transmission, and shows
better acceleration performance
during driving. But, initial launch
might be little bit slower than
Automatic Transmission.
The dry-type clutch transfers torque and provides a direct drive
feeling which may feel different
from a conventional automatic
transmission with a torque convert-
er. This may be more noticeable
when starting from a stop or low
vehicle speed.
When rapidly accelerating at lower vehicle speeds, the engine could
rev up to higher engine RPM
depending on the driving condition.
For smooth uphill launches, press down the accelerator pedal
smoothly depending on the current
conditions.
If you release your foot from the accelerator pedal at low vehicle
speed, you may feel strong engine
brake, which is similar to manual
transmission.5
To reduce the risk of serious
injury or death:
ALWAYS check the surround-
ing areas near your vehicle for
people, especially children,
before shifting a vehicle into
D (Drive) or R (Reverse).
Before leaving the driver's
seat, always make sure the
shift lever is in the P (Park)
position, then set the parking
brake, and place the ignition
switch in the LOCK/OFF posi-
tion. Unexpected and sudden
vehicle movement can occur
if these precautions are not
followed.
Do not use engine braking
(shifting from a high gear to
lower gear) rapidly on slip-
pery roads. The vehicle may
slip causing an accident.
WARNING
To avoid damage to your
transaxle, do not try to accel-
erate in R (Reverse) or any for-
ward gear position with the
brakes on.
When stopped on slope, do
not hold the vehicle with
accelerator pedal. Use the
service brake or the parking
brake.
CAUTION